Imagine finding the perfect image for your project on Shutterstock, only to realize it’s branded with their logo. It’s a common hurdle, especially when you want a clean, professional look. Removing Shutterstock logos can seem straightforward, but it’s more than just a simple edit. Whether you’re a designer, marketer, or content creator, understanding why these logos are there and how to handle them properly is key. In this guide, we’ll explore the ins and outs of
Legal Considerations When Removing Shutterstock Logos

Before you start editing images to remove Shutterstock logos, it’s crucial to understand the legal landscape. These logos are there for a reason: they protect Shutterstock’s intellectual property and distinguish their images from others. Removing a logo without proper permission can lead to serious legal consequences, including copyright infringement claims. Always ensure you have the right license to use the image without the logo, especially if you plan to modify or publish it publicly.
Typically, when you purchase a Shutterstock image with a standard license, you’re granted the right to use the image for specific purposes, but not to remove branding elements like watermarks or logos. To legally remove a Shutterstock logo, you generally need a different type of license, such as an extended license, which often covers more extensive use, including removing watermarks or logos for commercial projects.
Here are some key points to keep in mind:
- Check your license agreement: Understand what modifications are permitted under your license.
- Avoid unauthorized editing: Removing logos without permission can be considered copyright infringement.
- Use authorized tools and services: If you have the right to remove the logo, use proper editing software or professional services that comply with legal standards.
- Consider licensing options: If you frequently need images without logos, explore licensing plans that include this feature or consider purchasing images from sources that offer logo-free versions.
In summary, always prioritize legal compliance. It’s better to invest in the correct license or seek images that are already free of logos than to risk potential legal trouble. Respecting copyright laws not only keeps you out of trouble but also supports creators and platforms that provide valuable content. When in doubt, consult Shutterstock’s licensing terms or seek legal advice to ensure your image use remains compliant and ethical.
Tools and Software Options for Removing Logos
When it comes to removing logos like the Shutterstock watermark from images, you have a variety of tools and software options at your fingertips. The choice largely depends on your comfort level with editing tools, your budget, and the complexity of the logo removal task. Let’s explore some of the most popular and effective options available today.
Photo Editing Software
- Adobe Photoshop: The industry standard for image editing, offering powerful tools like the Clone Stamp, Healing Brush, and Content-Aware Fill that make removing watermarks fairly straightforward for those familiar with it.
- GIMP: A free, open-source alternative to Photoshop. It provides similar features such as the Clone Tool and Healing Tool, making it a solid choice if you’re on a budget.
- Pixlr: An online photo editor with user-friendly interface and basic editing tools. Suitable for quick edits and small watermark removals.
Specialized Logo Removal Tools and Plugins
- Inpaint: A dedicated software designed specifically for removing unwanted objects from images, including watermarks. It’s simple to use and effective for straightforward removals.
- Apowersoft Watermark Remover: An online tool that allows you to upload your image and remove watermarks without installing software. Ideal for quick fixes, though results may vary based on the image complexity.
- Fotor: An online editor with clone and healing features, suitable for small watermark edits without the need for advanced skills.
Mobile Apps
- TouchRetouch: A popular app available for both iOS and Android devices. It offers easy-to-use tools specifically designed for removing objects like watermarks and logos directly from your phone.
- Photo Retouch: Similar to TouchRetouch, it provides quick and effective object removal on mobile devices.
Choosing the right tool depends on your specific needs. If you’re comfortable with complex editing, Photoshop or GIMP might be the way to go. For quick, simple removals, online tools like Inpaint or mobile apps like TouchRetouch can be very effective. Remember, the key is patience and practice—removing a logo seamlessly takes a little bit of skill, but with the right tool, it’s entirely doable.
Step-by-Step Guide to Removing Shutterstock Logos Using Photoshop
If you have access to Adobe Photoshop and a bit of familiarity with its tools, removing a Shutterstock logo or watermark can be a manageable task. Here’s a step-by-step walkthrough to help you do just that:
Step 1: Open Your Image
Launch Photoshop and open the image containing the Shutterstock logo. To do this, go to File > Open and select your image file.
Step 2: Duplicate the Layer
Before making any edits, duplicate the original layer to preserve the original image. Right-click on the Background layer in the Layers panel and choose Duplicate Layer. Work on this new layer.
Step 3: Select the Logo Area
Use the Lasso Tool or Marquee Tool to carefully select the area around the logo. Be as precise as possible to make the removal seamless.
Step 4: Use the Content-Aware Fill
Once the area is selected, go to Edit > Fill. In the Fill dialog box, choose Content-Aware from the drop-down menu, then click OK. Photoshop will analyze the surrounding pixels and attempt to fill the selected area naturally.
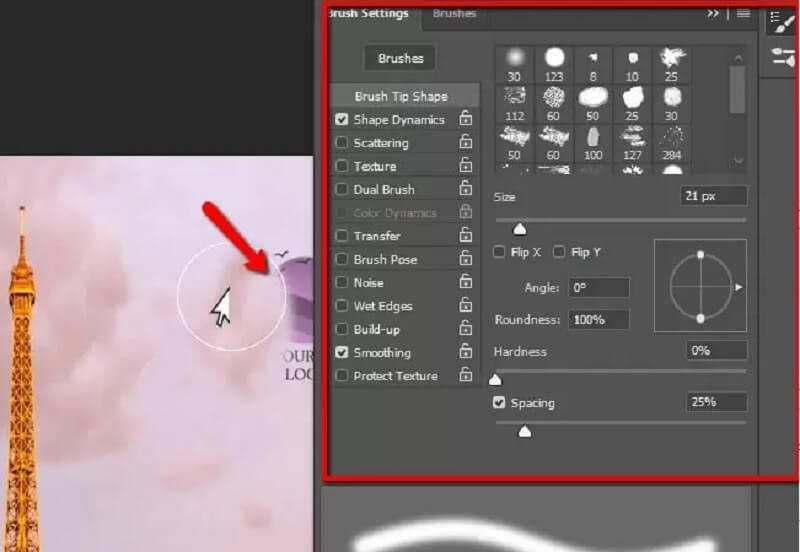
Step 5: Fine-Tune with Healing Tools
Sometimes, the Content-Aware Fill may leave behind minor imperfections. Switch to the Healing Brush Tool or Spot Healing Brush Tool from the toolbar. Hold down Alt (Windows) or Option (Mac) and click to sample a clean area nearby. Then, gently paint over any remaining artifacts or inconsistencies.
Step 6: Repeat as Necessary
If the first attempt doesn’t produce perfect results, undo (Ctrl+Z or Cmd+Z) and try again with different selection areas or settings. Sometimes, a combination of Content-Aware Fill and manual healing yields the best outcome.
Step 7: Review and Save
Zoom out and review your work. Make any final adjustments with the healing tools. Once satisfied, go to File > Save As to save your edited image in your preferred format.
And that’s it! With a bit of patience and practice, you can effectively remove Shutterstock logos from your images using Photoshop. Just remember to respect copyright laws and licensing agreements—this guide is intended for legitimate use cases, such as removing watermarks from images you own or have permission to edit.
Alternative Methods for Logo Removal Without Professional Software
If you’re looking to remove a Shutterstock logo from an image but don’t have access to professional editing tools like Photoshop, don’t worry! There are several user-friendly and often free or inexpensive options that can do the trick. While these methods might not be as precise or powerful as professional software, they can still help you achieve decent results, especially for simple images or logos.
Online Logo Removers are a popular choice for quick edits. Websites like Remove.bg or Inpaint Online offer tools to erase watermarks, logos, or unwanted objects from images directly in your browser. Usually, you just upload your image, select the area with the logo, and the tool does the rest. Keep in mind that results vary depending on the complexity of the background and the logo placement.
Mobile Apps can also be handy if you’re editing on your phone or tablet. Apps like TouchRetouch (available on iOS and Android) are designed specifically for removing objects from photos. With simple brushes, you can highlight the Shutterstock logo, and the app intelligently fills in the space based on surrounding pixels. It’s user-friendly and quick, perfect for casual editing.
Another straightforward method involves cloning or healing tools found in free editing apps like GIMP (which is free and open-source) or even basic editors like Paint.NET. These tools work by copying pixels from one part of the image and painting over the logo. It takes some patience and a steady hand, especially if the background is complex, but with a bit of practice, you can get good results.
Lastly, for simple images with plain backgrounds, you can consider cropping out the area containing the logo. While this isn’t always ideal, it’s the easiest way to remove unwanted marks if the composition allows. Just make sure that cropping doesn’t cut off important parts of your image!
In summary, if you’re avoiding professional software, online tools, mobile apps, and basic editing programs are your best bets. Experiment with different methods to see which one works best for your specific image, and don’t forget to save a copy before making any edits!
Tips for Maintaining Image Quality After Logo Removal
Removing a logo or watermark from an image can sometimes lead to a loss of quality or noticeable artifacts, especially if the background is detailed or complex. To keep your images looking sharp and professional after editing, here are some helpful tips:
- Work on a copy of the original image so you always have the unedited version in case you need to start over.
- Use high-resolution images whenever possible. Larger images give you more flexibility when editing, making it easier to blend in background areas seamlessly.
- Choose the right tool for the job. For simple backgrounds, cloning or healing tools work well. For more complex ones, consider using content-aware fill options if available.
- Zoom in closely while editing to ensure precise removal and better blending with the surrounding pixels.
- Pay attention to lighting and color consistency. After removing the logo, adjust brightness, contrast, or color balance if needed to match the rest of the image.
- Use feathering or soft brushes when blending edited areas to avoid harsh edges that can reveal the edit.
- Apply noise reduction or sharpening cautiously. Sometimes, editing can introduce unwanted noise or soften details. Use these tools sparingly to restore clarity without overdoing it.
- Save your edited image in a high-quality format, like PNG or TIFF, to prevent compression artifacts that degrade quality.
- If you’re working with complex backgrounds or large logo areas, consider doing multiple passes of small edits rather than trying to do everything in one go. This can produce cleaner results.
- Review your image on different screens or print a test copy to ensure the edits look natural in various contexts.
Remember, patience is key. Taking your time and making subtle adjustments can make a significant difference in the final quality. With a little practice and attention to detail, you can remove logos effectively without sacrificing the overall look of your images.
Best Practices for Using Shutterstock Images Legally
Using images from Shutterstock can be a fantastic way to enhance your projects, but it’s crucial to do so responsibly and legally. The last thing you want is to face copyright issues or legal headaches down the line. So, let’s talk about some best practices to keep your usage compliant and respectful of artists’ rights.
First and foremost, always read and understand the licensing agreement. Shutterstock offers different types of licenses—Standard and Enhanced. Standard licenses are suitable for most online uses, but if you’re planning to print a large billboard or merchandise, an Enhanced license might be necessary. Make sure you’re clear on what your license covers to avoid accidental violations.
Next, attribute properly when required. While Shutterstock images typically don’t require attribution for most uses, some licenses or specific images might. Always double-check the licensing terms associated with each image.
Keep records of your licenses and receipts. This way, if questions come up later, you can easily prove that you purchased the rights to use the images. This is especially important for commercial projects or large campaigns.
Here are some additional tips to keep your usage within legal boundaries:
- Avoid modifying images excessively: While editing is often fine, avoid altering images in a way that could be misleading or defamatory.
- Don’t use images in a way that suggests endorsement: Be cautious about implying that the image’s subject endorses your product unless you have explicit permission.
- Check for exclusivity or restrictions: Some Shutterstock images may have restrictions on their use, such as in sensitive contexts or for certain industries.
By following these best practices, you’re not only protecting yourself legally but also respecting the effort and rights of the content creators. Doing things the right way ensures you can continue using high-quality Shutterstock images without any worries.
Conclusion and Final Tips for Logo Removal
Removing a Shutterstock logo from an image can seem straightforward, but it’s a task that requires patience, the right tools, and a good understanding of ethical considerations. Whether you’re doing it for personal projects or professional presentations, always prioritize respecting copyright laws and licensing agreements.
Here are some final tips to keep in mind:
- Use legitimate editing tools: Programs like Adobe Photoshop, GIMP, or even online editors like Photopea can help you carefully remove logos without damaging the rest of the image.
- Practice subtle editing techniques: Clone stamping, healing brushes, and content-aware fill are your friends. Take your time to blend edits seamlessly.
- Maintain image quality: After removing the logo, make sure the image still looks natural and professional. Over-editing can make the edit obvious and unappealing.
- Respect licensing restrictions: Remember, removing a logo doesn’t automatically grant you rights to use the image in any way you want. Ensure your use complies with the original license.
- Consider purchasing or licensing images properly: If logo removal seems too complex or risky, consider reaching out to the image provider for proper licensing or look for images that are free for commercial use.
In the end, whether you’re removing a watermark or a Shutterstock logo, the goal is to produce a clean, professional-looking image while respecting the rights of creators. With the right tools, a careful approach, and a solid understanding of legal boundaries, you can confidently incorporate stunning visuals into your projects.