If you’ve ever downloaded a stock image from Shutterstock but found it watermarked and wanted to use it in your design projects, you might have wondered how to remove those pesky watermarks. While it might seem tempting to do so, it’s important to understand the legal and ethical implications involved. In this guide, we’ll walk you through the process using CorelDRAW, a popular graphic design software, and share insights on how to handle stock images responsibly. Remember, the goal is to respect creators’ rights while making the most of your design tools!
Understanding Copyright and Legal Considerations
Before diving into the technical side of removing watermarks, let’s take a moment to talk about copyright laws and why they matter. Watermarks are placed on images by Shutterstock to protect the rights of photographers and artists. They serve as a visual reminder that the image is copyrighted and that you need to purchase a license to use it legally.
Removing a watermark without proper authorization can lead to serious legal issues, including fines and lawsuits. It’s essential to understand that a watermark is not just a decorative element; it’s a legal marker indicating ownership. If you want to use an image from Shutterstock without the watermark, the correct way is to purchase the appropriate license. This grants you legal rights to use the image in your projects, often with additional options like editing or resizing.
However, if you’re working on personal projects or learning, some images may be available under free or Creative Commons licenses that allow certain uses without payment. Always check the licensing terms carefully before using any stock image, and when in doubt, reach out to the image provider for clarification.
In summary, respecting copyright laws isn’t just about avoiding legal trouble; it’s about supporting creators and ensuring that artists get the recognition they deserve. Using images responsibly helps maintain a fair creative ecosystem for everyone.
Preparing Your Image for Watermark Removal
Before diving into the actual removal process, it’s important to get your image ready. Proper preparation can make the whole task much smoother and increase your chances of achieving a clean result. So, let’s walk through what you need to do.
First, ensure you have a high-resolution version of your image. If your image is blurry or pixelated, removing the watermark might result in a less-than-perfect outcome. If you’re working with a low-res image, try to find a higher-quality version or consider resizing it after editing to maintain clarity.
Next, make a copy of your original image. This way, you can always revert back if needed. It’s a good habit to keep your original file untouched until you’re satisfied with your edits. Save the copy with a new name, like “Image_NoWatermark,” so you don’t accidentally overwrite your original.
Now, open your image in CorelDRAW. Depending on the file type, you might need to convert it to a compatible format, such as JPEG, PNG, or TIFF. Once opened, take a moment to examine the watermark’s placement and complexity. Is it on a plain background, or does it overlay detailed parts of the image? This will influence your removal approach.
If the watermark is on a uniform background, you’re in luck—removing it will be easier. For complex backgrounds, consider using tools like the ‘Clone Tool’ or ‘Healing Tool’ (if available) to assist in blending the area seamlessly after removal.
Finally, zoom in to get a detailed view of the watermark and the surrounding areas. This helps you plan your removal strategy and ensures you’re aware of any details that need special attention.
Using CorelDRAW Tools to Remove Watermarks
Now that your image is prepped, it’s time to get hands-on and start removing that watermark. CorelDRAW offers several tools that can help you do this effectively. Let’s go through some of the most useful methods.
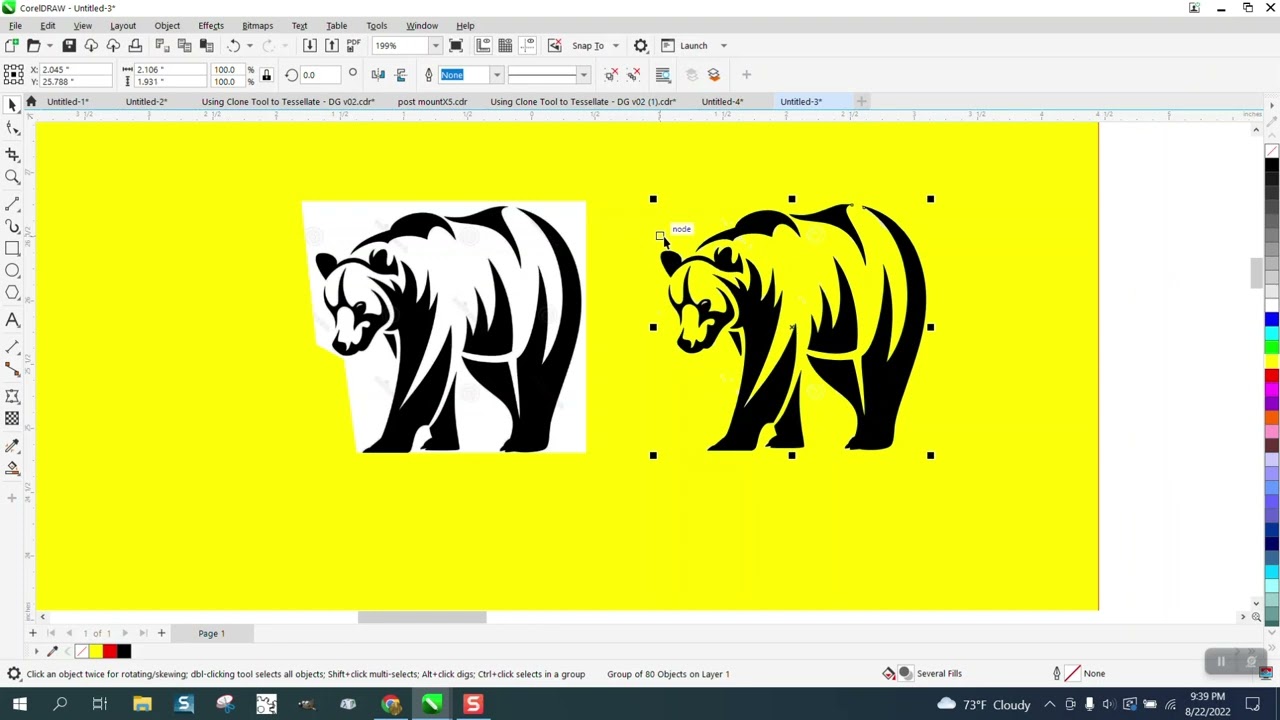
Method 1: Using the Clone Tool
The Clone Tool is a popular choice for removing watermarks because it allows you to copy pixels from one part of the image and paint over the watermark. Here’s how:
- Select the Clone Tool from the toolbox (it might look like a rubber stamp).
- Adjust the brush size to match the area you want to cover.
- Hold down the Alt key (or Option on Mac) and click on an area close to the watermark that you want to clone.
- Release Alt and carefully paint over the watermark. Repeat as needed, selecting new source points to blend seamlessly.
Take your time and zoom in for precision. This method works best on simple backgrounds or areas with uniform textures.
Method 2: Using the Healing Brush (if available)
If your version of CorelDRAW includes a Healing Brush or similar tool, it can be a real lifesaver. It automatically blends the cloned pixels with the surrounding area, making the removal less noticeable.
- Select the Healing Brush tool.
- Click to set the source point near the watermark.
- Paint over the watermark, letting the tool blend the area.
This method is great for more complex backgrounds, as it requires less manual blending.
Method 3: Using the Shape Tool and Node Editing
For more precise control, especially if the watermark is on a relatively simple shape or background, you can use the Shape Tool to manually edit the image:
- Select the Shape Tool from the toolbox.
- Click on the area around the watermark to create nodes outlining it.
- Adjust the nodes to cover the watermark area or reshape the background.
- Use the ‘Fill Tool’ to match the background color or texture as closely as possible.
This method requires a steady hand and some patience but offers excellent control over the final look.
Remember, removing a watermark isn’t always perfect on the first try. Don’t hesitate to combine these methods or undo and redo as you refine your image. With patience and practice, you’ll be able to clean up your images effectively using CorelDRAW’s versatile tools.
Alternative Methods for Watermark Removal
While the most straightforward way to remove a Shutterstock watermark is through the official licensing process, sometimes you might find yourself in a situation where you need alternative methods. Keep in mind, these methods should be used responsibly and ethically, especially when working with images you have rights to. Here are some common approaches:
Using Clone Stamp and Healing Tools
CorelDRAW doesn’t have built-in clone stamp or healing tools like Photoshop, but you can still achieve similar results by editing the image in other programs such as Corel PHOTO-PAINT or even third-party editors. The idea is to carefully paint over the watermark with nearby pixels, blending it seamlessly into the background. This method requires patience and a good eye for detail.
Employing Content-Aware Fill (via External Software)
Some advanced photo editing software, like Adobe Photoshop, offers Content-Aware Fill features that intelligently remove objects, including watermarks, by filling the selected area with matching surrounding pixels. You can:
- Open the image in Photoshop.
- Use the Lasso Tool to select the watermark.
- Apply Content-Aware Fill.
- Save the cleaned image and import it into CorelDRAW for further editing.
Note: This method works best with simple backgrounds and may not be perfect for complex images.
Using Online Watermark Removal Tools
There are many online services designed to remove watermarks automatically. Tools like Inpaint, HitPaw Watermark Remover, or WebInpaint can do the job with just a few clicks:
- Upload your image.
- Let the tool analyze and remove the watermark.
- Download the resulting image.
Be cautious when using online tools—ensure your images are not sensitive or copyrighted, and always verify the output quality before proceeding.
Important Reminder
Using these alternative methods on images without proper rights can lead to legal issues. Always aim to obtain licensed images or use royalty-free assets when possible. These methods are here as options if you have the legal right to modify the images or when you need to clean up images for personal projects.
Tips for Ensuring High-Quality Results
Removing watermarks can be tricky, but with the right approach, you can achieve professional-looking results. Here are some essential tips to help you get the best outcome:
Start with a High-Resolution Image
The higher the resolution of your original image, the better your chances of seamlessly removing the watermark without losing quality. High-res images provide more pixel data to work with, making it easier to blend edits naturally.
Use Layered Editing
If you’re working in Corel PHOTO-PAINT or other advanced editors, always work on duplicate layers. This way, you can experiment without risking the original image, and easily undo mistakes.
Pay Attention to Background Details
Watermarks often overlay complex backgrounds. When removing them, try to reconstruct or clone nearby textures and colors carefully. Use the eyedropper tool to match colors precisely and avoid noticeable transitions.
Employ Feathering and Blurring
Sometimes, edges around your edits might look harsh. Applying a slight feather or blur effect can help blend the cleaned area with the rest of the image, making your edits less obvious.
Test Different Methods
Don’t rely on just one technique. Sometimes combining tools—like using a clone stamp in one area and a content-aware fill in another—yields the best results. Experiment and see what works best for your particular image.
Maintain Consistency
If you’re removing a watermark from multiple images or sections, ensure consistency in your editing style. Use similar color matching, blending, and smoothing techniques across all images for a uniform look.
Final Review and Touch-Ups
Always review your edited image at 100% zoom to catch any irregularities. Make final touch-ups as needed, and consider using sharpening tools to enhance details. A polished finish will make your image look professional and clean.
Remember, patience and attention to detail are key. With the right approach, you can remove watermarks effectively while maintaining high image quality!
Conclusion and Best Practices for Using Shutterstock Images
Successfully removing watermarks from Shutterstock images in CorelDRAW can enhance your design projects, but it’s essential to do so ethically and responsibly. Always ensure you have the proper licensing or permission to use a Shutterstock image before editing or incorporating it into your work. Unauthorized removal of watermarks for commercial use is illegal and can lead to significant legal consequences. When working with licensed images, follow these best practices:
- Respect Copyright Laws: Only use images that you have purchased or obtained through authorized licenses.
- Maintain Image Quality: Use high-resolution images to ensure your final output is clear and professional.
- Use Proper Editing Techniques: When removing watermarks, employ non-destructive methods in CorelDRAW to preserve image integrity.
- Keep Original Files: Save original, unedited versions of images for future reference or re-use.
- Give Credit When Necessary: If the license requires attribution, ensure you include appropriate credits in your project.
By adhering to these guidelines, you can ethically incorporate Shutterstock images into your designs while respecting intellectual property rights. Always prioritize legal and ethical considerations, and use editing techniques responsibly to achieve professional results. Remember, the goal is to create compelling visuals that align with copyright laws and best practices in digital design.