If you’re a Shutterstock contributor, you already know how crucial it is to make your images stand out. One often overlooked but vital part of that is adding thoughtful descriptions to your photos. These descriptions help buyers find your images when they search, boosting your chances of making sales. Luckily, adding descriptions is straightforward and can significantly impact your portfolio’s visibility. In this guide, we’ll walk you through the process of adding descriptions to your photos on Shutterstock and share some tips to make them compelling. Let’s get started and turn your beautiful shots into easily discoverable treasures!
Why Accurate Descriptions Are Important for Shutterstock Contributors

Think of photo descriptions as the bridge between your images and potential buyers. When someone searches for a particular subject or theme, Shutterstock’s search algorithm relies heavily on the descriptions and keywords you provide. If your descriptions are vague or inaccurate, your images might not appear in relevant searches, meaning fewer views and sales for you.
Here’s why accurate descriptions matter:
- Improved discoverability: Clear, precise descriptions help your photos show up when users search for specific topics, increasing traffic to your portfolio.
- Enhanced search rankings: Shutterstock’s algorithm favors well-described images, making them more likely to appear at the top of search results.
- Better customer experience: Providing detailed descriptions helps buyers understand exactly what they’re getting, reducing confusion or returns.
- Increased sales potential: When your images are easy to find and accurately described, they’re more likely to attract the right buyers, leading to more downloads and earnings.
Moreover, accurate descriptions demonstrate professionalism and attention to detail, which can set you apart from other contributors. Remember, the goal isn’t just to upload beautiful images—it’s also about making sure those images reach the right audience. Taking the time to craft precise, descriptive text can make a big difference in your success on Shutterstock.
Step-by-Step Guide to Uploading and Describing Photos on Shutterstock

Uploading your photos to Shutterstock and making sure they’re properly described might seem a bit daunting at first, but once you get the hang of it, it’s pretty straightforward. Let’s walk through the process step by step so you can start sharing your images with the world and earning royalties!
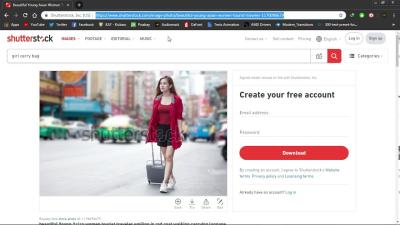
Step 1: Sign In or Create an Account
If you haven’t already, head over to Shutterstock.com and sign in. If you’re new, simply click on the “Join” button and set up your contributor account. Fill out all the necessary details, including payment information, so you’re ready to upload and get paid.
Step 2: Access the Contributor Dashboard
Once logged in, navigate to your dashboard. This is where you’ll find options to upload new photos, review your submissions, and manage your profile. Click on the “Upload” button to start adding new images.
Step 3: Select Your Photos to Upload
Click on “Select Files” or drag and drop your images into the upload box. Shutterstock recommends high-resolution photos with good lighting and clarity. You can upload multiple files at once, which saves time.
Step 4: Add Descriptions and Metadata
After uploading, you’ll be prompted to add details about each photo. This is where your descriptions come into play. Be descriptive and accurate—shutterstock uses this info to categorize your images and help buyers find them. Enter a clear, concise title, relevant keywords, and a detailed description.
Step 5: Categorize Your Photos
Select the appropriate categories and subcategories for your photo. This step improves discoverability and helps Shutterstock’s algorithm recommend your images to the right audiences.
Step 6: Review and Submit
Before finalizing, review all the details. Make sure your descriptions are accurate and free of typos. Once satisfied, click “Submit” to send your images for review. Shutterstock will review your submissions, which usually takes a few days.
And that’s it! You’ve successfully uploaded and described your photos. Remember, providing detailed and accurate descriptions can significantly impact how often your images get discovered and purchased. Now, let’s talk about how to craft those descriptions to maximize their effectiveness.
Tips for Writing Effective and SEO-Friendly Photo Descriptions
Great descriptions do more than just tell viewers what’s in your photo—they help your images get found by the right audience. Here are some helpful tips to craft descriptions that are both effective and SEO-friendly.
- Be Specific and Descriptive: Instead of vague phrases like “beautiful scenery,” describe what’s in the photo. For example, “Sunset over a mountain lake with reflections of pine trees” paints a clearer picture.
- Use Relevant Keywords Naturally: Think about what potential buyers might search for. Incorporate these keywords seamlessly into your description without keyword stuffing. For instance, include words like “corporate office,” “teamwork,” or “business meeting” if applicable.
- Focus on the Main Elements: Highlight the key subjects and their context. Mention colors, emotions, or activities to give a full picture.
- Keep it Concise but Informative: Aim for a description that’s thorough but not overly long—around 100-200 words. Be clear and avoid unnecessary details.
- Use Proper Language and Grammar: Well-written descriptions appear more professional and trustworthy. Avoid typos and grammatical errors.
- Think About the Buyer’s Perspective: What would someone searching for this image want to know? Address potential questions preemptively in your description.
Example of a Good Photo Description:
| Photo | Description |
|---|---|
| Image of a family having a picnic in a park | A cheerful family enjoying a sunny day picnic in Central Park. The scene features a picnic blanket spread on the grass, a basket filled with sandwiches and fruits, and children playing with a frisbee. Perfect for topics related to outdoor activities, family time, and leisure. |
By following these tips, your photo descriptions will not only be more engaging but also optimized for search engines. This increases the chances of your images getting noticed by buyers looking for exactly what you have to offer. Remember, a well-crafted description can make all the difference in your Shutterstock success story!
Common Mistakes to Avoid When Describing Photos on Shutterstock
Writing effective descriptions for your Shutterstock photos is crucial to making sure they get noticed by the right buyers. But, there are some common pitfalls that many contributors fall into—mistakes that can limit your images’ visibility or even cause rejection. Let’s go over a few to help you steer clear of trouble!
Overusing Keywords
It’s tempting to stuff your descriptions with as many keywords as possible, thinking it will boost your image’s chances of appearing in searches. However, keyword stuffing can do more harm than good. Shutterstock’s review team looks for natural, descriptive language that accurately captures the photo’s content. Overloading your description with keywords can make it seem spammy and may lead to rejection or reduced visibility.
Being Too Vague or Generic
Descriptions like “beautiful photo” or “great image” don’t tell buyers anything useful. Instead, focus on specific details that highlight what makes your photo unique. For example, instead of “a person in a park,” try “a smiling woman in a red jacket sitting on a park bench during autumn.” The more descriptive and specific you are, the easier it is for buyers to find your image when searching for something particular.
Ignoring Target Audience and Usage Context
Think about who might want to use your photo and for what purpose. Are they looking for professional business images, lifestyle shots, or creative artwork? Tailor your descriptions accordingly. Including relevant context, such as the mood, setting, or potential uses, can help your photo connect with buyers who are searching for just that kind of visual.
Failing to Include Important Details
Don’t forget to mention critical aspects like the number of people in the photo, the setting, colors, or any notable objects or actions. Missing these details can make your photo less discoverable. Remember, detailed descriptions help your image appear in diverse search queries and improve its chances of being licensed.
Neglecting Proper Grammar and Spelling
Clear, well-written descriptions look more professional and trustworthy. Spelling mistakes or awkward phrasing can detract from your credibility. Take a moment to proofread your descriptions before submitting—they can make a big difference in how your photos are perceived and found.
Conclusion and Additional Resources for Shutterstock Contributors
Mastering the art of adding compelling and accurate descriptions to your Shutterstock photos is a key part of increasing your sales and visibility. Remember to be specific, natural, and audience-focused in your writing, and avoid common pitfalls like keyword stuffing or vague descriptions. The effort you put into crafting quality descriptions pays off by helping your images stand out in a crowded marketplace.
Looking to improve your skills further? Here are some resources to help you become a better Shutterstock contributor:
- Shutterstock Contributor Help Center: Official guidelines and tips for submitting and describing your photos. https://submit.shutterstock.com/
- Photography and Stock Image Blogs: Blogs like Photofocus, Fstoppers, and Shutterstock’s own blog offer valuable insights and tutorials.
- Online Courses: Platforms like Udemy, Skillshare, or LinkedIn Learning offer courses on photography, SEO, and effective product descriptions.
- Community Forums and Groups: Join Shutterstock contributor communities on Facebook or Reddit to exchange tips, ask questions, and learn from others’ experiences.
Remember, continuous learning and attention to detail are your best tools for success as a stock photographer. Keep practicing, stay updated with Shutterstock’s guidelines, and your images will have a better chance to shine!