Activating a WordPress plugin programmatically may sound a bit daunting, but it’s actually quite straightforward! Whether you’re a developer looking to enhance your site’s functionality or you simply want to save time on manual activation, this guide will walk you through the process. Understanding how to programmatically activate plugins can streamline your workflow and ensure that your site is running the latest features without the hassle of navigating the WordPress admin panel.
Understanding WordPress Plugins
WordPress plugins are powerful tools that extend the functionality of your WordPress site. They allow you to add features without requiring extensive coding knowledge, which is one of the reasons WordPress is so popular among both developers and non-developers alike. Let’s break down the essentials:
- What is a WordPress Plugin?
A WordPress plugin is a piece of software that can be uploaded to your WordPress site to add new features or functionality. Think of them as apps for your website! - Why Use Plugins?
Plugins can help you with various site activities, including:- SEO enhancements
- Social media integration
- Security improvements
- Performance optimization
- eCommerce capabilities
- How Do Plugins Work?
When you install a plugin, it becomes part of your WordPress installation. It interacts with the core WordPress code and can modify or add to the default behavior of your site. Plugins can do everything from creating new widgets to automating repetitive tasks.
In summary, understanding plugins is crucial for anyone wanting to elevate their WordPress experience. The right plugins can make your site more functional, user-friendly, and engaging. And once you grasp how to activate them programmatically, you’ll find that managing your website becomes an even more efficient process!
When to Activate a Plugin Programmatically
Activating a WordPress plugin programmatically isn’t just a nifty trick; it can significantly streamline your workflow and enhance your site’s functionality. But when should you consider doing it? Let’s break it down.
1. Automated Deployments: If you’re working on a site that requires regular updates or changes, automating the plugin activation process can save you a lot of time. By using code to activate plugins, you reduce the risk of human error and ensure that your deployment is smooth and consistent.
2. Custom Setup Processes: When developing a custom theme or a complex site that relies on multiple plugins, it makes sense to handle plugin activations programmatically. This allows you to configure your site during installation without needing manual intervention from users or administrators.
3. First-Time User Experience: If you’re creating a site that will be used by clients or non-technical users, you might want to automate certain tasks. By activating plugins automatically, you enhance the user experience since it eliminates the need for them to navigate through the admin dashboard and understand plugin management.
4. Conditional Activations: Sometimes, you may want to activate a plugin based on specific conditions, such as the presence of another plugin or certain settings being enabled. This kind of dynamic activation can lead to more efficient resource management and site performance.
In summary, programmatically activating a WordPress plugin is beneficial in scenarios requiring automation, custom setups, enhanced user experiences, or conditional scenarios. Embracing this approach can save you time and elevate your WordPress development game!
Setting Up Your Development Environment
Before diving into the world of programmatically activating plugins in WordPress, it’s vital to set up a solid development environment. A well-configured workspace can make the development process smoother and more enjoyable. Here’s how you can get started.
1. Choose a Local Development Tool: Opt for tools like Local by Flywheel, XAMPP, or MAMP. They create a local server environment on your machine, allowing you to develop and test your plugins without affecting a live site. Local setups are faster and provide greater flexibility.
2. Install WordPress: Download the latest version of WordPress from the official site. Then, set it up on your local server by creating a new database and linking it to your WordPress installation. This step ensures your environment mirrors a production configuration.
3. Set Up a Code Editor: Choose a code editor that suits you best. Popular options include Visual Studio Code, Sublime Text, or Atom. These editors come equipped with plugins and extensions that can help you code more effectively, offering syntax highlighting, debugging tools, and version control integration.
4. Version Control: Consider using Git for version control. This not only helps track changes but also allows collaboration if you’re working with a team. You can set up a Git repository to keep your project organized and ensure you can roll back changes if needed.
5. Familiarize Yourself with WP CLI: The WordPress Command Line Interface (CLI) can be a game-changer. It allows you to manage your WordPress site through the command line, making tasks like activating plugins a breeze. Spend some time learning the basics; it’ll pay off in the long run.
By taking these steps, you’ll establish a robust development environment that sets you up for success when programmatically activating a WordPress plugin. Happy coding!
Using the WordPress Plugin API
The WordPress Plugin API is a powerful set of functions that allow developers to interact with the core of WordPress and its plugins. When it comes to activating a plugin programmatically, this API provides a structured approach to handling different aspects of plugin management. Utilizing the Plugin API not only standardizes how plugins operate but also enhances compatibility and reduces the likelihood of conflicts.
One of the key functions you can take advantage of is activate_plugin(). This function handles the activation of a plugin by taking the plugin’s file path as an argument. Here’s a brief overview of how this works:
- Pre-activation checks: Before activating a plugin, it’s essential to verify that it’s not already active and that it meets any dependencies.
- Activation hook: Each plugin can define an activation hook to execute specific code upon activation. This is a useful feature when you want to set up default settings or create database tables.
- Errors and logging: If anything goes wrong during activation, information can be logged for troubleshooting, helping developers zero in on issues quickly.
In a nutshell, the WordPress Plugin API simplifies the process of activating plugins programmatically, providing built-in functions to ensure a smooth and error-free experience. Leveraging this API is particularly beneficial for developers looking to maintain high standards and offer functionality that is both robust and reliable.
Step-by-Step Guide to Activate a Plugin Programmatically
Ready to dive into the details of activating a WordPress plugin programmatically? Follow this simple step-by-step guide to get your plugin up and running without breaking a sweat.
- Prepare Your Environment
Ensure you have a local or staging WordPress installation where you can test this without affecting a live site. Having FTP or file access is also helpful.
- Identify the Plugin
Determine which plugin you want to activate programmatically. You will need the path to its main file, usually found in the /wp-content/plugins/ directory.
- Use the activate_plugin Function
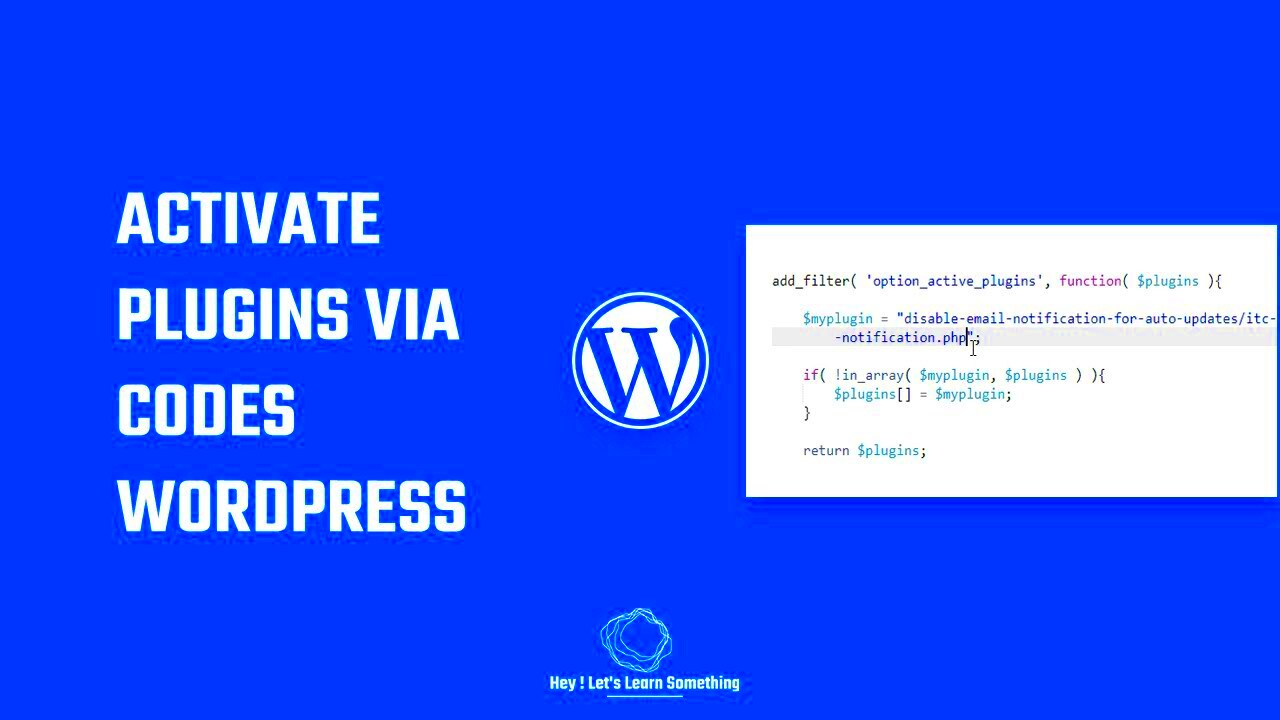
In your theme’s functions.php file or a custom plugin, add the following code:
activate_plugin('plugin-folder/plugin-file.php');Make sure to replace plugin-folder/plugin-file.php with the correct path to your plugin.
- Handle Activation Hooks
If your plugin uses activation hooks, ensure that you include any necessary setup code. This can involve creating default settings or custom database tables.
- Test It Out
After you’ve added your code, save your changes and refresh your WordPress site. The plugin should be activated automatically. Check your plugins page to confirm it!
With these steps, you’re well on your way to mastering the art of programmatically activating plugins in WordPress. Enjoy the benefits of automation and the efficiency it brings to your development workflow!
Common Use Cases for Programmatic Activation
Programmatically activating a WordPress plugin can be incredibly handy for a variety of scenarios. Let’s explore some common use cases where this technique can save you time and effort.
- Automated Plugins Setup: When deploying a new WordPress site, you might need to activate several plugins immediately. By using programmatic activation in your theme or setup script, you can streamline this process.
- Custom Theme Development: If you’re developing a theme, it might rely on certain plugins to provide specific functionalities. Programmatically activating those plugins ensures that your theme works flawlessly out of the box.
- Client Websites: When setting up a client’s website, using programmatic activation can be a huge timesaver. You can create a script that activates all necessary plugins, ensuring the site is ready to go with minimal manual intervention.
- Site Migration: During migration from one server to another, it’s essential to quickly reactivate plugins. Automating the process can help avoid downtime where functionalities might be missing.
- Testing Environments: For developers testing plugins or themes, programmatic activation allows for quicker checks of how different setups behave without manually activating each plugin.
- Multisite Networks: In a WordPress Multisite setup, you might want to activate the same plugin across all sites. Doing this programmatically simplifies the task significantly.
In essence, whether you are a developer or a website manager, programmatically activating plugins can enhance your workflow and make managing your WordPress sites a breeze!
Troubleshooting Activation Issues
Even with the best of intentions, you may encounter some hiccups when trying to programmatically activate a WordPress plugin. Luckily, troubleshooting these issues is often straightforward. Here are some common problems you might face, accompanied by steps to resolve them:
| Issue | Description | Solution |
|---|---|---|
| Plugin Not Found | The specified plugin can’t be activated because WordPress can’t locate it. | Check if the plugin is correctly installed in the ‘/wp-content/plugins/’ directory. |
| No Permissions | The current user may not have the necessary permissions to activate the plugin. | Ensure you have the right capabilities (like ‘activate_plugins’) in your user role. |
| Dependency Issues | Some plugins require others to be active first. | Make sure all dependencies are activated beforehand to avoid conflicts. |
| Conflict with Another Plugin | Another active plugin may conflict with the one you are trying to activate. | Disable other plugins one by one to identify the conflict, then seek a workaround. |
If you encounter activation issues, using the debugging functionalities in WordPress can also reveal error messages or logs that can point you in the right direction. Remember to have backups before making any major changes or troubleshooting, just in case you need to roll back!
Conclusion
Activating a WordPress plugin programmatically is an essential skill for developers looking to streamline their workflow and enhance their website’s functionality. By utilizing WordPress hooks and functions, you can efficiently manage plugin activation without manual intervention.
To recap the steps involved in activating a WordPress plugin programmatically, consider the following:
- Identify the Plugin: Know the plugin’s folder and file names for proper activation.
- Use Built-in Functions: Utilize
activate_plugin()function to activate the plugin. - Employ Hooks: Implement the
plugins_loadedaction hook to ensure that your activation logic runs at the right time. - Testing: Always test in a staging environment before deploying changes to a live site.
This method allows you to save time, reduce human error, and automate repetitive tasks, making it a valuable addition to your WordPress development toolkit. With careful implementation, you can easily maintain your website and enhance its features with minimal effort.
By following the guidelines and examples provided in this post, you’ll be equipped to activate WordPress plugins programmatically, ensuring a smoother and more efficient management of your site’s functionality.

