If you’re new to submitting vectors to Shutterstock, the first step is understanding what they’re looking for. Shutterstock has specific guidelines to ensure your artwork meets quality standards and fits their marketplace needs. Ignoring these can lead to rejections or delays, so it’s worth paying close attention. Basically, they want vectors that are original, well-crafted, and ready for commercial use. Before you start, make sure you’re familiar with their technical and content requirements — it’ll save you time and frustration down the line.
Here are some key points to keep in mind:
- File Format: Submit your vectors as AI, EPS, or SVG files. Make sure your files are compatible and clean.
- Resolution: Since vectors are scalable, make sure your artwork is crisp at any size, avoiding pixelation or blurriness.
- Layer Structure: Keep your layers organized. Use named layers and groups to make editing and review easier.
- Color Profiles: Use RGB color mode for digital images. Avoid CMYK unless specifically needed for print.
- Content Restrictions: Avoid copyrighted material, offensive content, or anything that infringes on trademarks.
Additionally, Shutterstock prefers vectors that are unique and creative. Plagiarized or overly similar work will be rejected, so originality is key. Take time to review their content guidelines on their website, as they regularly update their policies. Ensuring your submission aligns with these rules not only increases your chances of acceptance but also helps maintain the quality standards of the Shutterstock marketplace.
Creating High-Quality Vector Artwork

Now that you understand the guidelines, let’s talk about creating vectors that truly stand out. High-quality vector artwork isn’t just about technical precision; it’s also about creativity, clarity, and usability. Whether you’re designing icons, illustrations, or complex scenes, the goal is to produce clean, professional, and versatile art that buyers will love.
Here are some tips to elevate your vector creations:
- Start with a Clear Concept: Before diving into your software, sketch out your ideas. Having a solid plan helps keep your design focused and coherent.
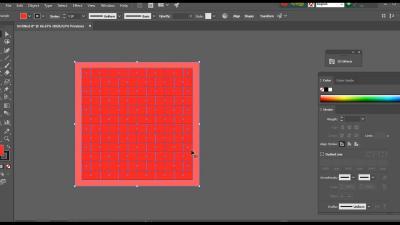
- Use Simple Shapes and Paths: Keep your shapes clean and avoid unnecessary complexity. Use the Pen tool carefully to create smooth, precise curves.
- Maintain Consistent Style: Whether it’s line weight, color palette, or shading style, consistency makes your work look professional and easier to integrate into various projects.
- Optimize for Scalability: Ensure your artwork looks good at both small and large sizes. Test your vectors by zooming in and out frequently.
- Use Colors Wisely: Stick to a limited, harmonious color palette. Avoid overly bright or clashing colors unless they serve a specific purpose.
- Pay Attention to Details: Small details can make or break your artwork. Clean up stray points, fix jagged lines, and make sure all paths are closed where necessary.
- Keep Files Organized: Name your layers properly and group related elements. This makes editing easier and shows professionalism.
Don’t forget to test your vector on different backgrounds and in various sizes. The best vectors are versatile—they work well in logos, icons, posters, and more. Also, consider feedback from peers or community forums to identify areas for improvement. With practice and attention to detail, you’ll be able to create high-quality vector artwork that not only passes Shutterstock’s review but also attracts buyers and earns you royalties.
Optimizing Vector Files for Submission
Now that your vector artwork is polished and ready, it’s time to make sure it’s optimized for submission to Shutterstock. Think of this step as giving your files a little boost—making sure they’re clean, efficient, and easy for reviewers to work with. Proper optimization not only helps your files get approved faster but also ensures they look their best once published.
Here are some key tips to optimize your vectors effectively:
- Simplify Your Design: Remove unnecessary elements, excess anchor points, and unused layers. A clean file is easier to review and less likely to cause issues during the review process.
- Use Standard Color Modes: Save your files in RGB color mode, as Shutterstock primarily displays images on screens. Avoid CMYK unless specifically requested.
- Check Resolution and Size: Though vectors are resolution-independent, ensure that embedded raster images (if any) are high resolution and appropriately scaled. For pure vectors, focus on the overall dimensions; Shutterstock recommends submitting files that meet their minimum size requirements.
- Organize Your Layers and Naming: Name your layers clearly and organize your artwork logically. This helps reviewers understand your design faster and reduces confusion.
- Embed or Outline Fonts: To prevent font issues, either embed fonts or convert text to outlines. This ensures your typography appears exactly as intended across devices.
- Check File Compatibility: Save your vector files in widely accepted formats like AI, EPS, or SVG. Ensure that your files open correctly in different vector editing software to avoid submission hiccups.
Before submitting, it’s a good idea to double-check your file in a different software environment or on a different device. This can reveal hidden issues or inconsistencies that might cause rejection. Remember, the cleaner and more professional your file looks, the smoother the review process will be!
Common Mistakes to Avoid When Preparing Vectors
Even experienced designers can make small errors that lead to rejection or delays during the Shutterstock review process. Let’s go over some common pitfalls so you can avoid them and ensure your submission stands out for all the right reasons.
1. Poor Layer Organization
Cluttered, disorganized layers can make your file confusing. Take the time to name layers descriptively and group related elements. Reviewers appreciate clarity and structure.
2. Using Too Many Anchor Points
Having an excessive number of anchor points can make your vector unnecessarily complex, which might cause rendering issues or increase file size. Simplify your paths and use fewer points where possible.
3. Ignoring File Specifications
Each platform has specific requirements for file format, size, and color mode. Submitting a JPEG instead of a vector file, or a file in the wrong color mode, can lead to rejection. Always double-check Shutterstock’s submission guidelines.
4. Including Embedded Raster Images
While vectors are scalable, embedding raster images within your vector file can cause issues. If you need to include raster elements, ensure they are high resolution and properly integrated, or consider submitting them separately.
5. Not Converting Text to Outlines
Leaving fonts editable can cause compatibility issues or font substitutions. Convert all text to outlines to preserve your design’s typography exactly as you intended.
6. Overcomplicating the Design
Details are great, but overly complex designs can be hard to review and may get rejected for being too cluttered or busy. Aim for a clean, balanced composition that clearly communicates your idea.
7. Forgetting to Check for Errors
Always proofread your artwork for spelling mistakes, inconsistencies, or visual errors. Small mistakes can undermine the professionalism of your submission.
By paying attention to these common mistakes and actively avoiding them, you’ll give your vector submissions a much higher chance of approval. Remember, the goal is to make your artwork easy to review, understand, and appreciate—so keep it clean, simple, and professional!
Step-by-Step Guide to Exporting Vectors for Shutterstock
Getting your vectors ready for submission to Shutterstock might seem a bit daunting at first, but once you follow a clear process, it becomes much more manageable. Let’s walk through the essential steps to ensure your vectors are perfectly prepared and ready to impress.
Step 1: Finalize Your Design
Before exporting, double-check your design. Make sure all elements are clean, well-aligned, and free of unnecessary clutter. Confirm that colors are consistent and that your file adheres to Shutterstock’s content guidelines. Remember, simplicity and clarity are key to creating a successful vector submission.
Step 2: Save Your Working File
Always save your original working file in your preferred vector editing software, like Adobe Illustrator or CorelDRAW. This gives you a backup if you need to make edits later. Use a descriptive filename so you can easily identify the project.
Step 3: Prepare Your Artwork for Export
Before exporting, do the following:
- Remove extra layers or hidden objects that shouldn’t be part of the final vector.
- Check that all paths are closed and that there are no stray points or overlapping shapes.
- Convert text to outlines to prevent font issues during submission.
- Flatten any complex effects or raster images embedded within the vector, if necessary, to maintain consistency.
Step 4: Choose the Right Export Settings
When ready, export your vector file. Shutterstock recommends submitting your files in formats like AI, EPS, or SVG. Here’s what to keep in mind:
- File Format: Use AI or EPS for compatibility and quality. SVG is also acceptable for web-based vectors.
- Color Mode: Set your document to RGB color mode, as Shutterstock prefers RGB for online images.
- Embed Fonts and Links: If your file contains text or linked images, embed fonts and link assets properly.
- Resolution: For vector files, resolution isn’t as critical as in raster images, but ensure embedded raster images are at least 300 DPI if included.
Step 5: Optimize the File Size
Compress your exported file without sacrificing quality. Large files can be cumbersome to upload or process. Remove unnecessary data, clean up unused swatches or symbols, and consider saving a copy with minimal embedded data.
Step 6: Review the Exported File
Open your exported file in your vector software or a compatible viewer to verify everything looks correct. Check for missing elements, incorrect colors, or any issues that might have crept in during export.
Final Checklist Before Submitting Your Vectors
Before hitting the submit button on Shutterstock, it’s wise to run through a quick checklist. This helps catch common mistakes and ensures your vectors meet all the platform’s requirements.
Content and Design
- Is the design original and free from copyright infringement? Make sure your artwork is unique or properly licensed.
- Does the design comply with Shutterstock’s content guidelines? Avoid problematic themes, offensive content, or prohibited subjects.
- Are all elements properly aligned and clean? Look out for stray points, overlaps, or messy edges.
Technical Aspects
- Did you convert all text to outlines? Prevent font issues and ensure consistency.
- Is your file in the correct format (AI, EPS, SVG)? Confirm the format that’s accepted and preferred.
- Are colors in RGB mode? Necessary for web and online platform compatibility.
- Have you embedded linked assets and fonts? To prevent missing elements upon submission.
File Quality and Presentation
- Have you checked the final exported file for visual issues? Open and review the design to catch any mistakes.
- Is the file size reasonable? Not too large, but high quality.
- Have you included all necessary supporting documentation or descriptions? Clear titles and keywords can help your vector get noticed.
Submission Readiness
- Have you read Shutterstock’s submission guidelines thoroughly? Stay updated on any changes or specific requirements.
- Did you back up your files? Keep copies of both your original working files and the exported vectors.
- Are your metadata and keywords accurate and relevant? To improve discoverability after upload.
Taking these final steps ensures your vectors are polished, compliant, and ready for showcase on Shutterstock. A little extra effort now can make a big difference in how your artwork performs once it’s live!