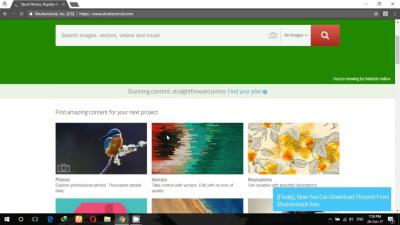
Thinking about turning your photography or artwork into a steady income stream? Shutterstock is one of the biggest platforms out there, offering a fantastic opportunity for creators to showcase their work to millions of potential buyers worldwide. But simply uploading images isn’t enough — you want to make sure your content gets noticed and earns you the most you can. In this guide, I’ll walk you through how to post on Shutterstock effectively, so you can boost your exposure and increase your earnings. Whether you’re just starting out or looking to refine your approach, let’s dive in!
Preparing Your Content for Upload

Before you even hit that upload button, it’s crucial to prepare your content properly. Think of it as getting your work ready for its big debut — presentation matters just as much as the quality of your images or videos. Here’s what you should focus on:
1. Quality is Key
Ensure your files are high-resolution, well-lit, and sharply focused. Shutterstock prefers images that are clear and professional-looking. Avoid blurry, pixelated, or poorly composed shots. If you’re uploading videos, make sure they’re stable, properly lit, and free of background noise. Remember, quality can make the difference between getting accepted and being rejected or overlooked.
2. Correct File Formats and Sizes
For images, JPEG is the standard format, with a minimum of 4 MP (megapixels). For videos, MP4 is common. Check Shutterstock’s current specifications, but generally, upload high-resolution files that meet or exceed their requirements. Keep your file sizes optimized to ensure quick uploads without sacrificing quality.
3. Metadata and Keywords
This is a super important part! Think of your metadata as the map that guides buyers to your work. Use accurate, descriptive titles and fill out the keyword tags thoughtfully. Include relevant keywords that describe the subject, mood, location, and style. Avoid overstuffing or irrelevant tags, as this can hurt your chances of getting discovered.
4. Consistency and Variety
Build a diverse portfolio that covers different subjects, styles, and themes. Consistency in quality and style can help you establish a recognizable brand, but variety keeps your portfolio appealing to a broader audience. Regularly updating your content keeps your profile fresh and engaging for both Shutterstock’s algorithms and potential buyers.
5. Understand Shutterstock’s Guidelines
Every platform has rules about what can and cannot be uploaded. Familiarize yourself with Shutterstock’s content policies, model and property releases, and legal considerations. Ensuring your files meet these standards from the start saves you time and frustration later.
By taking the time to prepare your content thoroughly, you increase your chances of acceptance, visibility, and ultimately, higher earnings. Think of it as laying a solid foundation for your success on Shutterstock — the effort you put in now pays off in the long run!
Step-by-Step Guide to Uploading Your Photos and Videos

Ready to get your images and videos out into the world and start earning? Uploading to Shutterstock is pretty straightforward, but following a clear step-by-step process can help you avoid common hiccups and make sure everything goes smoothly. Let’s walk through it together!
Step 1: Sign in or Create an Account
If you haven’t already, head over to Shutterstock and sign up as a contributor. It’s free, and the process is quick. If you already have an account, just log in.
Step 2: Access the Contributor Dashboard
Once logged in, click on the “Upload” button or navigate to your contributor dashboard. This is your control center for managing and submitting your content.
Step 3: Prepare Your Files
- Images: Make sure they are high resolution (at least 4MP), properly edited, and free of watermarks or branding.
- Videos: Export your clips in high quality, ideally in MP4 format, with a good bitrate for clarity.
Step 4: Click on “Upload Files”
Choose the files from your device. You can upload multiple images or videos at once, which makes the process faster.
Step 5: Fill Out Metadata
Here’s where you add important information that helps your content get found. You’ll need to:
- Select the appropriate categories and subcategories.
- Upload keywords (more on this in the next section).
- Add relevant titles and descriptions.
Step 6: Review and Submit
Double-check your files and metadata. Shutterstock will run a quick review to ensure your files meet their technical standards. Once everything looks good, hit the “Submit” button. Now, all that’s left is to wait for approval!
Tip:
Keep your files organized and named clearly before uploading. This saves you time and helps you keep track of what you’ve submitted.
Optimizing Your Submissions with Effective Titles and Descriptions
Great images and videos can only do so much if they aren’t discoverable. That’s where titles, descriptions, and keywords come into play. Think of them as the GPS for your content—they guide buyers right to your work!
The Power of a Good Title
Your title should be clear, concise, and descriptive. Instead of vague titles like “Nice Photo,” go for something specific like “Sunset Over Mountain Range with Pink and Orange Sky.” This helps both buyers and search engines understand what your content is about.
Writing Effective Descriptions
Your description is your chance to add context and details. Be informative but natural. For example, mention the location, mood, or activity depicted. This not only improves searchability but also helps buyers see the value in your content.
Keyword Strategy
| Best Practices | Examples |
|---|---|
| Use relevant keywords that describe the content | beach, sunset, vacation, summer, tropical |
| Avoid keyword stuffing | Focus on 15-30 well-chosen keywords per upload |
| Include synonyms and related terms | “Happy children,” “kids playing,” “family fun” |
Tips for Effective Titles and Descriptions
- Be Specific: Instead of generic phrases, describe what’s unique about your shot.
- Use Keywords Naturally: Incorporate keywords seamlessly so descriptions read naturally.
- Think Like a Buyer: What would someone search for if they wanted your content? Use those terms.
- Avoid Overloading: Too many keywords can hurt your ranking. Be strategic and thoughtful.
Remember, the goal is to make your content as discoverable as possible. Well-crafted titles and descriptions not only help your images and videos get found but also entice buyers to click and purchase.
Using Tags and Keywords to Increase Visibility
One of the most effective ways to get your images noticed on Shutterstock is by mastering the art of tagging. Think of tags and keywords as the signposts that guide buyers directly to your work. When someone searches for a specific subject—say, a ‘sunset over mountains’ or ‘happy family’—your images need to be easily discoverable among thousands of others.
Here’s the secret: be descriptive and specific. Instead of generic tags like “nature” or “people,” use detailed keywords that accurately describe your image. For example, instead of just “dog,” try “Golden Retriever puppy playing in the park.” This way, your image appears in more targeted searches, increasing the chance of it being seen and purchased.
Some tips for effective tagging:
- Use relevant keywords: Think about what a buyer might search for. Consider different variations and related terms.
- Include synonyms and related words: If your image features a beach, also include “seaside,” “coast,” or “ocean view.”
- Avoid overstuffing: While it’s good to be thorough, don’t stuff your tags with irrelevant keywords. Keep it natural and focused.
- Prioritize the first tags: The first few tags are most important since they carry more weight in search rankings.
Also, pay attention to trending keywords. Check out Shutterstock’s trending searches or explore popular images to see what tags they use. Staying current helps your images stay relevant and increases their chances of being featured or recommended.
Remember, the goal is to make your images as easy to find as possible while accurately representing them. Thoughtful tagging can significantly boost your exposure and, consequently, your earnings over time.
Best Practices for Consistent Posting and Portfolio Growth
Building a successful Shutterstock portfolio isn’t just about uploading a few great images—it’s about consistency, strategy, and growth over time. Think of your portfolio as a living entity that needs regular attention and updates to thrive in a competitive marketplace.
Here are some best practices to help you stay on track:
- Set a regular upload schedule: Whether it’s weekly, bi-weekly, or monthly, consistency helps keep your portfolio fresh and signals activity to Shutterstock’s algorithms.
- Focus on quality over quantity: Regular uploads are great, but never sacrifice quality. High-quality images attract more buyers and tend to get better visibility in search results.
- Research trending topics and themes: Stay aware of current events, seasonal themes, and popular subjects. Tailor some of your uploads to match these trends to increase relevance and sales.
- Diversify your portfolio: Upload a variety of subjects, styles, and formats. The more diverse your collection, the wider your potential customer base.
- Review your analytics: Use Shutterstock’s contributor tools to see which images perform best. Learn from these insights to guide future uploads.
- Engage with the community: Follow other contributors, participate in forums, and stay inspired. Networking can provide valuable tips and encouragement.
Remember, growing your portfolio is a marathon, not a sprint. Patience and persistence pay off. By maintaining a steady flow of high-quality images and paying attention to trends and data, you’ll build a robust portfolio that attracts more views, downloads, and earnings over time. Keep pushing forward, and your efforts will definitely pay off!
Understanding Shutterstock’s Review Process and Tips for Approval
If you’re just starting out with Shutterstock, one of the most important things to understand is their review process. It’s designed to ensure that all images, videos, and vectors meet quality and copyright standards before they go live. While it might seem a bit daunting at first, knowing what to expect can help you get your content approved faster and more consistently.
When you upload your files, Shutterstock’s review team will assess several key factors:
- Technical quality: Your media should be sharp, well-lit, and properly exposed. Avoid blurriness, noise, or pixelation.
- Composition: The elements should be balanced and visually appealing. Avoid clutter or distracting backgrounds.
- Copyright compliance: Make sure you own all the rights to your content. Avoid including recognizable people, trademarks, or copyrighted brands unless you have proper releases.
- Metadata: Properly keyword, title, and categorize your uploads. Well-optimized metadata can help your work get discovered.
Typically, the review process takes about 24 to 48 hours, but it can sometimes be longer during busy periods. If your submission is rejected, Shutterstock usually provides a reason—such as poor quality or copyright issues—so you can learn and improve for next time.
Here are some tips to increase your chances of approval:
- Follow their guidelines: Read Shutterstock’s contributor guidelines carefully and adhere to their standards.
- Upload high-resolution files: Always submit the highest quality versions of your media.
- Use accurate metadata: Use relevant keywords and clear descriptions to help your content get discovered.
- Be selective: Submit only your best work. Quality beats quantity.
- Learn from rejection: Review feedback, refine your content, and resubmit better versions.
Remember, patience and persistence are key. As you understand the review process better, you’ll be able to tailor your submissions for quicker approvals and better exposure.
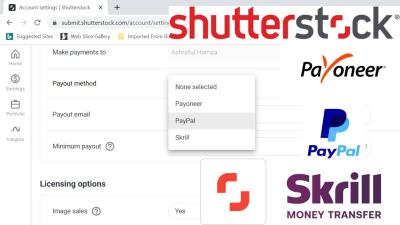
Analyzing Your Performance and Adjusting Your Strategy
Once your content starts to go live on Shutterstock, the real work begins—monitoring how it performs and tweaking your approach to maximize your earnings. Think of it as a continuous learning process. The more you understand what works and what doesn’t, the better your future uploads will perform.
Shutterstock provides contributors with access to performance metrics through their dashboard. Here’s what you should focus on:
- Download counts: This shows how often your files are being purchased. Higher downloads mean better exposure and earnings.
- Revenue data: Track which files generate the most income and identify patterns.
- Search terms: See what keywords are leading users to your content. This helps you optimize metadata.
- Comments and feedback: Sometimes, buyers leave comments or ratings that can give clues about how to improve your work.
To make the most of this data, consider these strategies:
- Identify top performers: Find out which images or videos are consistently selling well and create similar content.
- Optimize your keywords: Use the search terms report to refine your metadata, making it easier for buyers to find your work.
- Experiment with new styles or themes: If certain types of content perform better, focus on those niches but also keep testing new ideas.
- Review rejection reasons: If some content isn’t performing or gets rejected, revisit the feedback and improve your skills or metadata.
- Set realistic goals: Track your progress over time and adjust your expectations as you learn what’s achievable.
Remember, digital marketplaces like Shutterstock are dynamic. Trends change, and customer preferences evolve. Regularly analyzing your performance and being willing to adapt your strategy will keep you competitive and help grow your earnings steadily. Keep experimenting, learning, and refining—your success depends on it!
Additional Tips to Boost Your Exposure on Shutterstock
To maximize your visibility and increase your earnings on Shutterstock, consider implementing these effective strategies. First, ensure your images are of the highest quality by using professional equipment and editing tools. Clear, sharp, and well-composed photos tend to perform better in searches. Second, diversify your portfolio by uploading a variety of images across different themes, styles, and categories. This broadens your reach to a wider audience and increases the chances of your work being discovered.
Optimize your keywording to improve searchability. Use relevant, specific, and descriptive keywords that accurately reflect the content of your images. Include both popular and niche keywords to target different buyer segments. Regularly update your portfolio with fresh content to keep your profile active and engaging. Shutterstock’s algorithm favors active contributors, which can lead to higher visibility in search results.
Engage with the community by participating in forums, commenting on other contributors’ work, and sharing your own tips. This can increase your network and drive more traffic to your portfolio. Additionally, consider creating collections or themed galleries to showcase related images, making it easier for clients to find what they need in one place.
Lastly, pay attention to trending topics, seasons, and current events to tailor your uploads accordingly. Being timely and relevant can significantly boost your exposure during peak interest periods. Remember, consistency and quality are key to building a reputable presence on Shutterstock and ultimately increasing your earnings.
By applying these extra tips alongside your core efforts, you’ll enhance your chances of standing out in a competitive marketplace and achieving greater success as a contributor.