When you add a form to your WordPress site, it’s crucial that admins are notified whenever a user submits it. Form submissions can be a gateway to important actions like customer inquiries, feedback, or service requests. Without proper notifications, these submissions might go unnoticed, causing potential business opportunities or user issues to slip through the cracks. In this post, we’ll explore how you can set up form submission notifications in WordPress to keep your team informed and responsive.
Why Admins Need to Be Notified About Form Submissions
Admins need to be notified about form submissions for several reasons:
- Timely Response: Immediate notifications allow admins to respond quickly to customer inquiries, feedback, or support requests.
- Customer Satisfaction: Prompt responses increase user satisfaction, especially when dealing with customer service or potential leads.
- Lead Generation: Forms on landing pages or contact pages often serve as key lead generation tools. Immediate notifications ensure you can capture opportunities right away.
- Improved Communication: Keeping admins in the loop helps ensure smooth communication between the site users and the backend team, especially when multiple users handle form submissions.
In summary, receiving notifications promptly allows admins to take action quickly and maintain the flow of communication, which is essential for the overall functioning of the site and user satisfaction.
Different Ways to Notify Admins in WordPress
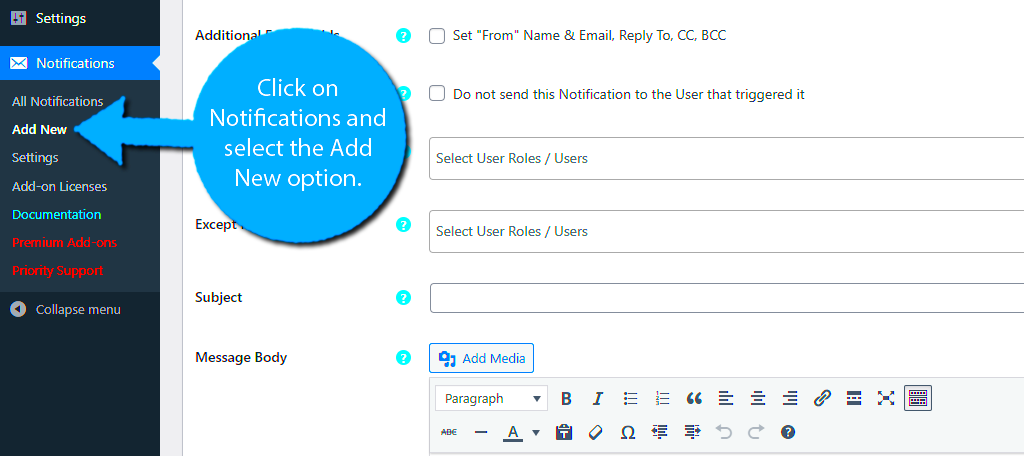
WordPress offers a variety of methods to notify admins when a form is submitted. Here are some common ways:
- Email Notifications: By default, most WordPress form plugins send email notifications to the admin when a form is submitted. You can customize the notification settings to include details like the form field responses, subject line, and sender.
- Using Plugins: There are many plugins designed specifically for form notifications. Plugins like Contact Form 7, WPForms, and Gravity Forms allow you to customize email alerts and even set up multiple recipients for notifications.
- SMS Notifications: Some advanced plugins allow SMS notifications, alerting admins via text message when a form is submitted. This can be especially useful for urgent forms or important customer inquiries.
- Push Notifications: With the use of push notification plugins, admins can receive notifications directly on their browser or mobile device, allowing for faster responses.
Each method offers its advantages, and depending on your site’s needs, you can choose the most effective way to stay informed about form submissions. Email notifications are the most common and easiest way, while more advanced methods like SMS or push notifications are great for time-sensitive forms.
Using Plugins to Set Up Form Notifications
Using plugins is one of the easiest and most efficient ways to set up form submission notifications in WordPress. Plugins designed specifically for forms come with built-in features that make it simple to receive notifications whenever a form is submitted. The great thing about using plugins is that they often offer additional customization options, like setting multiple recipients, customizing the email subject, and including form field data in the notification.
Here are some popular WordPress form plugins you can use:
- Contact Form 7: A widely used free plugin that supports email notifications. It allows easy customization of the notification message and recipients. You can add placeholders to include form field data in your emails.
- WPForms: A beginner-friendly plugin with drag-and-drop form building. WPForms offers advanced notification settings, including multiple recipients and conditional logic to send notifications based on form input.
- Gravity Forms: A premium plugin that provides more advanced options. It lets you configure email notifications with a high level of customization, including setting up multiple conditions for notifications based on user input.
When you install one of these plugins, setting up notifications is typically straightforward. You just need to configure the email address where you want to receive the notifications, customize the content of the email, and you’re all set. The flexibility these plugins offer makes them a top choice for anyone looking to stay on top of form submissions on their site.
Configuring Email Notification Settings for WordPress Forms
Configuring email notification settings for your WordPress forms is a crucial step in making sure you get notified every time someone submits a form. Most form plugins allow you to easily set up notification emails, but it’s important to configure these settings correctly to ensure the emails reach the intended recipient and include the necessary details.
Here’s how you can configure the email notification settings:
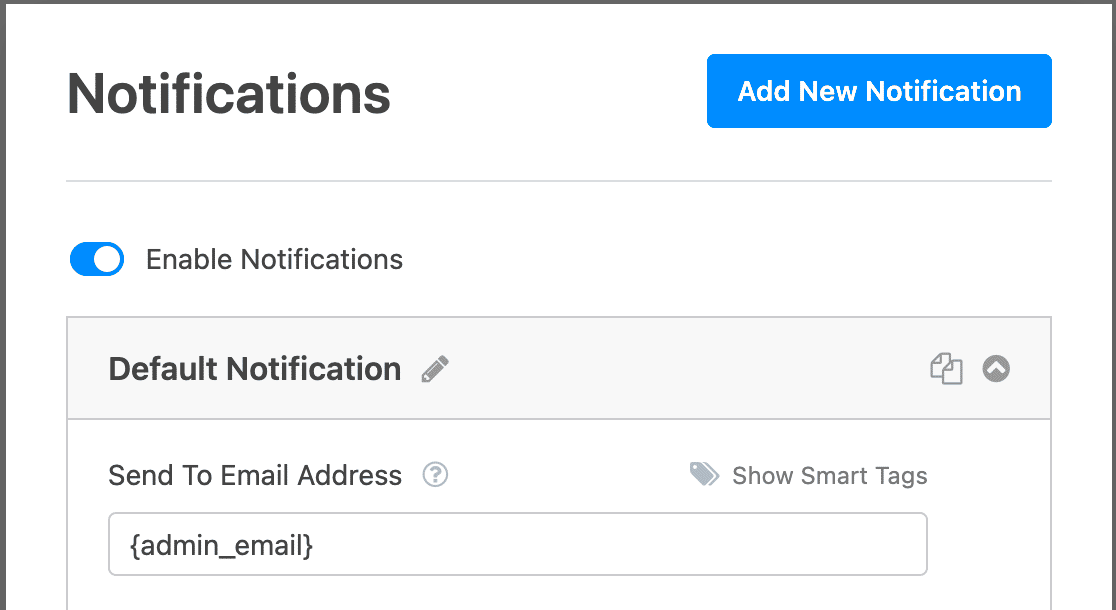
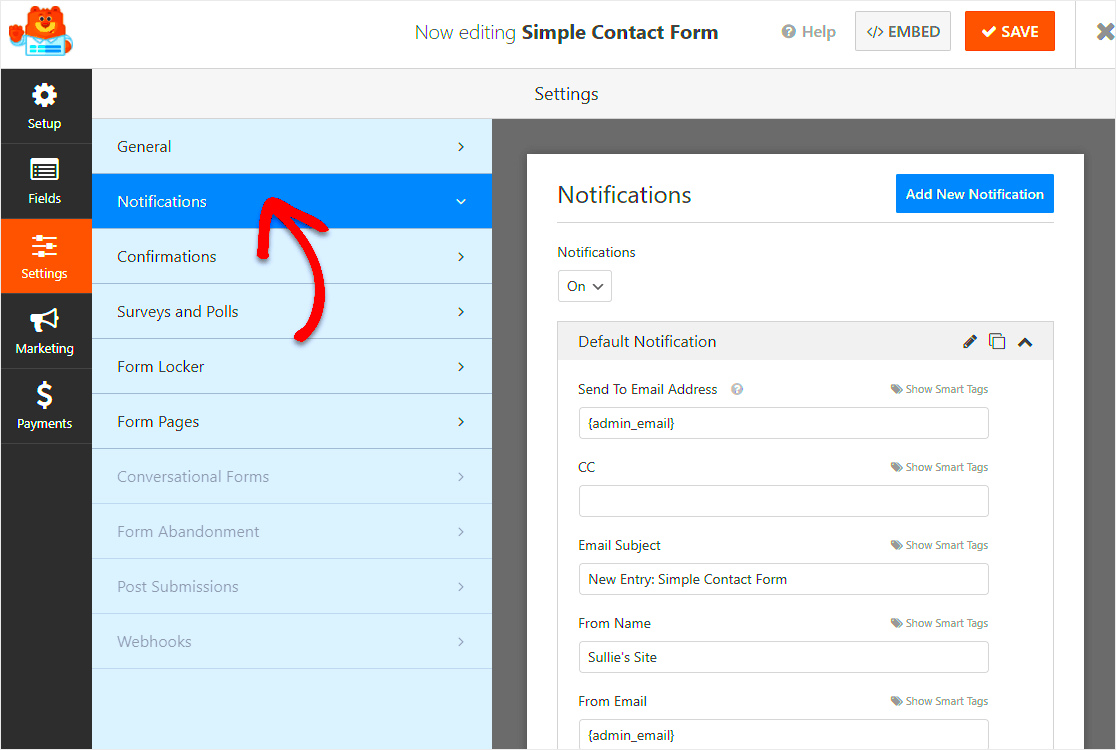
- Access the Form Settings: Open the form builder in your plugin (e.g., WPForms, Contact Form 7, etc.) and go to the settings or notifications section.
- Set the Recipient Email: Enter the email address where you want to receive the notifications. You can set it to the admin email or add multiple recipients if necessary.
- Customize the Email Content: Most plugins let you customize the email body. You can add form field data, so the email contains specific details, such as the user’s name, message, or contact information.
- Subject Line: Customize the subject line to include relevant information, such as the form’s name or a unique identifier. This helps admins quickly identify the form submission in their inbox.
- Set Up Conditional Logic: Some advanced plugins offer conditional logic, which allows you to send notifications only when certain conditions are met (e.g., if a user selects a specific option on the form).
Properly configuring email notifications helps ensure that no important form submission is missed, and it also makes managing responses more efficient. It’s essential to test these settings to verify that notifications are functioning as expected.
Testing Form Submission Notifications
Once you have set up form notifications, it’s important to test them to ensure everything is working correctly. Testing helps you verify that the email notifications are being sent to the right recipient, the information is formatted properly, and there are no issues in the notification process.
Here are the steps to test your form submission notifications:
- Submit a Test Form: After setting up the form and email notification settings, submit the form as if you were a user. This will trigger the notification process.
- Check the Admin Email: After submitting the form, check the email inbox of the recipient (usually the site admin). Verify that the email has arrived and that it includes the necessary form data.
- Review the Email Content: Ensure the email content is formatted correctly and contains all the necessary information, such as the user’s name, message, and any other fields submitted through the form.
- Test Different Scenarios: If your form has multiple fields, options, or conditional logic, test those scenarios to ensure the correct notifications are sent based on different form submissions.
- Check Spam/Junk Folders: Sometimes, email notifications may end up in the spam folder. Check these folders to ensure emails aren’t being blocked or flagged as spam by your email provider.
If everything looks good during your test, you’re all set. However, if you don’t receive the notification or if there’s any issue with the email content, review your settings and try again. Some issues, such as not receiving notifications, may be due to incorrect email configurations or issues with your hosting server’s email deliverability. It’s always a good idea to troubleshoot and test multiple times to ensure flawless functionality.
Common Issues and Troubleshooting Form Notifications
Even with the best setup, issues can arise when configuring form submission notifications. It’s crucial to troubleshoot effectively to ensure your notifications work as expected. Let’s explore some common problems and how to resolve them:
- Emails Not Arriving: If the notifications aren’t reaching the recipient’s inbox, first check the spam or junk folder. If they aren’t there, ensure that the admin email is correctly set up in the form plugin settings. Additionally, make sure the email address is valid and correctly formatted.
- Incorrect Email Content: Sometimes, the notification email may not include the correct form fields or might look misformatted. This usually happens if you’ve missed adding placeholders for form fields in the notification email body. Double-check the field variables and placeholders used in the email template.
- Conditional Logic Not Working: If you’re using conditional logic to trigger notifications based on user input, ensure the conditions are properly configured. Test different input combinations to verify that the correct logic is triggered and notifications are sent accordingly.
- Plugin Conflicts: Occasionally, plugins can conflict with each other, affecting email notifications. Disable other plugins temporarily to see if that resolves the issue. If the problem is fixed, enable the plugins one by one to find the culprit.
- Server-Side Issues: Hosting servers may sometimes block email notifications due to certain configurations. Check with your hosting provider to ensure that your server’s email settings are correctly configured to send form notifications.
By identifying and addressing these common issues, you can ensure that your form notifications work smoothly and reliably. Regular testing is a great way to avoid problems before they affect your users.
Conclusion
Setting up form submission notifications in WordPress is essential for maintaining communication and staying responsive to your users. With the right plugins and configurations, you can ensure that admins are notified immediately when a form is submitted, whether it’s for customer inquiries, support requests, or lead generation. While issues can arise, knowing how to troubleshoot common problems ensures that your form notifications continue to work flawlessly. By testing thoroughly and making the necessary adjustments, you can provide a better user experience and stay on top of every submission.
FAQ
1. Why are my form notifications not being sent?
There are several reasons this might happen. First, check your email settings in the form plugin to make sure the admin email is correct. Also, check your spam or junk folders. If the issue persists, it may be a server issue, or there may be a conflict with other plugins.
2. How can I include specific form fields in the email notification?
Most form plugins allow you to insert placeholders for form fields in the email content. For example, in Contact Form 7, you can use tags like [your-name] or [your-email] to display specific user input in the notification email.
3. Can I set up multiple recipients for form notifications?
Yes, most form plugins allow you to send notifications to multiple recipients. You can simply add multiple email addresses, separated by commas, in the notification settings of the plugin.
4. How do I test form notification emails?
After setting up the form and email notifications, test by submitting the form yourself. Check if the email arrives in the intended inbox and contains the correct content. You can also test different conditions and form entries to ensure the notifications behave as expected.
5. What can I do if my email notifications are being marked as spam?
If your emails are being flagged as spam, consider setting up SPF (Sender Policy Framework) and DKIM (DomainKeys Identified Mail) records on your server. Additionally, using a professional email service for notifications can help prevent emails from being marked as spam.

