WordPress is one of the most popular content management systems (CMS) used by millions of websites worldwide. As your website grows, it’s important to ensure that your hosting solution can scale with your needs. Amazon Web Services (AWS) offers a flexible, reliable, and scalable hosting solution for WordPress sites. With AWS, you can customize your hosting environment to meet specific requirements, optimize performance, and enjoy high availability.
Why Choose AWS for WordPress Hosting

AWS provides numerous advantages for hosting WordPress websites, making it a preferred choice for many businesses and developers. Here are some key reasons why you might choose AWS for your WordPress hosting needs:
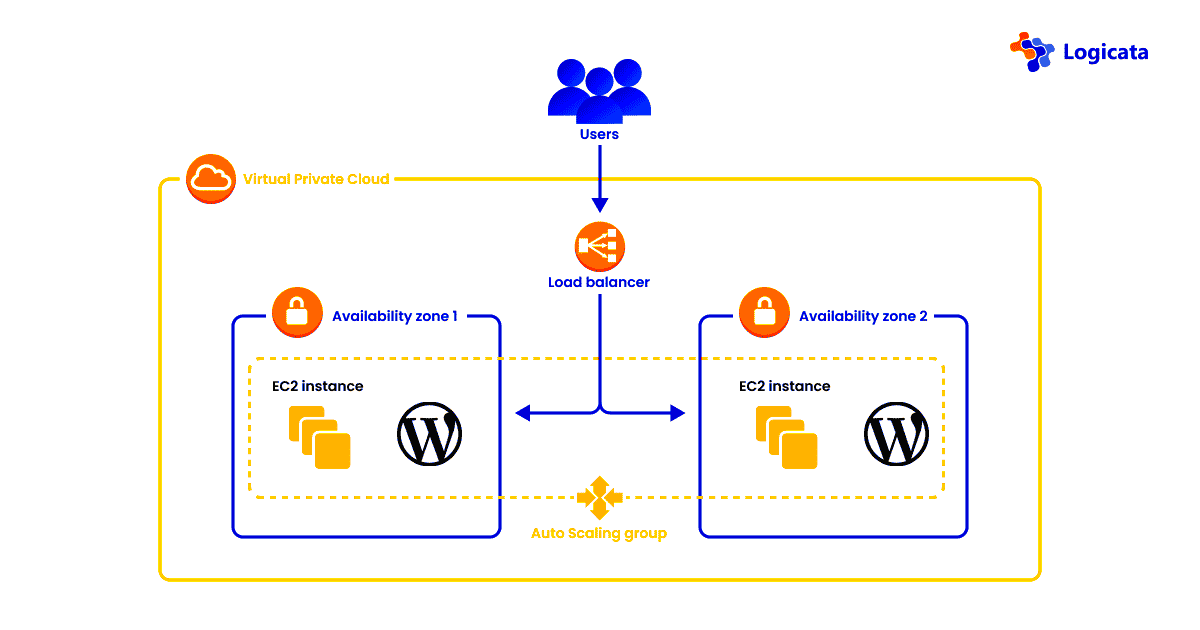
- Scalability: AWS allows you to easily scale your website’s resources up or down based on demand, ensuring optimal performance during traffic spikes.
- Reliability: AWS offers robust infrastructure with multiple data centers worldwide, ensuring your WordPress website stays online even during unforeseen issues.
- Security: AWS offers strong security features like encryption, firewalls, and monitoring tools to protect your WordPress website from threats.
- Cost-Efficiency: With AWS, you pay only for the resources you use, which can result in cost savings compared to traditional hosting options.
- Performance: AWS provides high-speed, low-latency hosting, ensuring that your WordPress site loads quickly for users around the globe.
Choosing AWS for WordPress hosting gives you full control over your server environment, making it a perfect fit for those who need a customizable and flexible solution.
Steps to Migrate WordPress to AWS

Moving your WordPress website to AWS can be a straightforward process if you follow the right steps. Here’s a step-by-step guide to help you migrate your WordPress site to AWS:
- Set Up an AWS Account: If you don’t already have one, go to the AWS website and create an account. You’ll need to enter your payment details, but AWS offers a free tier for new users to get started.
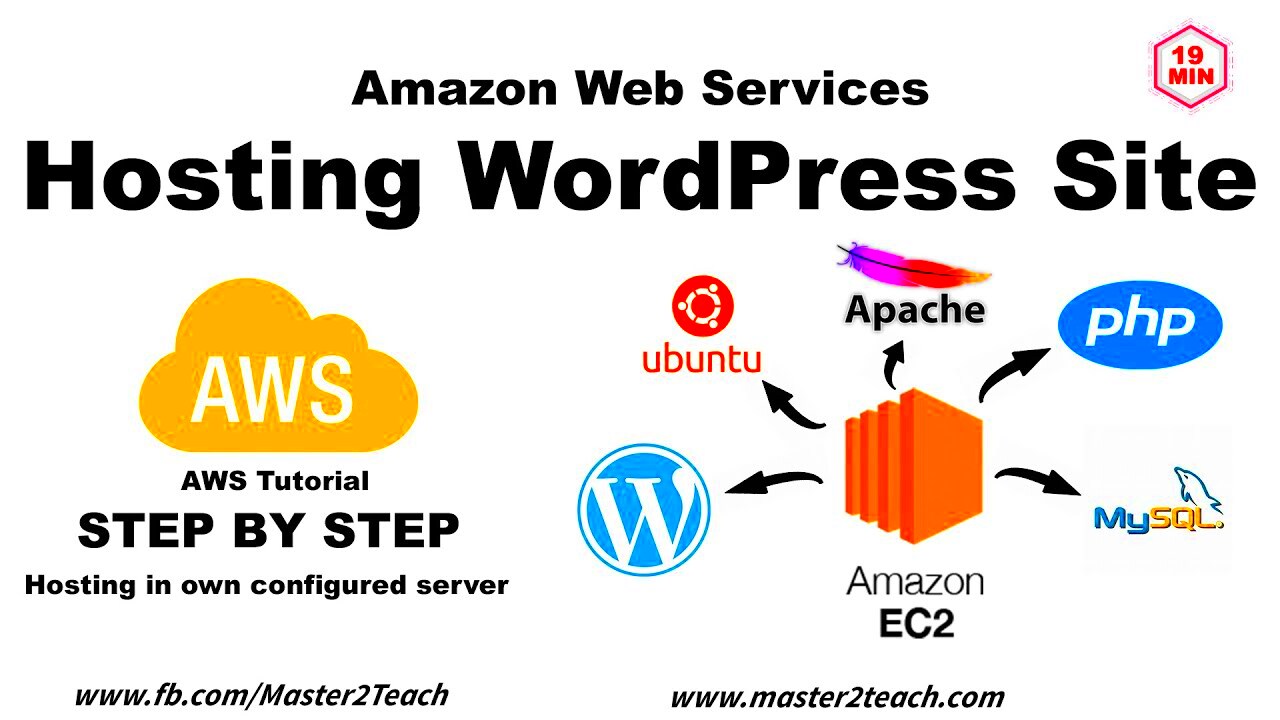
- Launch an EC2 Instance: AWS provides EC2 (Elastic Compute Cloud) instances, which are virtual servers that host your WordPress site. Choose an EC2 instance with appropriate resources (CPU, RAM) for your website’s needs.
- Install WordPress on EC2: Once your EC2 instance is running, install the latest version of WordPress. This can be done using the AWS Marketplace or manually via SSH.
- Set Up a MySQL Database: WordPress requires a MySQL database to store your website’s data. Use Amazon RDS (Relational Database Service) to set up a scalable, managed MySQL database for your WordPress site.
- Migrate Your WordPress Files and Database: To transfer your WordPress website, you need to move the files (themes, plugins, media) and the database (posts, settings). Use a plugin like Duplicator or manual methods like FTP and phpMyAdmin.
- Update DNS Settings: After migration, update your domain’s DNS records to point to the new AWS server IP. This ensures that your visitors are directed to your new hosting environment.
- Test the Website: Before making the switch permanent, test your WordPress site on AWS to make sure everything is working correctly, including plugins, themes, and database connections.
Once the migration is complete, your WordPress website will be fully hosted on AWS, offering improved performance, scalability, and security.
Setting Up an AWS EC2 Instance for WordPress
One of the first steps in hosting your WordPress site on AWS is to set up an EC2 instance. EC2 instances are virtual servers that give you full control over your hosting environment. By choosing the right EC2 instance type and configuration, you can ensure that your WordPress website runs efficiently and scales with your traffic demands. Here’s how to set up an EC2 instance for WordPress:
- Create an EC2 Instance: Log in to your AWS account and navigate to the EC2 dashboard. Click on “Launch Instance” to start the process. You’ll be prompted to select an Amazon Machine Image (AMI). Choose a Linux-based image, like Amazon Linux 2 or Ubuntu, as they are ideal for hosting WordPress.
- Select an Instance Type: AWS offers a range of instance types based on your needs. For WordPress, a t2.micro or t3.micro instance is sufficient for small to medium traffic websites. Choose an instance type and click “Next.”
- Configure Instance: Set the instance details like the number of instances, network settings, and storage options. For most WordPress websites, the default settings will work fine. However, you can customize them based on your requirements.
- Set Up Security Groups: Configure a security group to define which traffic can reach your server. Allow HTTP (port 80), HTTPS (port 443), and SSH (port 22) for secure access.
- Review and Launch: Review your configurations and click “Launch” to start the instance. Don’t forget to download your private key (.pem) file, which will allow you to securely SSH into your instance later.
Once your EC2 instance is up and running, you can proceed to install WordPress and set up your database. This instance will serve as the core of your WordPress hosting environment on AWS.
Configuring a MySQL Database on AWS for WordPress
A MySQL database is essential for running WordPress, as it stores all of your website’s content, settings, and user information. On AWS, you can use Amazon RDS (Relational Database Service) to create a fully managed MySQL database that integrates seamlessly with your WordPress website. Here’s how to configure it:
- Create an RDS MySQL Database: From the AWS console, go to the RDS dashboard and click “Create Database.” Select MySQL as the database engine and choose a version that supports WordPress (most recent versions will work fine).
- Choose Database Settings: Set up your database name, master username, and password. Be sure to choose secure credentials to prevent unauthorized access.
- Configure Instance Settings: Select an instance class based on your expected traffic. A db.t2.micro is a good starting point for small websites. Also, ensure that your instance has sufficient storage and backup options enabled.
- Set Network and Security Options: Configure the VPC (Virtual Private Cloud) and subnet settings, ensuring that your database can communicate with your EC2 instance. Set up security groups to allow traffic only from your EC2 instance to prevent unauthorized access.
- Launch the Database: After reviewing your settings, click “Create Database.” AWS will handle the setup process, and your MySQL database will be ready for use within a few minutes.
After setting up your MySQL database, you can connect your WordPress site to it by updating the wp-config.php file with the database hostname, username, and password. This will allow WordPress to store and retrieve data from the RDS MySQL database.
Connecting WordPress to AWS Storage Solutions
WordPress websites often require storage for media files such as images, videos, and backups. While you can use the local storage on your EC2 instance, AWS offers more scalable and cost-effective storage solutions. Amazon S3 (Simple Storage Service) is a popular choice for storing WordPress media files, while Amazon EBS (Elastic Block Store) is used for persistent storage on your EC2 instance. Here’s how to connect WordPress to AWS storage solutions:
- Setting Up Amazon S3 for WordPress Media:
- Create an S3 bucket in the AWS S3 console.
- Install a WordPress plugin like “WP Offload Media” to seamlessly integrate S3 with your WordPress site.
- Configure the plugin by providing your S3 bucket details (access key, secret key, and region).
- Setting Up Amazon EBS for EC2 Storage:
- Attach an EBS volume to your EC2 instance by selecting the “Volumes” option in the EC2 dashboard and choosing “Create Volume.”
- After the EBS volume is created, mount it to your EC2 instance. You can then store files like logs, backups, and WordPress themes or plugins on this volume.
- Integrating S3 and EBS for Backups:
- Use a plugin like “UpdraftPlus” to automate backups to both S3 and EBS, ensuring that your website data is safely stored and easily recoverable in case of issues.
By connecting your WordPress website to AWS storage solutions like S3 and EBS, you ensure that your site runs efficiently, can handle large amounts of data, and remains secure and scalable in the cloud.
Managing Security and Backups on AWS
Ensuring your WordPress website is secure and properly backed up on AWS is essential for protecting your data and maintaining website uptime. AWS offers a variety of security features that allow you to safeguard your website from attacks and data loss. In this section, we’ll cover key aspects of managing security and backups on AWS for WordPress.
Security Best Practices
- Use Security Groups and Network ACLs: AWS allows you to control access to your EC2 instance with security groups. By configuring security groups, you can restrict incoming and outgoing traffic based on IP addresses, ports, and protocols. Network Access Control Lists (NACLs) further add an additional layer of security to your network.
- Enable Multi-Factor Authentication (MFA): For an added layer of security, enable MFA on your AWS account to prevent unauthorized access, especially if your credentials are compromised.
- Keep Software Updated: Regularly update your WordPress core, themes, and plugins to ensure you’re protected from known vulnerabilities.
- Use SSL Certificates: Secure your website with HTTPS by installing an SSL certificate on your AWS EC2 instance. You can use AWS’s free service, AWS Certificate Manager (ACM), to easily manage SSL certificates.
Backup Solutions
- Automated Backups with AWS RDS: Use Amazon RDS for automated database backups. Set up daily backups to ensure your WordPress data is regularly saved and can be restored if necessary.
- Use Amazon S3 for Media Backups: Store media files and other important WordPress data on Amazon S3. Regularly back up your S3 buckets to safeguard against data loss.
- Backup Plugins: Use WordPress backup plugins like UpdraftPlus or BackupBuddy to automate and schedule backups of your entire website (files and database). You can configure them to store backups on AWS storage solutions like S3.
By following these practices, you ensure your WordPress site is secure and your data is always protected with regular backups.
Common Issues and Solutions During Migration
While migrating a WordPress website to AWS, you might encounter several common issues. Understanding these potential roadblocks and knowing how to address them will make the migration process smoother. Here’s a look at some of the typical challenges during migration and their solutions.
Common Migration Issues
- Website Downtime: During migration, your website may experience some downtime, which could affect visitors. To minimize downtime, plan the migration during off-peak hours and use AWS tools like Elastic Load Balancing to distribute traffic.
- Database Connection Errors: Sometimes after migrating, WordPress might display a “Error establishing a database connection” message. This typically occurs when the database credentials in the wp-config.php file are incorrect or the RDS instance is not configured properly. Double-check the database details and ensure the RDS security group allows inbound connections from your EC2 instance.
- URL and File Path Issues: After migration, internal URLs and file paths in your WordPress site may still point to the old server. Use a plugin like “Velvet Blues Update URLs” to update the URLs across your site’s content and database.
- File Permissions: Incorrect file permissions can prevent WordPress from writing to necessary directories, such as the wp-content folder. Make sure that your file and directory permissions are set correctly to avoid issues with uploads and plugin installations.
Solutions to These Issues
- Pre-migration Testing: Always test your migration on a staging environment before moving to production. This allows you to identify potential issues and fix them before the actual migration.
- Use Migration Plugins: Use WordPress migration plugins like Duplicator, All-in-One WP Migration, or WP Migrate DB to streamline the process and reduce the risk of errors.
- Enable Error Logs: Enable debugging and error logs on your WordPress site to quickly diagnose and resolve issues during migration.
By being aware of common migration issues and knowing how to resolve them, you can ensure a smooth transition to AWS for your WordPress website.
FAQ
Here are some frequently asked questions about migrating WordPress to AWS:
1. Do I need to be a developer to move WordPress to AWS?
While it helps to have some technical knowledge, you don’t need to be a developer to migrate WordPress to AWS. Tools like migration plugins and AWS’s easy-to-use interfaces make the process accessible to non-developers as well.
2. Can I use AWS for small WordPress sites?
Yes, AWS is ideal for websites of all sizes, including small WordPress sites. You can start with a low-cost EC2 instance and scale up as your website grows.
3. How much does it cost to host WordPress on AWS?
The cost of hosting WordPress on AWS depends on the resources you use (like EC2 instances, storage, and bandwidth). AWS offers a pay-as-you-go model, meaning you only pay for what you use. For small websites, AWS can be very cost-effective, especially with the free tier for new users.
4. Is AWS secure for hosting WordPress websites?
Yes, AWS offers a high level of security, including data encryption, secure access management, and various compliance certifications. By configuring AWS security features properly, you can ensure that your WordPress site is safe from potential threats.
5. Can I scale my WordPress website on AWS?
Absolutely! One of the major advantages of AWS is its scalability. You can easily increase your server resources, storage, and bandwidth as your website grows, ensuring it handles increased traffic without issues.
Conclusion
Moving your WordPress website to AWS offers numerous benefits, including scalability, reliability, and flexibility. AWS’s cloud infrastructure allows you to tailor your hosting environment to suit your site’s specific needs, whether you’re running a small blog or a large eCommerce platform. By following the steps outlined in this guide, including setting up an EC2 instance, configuring a MySQL database, and utilizing AWS storage solutions, you can enjoy the enhanced performance and control that AWS provides. Managing security and backups effectively ensures your site remains protected and operational. With the right planning and tools, migrating to AWS can significantly improve your WordPress hosting experience, offering the resources to grow and the stability to ensure long-term success.


