So, you’ve found the perfect video on Shutterstock, but it’s not quite right for your project. Maybe it’s the wrong length, has elements you don’t need, or just needs a little creative twist. No worries! Modifying Shutterstock videos is a common part of content creation, and it’s easier than you might think. Whether you want to trim, add effects, overlay text, or combine clips, there are plenty of tools and techniques to help you customize videos to fit your vision. Let’s explore how you can transform a stock video into something uniquely yours, all while respecting the original licensing terms.
Understanding Licensing and Usage Rights for Shutterstock Content
Before you dive into editing, it’s super important to understand the licensing and usage rights associated with Shutterstock videos. Shutterstock offers different types of licenses, mainly Standard and Extended, each with its own set of rules about how you can use the content.
Standard License: This license typically covers most common uses like online videos, social media, blogs, and presentations. However, there are limits—such as a maximum of 500,000 views or copies, and restrictions on redistribution or resale.
Extended License: If you plan to use the video in a product for resale, broadcast, or large-scale distribution, an Extended License is the way to go. It provides broader rights, allowing for unlimited views and usage, and removes certain restrictions.
Here are some key points to keep in mind:
- Always review the license agreement before modifying and publishing the video.
- Modifying a video doesn’t mean you own the copyright—your rights are limited to what the license permits.
- If your project changes significantly or involves commercial distribution, ensure your license covers those uses.
- Reselling or redistributing the modified video without proper licensing can lead to legal issues.
In short, understanding your licensing rights ensures you stay compliant and avoid potential copyright problems. When in doubt, consult Shutterstock’s licensing resources or contact their support team for clarification. This way, you can confidently modify and use videos, knowing you’re within legal boundaries and respecting creators’ rights.
Tools Needed to Edit Shutterstock Videos
So, you’ve found the perfect Shutterstock video and you’re ready to give it your personal touch. Before diving into the editing process, it’s essential to have the right tools at your fingertips. Luckily, there are plenty of user-friendly options that make editing a breeze, whether you’re a seasoned video editor or just starting out.
First up, you’ll need a reliable video editing software. Here are some popular choices:
- Adobe Premiere Pro: The industry standard for professional video editing. It offers a wide range of features, from basic cuts to complex effects.
- Final Cut Pro: A favorite among Mac users, providing powerful tools with a sleek interface.
- DaVinci Resolve: Known for its incredible color correction capabilities, and the basic version is free.
- Shotcut or HitFilm Express: Free options that are great for beginners and intermediate users.
In addition to editing software, you’ll want some supplementary tools:
- Video Codec Converters: To ensure your video is in the right format for your needs.
- Audio Editing Tools: Like Audacity, if you plan to add or modify sound tracks.
- Graphics and Text Assets: For overlays, titles, or branding—think Canva or Photoshop for creating visual elements.
Lastly, ensure your computer has enough processing power and storage space. Video editing can be resource-intensive, so a good CPU, ample RAM, and a decent graphics card will make your editing smoother and faster.
Once you’ve gathered these tools, you’re all set to customize your Shutterstock video to fit your project perfectly. Now, let’s walk through how to actually download your video from Shutterstock so you can start editing!
Steps to Download Your Shutterstock Video
Getting your hands on the video you want to modify is the first step. Downloading a Shutterstock video is straightforward, but there are a few important details to keep in mind to ensure a smooth process.
Here’s a simple step-by-step guide:
- Sign in to Your Shutterstock Account: Head over to Shutterstock.com and log in with your account credentials. If you don’t have an account, you’ll need to create one.
- Search and Select Your Video: Use the search bar to find the video that matches your needs. Once you find it, click on the thumbnail to see more details.
- Choose the Licensing Option: Shutterstock offers different licenses based on your intended use. Select the appropriate license for your project (e.g., Standard or Enhanced).
- Add to Cart and Purchase: Click the “Add to Cart” button, then proceed to checkout. You’ll need to provide payment details if you haven’t already purchased credits or subscription plans.
- Download the Video File: After purchase, go to your account’s download section. Locate the video you’ve bought and click the download button.
Note: Shutterstock provides videos in different resolutions. Choose the resolution that fits your editing needs—higher resolutions give you more flexibility but take up more storage space.
Once downloaded, the video will typically be in MP4 format, which is compatible with most editing software. Save it to a dedicated folder on your computer so it’s easy to locate during editing.
And that’s it! With your video downloaded, you’re now ready to start customizing it to match your project’s style and message. Whether you’re adding text overlays, trimming scenes, or applying special effects, these initial steps set the stage for a smooth editing experience. Happy editing!
Editing Techniques for Customizing Shutterstock Videos
Once you’ve chosen the perfect Shutterstock video to match your project, the real fun begins—customizing it to make it uniquely yours. Editing techniques can range from simple trims to more complex adjustments, all aimed at aligning the footage with your vision. Let’s walk through some essential editing techniques that can help you transform a stock clip into a tailored masterpiece.
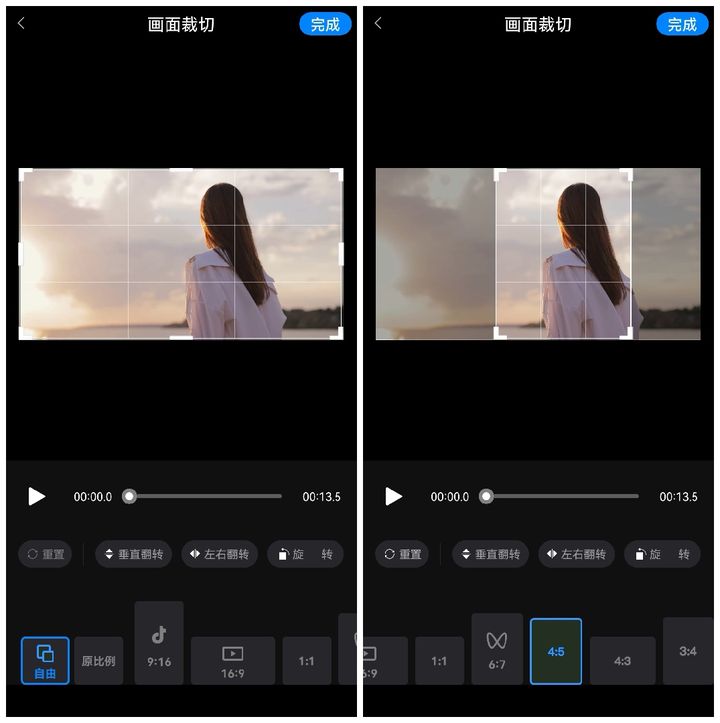
Trimming and Cropping are the foundational steps. Use your editing software to cut out any parts of the video that don’t serve your story. Cropping can also help focus on a specific subject or remove distracting elements from the frame. For example, if the video shows a bustling city street but you only need a close-up of a person walking, cropping can help isolate that shot.
Adjusting Speed allows you to create dramatic effects like slow motion or fast-forward sequences. If there’s a scene that needs to emphasize movement or emotion, slowing it down can add impact. Conversely, speeding up a segment can help you cover more ground quickly or create a humorous effect.
Color Correction and Grading are powerful tools to set the mood of your video. Whether you want a warm, inviting feel or a cool, professional look, adjusting the color palette can make a big difference. Most editing programs let you tweak brightness, contrast, saturation, and apply color filters to match your branding or aesthetic.
Another technique is Adding Transitions between clips to create smooth flow or dramatic jumps, depending on your style. Simple fades, wipes, or more creative transitions can help your story feel cohesive and polished.
Finally, don’t forget about Stabilization if your footage is shaky. Many editing tools have stabilization features that can help smooth out handheld shots, making your video look more professional.
The key is to experiment and find what works best for your project. Play around with these techniques to see how they can enhance your footage and better tell your story.
Adding Your Personal Touch with Text, Music, and Effects
Once your footage is edited to your liking, it’s time to add those personal touches that make your video stand out. Incorporating text, music, and visual effects can elevate your project from good to great. Let’s explore some ideas on how to do this effectively.
Text is a fantastic way to communicate messages directly. Whether it’s titles, subtitles, or call-to-actions, adding text helps guide your viewers. Use clear, readable fonts that match your brand style. Placement is key—think about where your audience’s eyes naturally drift and position your text accordingly. For example, overlaying a quote or a key message at the beginning or end of your video can reinforce your story.
Music sets the tone and evokes emotions. Choose background music that complements the mood of your video—upbeat, calm, dramatic, or professional. Shutterstock offers a wide selection of royalty-free tracks you can license for your project. When adding music, pay attention to volume levels; it should enhance your visuals without overpowering them. Also, consider syncing key moments in your video with beats or transitions in the music for a more engaging experience.
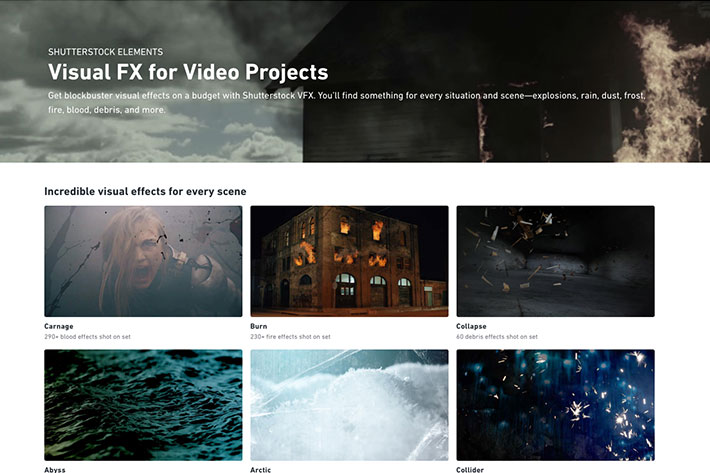
Effects and Filters can add flair and personality. Subtle use of visual effects like light leaks, lens flares, or vignette can give your video a polished look. Many editing tools also include filters that can create a vintage, cinematic, or modern aesthetic. Use effects sparingly—overdoing it can distract from your main message.
Another creative approach is to incorporate animations or motion graphics. Animating text or icons can help emphasize important points or make your video more dynamic. If you’re comfortable with more advanced editing, adding overlays like animated arrows or highlights can guide viewers’ attention.
Remember, the goal is to make your video feel authentic and aligned with your brand or personal style. Take your time experimenting with these elements, and don’t be afraid to get creative. When used thoughtfully, your personal touches will make your Shutterstock video truly yours.
Exporting and Saving Your Modified Video
Congratulations! You’ve made all the tweaks and edits to your Shutterstock video. Now, it’s time to save and export your masterpiece so you can use it wherever you need. But before you hit that save button, there are a few things to keep in mind to ensure your final video looks professional and high-quality.
First off, always double-check your project settings. Make sure the resolution, frame rate, and aspect ratio match your intended use. For example, if you’re uploading to YouTube, a resolution of 1920×1080 pixels at 30 fps is standard. If you plan to use the video on social media, consider the platform’s recommended specs—Instagram, for instance, favors square or vertical formats.
When you’re ready to export, choose the right format. The most common formats are MP4 (using the H.264 codec) because it offers a good balance between quality and file size, making it ideal for online sharing. Some editing tools also allow exporting in MOV or AVI, which might be necessary for high-quality archives or specific editing workflows.
Here’s a quick checklist before exporting:
- Verify the final edits — play through the entire video to catch any missed mistakes.
- Ensure your audio levels are balanced and synchronized.
- Set the export quality to high or maximum to preserve detail.
- Choose the appropriate resolution and aspect ratio.
Once you’ve set everything, hit the export button. Depending on the length and complexity of your video, this might take a few minutes. After the process completes, save your file in a well-organized folder with a descriptive name, so you can easily locate it later. If you’re working on multiple versions, consider adding version numbers or dates to differentiate them.
Finally, it’s always a good idea to review your exported video once more. Play it on different devices if possible, to ensure it looks and sounds perfect across various screens. That way, you’re confident your video will impress wherever it’s viewed!
Tips for Ensuring High-Quality Results
Achieving a polished, professional-looking video isn’t just about editing skills; it’s also about paying attention to the details that make your final product stand out. Here are some tried-and-true tips to help you ensure high-quality results when modifying Shutterstock videos:
1. Use High-Quality Source Files
If you’re starting with stock footage, choose clips with the highest resolution available. The better the quality of your original footage, the more flexibility you’ll have when editing without losing clarity.
2. Maintain Consistent Lighting and Color
When editing different clips together, make sure the color tones and lighting match. Use color correction tools to create a cohesive look, which makes your video more professional and visually appealing.
3. Keep Your Edits Subtle
While it’s tempting to add lots of effects, sometimes less is more. Subtle transitions, gentle color grading, and natural sound levels tend to produce cleaner, more polished results.
4. Optimize Audio Quality
Clear audio is key. Use noise reduction tools if needed, balance your audio levels, and consider adding background music or sound effects thoughtfully. Remember, audio that’s too loud or uneven distracts viewers.
5. Check Compatibility and Compatibility
Make sure your final video is compatible with your intended platform or device. Different platforms have different specifications—double-check format, resolution, and file size limits.
6. Preview on Multiple Devices
Test your video on computers, smartphones, and tablets to see how it looks and sounds. Sometimes, what looks good on a desktop might need adjustments for mobile viewing.
7. Save Multiple Versions
Keep backups of your work at different stages. Save high-resolution masters and smaller, web-optimized versions. This saves you time if you need to make quick adjustments later.
By paying attention to these details and taking your time during each step, you’ll end up with a refined, high-quality video that truly does your content justice. Happy editing!
Common Challenges and How to Overcome Them
Modifying Shutterstock videos can be a fantastic way to personalize content for your project, but it doesn’t come without its hurdles. Whether you’re a beginner or have some experience, you might run into a few common challenges. Don’t worry—most of these can be easily tackled with a little patience and the right approach.
Challenge 1: Limited Editing Flexibility
Shutterstock videos often come as ready-made clips, which can be limiting if you want to do extensive modifications. For example, cropping or adding overlays might be straightforward, but changing the core footage can be tricky.
Solution: Use professional editing software like Adobe Premiere Pro, Final Cut Pro, or DaVinci Resolve. These tools give you more control over the footage, allowing you to cut, crop, add effects, or even replace parts of the video. Also, consider downloading multiple clips at different angles or scenes to have more options for customization.
Challenge 2: Quality Loss During Editing
Sometimes, when editing or re-encoding videos, you may notice a drop in quality, which can ruin the visual impact of your project.
Solution: Always work with the highest resolution version of the clip available. When exporting, choose the best quality settings, and avoid unnecessary re-encoding. Using a lossless format or high-bitrate settings can help preserve the original quality.
Challenge 3: Synchronizing Audio and Video
If your modifications involve adding new audio or syncing clips, timing can be a challenge, especially if the original footage is fast-paced or has quick cuts.
Solution: Use editing software with waveform and timeline features. These tools help you visually align audio with video cues. Take your time to preview and fine-tune the synchronization until it feels natural.
Challenge 4: Maintaining Consistency in Style and Color
When combining multiple clips or overlays, color mismatches or stylistic differences can make the final product look inconsistent.
Solution: Use color grading tools to match the tones across clips. Many editing programs offer presets or manual controls to adjust brightness, contrast, saturation, and hue. Applying a consistent filter or LUT (Lookup Table) can also unify the look.
Remember, patience is key. Experiment with small edits first, preview your work regularly, and don’t hesitate to consult tutorials or forums if you get stuck. Overcoming these challenges will ultimately give you a polished, professional-looking result tailored to your needs.
Legal Considerations When Modifying Shutterstock Content
Before you dive into editing Shutterstock videos, it’s crucial to understand the legal landscape. Shutterstock offers a vast library of licensed content, but with that comes specific rules about how you can use and modify their media. Ignoring these can lead to copyright issues or licensing violations, so let’s break down what you need to know.
Understanding Licensing Types
- Standard License: This is suitable for most projects like online videos, presentations, or social media. It generally allows modifications, but there are limits on usage and distribution.
- Enhanced License: For larger-scale use, such as TV broadcasts, merchandise, or print runs over a certain quantity, this license grants broader rights, including more extensive modifications.
Modifications Are Usually Allowed, But With Conditions
In most cases, Shutterstock’s licensing agreements permit you to modify the content—such as cropping, adding overlays, or combining clips—as long as you respect the license terms. However, you cannot:
- Use the content in a way that suggests endorsement of a product or service without permission.
- Repackage the content as standalone footage or distribute unaltered copies.
- Create derivative works that infringe on the rights of the original creators or subjects depicted.
Respect Privacy and Model/Property Releases
If the footage features recognizable individuals or private property, ensure that the necessary releases are in place. Modifying such content doesn’t automatically negate privacy rights or licensing restrictions.
Attribution and Credit
Unlike some Creative Commons licenses, Shutterstock content typically does not require attribution. Still, always double-check the license agreement to confirm whether any credits are necessary, especially if you’re using the content for commercial purposes.
Be Careful with Sensitive Content
Some Shutterstock clips may include sensitive or controversial subjects. Modifying such content doesn’t exempt you from ethical considerations or potential legal issues. Use your judgment and ensure your project aligns with legal standards and community guidelines.
In summary, always review the license agreement attached to each Shutterstock clip before modifying and using it. When in doubt, consult legal professionals or reach out to Shutterstock’s customer support for clarification. Staying compliant not only protects you legally but also respects the creators and subjects involved in the footage.
Conclusion and Final Tips for Successful Video Customization
Modifying a Shutterstock video to perfectly suit your project requires attention to detail and a clear understanding of your goals. Remember, the key steps involve selecting the right footage, utilizing effective editing tools, and maintaining a consistent aesthetic throughout the process. As you finalize your edits, ensure that the video aligns with your brand or message by checking for visual coherence and appropriate pacing.
To enhance your editing experience, consider the following final tips:
- Plan Ahead: Outline your desired outcome before starting the editing process to stay focused and avoid unnecessary revisions.
- Use High-Quality Tools: Invest in or utilize reputable editing software that offers advanced features like color correction, cropping, and audio editing.
- Maintain Consistency: Keep a uniform style in terms of color palette, fonts, and transitions to create a professional look.
- Test on Multiple Devices: Preview your video on different screens to ensure it appears polished across all platforms.
- Respect Licensing Terms: Always adhere to Shutterstock’s licensing agreements, especially if making significant modifications or combining clips.
In summary, successful video customization hinges on careful planning, utilizing the right tools, and paying attention to detail. With these best practices, you can transform Shutterstock footage into a compelling visual asset tailored perfectly to your needs.