So you’ve decided to migrate your WordPress blog to another platform? You’re not alone! Many bloggers find themselves in this situation for various reasons. Whether it’s to seek better features, improve performance, or simply explore new opportunities, migrating can seem daunting. But fear not! In this guide, we’ll walk you through the steps and considerations needed for a smooth transition. Let’s dive in!
Reasons to Migrate Your WordPress Blog

Understanding why you want to migrate your WordPress blog can help you navigate the process more easily. Here are some common reasons that might resonate with you:
- Better Performance: Some platforms offer faster loading speeds, which can enhance user experience and improve SEO rankings.
- Enhanced Features: You might find another platform that supports advanced features you need, like custom themes, plugins, or analytics.
- Ease of Use: Some platforms come with intuitive interfaces that make managing your content much simpler, especially for non-tech-savvy users.
- Cost-Effectiveness: A new platform could provide a more affordable solution, especially if your current hosting fees are getting out of hand.
- Improved Support: If you’re facing challenges with your current host or platform, switching might offer better customer service or community support.
- Better Security: Some platforms prioritize security features such as automated backups and robust firewalls, keeping your blog safe from threats.
In the end, your specific needs and goals as a blogger will determine your reasons for migrating. Consider what aspect is most critical for you, and use that as your guiding star during the transition!
Preparing for the Migration

When it comes to migrating your WordPress blog to another platform, preparation is key. Jumping into the process without a solid plan can lead to headaches and potential data loss. So, grab a cup of coffee, and let’s go through some important steps to get you ready for this transition!
First up, backup your data. This is non-negotiable. You don’t want to lose any of your precious content during the migration. Use a reliable backup plugin like UpdraftPlus or BackupBuddy to save all your files and database. Here’s a quick checklist for your backup:
- Export your WordPress database.
- Backup your entire WordPress folder, including themes, plugins, and uploads.
- Store the backup in multiple locations (e.g., cloud storage, external hard drive).
Next, create a checklist of your essential elements to be migrated. This could include:
- Your posts and pages
- Media files like images and videos
- Comments and user data
- Plugins and themes you want to retain
Then, take time to research your new platform. Look into how it handles content migration, SEO features, and any limitations it may have. Some platforms are more flexible than others, so knowing what you’re getting into will save you trouble later on.
Finally, make sure to keep your audience informed. If you have a loyal following, they’ll appreciate transparency during this transition. Consider sending out a newsletter or posting on your social media channels about the change—after all, your readers are the heart of your blog!
Choosing the Right Platform for Your Needs

Now that you’re prepared, it’s time to pick the right platform for your blog. With so many options out there, it can feel overwhelming. But don’t stress—we’ll break it down together!
First, consider your content type. Are you blogging mainly text, or do you need robust support for multimedia? If your blog incorporates lots of images, videos, or audio, platforms like Squarespace or Wix may be great options due to their visual design capabilities.
Next, think about your technical proficiency. Some platforms require a bit more technical know-how than others. If you’re a beginner and don’t want to fuss around with code, you might prefer user-friendly platforms like Blogger or Medium. On the flip side, if you’re comfortable with HTML/CSS and desire more customization, consider platforms like Ghost or Jekyll.
Another important factor is SEO capabilities. Search engine optimization is crucial for attracting traffic to your blog. Before committing to a new platform, check how it supports SEO features. Does it allow for custom permalinks? Can you easily add meta descriptions? A quick comparison table may help:
| Platform | SEO Friendly | Ease of Use | Customization |
|---|---|---|---|
| WordPress | ✔️ | Moderate | High |
| Squarespace | ✔️ | High | Moderate |
| Blogger | ✔️ | High | Low |
| Ghost | ✔️ | Moderate | High |
Finally, don’t forget to take a look at your budget. Some platforms offer great features but come with a higher price tag. Make sure to evaluate your finances and choose a platform that fits your needs without breaking the bank. There are plenty of affordable options out there; it’s all about finding the right balance for you.
In summary, by taking the time to fully understand what you need from a new platform, you’ll make the migration process smoother and your blog even better! Happy choosing!
Backing Up Your WordPress Blog
Before you embark on the journey of migrating your WordPress blog to another platform, it’s crucial to back it up properly. Think of this step as securing your belongings before moving houses; you wouldn’t want to leave anything important behind, right?
Backing up your WordPress blog involves saving all your content, files, and the database. Here’s a simple breakdown of how you can do this:
- Manual Backup: You can manually back up your blog by downloading all your files via FTP and exporting your database using phpMyAdmin. To do this, connect to your site via an FTP client, select your WordPress directory, and download all the files.
- Using a Plugin: If the manual route feels too technical, there are plenty of plugins designed to make backups a breeze. Some popular options include:
- UpdraftPlus
- BackupBuddy
- Duplicator
- Cloud Storage: For added safety, consider storing backups on a cloud service like Google Drive, Dropbox, or Amazon S3. Most backup plugins will allow you to set this up automatically.
Remember, it’s not just about backing up your posts and comments; you’ll also want to save themes, plugins, and any images you’ve uploaded. A solid backup ensures that if anything goes wrong during the migration process, you can easily revert back to your original blog without losing a single thing.
Exporting Content from WordPress
Now that you’ve securely backed up your blog, it’s time to focus on exporting your content. Think of this as gathering all your books and decorations in nice boxes to bring to your new home. WordPress makes this process relatively straightforward.
Here’s how you can export your content:
- Using WordPress Export Tool: Navigate to your WordPress admin dashboard and go to Tools > Export. You’ll find options to export all content or just specific types. If you’re moving everything, select All Content. This will create an XML file that houses your posts, pages, comments, and custom fields.
- Choosing Specific Content: If you only want to export certain posts or pages, select those from the options provided. You can filter by year, author, or content type, giving you full control over what makes the journey to the new platform.
Once you’ve made your selections, simply click the Download Export File button, and voilà! Your XML file will be downloaded. Keep it safe, as this is essential for importing content into your new platform.
Lastly, note that while this XML file will transfer most of your content, some elements like certain themes or plugins’ settings won’t always make the transition. Always refer to your new platform’s guidelines for the smoothest import experience.
7. Setting Up Your New Platform
Alright, so you’ve decided to make the leap and migrate your WordPress blog to a new platform. Exciting times ahead! The first step in this journey is setting up your new platform correctly. Depending on your choice, the setup process can vary, but let’s keep it straightforward.
First and foremost, select the hosting provider that suits your needs. A good hosting provider is crucial for your blog’s performance. Some popular options include:
- SiteGround
- Bluehost
- HostGator
Once you’ve chosen a hosting provider, it’s time to install the new platform. If you’re moving to a platform like Squarespace or Wix, you won’t have to worry about hosting separately since they offer all-in-one solutions.
After installation, configure the basic settings of your new platform. This involves:
- Setting up your domain name to point to the new platform.
- Choosing the right theme or design that reflects your blog’s personality.
- Configuring essential plugins or built-in features to enhance functionality.
Don’t forget to check your site’s security measures! Ensure you set up SSL certificates and any necessary security plugins to protect your new blog from unwanted threats.
Finally, take a deep breath. You’re on your way to establishing a new home for your blog. The next step is bringing in all that wonderful content you’ve created!
8. Importing Content into the New Platform
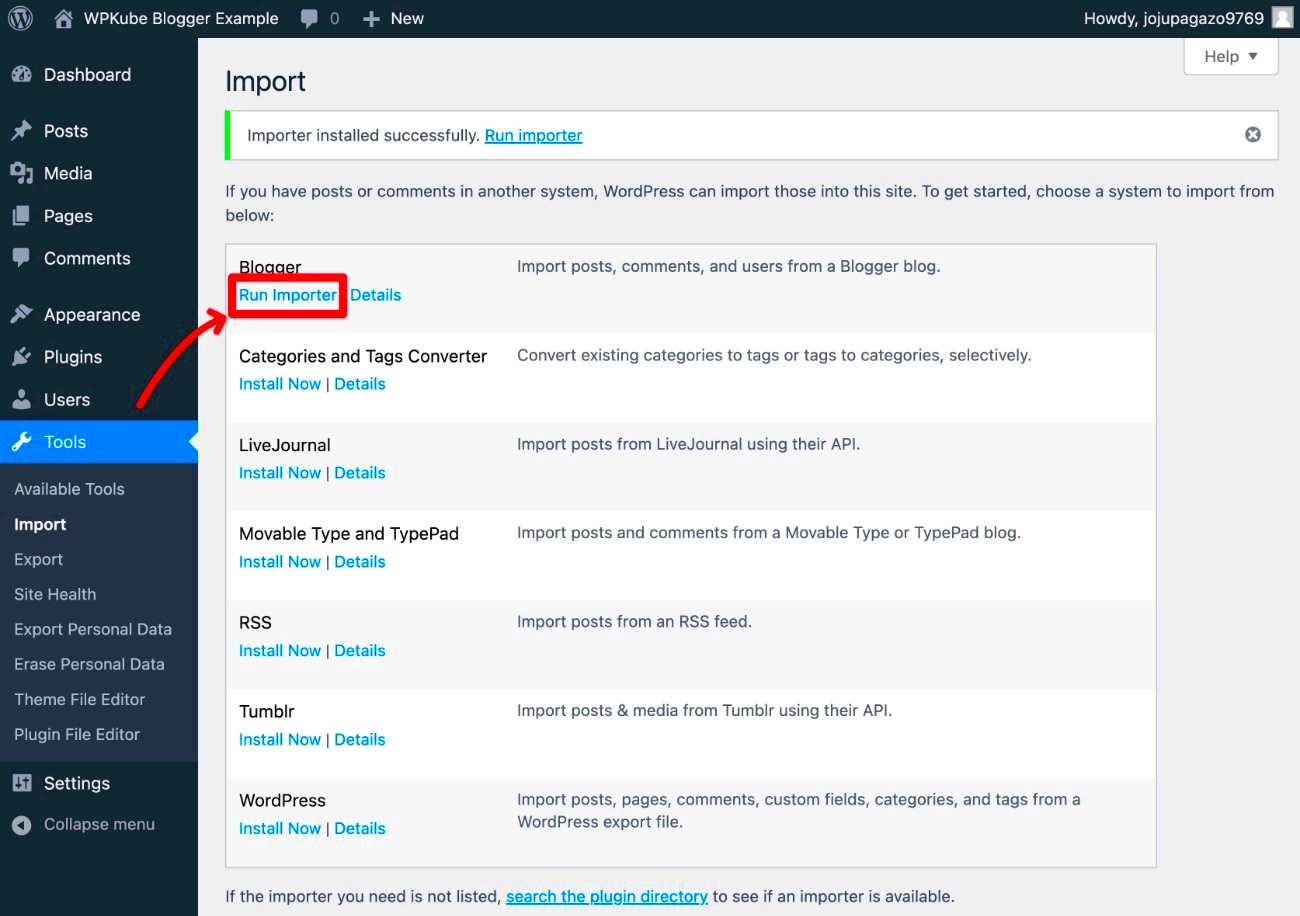
Now that your new platform is ready and waiting, it’s time for the exciting part: importing your content! The process can differ based on the platform you’re migrating to, but let’s break it down, step by step.
For platforms such as Ghost or Squarespace, there are usually built-in import tools. Here’s a general guideline:
- Check for Import Tools: Start by looking for an import feature in your new platform’s settings or dashboard. Most platforms have a structured process that simplifies content migration.
- Prepare Your Exported Content: If you exported your WordPress content in an XML file, you’re good to go. Make sure you have it handy!
- Follow the Import Instructions: Each platform has its own method. For example, on Ghost, you can import using the Admin panel, while for Squarespace, you might upload the XML directly.
During the import process, it’s smart to:
- Double-check that all your images are linked properly.
- Verify that your posts, pages, and custom posts are intact.
- Ensure your comments are migrated if that’s a feature you wish to keep.
After importing, take some time to review your content. Check for formatting issues or any errors that might have popped up during the transfer. You want your new blog to look just as good, or even better, than the old one!
And voilà! Your content is now in its new home, and you’re one step closer to launching your blog on a new platform. Happy blogging!
9. Redirecting Traffic from Your Old Blog
One of the most critical steps in migrating your WordPress blog to a new platform is ensuring that your visitors can easily find their way to the new site. Redirecting traffic is not merely a technical formality; it’s essential for retaining your audience and maintaining your SEO rankings. If users have bookmarked your old blog or link to it, you want to make sure they’re seamlessly guided to the new location.
So, how do you do this effectively? Here’s a simple guide:
- Set Up 301 Redirects: Use 301 redirects from your old blog to your new one. This tells search engines and browsers that the content has permanently moved. In WordPress, you can use plugins like Redirection to accomplish this.
- Update Internal Links: Check your old posts for any internal links pointing to other articles on the old platform and update them to the new URL. This effort helps maintain a good user experience.
- Inform Your Audience: Use communication channels—like email newsletters, social media, or blog announcements—to inform your followers about the move. Let them know what’s new and exciting at the new site!
- Monitor Traffic: After setting up your redirects, keep an eye on your traffic metrics. Tools like Google Analytics can help you track if users are appreciated for being redirected properly.
By following these steps, you’ll ensure that your audience can easily transition to your new blog, thereby preserving your hard-earned traffic and maintaining your online presence.
10. Testing Your New Blog Setup
Congratulations on completing the migration of your WordPress blog to a new platform! But before you officially launch your new site, it’s crucial to take a moment to test everything. Think of it like a dry run before a big performance; you want to ensure that all systems are go before your audience arrives.
Here’s a checklist to help you test your new blog setup:
- Check Functionality: Browse through your new blog and check every link, button, and feature to make sure they work as intended. If you’re using custom plugins or features, ensure they function flawlessly.
- Review Layout and Design: Verify that your new theme looks good across various devices and screen sizes. Use responsive design tools to emulate how your blog appears on mobile and tablet devices.
- Assess Load Speed: Performance matters! Use tools like Google PageSpeed Insights to test your blog’s loading speed. The quicker the better—aim for under 3 seconds.
- SEO Check: Utilize SEO checks to ensure that meta titles, descriptions, and alt texts are properly set for each page. You don’t want to lose that hard-earned SEO ranking!
- Conduct User Testing: If possible, invite a few trusted individuals to navigate your blog. Gather their feedback and adjust if needed.
Following this structured approach will help you launch a new blog that is well-optimized, user-friendly, and ready for your loyal readers. Testing might seem a tad tedious, but you’ll be glad you did once everything runs smoothly!
Conclusion and Next Steps
In conclusion, migrating your WordPress blog to another platform can be a daunting but rewarding process. By following the outlined steps, you can ensure a smooth transition and minimize potential disruptions to your audience. It’s essential to plan meticulously, back up your data, and address any SEO considerations to maintain your blog’s visibility post-migration.
Now that you’ve successfully migrated your blog, consider implementing the following next steps to enhance your new platform experience:
- Test Your Website: After migration, thoroughly check to ensure all elements are functioning correctly, including links, images, and functionalities.
- Update Google Analytics: Set up your tracking on the new platform to monitor traffic and user behavior effectively.
- Notify Your Audience: Inform your readers about the platform change through a blog post or newsletter for better engagement.
- Monitor SEO Performance: Keep an eye on your rankings and traffic to detect any issues immediately.
- Explore New Features: Take advantage of the features available on your new platform that can improve your blog’s performance and user experience.
Adapting to your new blogging environment may take time, but embracing this change can lead to enhanced functionalities, better user experiences, and ultimately, a more successful blog. Remember, every successful migration is a step towards a more productive online presence!


