Are you looking to enhance your WordPress site’s capabilities? The Brevo Plugin might just be what you need! Formerly known as Sendinblue, Brevo is a powerful marketing tool that integrates seamlessly with your WordPress site. It allows you to manage email campaigns, SMS marketing, and customer management all in one place. This plugin is particularly useful for those looking to boost user engagement or streamline their marketing efforts.
With features like customizable templates, contact segmentation, and analytics, Brevo empowers businesses to connect better with their audience. Want to learn how to install it? Let’s dive in!
Prerequisites for Installing Brevo Plugin

Before you roll up your sleeves and start the installation, there are a few requirements to keep in mind. The following prerequisites will help ensure that your installation process goes smoothly:
- WordPress Version: Ensure you are running a recent version of WordPress (preferably 5.0 or higher) as the Brevo Plugin is optimized for newer releases.
- Hosting Environment: A reliable hosting provider that supports WordPress is essential. Most managed WordPress hosts will be compatible, but check if PHP version is at least 7.2 or above.
- Admin Access: You’ll need admin privileges on your WordPress dashboard to install plugins. Without this, you won’t be able to add the Brevo Plugin.
- Brevo Account: Create a Brevo account if you don’t have one. This will be your gateway to using all the features the plugin offers!
With these prerequisites sorted out, you’re all set for a smooth installation experience. Next up, we’ll discuss how to install the Brevo Plugin step-by-step!
Step 1: Accessing Your WordPress Dashboard
First things first, let’s get you to your WordPress dashboard. This is like the command center of your website, where all the magic happens! To access your dashboard, follow these simple steps:
- Open your web browser.
- Type in your website’s URL followed by /wp-admin. For example, if your website is www.yourwebsite.com, you’ll go to www.yourwebsite.com/wp-admin.
- Now, hit Enter on your keyboard.
You should be greeted with a login page. This is where you’ll need to enter your username and password. If you’ve forgotten them, don’t panic! There’s usually a “Lost your password?” link to help you reset things.
Once you’ve logged in, you’ll arrive at your WordPress dashboard. This page might seem a little overwhelming at first with all its menus and widgets, but don’t worry! With time, you’ll find your way around like a pro.
The dashboard contains various sections like your recent posts, comments, and a menu on the left side with options for different features. Remember, you have control here, and exploring is part of the fun!
Step 2: Navigating to the Plugin Section
Now that you are comfortably settled in your WordPress dashboard, let’s move on to the next step—finding the plugin section. This is crucial for installing the Brevo plugin.
- Look for the menu on the left-hand side of your dashboard.
- Scroll down until you see a menu item called Plugins.
Click on Plugins to expand the section. You’ll see several options here, mainly Installed Plugins and Add New.
To install the Brevo plugin, you’ll want to click on the Add New option. This directs you to a new page full of plugins that you can explore!
Here’s a quick breakdown of the Add New Plugins page:
- Search Box: Use this if you know the exact name of a plugin you want to install.
- Featured Plugins: Here are some popular choices that WordPress thinks you might like.
- Recommended Plugins: Based on what you have installed or the ones that fit your site type.
In just a moment, you’ll zero in on the Brevo plugin and get to installing it with ease. You got this!
Step 3: Searching for the Brevo Plugin
Alright, now that you’re ready to install the Brevo plugin, it’s time to locate it in the vast WordPress plugin repository. This step is as easy as pie, so let’s dive in!
First things first, you’ll want to log into your WordPress dashboard. Once you’re in, look over to the left-hand side and click on the “Plugins” option. A dropdown menu will appear – go ahead and select “Add New.” This is where all the magic happens!
Now, you’ll notice a search bar on the top right corner of the screen. This is your tool for searching. Just type in “Brevo” and hit enter. In a jiffy, you should see a list of plugins that match your search.
When you find the Brevo plugin (it’ll often have a catchy description and the Brevo logo), take a quick moment to check out its ratings and reviews. This will give you an idea of how well it’s been received by other users.
In case you can’t find Brevo right off the bat, don’t fret! Ensure your search term is spelled correctly or try variations like “Brevo Email Marketing” to increase your chances. Remember, this is a common scenario, and taking your time to find the correct plugin is totally alright!
Step 4: Installing the Brevo Plugin
Great! You’ve successfully searched for the Brevo plugin. Now, let’s move on to the actual installation. This is where the fun begins!
Once you’ve located the Brevo plugin in the search results, look for the “Install Now” button next to it. Simply click that button. If you’re a bit unsure about where the button is, it’s generally a vibrant shade of blue and hard to miss!
After you click “Install Now,” WordPress will take just a few moments to download and install the plugin for you. You’ll see a progress bar, and before you know it, it’ll be ready to go.
Once the installation is complete, the button you clicked will change to “Activate.” Here’s a little tip: make sure you click on “Activate”. This step is crucial because it makes the plugin functional on your site.
In summary, here’s what you will do:
- Locate the “Install Now” button next to the Brevo plugin.
- Click “Install Now” and wait for it to finish downloading.
- Click “Activate” to enable the plugin on your WordPress site.
And just like that, you’ve installed and activated the Brevo plugin! You’re one step closer to enhancing your website’s capabilities. Keep your enthusiasm up; you’re doing great!
Step 5: Activating the Brevo Plugin
Once you’ve successfully installed the Brevo plugin, the next crucial step is activation. Think of this as flipping the switch that turns the plugin on for your WordPress site. Not activating it means you’re missing out on all the cool features that Brevo has to offer!
Here’s a simple guide to activate your Brevo plugin:
- Navigate to your WordPress dashboard.
- Look for the “Plugins” option on the left sidebar and click on it.
- You’ll see a list of installed plugins. Find “Brevo” in this list. It should be there, just waiting to be activated!
- Right next to the Brevo plugin, you’ll see an “Activate” button. Go ahead and click it.
Once activated, you should see a confirmation message at the top of your screen, telling you that the plugin is now active. You’ll also notice that the Brevo plugin’s settings are now accessible from your dashboard menu, usually under a new tab named “Brevo.”
In summary, activation is a straightforward process that takes just a few seconds. Make sure to activate the plugin to start leveraging its amazing functionalities for your email marketing needs!
Step 6: Configuring Brevo Plugin Settings
Now that your Brevo plugin is activated, it’s time to roll up your sleeves and configure its settings. This step is essential because it allows you to tailor the plugin according to your specific needs and to integrate it seamlessly with your marketing strategies.
Here’s a step-by-step guide to configuring the Brevo plugin settings:
- In your WordPress dashboard, find the “Brevo” tab on the left sidebar and click on it.
- You’ll be taken to the Brevo settings page. You might be prompted to connect your Brevo account if you haven’t done so yet.
- If prompted, log in to your Brevo account using your credentials. Once logged in, you may need to allow the plugin access to your account.
- Now, it’s time to customize settings to fit your needs. Here are some key configurations to consider:
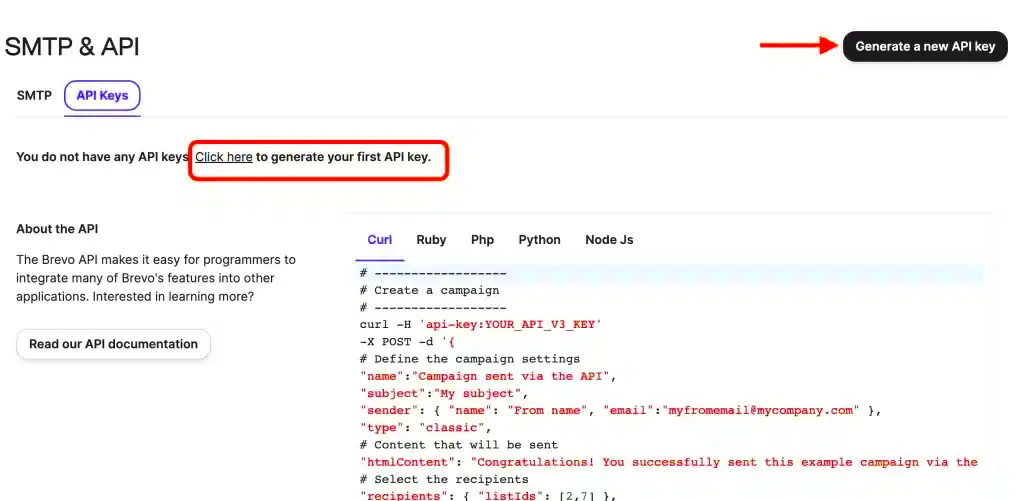
- API Configuration: Ensure your API key is correctly entered for seamless communication between your website and Brevo.
- Email List Management: Set up and manage your email lists to organize your contact database effectively.
- Form Settings: Customize the appearance and fields of the forms you will be using on your site.
- Automations: Set up automated responses and workflows to streamline your marketing efforts.
Once you’re finished tweaking all these settings, make sure to hit the “Save Changes” button. This will ensure all your configurations are stored.
In a nutshell, configuring the Brevo plugin settings is vital for creating tailored and effective email campaigns. Take your time to understand each option, and don’t hesitate to explore different settings to find what works best for you!
Troubleshooting Common Installation Issues
Installing the Brevo plugin in WordPress can be a smooth process, but sometimes you may run into a few bumps along the way. Don’t worry—many users face similar issues, and most of them have easy fixes. Let’s dive into some of the common installation problems you might encounter and how to resolve them.
1. The Plugin Doesn’t Appear in the Dashboard
If you’ve successfully installed Brevo but can’t find it in your WordPress dashboard, there are a few reasons this might happen:
- Incompatibility: Ensure that the plugin is compatible with your version of WordPress.
- Installation Errors: Sometimes, the installation might not fully complete. Try reinstalling the plugin.
- Cache Issues: Clear your WordPress cache or your browser cache to see if the plugin appears.
2. Activation Problems
If the plugin fails to activate, consider these troubleshooting steps:
- PHP Version: Make sure your hosting environment is running a compatible PHP version.
- Plugin Conflicts: Deactivate other plugins to see if there’s a conflicting plugin causing the issue.
- Theme Issues: Temporarily switch to a default WordPress theme to rule out theme-related conflicts.
3. Error Messages
Encountering error messages can be frustrating. Common error messages often relate to:
- File Permission Errors: Ensure your server allows uploads and installation of plugins.
- Memory Limit Issues: Increase your PHP memory limit via wp-config.php to resolve outgoing memory problems.
If you’re still having trouble after trying these solutions, consider checking the Brevo documentation or reaching out to support forums for additional help.
Conclusion
Successfully installing the Brevo plugin in WordPress can greatly enhance your site’s functionality, especially when it comes to managing contacts, email marketing, and automation. Remember, the installation process is usually straightforward, but like anything tech-related, some hiccups can occur. That’s why we just discussed troubleshooting common issues, ensuring you’re well-equipped to tackle any problems that may arise.
To recap:
- Before installation: Ensure your WordPress version is updated and that your server meets the plugin’s requirements.
- Installation process: You can install the Brevo plugin directly from the dashboard or via the upload method.
- Troubleshooting: If something goes wrong, don’t panic. Use the solutions provided to diagnose and resolve the issues.
In conclusion, whether you’re new to WordPress or a seasoned pro, the Brevo plugin brings a lot to the table. Once installed, take your time to explore its features and see how they can benefit your website and improve your outreach strategies. Happy plugin-ing!


