Elementor is a powerful page builder for WordPress that allows users to create stunning websites with drag-and-drop functionality. It’s designed for all skill levels, whether you’re a seasoned developer or a beginner just starting out. One of the great features of Elementor is its ability to include embeds, such as videos, social media posts, or forms, directly into your pages, enhancing the user experience and providing dynamic content.
Embeds essentially allow you to integrate external content right into your Elementor layouts. This can be incredibly useful for showcasing multimedia elements or even integrating third-party applications. When used effectively, embeds can enrich your website’s design and functionality, keeping visitors engaged longer. In this blog post, we’ll discuss how to combine embeds with tabs using Elementor to create organized, visually appealing content sections. Ready to dive in?
Understanding the Concept of Tabs in Web Design
Tabs are a fantastic way to arrange content in a clean, organized manner. They provide a user-friendly navigation experience by allowing users to switch between different sections of content without needing to load new pages. Think of them as a digital version of a file cabinet, where you can easily pull out particular drawers to access specific information.
Here are a few key benefits of using tabs in web design:
- Space Efficiency: Tabs help you save space on your website by condensing content into expandable sections.
- Enhanced User Focus: By segmenting information, users can focus on one topic at a time, reducing overwhelm.
- Improved Navigation: Tabs make it easier for users to find the content they’re looking for quickly, thus improving overall usability.
- Visual Appeal: Well-designed tabs add an interactive element, making your website look modern and professional.
Incorporating tabs into your Elementor design can elevate your website’s functionality. They can host various content types, including text, images, and, of course, embeds. So, let’s explore how to effectively integrate embeds into tabs for a seamless user experience!
Preparing Your Content for Embedding
Before diving into the technical aspects of embedding content into tabs in Elementor, it’s crucial to prepare your content appropriately. This preparation ensures that the end product not only looks good but functions seamlessly. Here are some steps to get you started:
- Identify the Content Type: First, determine what type of content you want to embed. It could be videos, audio files, images, or third-party content like Google Maps or social media posts.
- Gather Your Sources: Collect links and resources you intend to embed. For example, if it’s a YouTube video, make sure you have the correct URL ready. Note that some platforms might require specific embed codes that you can find on the share option of the content.
- Plan Your Layout: Think about how you want the tabs to be organized. Aim for a logical flow. For instance, if you’re embedding video tutorials, you might categorize them by topic or difficulty.
- Optimize Content: Ensure that your content is optimized for web use. For instance, videos should be in a format that loads quickly to avoid lag, and images should be appropriately sized to enhance performance.
- Test Your Links: Before embedding, test all your links and content to ensure they work properly. Broken links can frustrate users and lead to a poor experience.
By carefully preparing your content, you’ll set a solid foundation for creating tabs in Elementor that are not only visually appealing but also enhance user engagement.
Step-by-Step Guide to Create Tabs in Elementor
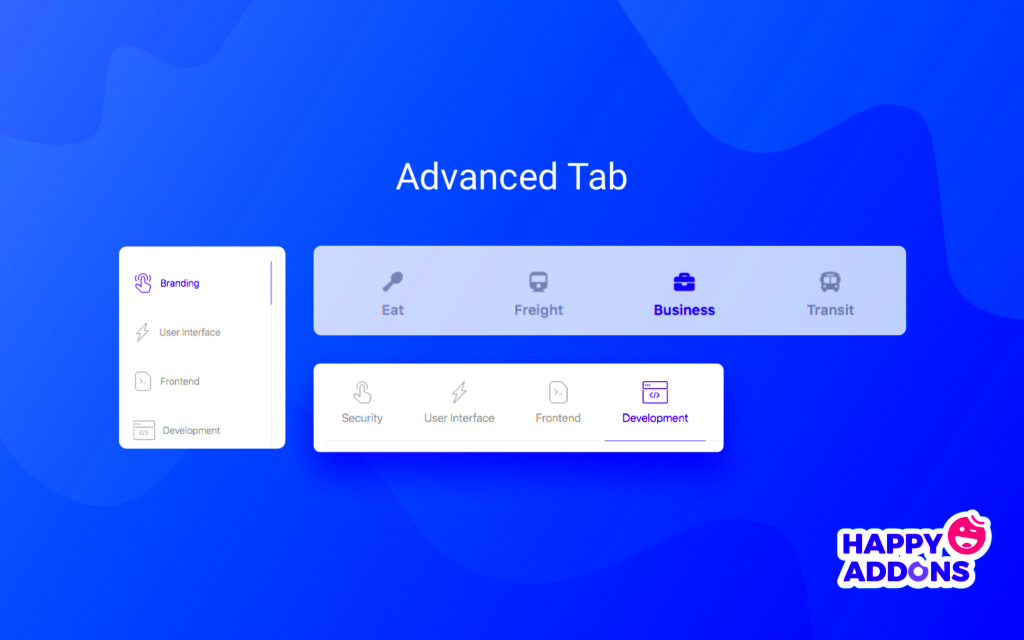
Creating tabs in Elementor is a straightforward process, and once you hit a certain rhythm, you’ll find it becomes second nature. Here’s a step-by-step guide to walk you through it:
- Add a New Section: Start by creating a new section in Elementor. Click on the plus icon to add a new section and choose your preferred layout.
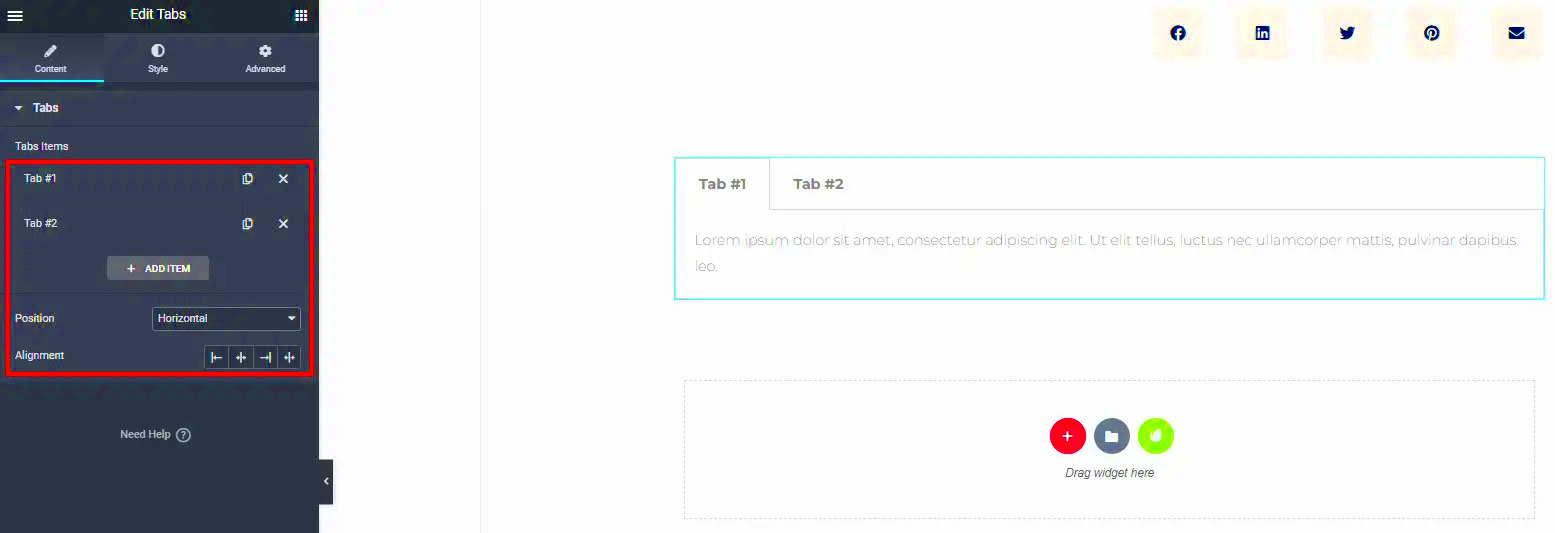
- Insert the Tabs Widget: Find the “Tabs” widget in the Elementor panel. Simply drag and drop it into the section you just created. You’ll see placeholder tabs appear on your page.
- Edit Tab Titles: Click on each tab title to customize it. Change the default text to suit your content—make it descriptive but concise!
- Embed Your Content: In each tab settings, switch to the “Content” tab. Here, you can insert the content you’ve prepared. This could be video links, images, or scripts. For instance, if embedding a video, simply paste the URL.
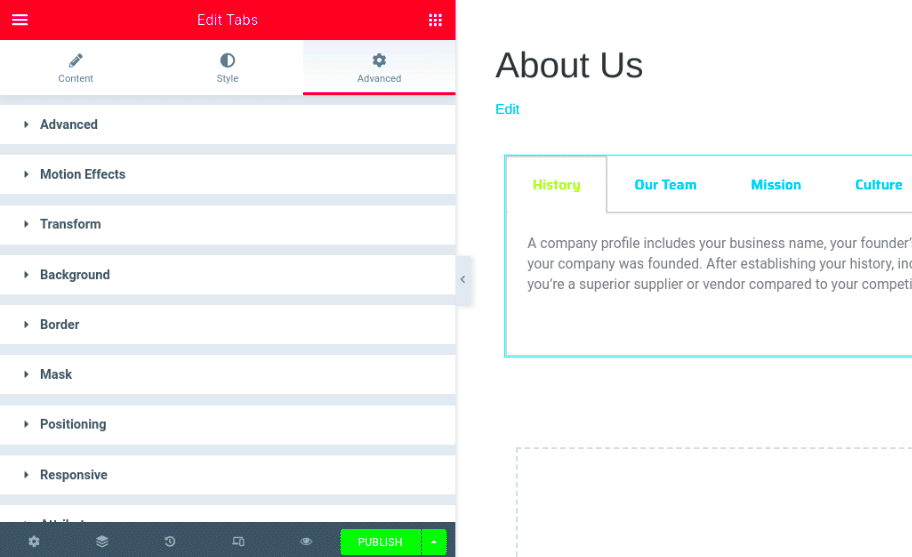
- Style Your Tabs: Switch to the “Style” tab to customize the appearance. Adjust the text size, colors, and spacing to match your site’s theme. Keep it visually coherent to promote a seamless user experience.
- Preview Your Work: Once you’re satisfied with the setup, click on the preview button to see how your tabs look on the front end. Test the functionality to ensure everything works as planned.
- Publish Your Changes: If you’re happy with the results, go ahead and hit the publish button to make your tabs live on your website!
And that’s it! With these steps, you can effectively create engaging tabs in Elementor that house your embedded content, making it accessible and easy to navigate for your users.
5. How to Embed Various Types of Content in Tabs
Embedding various types of content into tabs in Elementor can enhance the user experience on your website. Whether it’s videos, images, or social media feeds, tabs can efficiently organize this content for easy navigation. Here’s how you can include different types of embeds:
- Video Embeds: To embed a video, you can simply grab the embed code from platforms like YouTube or Vimeo. In Elementor, add a tab and then insert an HTML widget within that tab. Paste the embed code there. It’s that easy!
- Image Galleries: Instead of cluttering your page with images, use tabs to organize them. Create a tab for each image gallery. Use the Image Gallery widget in Elementor, choose your images, and place it in the respective tab.
- Maps: Want to show your location or any other geographical information? Use Google Maps. Grab the embed code from Google Maps, then use the HTML widget in your tab to display it!
- Social Media Feeds: Embedding feeds from platforms such as Instagram or Twitter can engage visitors. Many social media platforms offer embed options; copy their code and place it into the HTML widget of your tab.
With Elementor, embedding different types of content in tabs not only makes it visually appealing but also keeps your audience engaged. Experiment with various content types to see what works best for your visitors!
6. Customizing Tab Design for Better User Experience
Design plays a critical role in ensuring that your tabs not only look good but are also user-friendly. Here are some strategies for customizing the design of your tabs in Elementor for an optimal user experience:
- Font and Color Schemes: Customizing the font and colors of your tabs can significantly enhance readability. Use the Typography settings in Elementor to select a font that matches your brand identity and ensures legibility.
- Hover Effects: Adding hover effects can give users feedback when they interact with the tabs. You can choose to change the background color, text color, or even add animations to make it more engaging.
- Tab Layout: Explore different layouts! Instead of the default horizontal tabs, consider using vertical tabs if it fits your content better. Elementor allows several layouts, providing more flexibility.
- Icon Support: Adding icons to your tabs can enhance comprehensibility. Icons can serve as visual cues, helping users to quickly understand the content within each tab at a glance.
Don’t forget to preview your tabs on various devices to ensure a consistent and pleasant user experience. Remember, well-designed tabs not only improve aesthetics but also enhance functionality, making it easier for visitors to navigate your site!
7. Common Issues and Troubleshooting Tips
When integrating embeds into tabs in Elementor, you might encounter some common issues that can hinder your design. But don’t worry! With a few troubleshooting tips, you can get everything running smoothly in no time.
Loading Issues: Sometimes, the content may not load properly within the tabs. This can happen due to conflicts with JavaScript or CSS. Here are steps to resolve this:
- Clear your browser cache.
- Ensure your Elementor and WordPress versions are up to date.
- Check for plugin conflicts by disabling all other plugins temporarily.
Responsiveness Problems: Embeds might not scale well on mobile devices, potentially affecting the user experience. To address this:
- Use responsive settings within Elementor when adjusting your tabs.
- Test your tabs on multiple devices to ensure they look great everywhere.
Size and Alignment Issues: If your embeds look off or get cut off, consider the following:
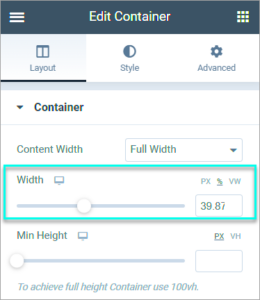
- Adjust the width and height settings in the embed code.
- Make sure the tab content area has enough padding for your embeds.
Lastly, if you’re still running into problems, consult the Elementor Community Forum where many users share their experiences and solutions. Remember, patience is key when solving these tech glitches!
8. Best Practices for Using Embeds in Tabs
Embedding content in tabs in Elementor can elevate your design and help present information in an organized manner. However, following some best practices can enhance effectiveness and user engagement.
Keep It Relevant: Always ensure that the content you embed is relevant to the tab it is in. This keeps your audience engaged and provides them with a seamless experience.
Optimize File Sizes: Large embedded files can slow down your page loading time. It’s crucial to optimize images and videos so that your site runs smoothly. Here are some tips:
- Use compressed file formats, such as MP4 for videos and JPEG for images.
- Utilize lazy loading techniques to load embeds only when they’re in the viewport.
Test Across Devices: As you design, don’t forget to test the look and functionality of your tabs across various devices and browsers. What looks good on a desktop may not be as effective on a smartphone. Make sure everything is responsive!
Limit Number of Tabs: Too many tabs can overwhelm users. Aim for a clean, simple layout with a maximum of five to seven tabs. This dynamic approach keeps information digestible.
By following these best practices, you can enhance the user experience and make your Elementor tabs a hub for engaging content. Happy designing!
Conclusion and Further Resources
Implementing embedded content into tabs using Elementor can significantly enhance user experience and content organization on your website. By following the outlined steps, you can effectively harness the power of Elementor’s features to showcase diverse types of media, such as videos, social feeds, or interactive elements, within a tabbed layout.
To summarize, here are the key points to consider when including embeds into tabs in Elementor:
- Choose the Right Tab Layout: Decide which tab format suits your content best—horizontal or vertical tabs.
- Utilize the Elementor Editor: Take advantage of the drag-and-drop functionality to easily add tabs to your page.
- Embed Your Content: Use the HTML widget or shortcode to add your embeds directly into the tab content areas.
- Customize Appearance: Tailor the design and styling options within Elementor for a cohesive look.
- Test Functionality: Ensure all tabs and embeds function correctly across various devices and browsers.
For those looking to dive deeper into Elementor’s capabilities and improve their skills further, consider exploring the following resources:
| Resource | Description |
|---|---|
| Elementor Help Center | A comprehensive guide on using Elementor, including FAQs and troubleshooting tips. |
| Elementor Blog | Stay updated with the latest features, tips, and tutorials on Elementor. |
| Elementor YouTube Channel | Video tutorials that demonstrate Elementor’s functionalities in action. |

