Getting started with importing vector files from Shutterstock can seem a bit daunting at first, especially if you’re new to digital design or just looking to streamline your workflow. Shutterstock offers a vast library of high-quality vector graphics that can elevate your projects, from logos to illustrations. In this guide, we’ll walk you through the essentials of importing these files smoothly, ensuring you make the most out of the resources available. Whether you’re designing for print, web, or branding, understanding the ins and outs of importing vectors will save you time and help you achieve professional results.
Understanding Transparent Vector Files and Their Benefits

Before diving into the import process, it’s crucial to understand what makes transparent vector files special. These files typically come in formats like SVG, AI, or EPS, which support transparency and scalability without losing quality. The transparency feature means that the background of the graphic is see-through, allowing seamless integration into various backgrounds or designs. This flexibility is a game-changer for designers, as it eliminates the need for tedious background removal or masking.
Benefits of Transparent Vector Files include:
- Versatility: Easily place vectors over different backgrounds without worrying about unwanted white boxes or backgrounds.
- Scalability: Maintain crisp, clear images at any size—perfect for logos, icons, and detailed illustrations.
- Professional Appearance: Create polished, clean designs that look consistent across all mediums.
- Easy Editing: Vector files are fully editable, so you can tweak colors, shapes, and details with software like Adobe Illustrator or Inkscape.
Overall, transparent vector files are a designer’s best friend, offering flexibility and quality that raster images just can’t match. Understanding their benefits helps you appreciate why they’re so popular and why importing them correctly from Shutterstock is worth the effort. Once you know how to handle these files, integrating them into your projects becomes straightforward, enabling you to produce professional-grade work efficiently.
Steps to Download Transparent Vector Files from Shutterstock
Getting your hands on transparent vector files from Shutterstock is pretty straightforward once you know the process. Let’s walk through the steps so you can start using those high-quality assets in your projects right away.
Step 1: Sign In or Create an Account
If you haven’t already, head over to Shutterstock and sign in. Creating an account is quick and free, but keep in mind that downloading files requires a subscription or a license purchase. If you’re serious about using vectors regularly, consider subscribing to a plan that suits your needs.
Step 2: Search for Your Vector
Use the search bar at the top of the homepage. Type in your keywords—be specific! For example, instead of just “flower,” try “red rose vector transparent” to narrow down your options. You can also filter your search results by selecting “Vectors” from the media type options to make your search more efficient.
Step 3: Use Filters to Find Transparent Background Files
Once you see the results, look for vectors that are labeled as having a transparent background. Shutterstock often tags these as “PNG” or “vector files” with transparency. You can further filter by file type or orientation, depending on your project needs.
Step 4: Preview and Select Your Vector File
Click on a thumbnail to view the details. Make sure the image is the right size, style, and has a transparent background. You can usually see a preview with a transparent checkerboard pattern indicating transparency. If everything looks good, click the “Add to Cart” or “Download” button.
Step 5: Choose Your Download Option
Depending on your subscription or license, you’ll have options for downloading. For transparent vectors, you’ll want to select the appropriate file type—typically EPS, AI, or SVG. If transparency isn’t visible in the preview, check the file details or download the sample to verify transparency before purchasing the full version.
Step 6: Download and Save Your Files
Once your payment is processed, you’ll get access to the download link. Save the vector file to a dedicated folder on your computer. Remember to keep a backup in case you need it later!
And that’s it! You now have a high-quality, transparent vector file ready to be imported into your design software. The key is to take your time during the search and preview stages to ensure you’re getting exactly what you need.
Preparing Your Vector Files for Import
Before you jump into your design project, it’s essential to prepare your vector files properly. Even high-quality files can need a little tidy-up to ensure they work smoothly in your workflow. Here’s a simple guide to make sure your files are perfectly ready for import.
Step 1: Open Your Vector File in the Appropriate Software
Use software like Adobe Illustrator, CorelDRAW, Inkscape, or any other vector editing tool. Open the file and take a quick look to see if everything appears as expected. Check that the transparency is intact, and no unwanted backgrounds or artifacts are visible.
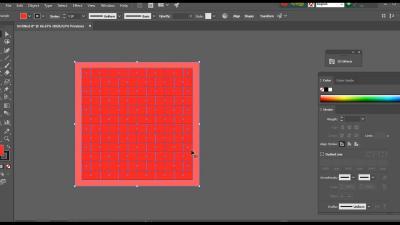
Step 2: Check and Confirm Transparency
Since you’re working with transparent files, double-check that the transparent areas are truly transparent. In most software, you can toggle the background grid or turn on transparency grids to verify this. If the background isn’t transparent, you may need to remove any unwanted background layers or objects.
Step 3: Clean Up and Simplify the Artwork
- Remove Unnecessary Elements: Delete any extra layers, guides, or objects that won’t be part of your final design.
- Optimize Paths: Simplify complex paths to reduce file size and improve performance. Use “Simplify” or “Path > Simplify” functions available in most software.
- Check for Broken Links or Missing Fonts: Make sure all linked assets are embedded, and fonts are outlined if necessary.
Step 4: Adjust Colors and Sizes if Needed
If your vector includes colors that aren’t suitable for your project or if the size needs tweaking, do those adjustments now. Remember, vectors are scalable, so resize as needed without losing quality.
Step 5: Save in the Correct Format
Depending on your target application, save the file in the appropriate format:
| Format | Use Case | Notes |
|---|---|---|
| EPS | Most vector editing and printing | Widely supported, preserves layers and paths |
| AI | Adobe Illustrator projects | Best for editing in Illustrator |
| SVG | Web use, scalable graphics | Good for web projects, supports transparency |
Step 6: Organize and Backup Your Files
Keep your files organized in clearly labeled folders. Consider creating a version history if you plan multiple edits. Backups ensure you don’t lose your work and can revert to earlier versions if needed.
By taking these steps, you’ll ensure your transparent vector files are clean, optimized, and ready for a smooth import into any project. Proper preparation saves you time and headaches down the line, letting you focus on creating amazing designs!
How to Import Vector Files into Your Design Software
Now that you’ve downloaded your perfect transparent vector files from Shutterstock, the next step is getting them into your favorite design software. Whether you’re using Adobe Illustrator, CorelDRAW, or even free tools like Inkscape, the process is pretty straightforward. Let’s walk through the common steps to ensure your import goes smoothly.
Step 1: Check the File Format
Most vector files from Shutterstock come in formats like AI, EPS, SVG, or PDF. Before importing, double-check which format best suits your software. For example:
- Adobe Illustrator handles AI, EPS, and SVG seamlessly.
- Inkscape prefers SVG files but can import EPS and PDF nicely.
- CorelDRAW supports AI, EPS, and PDF.
Step 2: Open Your Design Software
Launch your preferred software and create a new document or open an existing project where you want to add the vector file.
Step 3: Import the Vector File
Most programs have an Import or Place option, usually found in the File menu. Here’s how:
- Go to File > Import or Place.
- Navigate to your downloaded vector file.
- Select the file and click Open.
In some software, you might simply drag and drop the file directly into the workspace, which is super quick and convenient.
Step 4: Adjust Import Settings
Depending on your software, you might get options like:
- Embedding or linking the file
- Preserving layers or flattening everything into a single layer
- Importing with transparency preserved
Make sure to select options that keep the transparency intact and maintain the vector quality.
Step 5: Resize and Position
Once imported, you can resize, move, or edit the vector graphic as needed. Remember, because the vector is scalable, you can make it as big or small as you want without losing quality!
Pro Tips:
- If your vector file contains multiple elements, consider ungrouping or releasing compound paths for easier editing.
- Save your project after importing to prevent any loss of work.
That’s it! Importing transparent vector files is a straightforward process once you know the steps. Now, you’re ready to incorporate stunning graphics into your designs seamlessly.
Tips for Working with Transparent Vector Files Effectively
Working with transparent vector files opens up a world of creative possibilities, but it also requires a few best practices to make your workflow smooth and your results professional-looking. Here are some handy tips to help you get the most out of your transparent vectors.
1. Keep the Transparency Layered and Editable
When possible, work with vector files that preserve layers and groups. This makes editing specific parts easier and helps you maintain control over transparency effects. If your software supports it, avoid flattening transparency too early—keep those layers editable for flexibility.
2. Use Layers Strategically
Organize your vector graphic into layers—backgrounds, main elements, overlays, etc. Transparency often involves overlays or shading, so separating these layers makes adjustments straightforward. This way, you can tweak the transparency level or replace elements without disturbing the entire design.
3. Adjust Transparency with Precision
Instead of relying solely on the default opacity settings, consider using blending modes (like Multiply, Screen, Overlay) to create more nuanced effects. Experimenting with blending modes can help your transparent vectors blend seamlessly into your background or other elements.
4. Beware of Rasterization
When exporting or saving, be cautious about rasterizing your transparent vectors. While raster images like PNGs support transparency, they lose scalability. Keep your original vectors in vector formats for editing, and only rasterize when necessary for specific use cases.
5. Test Different Backgrounds
Since transparency is a key feature, always preview your vector on different backgrounds—white, black, colored—to ensure the transparency looks good in various contexts. This is especially important if your design will be placed on complex or textured backgrounds.
6. Maintain Consistent Color Profiles
Color consistency is vital, especially when transparency is involved. Use consistent color profiles and color modes (like RGB or CMYK) to prevent unexpected color shifts when sharing or printing your designs.
7. Export with Transparency Settings Enabled
When exporting your final design, choose formats that support transparency—like PNG, SVG, or PDF. Double-check export settings to ensure transparency is preserved. For example, in PNG options, select Transparent Background.
8. Keep Backup Copies
Always save backup versions of your layered and editable files. Working with transparency can sometimes lead to unexpected results—having backups ensures you can revert if needed.
In Summary
Working with transparent vector files offers incredible flexibility, but it’s crucial to stay organized and make thoughtful adjustments. By keeping layers intact, experimenting with blending modes, and exporting properly, you can create stunning, professional designs that leverage transparency to their fullest potential.
Common Issues and Troubleshooting During Import
Importing transparent vector files from Shutterstock can sometimes come with its fair share of hiccups. Don’t worry, though—most issues are straightforward to resolve once you know what to look for. Here are some common problems you might encounter and practical tips to troubleshoot them:
1. File Compatibility and Format Errors
One of the first things to check is whether the file format is compatible with your design software. Shutterstock typically provides files in formats like AI, EPS, SVG, or PDF. If your software doesn’t support the specific format, the import might fail or result in unexpected issues.
- Solution: Confirm the file format and ensure your software can open it. If needed, convert the file to a compatible format using trusted online converters or vector editing tools.
2. Missing or Incorrect Transparency
Sometimes, the transparency might not appear as expected, especially if the file was exported improperly or if transparency effects are embedded incorrectly.
- Solution: Open the file in a vector editing program like Adobe Illustrator or Inkscape to verify transparency. If transparency isn’t showing, try re-saving or exporting the file with proper transparency settings.
3. Rasterization of Vector Elements
Occasionally, vectors might appear pixelated or rasterized after import, which defeats the purpose of using vector files.
- Solution: Make sure you’re importing the original vector file, not a flattened or rasterized version. Also, check your import settings—some programs have options to preserve vector data during import.
4. Loss of Layered Structure or Effects
If the imported file loses its layers, groups, or effects, editing becomes cumbersome.
- Solution: Use import options that preserve layers and effects. For example, in Adobe Illustrator, choose “File” > “Place” and select “Link” or “Embed” based on your needs. Also, ensure you’re importing the file into a compatible version of your software.
5. Corrupted Files or Incomplete Downloads
A corrupt or incomplete download can cause import errors or missing elements.
- Solution: Re-download the file from Shutterstock, ensuring the download completes successfully. Verify the file size matches the original and try opening it again.
6. Software-Specific Tips
Different programs may handle imports differently. Always refer to the official guides for your software, and consider updating to the latest version for improved compatibility.
Remember: Always keep backups of original files before attempting conversions or troubleshooting. And if you run into persistent issues, reaching out to Shutterstock support or your software’s help center can save you time.
Conclusion and Additional Resources for Vector File Management
Congratulations! You’ve now got a solid understanding of how to import transparent vector files from Shutterstock, troubleshoot common issues, and manage your vector assets more effectively. Proper handling of these files ensures your creative projects look professional and polished, whether you’re designing logos, illustrations, or marketing materials.
To keep leveling up your vector game, here are some additional resources and tips:
- Official Tutorials: Check out Adobe’s, Inkscape’s, or other vector software’s official tutorials for detailed workflows.
- File Management Tools: Use cloud storage solutions like Google Drive or Dropbox to organize your assets and keep track of different versions.
- Vector Libraries: Explore other royalty-free vector resources such as Freepik, Vecteezy, and Flaticon for diverse assets.
- File Conversion & Optimization: Tools like Vector Magic or SVGOMG can help optimize and convert files efficiently.
- Community Forums: Join design communities like Adobe Community, Reddit’s r/Design, or Stack Exchange for troubleshooting tips and inspiration.
Remember, mastering vector file management is an ongoing process. The more you practice importing, editing, and troubleshooting, the more intuitive it becomes. Keep experimenting, stay curious, and don’t hesitate to explore new tools and techniques to elevate your design projects to the next level!