Hey there! If you’re diving into the world of WordPress, you might be wondering how to make your site visually appealing without starting from scratch. One of the easiest ways to do this is by importing page designs. Whether you’ve come across a beautiful template you want to replicate or you’ve created a design in another platform, importing it into WordPress can save you a ton of time and effort. In this post, we’ll break down the fundamentals of importing designs and explore different methods that can help transform your website into a stunning digital space.
Understanding the Different Methods of Importing Designs

When it comes to importing page designs into WordPress, there’s more than one way to do it. Let’s explore the various methods you can use to get your designs up and running.
- Using Page Builders: Popular plugins like Elementor, Beaver Builder, and WPBakery allow you to import pre-made templates with ease.
- Importing Theme Demos: Many WordPress themes come with demo content that can be imported with a single click.
- Custom HTML/CSS: If you’re comfortable with coding, you can create custom pages by directly writing HTML and CSS and then using the WordPress editor.
- Widgets & Shortcodes: For more modular designs, you can leverage widgets and shortcodes to build your pages.
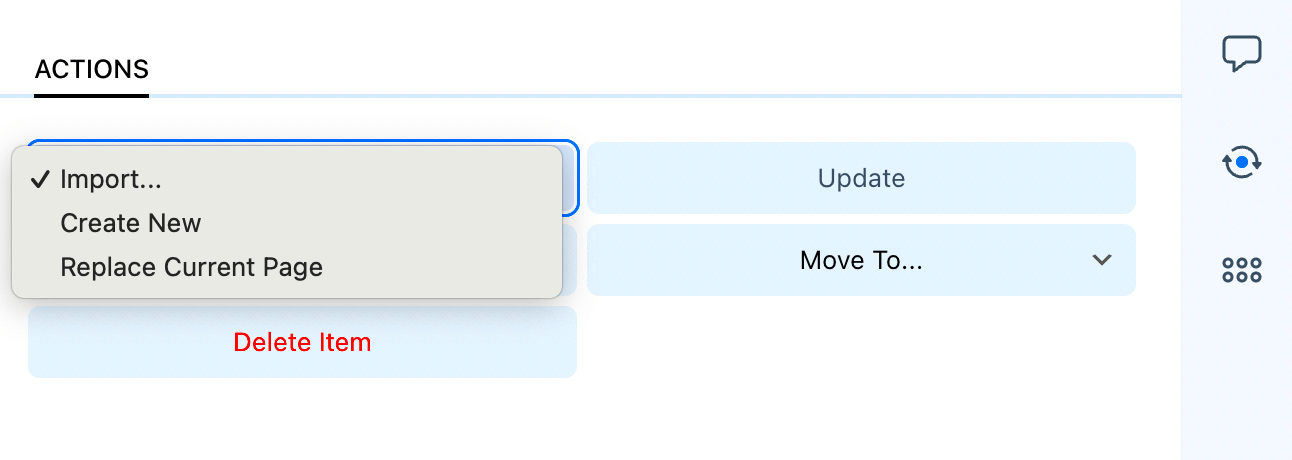
- Using a JSON File: If you’ve designed your pages in a page builder, you can often export them as a JSON file and import them into another WordPress installation.
Each method has its own set of pros and cons. For instance, page builders are user-friendly, while manually coding offers more customization. Think about your needs and technical skills when choosing how to import your designs, and don’t hesitate to experiment!
Preparing Your Page Design for Import

When it comes to importing a page design into WordPress, preparation is key. You can’t just throw anything into your site and hope for the best; a little organization and foresight can save you a lot of headaches later on. So, how do you set your design up for success? Let’s break it down!
First things first, you need to decide the format of your page design. Are you working with a Photoshop file, a Sketch design, or perhaps just ready-made HTML/CSS files? Each of these comes with its own requirements, so it’s crucial to know what you’re working with. If you’re converting a design that’s been created outside of WordPress, you’ll want to export all necessary assets, like images, CSS styles, and any custom fonts. Here’s a quick checklist:
- Export Images: Make sure all the images are exported in web-friendly formats like JPG or PNG.
- Gather Fonts: If you’re using custom fonts, make sure you have the correct files or links (like Google Fonts).
- Document Layout: Outline how elements are arranged on the page; this will help you later when you start building.
- Check Responsiveness: Confirm that your design looks good on various screen sizes.
Once you’ve got everything prepared, it’s a good idea to do a little test run. You might want to create a draft page in WordPress to experiment with the layout before going live. This way, you can tweak things without worrying about how they’ll affect your site’s live environment. Preparation isn’t just about gathering files; it’s about ensuring everything works together seamlessly.
Using Page Builder Plugins for Easy Import
So, you’ve got your page design prepped and ready to go! Now, let’s talk about how to make the importing process as smooth as possible by using page builder plugins. These handy tools can transform your design dreams into a reality without needing a degree in coding. But which ones should you consider?
| Page Builder Plugin | Key Features |
|---|---|
| Elementor | Drag-and-drop interface, pre-designed templates, responsive editing. |
| Beaver Builder | Easy-to-use, tons of modules, front-end editor. |
| Divi Builder | Visual builder, split testing, lots of design options. |
Each of these page builders offers unique features that can make importing designs a breeze. For instance, Elementor is incredibly user-friendly, allowing you to drag and drop elements where you need them, making it easy to match your exported design. On the other hand, Divi Builder gives you extensive customization options that can help fine-tune every aspect of your page.
Here’s a quick guide on how to use a page builder to import your design:
- Install your chosen page builder plugin from the WordPress dashboard.
- Create a new page or edit an existing one.
- Open the page builder interface (usually a button like “Edit with Elementor”).
- Upload and place your design elements, following the layout and styles you documented earlier.
- Adjust settings to ensure mobile responsiveness if necessary.
Using page builders not only simplifies the importing process, but they also make it easier to maintain and update your designs down the line. So, pick your plugin and get to work transforming that design into a stunning WordPress page!
Importing Designs with the WordPress Theme Customizer
If you’re looking to give your WordPress site a fresh, new look without starting from scratch, the WordPress Theme Customizer is a fantastic tool to use. Through this interface, you can import various design elements to customize your website effectively. Here’s how to do it:
- Access the Theme Customizer: Start by logging into your WordPress dashboard. Navigate to
Appearance>Customize. This will bring up the Theme Customizer panel. - Find the Import Option: Depending on your theme, look for options such as
Import/Export. Some themes come with built-in options for importing demo content. If your theme includes such a feature, simply click on it. - Upload Your Design File: You’ll often have a button like
UploadorChoose File. Click it to find your design (usually in a .json or .xml format) on your computer. Once selected, clickImport. - Preview Changes: After importing, take some time to preview how your new design elements fit into your existing site. Customize further if needed, adjusting colors, fonts, and layout settings.
- Publish Changes: When satisfied with your design tweaks and preview, hit
Publishto apply the changes to your live site.
Remember, the Theme Customizer is versatile but intuitive! Explore its features without hesitation to make your site more visually appealing.
Exporting and Importing Demo Content
One of the easiest ways to kickstart your WordPress site is by utilizing demo content. Whether you’re building a personal blog or a professional portfolio, importing demo content can save you time and effort. Here’s how to effectively export and import this valuable resource:
Exporting Demo Content
Exporting demo content may vary by theme, but generally, it follows these steps:
- Go to Tools: From your WordPress dashboard, click on
Tools>Export. - Select Content to Export: Choose what you want to export. You can opt for all content, or just posts, pages, or media. Click on
Download Export Fileto get a .xml file.
Importing Demo Content
Now, let’s get that demo content into your new WordPress installation:
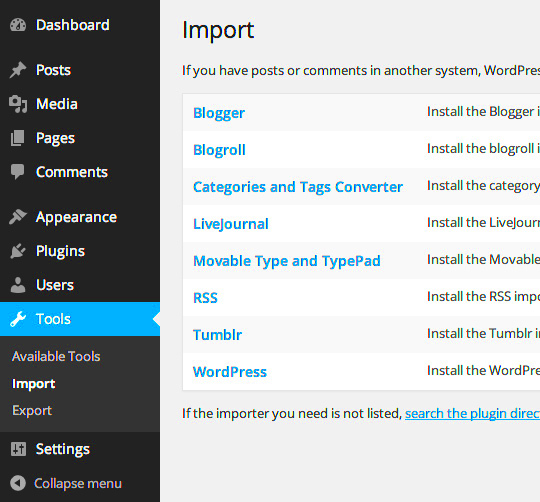
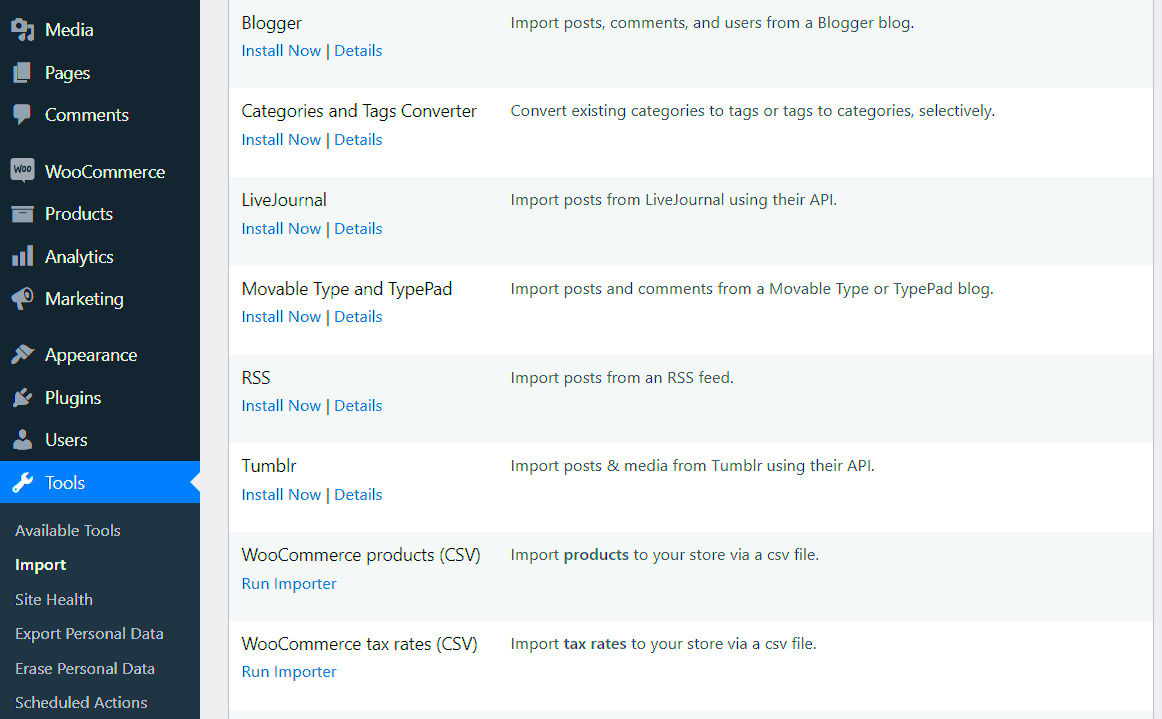
- Go to Tools: Just like before, navigate to
Tools>Import. - Select WordPress: Click on the
Install Nowlink under the WordPress option. This will enable you to upload your exported .xml file. - Upload Your File: Choose the .xml file you downloaded earlier and click
Upload file and import. - Assign Authors: You will be prompted to assign authors to the imported content. You can choose to create new users as needed.
- Finish Importing: Finally, click on
Submit. Your demo content will start appearing on your site!
With these steps, you can easily set up a website that closely resembles the demo version of your chosen theme, giving you a significant head start!
7. Common Issues and Troubleshooting Tips
When you’re importing a page design into WordPress, it’s not uncommon to encounter a few hiccups along the way. But don’t worry! Most issues can be diagnosed and resolved with a bit of troubleshooting. Here’s a handy list of common problems and how to fix them:
- Mismatched Content: Sometimes, the content you see after importing doesn’t match the original design. Double-check that you are using the right import file. If it’s a demo import, the content should match, but for custom designs, you may have to manually fill in some gaps.
- Images Not Displayed: If images aren’t visible after the import, it may be due to import settings or broken links. Ensure that your image URLs are correct, and check if the images were included in the import package. If they were missing, you may need to upload them manually.
- CSS Not Applying: Sometimes the styles may not appear as expected. This can happen if the CSS files aren’t properly linked. Check the theme settings to make sure your stylesheets are loaded correctly.
- Plugin Conflicts: If you run into functionality issues, it might be due to conflicts with existing plugins. Temporarily deactivate plugins one by one to identify the culprit.
- Themes Not Compatible: If you’re not seeing the design as intended, it could be because the import was designed for a different theme. Ensure that you’re using the correct theme version that matches your import file.
By keeping these common issues in mind, you can efficiently troubleshoot and get your page design looking just right in WordPress!
8. Conclusion and Best Practices
So there you have it! Importing a page design into WordPress can seem daunting at first, but with the right tools and knowledge, you can make it a smooth process. Here are some best practices to keep in mind:
An internal server error occurred.


