Uploading your images and videos to Shutterstock might seem like a straightforward task, but when you’re managing a large portfolio, using FTP (File Transfer Protocol) can make the process much smoother. FTP allows you to transfer multiple files quickly and securely directly from your computer to Shutterstock‘s servers, saving you time and effort. Whether you’re a seasoned contributor or just starting out, understanding how FTP works and how to set it up can help streamline your workflow and get your content published faster. In this guide, we’ll walk you through everything you need to know to get your files uploaded via FTP with confidence.
Prerequisites for Uploading Files via FTP

Before you dive into uploading your files to Shutterstock through FTP, there are a few important prerequisites to check off your list. Ensuring you have everything ready will help prevent any hiccups during the upload process and make everything run smoothly.
- FTP Client Software: You’ll need an FTP client—think of this as your digital delivery truck. Popular options include FileZilla (free), Cyberduck, and WinSCP. These programs are user-friendly and support secure file transfers.
- Shutterstock Contributor Account: Of course, you need an active contributor account on Shutterstock. If you haven’t signed up yet, head over to their contributor portal and get registered.
- FTP Login Details: Shutterstock provides specific FTP server details, including the hostname, port number, username, and password. These are usually sent after you set up your FTP submission method in your contributor dashboard.
- Properly Organized Files: Keep your images and videos well-organized in folders on your computer. Use clear naming conventions and ensure your files meet Shutterstock’s technical specifications and guidelines.
- Internet Connection: A stable and fast internet connection is crucial. Large files can take time to upload, so a reliable connection minimizes interruptions.
Once you have these prerequisites in place, you’re all set to start your FTP upload journey. Remember, taking the time to prepare now will save you headaches later and help ensure your content gets uploaded efficiently and correctly.
Setting Up Your FTP Client for Shutterstock

Alright, so you’re ready to start uploading your awesome images to Shutterstock using FTP, but first things first—let’s get your FTP client set up properly. Think of your FTP client as the bridge that connects your computer to Shutterstock’s servers. Without a proper setup, those beautiful photos won’t make it to your portfolio.
Here’s a simple step-by-step guide to get everything configured:
- Choose Your FTP Client: If you haven’t picked one yet, popular options include FileZilla (free and user-friendly), Cyberduck, or WinSCP. All of these work well across different operating systems.
- Get Your FTP Credentials: Before you can connect, you’ll need some info from Shutterstock:
- FTP Server Address: Usually something like ftp.shutterstock.com
- Username & Password: These are provided when your account is set up for FTP uploads. If you don’t have them yet, contact Shutterstock support.
- Port Number: Typically 21 for FTP, unless Shutterstock specifies otherwise.
- Open Your FTP Client and Enter Details: Launch your chosen client and look for the option to create a new connection or site. Fill in the server address, username, password, and port.
- Set Transfer Mode: Make sure to select ‘Passive’ mode if prompted. It helps with smoother connections, especially if you’re behind a firewall.
- Test the Connection: Hit connect! If everything is correct, your client should establish a connection to Shutterstock’s server. If not, double-check your credentials or firewall settings.
And voilà! Your FTP client is now ready to send files to Shutterstock. Remember to keep your credentials safe and avoid sharing them with anyone. Once connected, you’ll see a directory structure—this is where you’ll upload your images, organized neatly for easy access.
Preparing Your Files for Upload
Before you start dragging and dropping files into your FTP client, it’s super important to make sure your images are primed and ready. Uploading properly prepared files not only speeds up the process but also helps you avoid rejection or delays in your submission.
Here’s what you need to do to prepare your files:
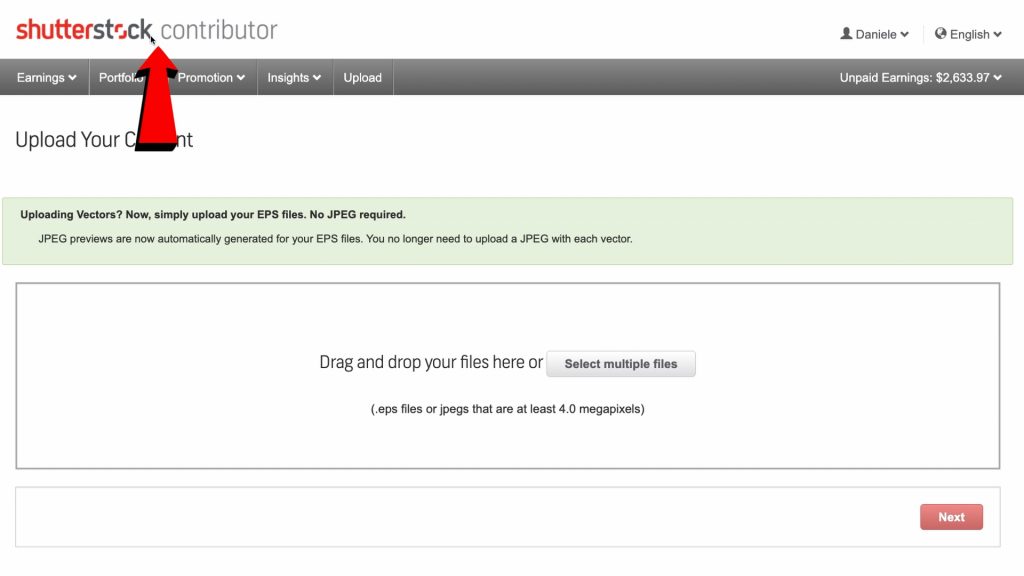
- Check Image Quality: Make sure your photos are high-resolution, crisp, and free of noise or artifacts. Shutterstock typically requires images to be at least 4 megapixels, but higher is always better.
- Rename Files Consistently: Use clear, descriptive filenames without spaces or special characters. For example, sunset-beach-vacation.jpg. This helps keep your portfolio organized and makes it easier to find files later.
- Optimize File Formats: JPEG is the standard format for Shutterstock. Ensure your images are saved in JPEG format with sRGB color profile for consistent display across devices.
- Resize and Compress: While Shutterstock prefers high-quality images, compressing your JPEGs slightly can reduce upload times without sacrificing quality. Aim for a good balance between file size and resolution.
- Check Metadata: Add relevant keywords, titles, and descriptions in your image metadata. This boosts discoverability once uploaded and helps reviewers understand your image’s content.
- Review for Rejections: Before uploading, double-check for watermarks, logos, or any distracting elements. Shutterstock wants clean, professional images.
Once your files are ready, organize them into folders—perhaps by theme or shoot date—to keep your workflow smooth. When uploading via FTP, you’ll usually upload to specific directories Shutterstock provides. Just make sure to match your local folder structure with their guidelines if specified.
To sum it up: quality, consistency, and organization are the keys. Preparing your files thoroughly makes the entire uploading process seamless and increases your chances of acceptance. Now that you’re all set with your FTP connection and files ready, you’re well on your way to sharing your creative work with the world on Shutterstock!
Uploading Files to Shutterstock Using FTP
Ready to get those stunning images and videos onto Shutterstock without the hassle of a web browser? Using FTP (File Transfer Protocol) is a fantastic way to upload large batches efficiently, especially if you’re a photographer or content creator with lots of files to share. Let’s walk through the process together so you can start uploading like a pro!
First things first, you’ll need to set up your FTP client. Popular options include FileZilla, Cyberduck, or WinSCP. Most of these are free and easy to use. Once you’ve downloaded and installed your preferred FTP client, you’ll need the following details from Shutterstock:
- FTP server address (e.g., ftp.shutterstock.com)
- Username and password (your Shutterstock login credentials)
- Port number (usually 21 for FTP)
Before connecting, it’s a good idea to double-check your credentials and ensure your internet connection is stable. Now, open your FTP client and enter the server details. Connect to the server, and you’ll see a directory structure that mirrors Shutterstock’s server system.
Once connected, you’ll navigate to the designated upload folder—usually labeled something like “Uploads” or “Your Account Uploads.” Inside, you can drag and drop your files from your computer directly into the FTP window. Here are some tips to keep in mind:
- Organize files beforehand — creating folders for different projects or categories can save time.
- Check file formats and sizes — ensure they meet Shutterstock’s specifications.
- Use batch uploads — select multiple files at once for faster processing.
After dragging and dropping your files, the FTP client will start transferring them. Depending on your connection and file sizes, this process could take a few minutes or longer. Once the transfer is complete, your files are queued for review by Shutterstock’s team.
Remember, while FTP uploads are efficient, they’re best suited for users comfortable with technical setups. If you’re new to FTP, take it slow, and don’t hesitate to refer to Shutterstock’s detailed guides or seek support. With some practice, uploading via FTP becomes a swift and straightforward part of your content workflow!
Verifying Successful Uploads on Shutterstock
So, you’ve uploaded your files—great! But how do you know they made it safely to Shutterstock’s servers? Verifying your uploads is an important step to ensure your work is in the queue and ready for review or sale. Let’s explore how to check your uploads and confirm everything is in order.
First, log into your Shutterstock Contributor account. Once you’re in, navigate to the “My Portfolios” or “Uploads” section—this is where all your recent submissions are listed. Here, you’ll see a list of files with various statuses:
| Status | Description |
|---|---|
| Pending Review | Your files are uploaded and awaiting Shutterstock’s review process. |
| Under Review | The files are currently being reviewed by Shutterstock’s reviewers. |
| Accepted | Your files have been approved and are now live on Shutterstock. |
| Rejected | Unfortunately, these files didn’t meet Shutterstock’s standards. You can view feedback and resubmit if needed. |
Check the status of your recent uploads. If they are marked as “Accepted,” congratulations! Your files are now available for licensing. If they’re still “Pending” or “Under Review,” give Shutterstock some time—they usually update statuses within a few days.
In case your files show as “Rejected,” don’t worry! Shutterstock provides feedback on why they were rejected, which can include issues like poor image quality, inappropriate content, or technical problems. Use this feedback to make necessary adjustments and resubmit your files.
For peace of mind, you can also download the files from your FTP server or local storage to verify the upload quality. Additionally, some contributors prefer to use the “Batch Preview” feature to review their submissions in the portfolio before approval.
Keeping track of your uploads and their statuses ensures you stay organized and confident that your hard work is reaching potential buyers. If you encounter any issues or discrepancies, Shutterstock’s contributor support is just a message away. Happy uploading—and watching your portfolio grow!
Troubleshooting Common FTP Upload Issues
Uploading your files to Shutterstock via FTP can sometimes come with a few hiccups. Don’t worry—many of these issues are straightforward to resolve once you know what to look out for. Let’s go through some common problems and how to troubleshoot them.
1. Connection Failures
If you’re having trouble connecting to the FTP server, double-check your credentials first—make sure your username, password, and server address are correct. Also, verify that your internet connection is stable. Sometimes, firewalls or antivirus software can block FTP connections, so consider temporarily disabling them to test if they’re the cause.
2. Timeout Errors
Timeout errors happen when the server doesn’t respond within the expected time frame. This can be caused by slow internet speeds or server overload. To fix this, try increasing the timeout setting in your FTP client or simply reconnect after a few minutes.
3. File Transfer Failures
If your files aren’t uploading successfully, ensure that the files meet Shutterstock’s specifications (like file size, format, and naming conventions). Also, check if you have enough storage space and that your disk isn’t full. Sometimes, transfer interruptions occur due to network instability—switching to a wired connection can help.
4. Permissions and Access Issues
Make sure you have the right permissions to upload to the designated folders. If you encounter permission denied errors, contact Shutterstock support or your system administrator to adjust your access rights.
5. Troubleshooting Tips
- Use a reliable FTP client like FileZilla or Cyberduck—these often have helpful logs that can pinpoint issues.
- Update your FTP client to the latest version to avoid bugs or compatibility problems.
- Check Shutterstock’s support resources or forums—they often have specific advice for common upload problems.
Remember, patience is key. Sometimes, the issue is on the server’s end, and waiting a little while before trying again can do the trick. If problems persist, don’t hesitate to reach out to Shutterstock’s technical support—they’re there to help you get your files uploaded smoothly.
Tips for Managing Your Shutterstock Portfolio Efficiently
Managing a large Shutterstock portfolio can feel overwhelming, but with a few smart strategies, you can keep everything organized and maximize your earnings. Here are some tips to help you stay on top of your portfolio management game.
1. Organize Your Files Before Upload
Start by creating a clear folder structure on your computer. For example, separate your images by categories, styles, or projects. This makes it easier to find and upload files without scrambling through cluttered folders.
- Use descriptive filenames that include keywords relevant to the image.
- Maintain consistent naming conventions for easy sorting.
2. Regularly Review and Update Your Portfolio
Periodically review your existing uploads. Remove outdated or underperforming images, and update titles, descriptions, and keywords to improve discoverability. Refreshing your portfolio keeps it active and attractive to buyers.
3. Use Keywording Strategically
Keywords are your best friends on Shutterstock. Invest time in researching popular and relevant keywords for your images. Use a mix of broad and niche terms to reach a wider audience. Remember, accurate and strategic keywords help your images appear in relevant searches.
4. Track Your Performance
Shutterstock provides analytics and sales data. Use these insights to understand what types of images sell well and which don’t. Focus your efforts on creating more of what your audience wants.
5. Keep Your Portfolio Up-to-Date
Stay current with trends and seasonal themes. Upload new content regularly to keep your portfolio fresh and engaging. This signals activity to Shutterstock’s algorithms, which can help boost your visibility.
6. Use Collections and Folders
Group similar images into collections or folders within Shutterstock’s platform. This not only helps you manage your uploads but also creates curated sets that can be marketed together, increasing your chances of sales.
7. Backup Your Work
Always keep backups of your original files and metadata. Losing your images or metadata can be frustrating, and backups ensure you can restore your portfolio quickly if needed.
By implementing these management tips, you’ll find it easier to maintain a high-quality, profitable Shutterstock portfolio. Consistency and organization are key—over time, these practices will pay off in better visibility and more sales.
Conclusion and Additional Resources
Uploading your creative assets to Shutterstock via FTP can significantly streamline your submission process, saving time and ensuring your files are delivered securely and efficiently. By understanding the steps involved—such as setting up your FTP client, organizing your files, and adhering to Shutterstock’s specifications—you can confidently manage your uploads and maintain a steady flow of content. Remember, consistency and organization are key to maximizing your success on the platform.
If you’re new to FTP or looking to optimize your workflow, consider exploring the following resources:
- Shutterstock Contributor Help Center: Detailed guides and FAQs on uploading, file requirements, and account management.
- FTP Client Tutorials: Learn how to set up and use popular clients like FileZilla or Cyberduck.
- File Management Best Practices: Tips on organizing your files for batch uploads and version control.
- Community Forums and Support: Connect with other contributors to share tips, ask questions, and troubleshoot issues.
Incorporating these resources into your workflow can help you become more proficient in using FTP for Shutterstock uploads. Stay organized, adhere to platform guidelines, and leverage available tools to enhance your contribution experience and maximize your earnings.