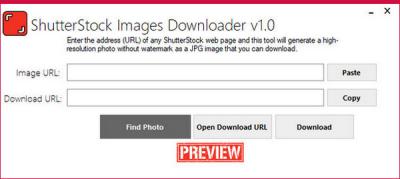
Ever come across a stunning Shutterstock image and wonder, “Who took this photo?” You’re not alone! Whether you’re a content creator, a designer, or just a curious mind, knowing how to identify the photographer behind an image can be incredibly helpful. It not only gives credit where it’s due but also helps you find more of their work or reach out for permissions. Luckily, Shutterstock makes this process pretty straightforward once you understand where to look and what information is available. Let’s dive into how to figure out who took that eye-catching photo and why it matters.
Understanding Shutterstock’s Photographer Attribution and Licensing
Before jumping into the how, it’s good to understand the what and why of attribution and licensing on Shutterstock. When you browse images on Shutterstock, each photo is uploaded by a contributing photographer or artist. These photographers are often professional or passionate hobbyists who upload their work to share with a broader audience. Attribution means giving credit to these creators, which is especially important if you’re using images for projects that require acknowledgment or for legal reasons.
On Shutterstock, the licensing model is designed to protect both the user and the photographer. When you purchase a license to use an image, you’re granted specific rights—like how you can use the photo, where, and for how long. There are mainly two types of licenses:
- Standard License: Suitable for most commercial uses, like websites, social media, and advertisements. It usually has a maximum usage limit.
- Extended License: For larger-scale uses, such as product packaging or mass distribution, with fewer restrictions.
Each Shutterstock image has a clear attribution section, which includes the photographer’s name and sometimes a link to their profile. This attribution is essential if you’re using images under certain licenses or for projects that require credit. To identify the photographer:
- Look for the photographer’s name directly on the image page. It’s usually right below the image, labeled as “Photographer” or “Author”.
- Check the profile link. Clicking on the photographer’s name will often lead you to their profile page, showcasing more of their work and contact info.
- Review the licensing details. The licensing agreement will specify attribution requirements, helping you understand your obligations when using the image.
In summary, understanding how Shutterstock handles attribution and licensing ensures you respect creators’ rights and use images appropriately. It also makes it easier to identify the talented photographers behind the beautiful visuals you love. Next time you’re browsing, keep an eye out for those details—they’re your key to uncovering who took that amazing shot!
Checking the Image Details and Photographer Information

When you’ve come across a Shutterstock image and want to find out who took the photo, one of the first things you should do is examine the image details. Many times, the photographer’s information or licensing details are embedded right into the image file itself or available through the platform where it’s hosted.
Start by reviewing the image metadata: This includes EXIF data, which can sometimes contain valuable information like the camera used, date taken, and even the photographer’s name. However, keep in mind that many stock images, especially those from Shutterstock, often have metadata stripped to protect privacy and copyright details.
Next, check the image details on Shutterstock itself:
- Visit the Shutterstock page: Usually, the photographer’s name is displayed near the image, along with their portfolio or profile link.
- Look for credits or attribution: Shutterstock often provides licensing information, which includes the photographer’s name and sometimes a brief bio.
- Check the photographer’s profile: Clicking on their name or profile link can lead you to their collection of images, giving you a better idea of their work and style.
Why is this important? Knowing the photographer not only helps you properly attribute the image if you plan to use it but also provides insights into the creator’s other work. Respect for creator rights is crucial, especially when dealing with copyrighted material.
In some cases, the photographer’s information might be missing or incomplete. If that’s the case, don’t worry—there are other methods to track down the original creator, which leads us to the next section.
Using Reverse Image Search to Find the Original Photographer

If checking the image details didn’t give you the answers you need, a reverse image search can be a powerful tool. It allows you to upload or paste the image URL to find other instances of that image across the web, which can help identify the original photographer or source.
Here’s how to do it:
- Choose a reverse image search tool: Popular options include Google Images, TinEye, and Yandex Images. Each has its strengths, but Google Images is widely used and very effective.
- Upload the image or paste its URL: Most tools allow you to drag and drop the image or input the web address where it’s hosted.
- Review the search results: Look for websites that host the image or mention the photographer. The results may show the original source, licensing info, or related images by the same creator.
Pro tip: When using reverse image search, pay attention to the context of the results. If you find the same image on a personal blog, photography portfolio, or a licensing site, you’re likely onto the original creator.
Additionally, some reverse image search engines can help you discover similar images. This can be useful if the exact image isn’t directly linked to the photographer, but similar work is available elsewhere.
Remember, always approach these searches ethically. If you find the photographer’s details, reach out politely if you want to use their work, and make sure to give proper attribution or licensing as required.
Contacting Shutterstock Support for Assistance

If you’ve gone through the usual steps and still can’t identify who took a particular Shutterstock picture, reaching out to Shutterstock support can be a good next move. They have a dedicated team that can help you navigate copyright concerns and provide guidance on image ownership.
Here’s what you should know about contacting Shutterstock support:
- Gather all relevant information: Before reaching out, make sure you have details like the image ID, the link to the image, your intended use, and any correspondence or screenshots related to your query. The more specific you are, the easier it is for support to assist you.
- Use the official support channels: Shutterstock offers several ways to get help, including their help center, email, or live chat options for registered users. Logging into your account can streamline the process and give support access to your purchase history and licensing details.
- Explain your situation clearly: When contacting support, be concise but detailed. Describe why you need to identify the photographer—whether it’s for attribution, licensing, or resolving a potential copyright issue.
- Follow up if needed: Sometimes, responses can take a little time. Don’t hesitate to follow up politely if you don’t hear back within a few days. Keep a record of all communication for future reference.
Remember, Shutterstock support is there to help you navigate licensing questions, resolve issues, and ensure you’re using images legally and ethically. Patience and clear communication are key to getting the assistance you need.
Tips for Ensuring Proper Attribution and Avoiding Copyright Issues
One of the best ways to prevent copyright headaches is to be proactive about attribution and understanding licensing. Here are some practical tips to help you stay on the right side of copyright law when using Shutterstock images:
- Always read the licensing agreement: Shutterstock offers different licenses—Standard and Enhanced. Make sure you understand what each license allows, especially regarding attribution requirements and usage limits.
- Provide proper attribution when required: If the license or the image’s creator requests attribution, make sure to include the photographer’s name and Shutterstock as the source. For example: Photo by John Doe / Shutterstock.
- Keep detailed records: Save copies of your licensing agreements, purchase receipts, and any correspondence with Shutterstock or photographers. These documents can be invaluable if questions about usage or attribution arise later.
- Use images within license boundaries: Don’t stretch the license terms. For example, if the license restricts commercial use or modifications, respect those rules to avoid infringement issues.
- Stay updated on copyright laws: Intellectual property laws can change, and platform policies may be updated. Regularly review Shutterstock’s terms and relevant copyright guidelines to stay compliant.
- Consider licensing directly from photographers for attribution flexibility: If you want to ensure clear attribution and support photographers directly, you might contact them for custom licensing arrangements outside Shutterstock, but always clarify licensing terms beforehand.
By following these tips, you can enjoy Shutterstock’s vast library of images while respecting creators’ rights. Proper attribution not only keeps you compliant but also supports the talented photographers who make these images possible. Remember, a little diligence upfront can save you a lot of trouble down the line!
Conclusion and Best Practices for Using Shutterstock Images Safely
Using Shutterstock images responsibly is crucial to avoid legal issues and ensure proper attribution. Remember, even though Shutterstock offers a vast library of high-quality images, each image comes with licensing terms that must be followed. To protect yourself and respect creators, always verify the license type associated with the image you intend to use. For example, some images are available under standard licenses, which are suitable for most uses, while others require extended licenses for commercial or high-volume applications.
Here are some best practices to ensure safe and legal use of Shutterstock images:
- Always check the license: Confirm whether the image is licensed for your intended use, especially for commercial projects.
- Keep records: Save the licensing agreement, purchase receipt, and any correspondence related to the image for future reference.
- Avoid unauthorized use: Never use images beyond the scope of your license or without proper permission.
- Give proper attribution: When required, credit the photographer or Shutterstock as specified in the license terms.
- Use reverse image search tools: To identify the original source or photographer, employ tools like TinEye or Google Reverse Image Search.
By adhering to these guidelines, you can confidently incorporate Shutterstock images into your projects while respecting the rights of creators. Remember, responsible usage not only safeguards you legally but also supports the talented photographers behind the images.