Exporting individual products in WooCommerce can feel a bit overwhelming if you’re not familiar with the platform’s functionalities. But fear not! This guide is here to walk you through the process step by step. Whether you want to back up your products or transfer them to another site, exporting individual product data can save you a lot of time and hassle. Let’s dive in and understand how you can streamline this task like a pro!
Understanding WooCommerce Product Data Types

When you’re dealing with WooCommerce, it’s essential to know that not all products are created equal. Each product has specific data types, which dictate how information is stored and displayed. Here’s a quick breakdown of the main WooCommerce product data types:
- Simple Product: A basic, straightforward item without variations. Think of a single t-shirt in one color and size.
- Variable Product: More complex, these products allow for variations, like sizes or colors. For instance, a t-shirt available in multiple sizes and colors would be a variable product.
- Grouped Product: A collection of simple products that can be purchased together. Imagine a set of matching t-shirts, each sold separately but grouped under one product listing.
- External/Affiliate Product: These products are not physically stored in your WooCommerce site but are available through an external link. Ideal for dropshipping or promoting products from third-party sites.
- Subscription Product: For recurring payment products, like memberships or magazine subscriptions. They’re designed for items that customers pay for regularly.
Understanding these products is crucial before exporting. Depending on the product type, the export process and the data you need might vary significantly. Get familiar with these, and you’ll be one step closer to a successful export!
Preparing Your WooCommerce Environment
Before diving into the export process, it’s essential to ensure that your WooCommerce environment is fully prepared. A well-set-up environment not only makes exporting smoother but also minimizes the chance of errors. Let’s break this down into a few crucial steps.
- Update WooCommerce: Always start with the latest version of WooCommerce. This ensures you have the latest features and bug fixes. To update, navigate to Dashboard > Updates, and apply any updates available for WooCommerce.
- Backup Your Data: It’s a smart practice to back up your website before making significant changes like exporting products. There are several plugins available that can help with backup, such as UpdraftPlus or BackupBuddy. A full site backup can save you from potential mishaps.
- Check Plugin Compatibility: Ensure that any other plugins you use are compatible with your version of WooCommerce. Sometimes, outdated or incompatible plugins can interfere with the export process.
- Review Product Data: Take a moment to review the product you plan to export. Ensure all necessary fields, such as name, SKU, price, and inventory status, are filled out correctly. This will help maintain data integrity during the export.
- Set User Permissions: Ensure that you have the right user permissions to access and export WooCommerce products. Typically, you need to be an Administrator or have specific permissions granted to perform this task.
By following these steps, you can effectively prepare your WooCommerce environment for exporting an individual product without a hitch!
Using the Built-in WooCommerce Export Tool
Once your WooCommerce environment is ready, the next step is to use the built-in export tool—an incredibly handy feature that makes exporting individual products a breeze!
Here’s how you can access and utilize this tool:
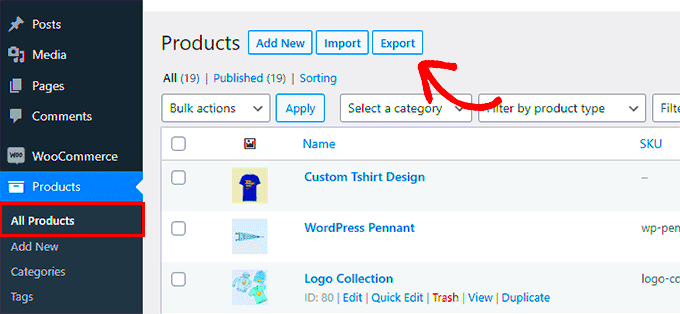
- Access the Export Tool: From your WordPress dashboard, navigate to WooCommerce > Products. You will find an Export button at the top of the page. Click on it to start.
- Select Your Product: The built-in export tool allows you to export all products, or you can choose to export just a specific product. To do this, you’ll need to filter your products to find the one you want to export by using the product filters available.
- Choose Export Format: Required format options usually include CSV (Comma Separated Values), which is the most commonly used format for product data. Make sure you select the format that best suits your needs.
- Customize Your Export: Before finalizing the export, you can customize which data fields to include. You can choose from columns like product name, SKU, and price. This allows you to keep your export focused on what you really need!
- Download the File: After making your selections, simply hit the Generate CSV button. Your file will download automatically, ready for your next steps, whether that’s importing into another system, sharing with a team member, or keeping it for your records.
Using the built-in WooCommerce export tool is not just easy; it’s also a powerful way to manage your product data. It allows for a streamlined process, ensuring you get exactly what you need without unnecessary hassle. So go ahead, and start exporting!
Exporting an Individual Product Using a Plugin
If you want to streamline your WooCommerce product exporting process, using a plugin can be a game changer. Plugins not only simplify tasks but also add a layer of functionality that can save you time and hassle. There are several top-rated plugins out there designed specifically for exporting WooCommerce products, such as “Product CSV Import Suite” or “WP All Export.” Let’s break it down on how to use these plugins step by step.
First, you’ll need to install the plugin of your choice. Here’s how you can do that:
- Log in to your WordPress dashboard.
- Navigate to Plugins > Add New.
- Search for the name of your desired plugin.
- Click Install Now and then Activate.
Once the plugin is activated, follow these easy steps:
- Go to the plugin’s settings, usually found in your WooCommerce or Tools menu.
- Select the individual product you wish to export by either searching for it or browsing through your product list.
- Choose your export settings, like what data fields you want (e.g., price, SKU, categories).
- Finally, click on the Export button, and your product will be exported in your chosen format.
Using a plugin makes this process flexible and customized to your specific needs. It’s a great way to manage and share product information efficiently!
Exporting to CSV Format
CSV (Comma-Separated Values) is one of the most common file formats used for exporting data, and WooCommerce makes it super easy to export your products in this format. CSV files can be opened in spreadsheet programs like Excel or Google Sheets, making data manipulation a breeze. Here’s how to export an individual product to CSV format directly from WooCommerce.
Follow these detailed steps:
- From your WordPress dashboard, go to Products.
- Find the specific product you want to export and hover over it to reveal options.
- Click on the Edit link to open the product editing interface.
- Scroll down to the product data section and look for the export option—this is usually found in the settings or tools area depending on your theme.
- Select Export or Download as CSV.
Additionally, you can customize what gets exported by:
- Choosing specific product fields (like SKU, price, etc.).
- Filtering products by category or tags.
Once you complete these steps, your CSV file will be downloaded. You can now open it in any spreadsheet software to view and manipulate your product data as needed. This method is quick, efficient, and allows for easy data handling! Plus, you can easily share this file with others or import it into other platforms if necessary.
7. Importing the Exported Product Data
After you’ve successfully exported your product data from WooCommerce, the next step is to import that data back into your site, either to another store or for any necessary updates. You’ll want to follow a structured approach to ensure a smooth import process. Here’s a straightforward guide to help you with this task:
- Prepare the Exported File: Ensure that the file you exported is in the correct format, typically a CSV. Open it briefly to verify that all required columns are present, and double-check for any issues with the data.
- Access the Import Tool: Log into your WooCommerce dashboard. Navigate to Products on the sidebar and click on Import. This will take you to the product import screen.
- Upload the File: Click the Choose File button, find your exported CSV file, and select it. After that, hit Continue to move to the next step.
- Map the Columns: WooCommerce will try to automatically map your CSV columns to the appropriate product fields. Review the mappings carefully. You might need to adjust the mappings to ensure everything aligns properly. This step is crucial; misaligned columns can lead to data errors.
- Log in to your WordPress dashboard and navigate to WooCommerce.
- Go to the “Products” section and locate the individual product you wish to export.
- Use the built-in “Export” option if available or employ a plugin that supports individual product exports.
- Choose the product data fields you want to export, such as price, SKU, stock status, and attributes.
- Export the data in your preferred format, typically CSV or XML.
Conclusion
Exporting an individual product in WooCommerce is a straightforward process that can be incredibly beneficial for managing your eCommerce store effectively. With the right steps, you can easily extract product data for various purposes such as inventory management, listing on different platforms, or performing bulk data edits. By following the methods detailed in this blog post, you can ensure that you retrieve the specific product information you need with minimal hassle.
To summarize the steps for exporting an individual product in WooCommerce:
Be mindful of the following points:
- Data Integrity: Always double-check the data fields selected for export to ensure accuracy.
- Backup: Consider backing up your products and store data before making extensive changes.
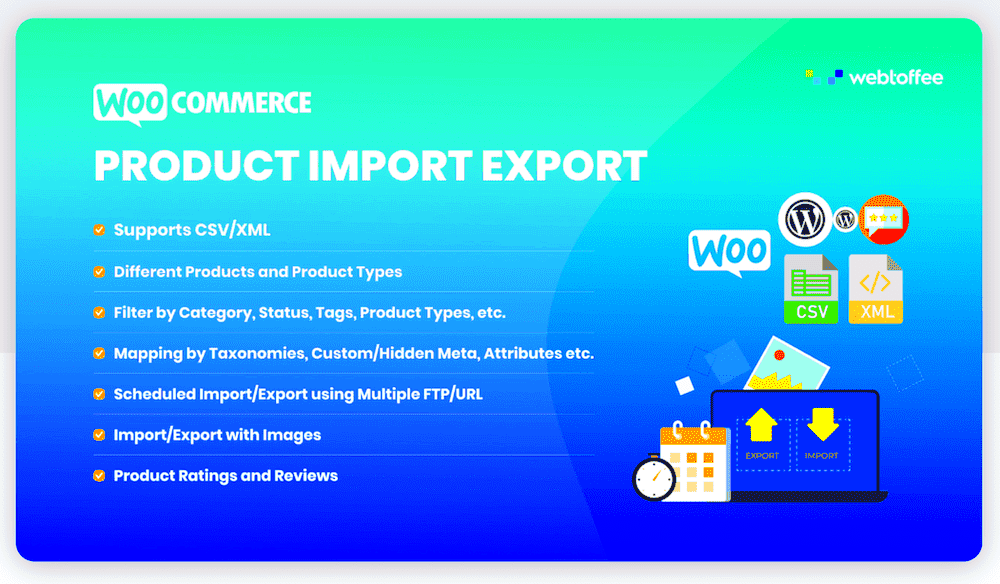
- Plugins: Utilize WooCommerce-compatible plugins like “Product Import Export for WooCommerce” for added features and flexibility.
By following these guidelines, you will not only facilitate a smoother export process but also empower your eCommerce operations.


