Custom Post Types (CPTs) in WordPress are essential tools that let you tailor your site to fit specific content needs. Whether you’re showcasing a portfolio, managing events, or creating a store, custom post types give you the flexibility to organize your content effectively. Unlike standard posts and pages, CPTs allow for unique features and functionalities, making them ideal for developers and users who need more than what the default WordPress structure offers.
Understanding Parent Attachments in WordPress

Before diving deep into implementing parent attachments, it’s crucial to grasp what they are. In WordPress, parent-child relationships between custom post types allow for structured content organization. Simply put, a parent post acts as a container for its child posts. Here’s why this matters:
- Improved Navigation: Users can seamlessly navigate related content.
- Content Hierarchy: Parents can help define relationships between different types of content.
- Enhanced SEO: Properly structured content can boost your site’s visibility on search engines.
To effectively manage parent attachments for your custom post types, you need to consider a few key aspects:
| Aspect | Importance |
|---|---|
| Registration of Custom Post Types: | Every custom post type needs to be registered properly to utilize the parent-child relationship. |
| Post Relationships: | Define how your custom post type relates to other types, including its hierarchy. |
| User Interface: | A clear interface helps users understand the parent-child dynamics when creating content. |
By understanding these components, you can ensure your custom post types leverage the power of parent attachments, leading to a better-organized and user-friendly WordPress site.
Setting Up Your Custom Post Type
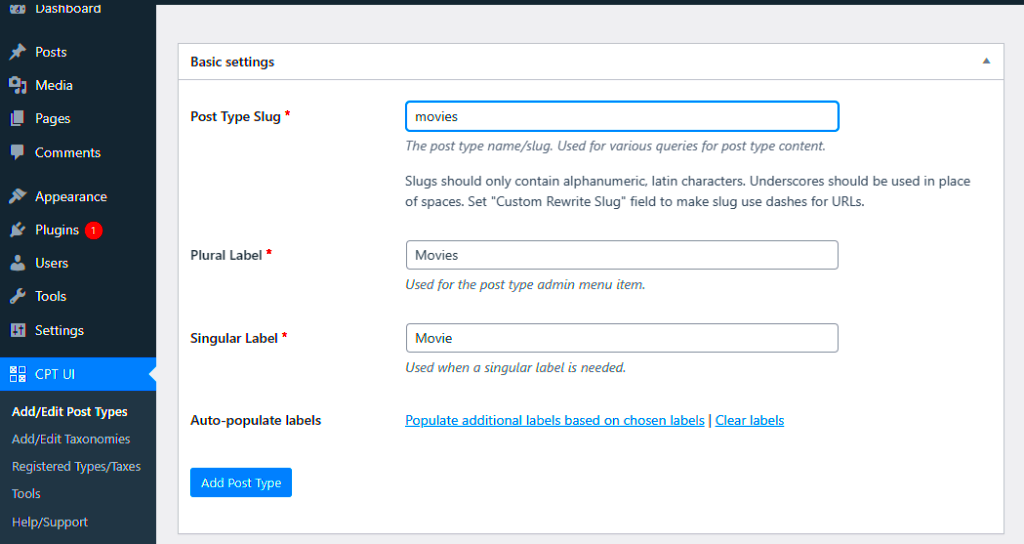
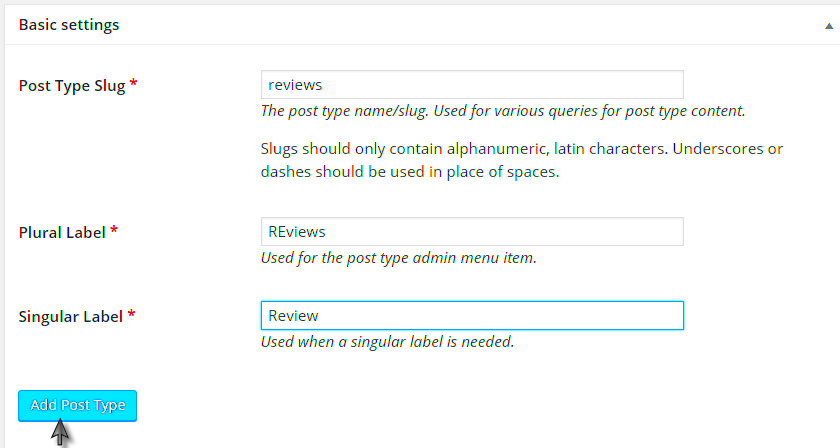
Creating a custom post type (CPT) in WordPress is a fantastic way to tailor your website content to fit your unique needs. It allows you to manage content that is different from the standard posts and pages. So, how do you set one up? Buckle up, it’s easier than you think!
To start, you need to register your custom post type using the register_post_type function. This can be done in your theme’s functions.php file or via a custom plugin. Here’s a general way to do it:
function my_custom_post_type() { register_post_type('my_cpt', array( 'labels' => array( 'name' => __('My Custom Posts'), 'singular_name' => __('My Custom Post') ), 'public' => true, 'has_archive' => true, 'supports' => array('title', 'editor', 'thumbnail', 'page-attributes'), ) );}add_action('init', 'my_custom_post_type');In this code:
- register_post_type: The function used to define your CPT.
- ‘public’: Determines whether the post type is visible on the front end.
- ‘supports’: Specifies the features you want (like title, thumbnails, etc.).
Once you’ve set this up, you can access your custom post type directly from the WordPress Admin Dashboard. Just like that, you’ve created a new area for organizing unique content!
Creating Parent-Child Relationships
Now that you’ve got your custom post type set up, the next step is establishing parent-child relationships. This is particularly essential if your content needs to be organized hierarchically. Think of it like a family tree, where some posts are parents and others are their children.
In WordPress, this is done through the page-attributes support you enabled during the CPT setup. Here’s how to create those relationships:
- Go to your custom post type in the Admin Dashboard.
- Create a new post or edit an existing one.
- On the right-hand side, you’ll see a “Parent” dropdown menu. This is where you can select which post will be the parent.
- Choose the parent post you want, and don’t forget to publish or update the post!
Now, when you view your custom post type, you’ll see a neat hierarchy! This organization helps with navigation and clarity—especially useful if you’re dealing with multiple related posts.
To visualize this better, here’s a simple table:
| Post Type | Parent | Child |
|---|---|---|
| Article 1 | — | Sub Article 1 |
| Article 2 | — | Sub Article 2 |
| Article 1 | — | Sub Article 3 |
With this setup, you can easily create depths of content that enhance user experience and SEO. It’s all about giving your users a clearer path through your offerings!
Using WordPress Functions for Attachment Management
When working with custom post types in WordPress, managing attachments effectively is crucial for maintaining a clean and organized site structure. Thankfully, WordPress provides several built-in functions that allow you to handle attachments like a pro. Let’s dive into some of the key functions and how you can use them.
- get_attached_media(): This handy function retrieves all media attachments associated with a particular post. This way, you can easily fetch the images, videos, or documents linked to your custom post type. A simple call like
get_attached_media('image', $post_id)will fetch only image attachments. - wp_get_attachment_url(): If you already have the ID of an attachment, you can use this function to get the direct URL to that media file. For example, if you’re displaying an attachment in your custom template, you might use
echo wp_get_attachment_url($attachment_id);. - wp_get_attachment_metadata(): This function helps you get detailed metadata about a specific attachment. Are you curious about the dimensions of an image or other properties? Just pass the attachment ID, and voilà!
- update_post_meta(): You can always attach information to your attachments by using this function. If you want to add a custom field to an attachment, you can do so easily with
update_post_meta($attachment_id, 'custom_field', 'value');. - wp_get_attachment_image(): Displaying an image involves more than just retrieving its URL. This function pulls in the necessary HTML, complete with sizes and classes, making your life a lot easier.
By leveraging these fundamental WordPress functions for attachment management, you’ll not only streamline your workflow but also enhance user experience on your site. So be sure to give them a try!
Displaying Parent Attachments in Your Custom Post Type
Now that you’ve got the tools at your disposal for managing attachments, let’s tackle how to display parent attachments for your custom post type effectively. This is crucial because it helps users see a hierarchy of related content, making navigation more intuitive.
To begin, you would typically want to set up a query to fetch the parent post, followed by its associated attachments. Here’s a simplified approach to get you started:
$parent_id = get_post_field('post_parent', $post_id);$attachments = get_attached_media('image', $parent_id);foreach($attachments as $attachment) { echo wp_get_attachment_image($attachment->ID, 'thumbnail');}In this snippet, we first retrieve the parent ID of the current post using get_post_field(). Next, we call get_attached_media() to get all media attachments associated with that parent post. The foreach loop then displays each attachment using wp_get_attachment_image(), which is perfect for rendering images correctly.
To make this even more user-friendly, you might want to display additional information about each attachment, such as titles or captions. This can be done in the loop as well:
foreach($attachments as $attachment) { $img = wp_get_attachment_image($attachment->ID, 'thumbnail'); $title = get_the_title($attachment->ID); echo <div>{$img} <p>{$title}</p></div>;}Don’t forget to style the output to match your theme’s aesthetics. With a few CSS tweaks, you can make those parent attachments pop.
By following these steps, not only do you ensure that the parent-child relationship between your content is clear, but you also enhance the overall user experience on your site!
Common Issues and Troubleshooting
When working with custom post types in WordPress, you might run into a few bumps along the way. Knowing common issues can save you a lot of time and frustration. Here are some of the most frequent problems users encounter, along with practical solutions.
- Missing Parent Attachments: Sometimes, you might find that the parent-child relationship you created isn’t displaying as expected. Double-check the settings in your custom post type registration. Ensure you have the
hierarchicalparameter set totrue. - Permalink Issues: Changes in custom post types can lead to 404 errors on links. If this happens, go to your admin dashboard and navigate to Settings → Permalinks. Simply hitting the Save Changes button can often resolve the issue.
- Meta Box Confusion: If you’ve created custom meta boxes that rely on parent-child relationships, they might not show up correctly. Ensure that you’re targeting the correct post type and implementing the proper hooks.
- Querying Issues: When querying your custom post types, you might face difficulties retrieving the correct data. Use the
post_parentparameter in yourWP_Queryto ensure you’re fetching posts that are related to a specific parent. - Theme Compatibility: Your theme might not be properly set up to handle custom post types. Check if your theme supports custom templates for your post types. If not, you may need to add template files manually.
Understanding these common pitfalls can make your life a whole lot easier. If you encounter a problem, don’t hesitate to consult the WordPress forums or the extensive documentation available online; you’re likely not the first to face that issue!
Conclusion and Best Practices
As you venture into setting up custom post types with parent attachments in WordPress, it’s essential to remember a few best practices that can enhance both the performance and usability of your site. Here’s a quick rundown of what to keep in mind:
- Plan Your Structure: Before you dive into the nitty-gritty of coding, ensure you have a clear plan for how your post types should relate to each other. Create a visual map if necessary!
- Use Consistent Naming Conventions: When registering post types and taxonomy terms, sticking to a consistent naming system can prevent confusion later on.
- Regularly Update and Maintain: WordPress is constantly evolving, so it pays to keep your themes, plugins, and core updated to avoid potential compatibility issues.
- Test, Test, Test: After setting everything up, put it through thorough testing. Create a few parent and child posts to ensure everything behaves as expected.
- Documentation Matters: Make sure you document your code and decisions. A well-documented site is much easier to maintain and troubleshoot later.
In conclusion, ensuring your custom post types have parent attachments doesn’t have to be a daunting task. By following best practices and staying aware of common issues, you can create a robust and user-friendly experience for visitors to your site. Happy coding!


