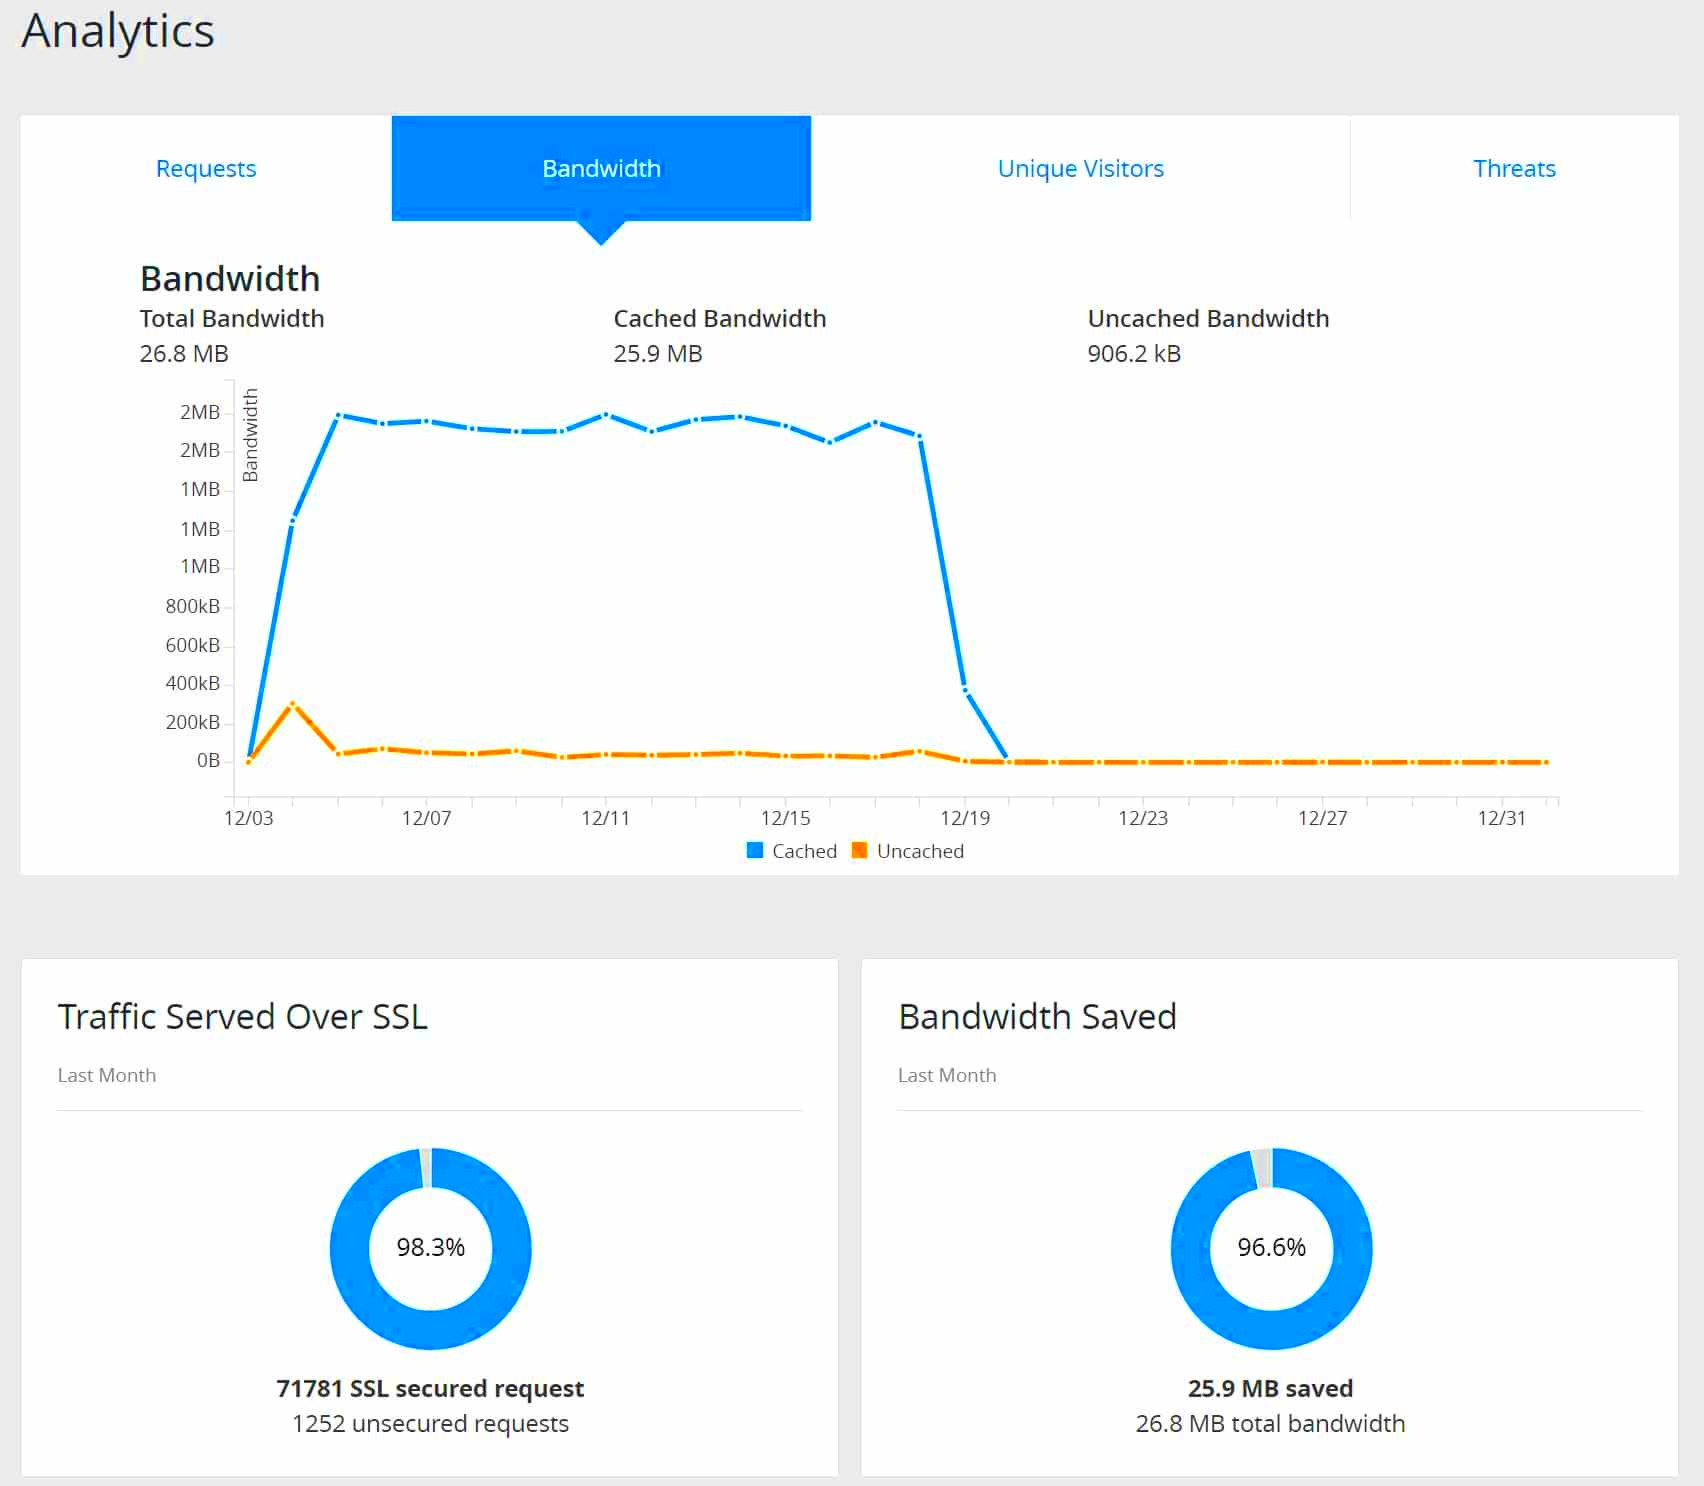
Cloudflare Analytics provides valuable insights into your website’s performance, security, and traffic. By integrating this tool into your WordPress website, you can track key metrics like visitor data, page load times, and security threats in real time. It helps you make data-driven decisions to enhance the user experience and improve website performance. With Cloudflare’s easy-to-understand dashboard, you can quickly interpret complex data and gain valuable insights to optimize your site’s efficiency.
Why Cloudflare Analytics is Important for WordPress Websites

Cloudflare Analytics plays a crucial role in improving the performance and security of your WordPress website. Here’s why it’s important:
- Real-Time Data: It offers live traffic and performance data, so you can monitor your website’s health instantly.
- Improved Performance: By analyzing metrics such as load times and cache hit rates, you can identify areas for optimization.
- Enhanced Security: Cloudflare helps protect your website from cyber threats by blocking malicious traffic, DDoS attacks, and other vulnerabilities.
- Reduced Downtime: With Cloudflare’s global CDN and security features, your site’s uptime is improved, even during peak traffic times.
- Easy Integration: Integrating Cloudflare with WordPress is straightforward, allowing you to start monitoring and optimizing your website with minimal effort.
Cloudflare Analytics helps you understand your website’s strengths and weaknesses. By leveraging these insights, you can take proactive measures to ensure smooth website operation, enhance security, and provide a better user experience.
Steps to Embed Cloudflare Analytics in WordPress

Embedding Cloudflare Analytics into your WordPress website is a simple process. Here’s a step-by-step guide:
- Sign Up for Cloudflare: If you haven’t already, create a Cloudflare account at Cloudflare.com and add your website to the platform.
- Configure Cloudflare Settings: Once your site is added, follow the instructions to configure Cloudflare’s settings, such as enabling the CDN and security features for your site.
- Install Cloudflare Plugin for WordPress: In your WordPress dashboard, go to Plugins > Add New, search for “Cloudflare,” and install the official Cloudflare plugin.
- Activate and Connect Your Account: After installation, activate the plugin and log into your Cloudflare account to link it with your WordPress site.
- Enable Analytics: In the Cloudflare plugin settings within your WordPress dashboard, ensure the analytics option is enabled. This will allow you to view traffic and performance data directly from your WordPress site.
- Review Analytics Data: Once integrated, you can access Cloudflare Analytics data through the Cloudflare dashboard, where you can monitor traffic trends, security alerts, and performance metrics.
With these simple steps, you’ll be able to embed Cloudflare Analytics into your WordPress website and start benefiting from real-time data and performance insights.
Using Cloudflare Analytics for Site Performance Insights
Cloudflare Analytics is an excellent tool for understanding your website’s performance. With its detailed reports and real-time data, you can identify potential issues that may affect your visitors’ experience. Here’s how you can use Cloudflare Analytics to monitor and improve your site’s performance:
- Track Traffic: Cloudflare shows the number of visitors to your site, including details on their geographic locations, devices, and browsers. This helps you understand who’s visiting and how they’re interacting with your site.
- Page Load Times: You can monitor how fast your pages are loading globally and identify areas that might need optimization, such as slow-loading images or heavy scripts.
- Cache Performance: Cloudflare’s caching system helps speed up your site by storing static content in multiple data centers. Analytics shows you how often content is being served from the cache, reducing server load.
- Identify Bottlenecks: Performance bottlenecks are often linked to server issues, large files, or inefficient code. Cloudflare Analytics helps you identify and address these problems to keep your site running smoothly.
- Resource Usage: Track which resources (CSS, JS, images) are consuming the most bandwidth and make adjustments to optimize them for a better user experience.
By using Cloudflare Analytics, you can spot trends, understand visitor behavior, and make the necessary improvements to enhance your site’s speed, security, and overall performance.
Integrating Cloudflare Analytics with WordPress Plugins
Integrating Cloudflare Analytics with WordPress plugins takes your site optimization to the next level. The Cloudflare plugin for WordPress simplifies this integration and makes it easier to access analytics data right from your
- Install Cloudflare Plugin: First, install the official Cloudflare plugin from the WordPress plugin repository. This plugin connects your site with Cloudflare and gives you access to analytics data within WordPress.
- Enable Analytics Features: Once the plugin is activated, navigate to the plugin settings and enable analytics options. This allows you to view Cloudflare data without leaving your WordPress dashboard.
- Combine with Caching Plugins: For optimal performance, integrate Cloudflare with caching plugins like WP Super Cache or W3 Total Cache. This helps ensure that cached content is served efficiently, improving both load times and server performance.
- Monitor Traffic and Security: With the integration, you can track not just performance, but also security-related insights, such as blocked threats and malicious traffic. This can be especially useful if you’re using security plugins like Wordfence or Sucuri Security alongside Cloudflare.
- Leverage Analytics for Optimization: Many WordPress optimization plugins, such as Autoptimize or WP Rocket, can work alongside Cloudflare’s analytics to improve site performance. By analyzing the insights, you can fine-tune caching rules, reduce file sizes, and optimize resource loading.
Integrating Cloudflare Analytics with WordPress plugins simplifies performance monitoring and optimization, helping you improve your site’s speed and security directly from the WordPress dashboard.
Common Challenges and Solutions for Embedding Cloudflare Analytics
While embedding Cloudflare Analytics into your WordPress website is relatively easy, there are some common challenges you may encounter. Here are a few problems and their solutions:
- Challenge: Cloudflare Data Not Displaying
Solution: Ensure that the Cloudflare plugin is properly installed and connected to your Cloudflare account. Sometimes, a simple plugin reactivation or clearing your browser cache can resolve this issue. - Challenge: Incorrect Analytics Data
Solution: If the data appears inaccurate, check your Cloudflare settings. Ensure your DNS is set up correctly, and that Cloudflare’s CDN is active. Sometimes, issues with caching or misconfigured firewall rules can affect the accuracy of the data. - Challenge: Plugin Conflicts
Solution: Cloudflare Analytics might not work well with certain plugins. To resolve this, deactivate plugins one at a time to find the one causing the conflict. Once identified, check for updates or seek alternatives if necessary. - Challenge: Difficulty Understanding Data
Solution: If you’re not familiar with analytics terminology, take time to explore Cloudflare’s documentation or tutorials. You can also use a plugin like Google Analytics Dashboard for WP to view more familiar metrics alongside Cloudflare data. - Challenge: Slow Performance Despite Integration
Solution: Check for issues unrelated to Cloudflare, such as inefficient WordPress themes or plugins, and large images. Use optimization tools to compress images and minimize unnecessary scripts. Cloudflare’s caching system should be able to handle most performance issues if configured correctly.
By understanding these common challenges and solutions, you can quickly resolve issues and ensure that Cloudflare Analytics works seamlessly with your WordPress website.
Best Practices for Monitoring Website Performance
Monitoring website performance is crucial to ensure your WordPress site runs smoothly and provides a seamless user experience. Here are some best practices to follow for effective performance monitoring:
- Regularly Track Key Metrics: Use tools like Cloudflare Analytics, Google Analytics, or GTmetrix to monitor essential performance indicators such as page load times, bounce rates, and traffic sources. Regular tracking helps you stay ahead of any performance issues.
- Set Performance Benchmarks: Establish baseline performance benchmarks for your site. Knowing your typical page load times, bounce rates, and traffic can help you detect any unusual changes or dips in performance.
- Optimize Content Delivery: Use a Content Delivery Network (CDN) like Cloudflare to ensure your content loads quickly from the closest server to your user. This minimizes latency and boosts performance.
- Regularly Update Your Website: Keeping your WordPress themes, plugins, and the core system updated ensures you have the latest performance optimizations and security patches. Outdated software can cause slowdowns and vulnerabilities.
- Perform Regular Speed Tests: Use speed testing tools like Pingdom, Google PageSpeed Insights, or GTmetrix to perform regular speed tests. These tools give you valuable insights into how your site is performing globally and offer recommendations for improvement.
- Monitor User Behavior: Analyzing user behavior through heatmaps and session recordings can reveal performance bottlenecks, such as slow-loading elements or broken links that frustrate visitors.
By following these best practices, you can maintain an optimized, high-performing website that provides the best experience for your visitors.
FAQ
Here are some frequently asked questions about embedding Cloudflare Analytics in WordPress and monitoring website performance:
- How do I start using Cloudflare Analytics?
Sign up for a Cloudflare account, configure your website settings, and install the official Cloudflare plugin on WordPress to access your analytics data. - Can Cloudflare Analytics replace Google Analytics?
No, Cloudflare Analytics provides insights into website traffic and performance but does not offer the same depth of user behavior data that Google Analytics does. It’s best to use both together for a complete picture. - Is Cloudflare Analytics free?
Yes, Cloudflare offers free analytics for websites using its free plan. However, premium features such as advanced security insights are available with Cloudflare’s paid plans. - How often should I check my website’s performance?
Ideally, you should check your site’s performance weekly or after any major updates. This ensures you catch any issues before they affect your visitors. - Can Cloudflare Analytics help with website security?
Yes, Cloudflare Analytics also provides security-related data, such as blocked threats and suspicious activity, helping you monitor and protect your site from cyber-attacks.
Conclusion
Integrating Cloudflare Analytics with your WordPress website is a powerful way to monitor and improve your site’s performance, security, and user experience. By regularly analyzing key metrics, optimizing your site based on insights, and following best practices, you can ensure your site runs efficiently and remains secure. Whether you’re a beginner or an experienced website owner, Cloudflare’s easy-to-use analytics dashboard can provide valuable data to help you make informed decisions. Combine it with other performance monitoring tools to gain a comprehensive view of your site’s health and continue providing a smooth, fast experience for your visitors.


