Sharing eye-catching images on social media is a fantastic way to engage your audience, but sometimes the original Shutterstock photos need a little personal touch. Whether you want to add your branding, adjust colors, or crop images to fit your platform, editing is key. In this guide, we’ll walk through how to effectively edit Shutterstock images for social media, making sure your visuals stand out while respecting licensing rules. No matter your skill level, you’ll learn simple tips to enhance your images and ensure they look polished and professional across all your channels.
Understanding Licensing and Usage Rights for Shutterstock Images
Before diving into editing Shutterstock images, it’s crucial to understand the licensing options and usage rights. Shutterstock offers different licenses, primarily Standard and Enhanced, each with its own rules about how you can use the images.
Standard License typically covers most social media uses, such as posts, stories, and banners, but there are some limitations:
- No use in products for resale or redistribution
- Cannot be used in printed items over 500,000 copies
- Cannot be used in promotional materials that imply endorsement
Enhanced License is more flexible and suitable if you plan to use images in merchandise, large-scale prints, or promotional campaigns. It allows for:
- Unlimited reproduction for resale
- Use in products for sale or distribution
- Greater licensing rights for commercial projects
It’s important to always check the license associated with each image before editing and posting. If you plan to make significant modifications or use images in commercial contexts, ensure your license covers those uses. Violating licensing terms can lead to legal issues, so when in doubt, opt for the more comprehensive license or seek permission directly from Shutterstock or the original contributor.
Remember, respecting licensing rights not only keeps you compliant but also supports creators who produce these fantastic images. When editing Shutterstock images, always keep licensing restrictions in mind to avoid any unintended misuse.
Choosing the Right Editing Tools and Software
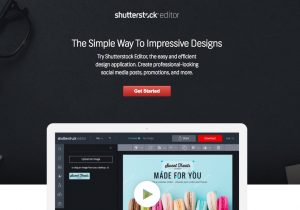
When it comes to editing Shutterstock images for social media, selecting the right tools can make all the difference. You want software that’s user-friendly, versatile, and capable of helping you bring out the best in your images without overwhelming you with complicated features. Luckily, there are plenty of options tailored for different needs and skill levels.
For beginners or those looking for quick edits, free tools like Canva and Pixlr are fantastic. They offer intuitive interfaces, pre-made templates, and a variety of filters and effects that can elevate your images in just a few clicks. Plus, many of these platforms are web-based, so no downloads are required.
If you want more control and advanced features, desktop software like Adobe Photoshop or GIMP might be the way to go. Photoshop is a powerhouse for detailed editing, retouching, and creating custom graphics. GIMP offers a free alternative with many similar capabilities, perfect for those who want professional results without the price tag.
Mobile editing apps are also worth considering, especially if you’re managing social media on the go. Adobe Lightroom Mobile and Snapseed provide powerful editing tools optimized for smartphones, letting you tweak brightness, contrast, colors, and more with ease.
Here’s a quick comparison to help you decide:
| Tool | Best For | Cost | Platform |
|---|---|---|---|
| Canva | Quick edits, social media templates | Free & Paid options | |
| Pixlr | Easy online editing | Free & Paid options | |
| Adobe Photoshop | Detailed, professional editing | Subscription-based | |
| GIMP | Free professional editing | Free | |
| Lightroom Mobile | Mobile photo editing | Free & Paid options | |
| Snapseed | Mobile quick edits | Free |
Remember, the best tool is the one you feel comfortable using and that fits your editing style and goals. Don’t be afraid to experiment with a few options to see what works best for you!
Steps to Edit Shutterstock Images for Optimal Social Media Engagement
Now that you have your tools picked out, let’s walk through a simple, effective process to edit Shutterstock images so they stand out on social media and boost engagement. The goal is to make your images eye-catching, on-brand, and optimized for each platform’s specifications.
Step 1: Choose the Right Image
Start by selecting a high-quality Shutterstock image that resonates with your audience. Look for images with clear focal points, vibrant colors, and enough space for text or overlays if needed. Remember, relevance is key—your image should complement your message or campaign.
Step 2: Crop and Resize
Each social media platform has preferred image dimensions—for example, Instagram posts are typically 1080×1080 pixels, while Facebook cover photos are 820×312 pixels. Use your editing software to crop and resize your image accordingly, ensuring it looks crisp and professional without awkward cropping or pixelation.
Step 3: Adjust Brightness, Contrast, and Colors
Enhance the visual appeal by tweaking the brightness and contrast to make your image pop. Adjust colors to match your brand palette or to evoke the desired mood. Don’t overdo it—aim for a natural look that attracts attention without appearing overly edited.
Step 4: Apply Filters and Effects
Subtle filters can unify your aesthetic and add a professional touch. For example, a slight vignette can draw focus to the center, or a warm filter can create a cozy, inviting vibe. Keep effects consistent across your posts for brand cohesion.
Step 5: Add Text or Overlays
If your social media post includes a call-to-action or message, overlay text thoughtfully. Use contrasting colors and legible fonts, and position text where it doesn’t obscure key parts of the image. Many editing tools offer pre-made text templates to streamline this step.
Step 6: Final Touches and Export
Review your edits—zoom in to check details and ensure nothing looks out of place. Adjust if necessary, then export your image in the appropriate format (JPEG or PNG) with optimal resolution. Save a copy of your original, unedited image for future edits or repurposing.
By following these steps, you’ll create visually appealing images that grab attention and encourage engagement. Remember, consistency is key—develop a recognizable style that aligns with your brand and appeals to your followers. Happy editing!
Tips for Enhancing Image Quality and Visual Appeal
When it comes to making your Shutterstock images stand out on social media, enhancing their quality and visual appeal is key. You want your images to catch the eye, communicate your message clearly, and look professional. Here are some practical tips to help you elevate your images:
Adjust Brightness and Contrast
Sometimes, an image just needs a little tweaking to look its best. Adjusting brightness can make your image more vibrant, while tweaking contrast helps define elements and add depth. Use photo editing tools to subtly enhance these settings — avoid overdoing it, as too much adjustment can make images look unnatural.
Sharpen Details
Sharpening helps bring out fine details, especially if your original image is a bit soft. Be cautious—over-sharpening can introduce noise or halos, which distract viewers. A good rule of thumb is to apply sharpening sparingly and compare results before and after.
Remove Distractions and Imperfections
Invisible clutter or small blemishes can detract from your main message. Use tools like spot healing or cloning to eliminate unwanted elements, ensuring your focus remains on the subject. Clean, polished images tend to perform better on social media.
Enhance Colors
Vibrant colors can boost engagement, but they should still look natural. Play with saturation and vibrance sliders to make colors pop without oversaturating. Consider applying filters or adjustments that complement the mood you want to convey.
Use Filters and Effects Wisely
Filters can quickly give your image a distinctive look, but moderation is key. Choose filters that enhance your image without overpowering it. Subtle effects often work best, especially if your goal is to maintain professionalism while adding a creative touch.
Consider Image Composition
Crop and straighten your image if necessary. A well-composed image with balanced elements naturally draws viewers’ eyes. Use the rule of thirds or grid overlays to position key subjects for maximum impact.
Utilize Advanced Editing Tools
If you’re comfortable with more sophisticated editing, tools like Adobe Photoshop or Lightroom offer powerful features to fine-tune your images. These can include selective adjustments, masking, and retouching to make your images truly shine.
Remember, the goal is to make your images more engaging and professional without losing their authenticity. Experiment, compare, and trust your eye — with a little practice, your social media visuals will look amazing!
Best Practices for Resizing and Formatting Images for Different Platforms
Each social media platform has its own preferred image sizes and formats, and using the right specifications can make a big difference in how your content appears. Proper resizing and formatting ensure your images look crisp, professional, and optimized for each platform’s audience. Here’s a handy guide to help you get it right:
Understand Platform-Specific Dimensions
| Platform | Recommended Image Size | Aspect Ratio |
|---|---|---|
| 1200 x 628 pixels (shared images) | 1.91:1 | |
| 1080 x 1080 pixels (square), 1080 x 1350 pixels (portrait), 1080 x 566 pixels (landscape) | 1:1 (square), 4:5 (portrait), 1.91:1 (landscape) | |
| 1024 x 512 pixels (shared images) | 2:1 | |
| 1200 x 627 pixels (shared images) | 1.91:1 | |
| 1000 x 1500 pixels (vertical pins) | 2:3 |
Choose the Right File Format
For most social media images, JPEG and PNG are the top contenders:
- JPEG: Best for photographs and images with gradients. Offers good compression, which helps keep file sizes manageable without losing quality.
- PNG: Ideal for images with transparency, logos, or graphics with text. Maintains sharpness and clarity.
Optimize File Size
Large files can slow down loading times and impact user experience. Use your editing software to export images at optimal quality—usually around 70-80% quality for JPEGs—without sacrificing visual appeal. Resize images to the platform’s recommended dimensions before uploading.
Maintain Aspect Ratios
Always keep the aspect ratio consistent with platform guidelines to avoid awkward cropping or stretching. Most editing tools allow you to lock aspect ratios during resizing to ensure your image maintains its proportions.
Consider Cropping and Composition
Crop your images thoughtfully to highlight the main subject and ensure important elements aren’t cut off. Use grid overlays to align your composition according to the rule of thirds or other design principles.
Test Before Posting
Always preview your images on the platform if possible. Check how they look on different devices — mobile, tablet, desktop — to ensure they display beautifully across the board.
By paying attention to these resizing and formatting best practices, you’ll make sure your images look crisp, professional, and engaging — no matter where you share them. A little extra effort goes a long way in boosting your social media presence!
Adding Text, Logos, and Branding Elements to Your Images
When it comes to making your Shutterstock images stand out on social media, adding your own touch can make a huge difference. Whether you want to include a catchy quote, your logo, or some branding elements, doing it right ensures your content remains professional and engaging.
First, think about the purpose of your image. Are you trying to promote a product, build brand awareness, or just share something inspiring? Your added elements should align with that goal.
Here’s a quick checklist to help you enhance your images:
- Choose the right font: Use clear, easy-to-read fonts that match your brand style. Avoid overly decorative fonts that might be hard to read on smaller screens.
- Keep text minimal: Social media users tend to scroll quickly. Use short, punchy messages or hashtags to catch their attention.
- Position your text strategically: Place your text where it won’t obscure important parts of the image. Usually, the top or bottom corners work well.
- Add logos tastefully: Logos should be visible but not overpowering. Consider placing them in a corner with some transparency or padding.
- Use branding colors: Incorporate your brand colors for consistency. If your brand palette includes specific shades, use those for text and logos.
Popular tools like Canva, Adobe Spark, or even simple apps like Over can make the process straightforward. These tools let you layer text and logos onto your images easily, with drag-and-drop simplicity.
Remember, less is often more. Overcrowding your image with too much text or multiple logos can look cluttered and distract from your main message. The key is to strike a balance—highlight your branding without overwhelming the visual.
Finally, always preview your edited image on different devices to ensure the text is legible and the branding looks good across various screen sizes. A well-branded, clear image can boost your social media presence and leave a lasting impression!
Ensuring Your Edited Images Comply with Platform Guidelines
Before you hit that “post” button, it’s crucial to make sure your Shutterstock images meet the specific guidelines of each social media platform. Each platform has its own rules about image size, content restrictions, and formatting. Ignoring these can lead to your posts being rejected or less effective.
Let’s go over some common platform guidelines to keep in mind:
| Platform | Recommended Image Size | Important Guidelines |
|---|---|---|
| 1080 x 1080 pixels (square), 1080 x 1350 (portrait), 1080 x 608 (landscape) | Use high-resolution images, avoid text that gets cut off, and keep file size under 30MB. Stories require vertical images with 1080 x 1920 pixels. | |
| 1200 x 630 pixels for shared images | Maintain aspect ratios, avoid overly text-heavy images (Facebook recommends less than 20%), and use JPG or PNG formats. | |
| 1024 x 512 pixels | Ensure images are clear and not overly busy. Keep important info within the central 600 pixels to avoid cropping. | |
| 1000 x 1500 pixels | Vertical images perform better, so optimize accordingly. Use high-quality images to attract pin clicks. |
Besides size and format, be aware of content restrictions. For example, avoid using copyrighted logos or images without proper rights, even if you’ve edited them. While Shutterstock provides licensed images, ensure your edits don’t infringe on other proprietary rights.
Another key point is accessibility. Use contrasting colors for text and background to ensure readability. Adding descriptive alt text (if the platform supports it) can also improve accessibility for users with visual impairments.
Lastly, keep in mind platform-specific policies about promotional content, sensitive topics, and community standards. Violating these can result in your content being removed or your account being penalized.
By paying close attention to these guidelines and optimizing your images accordingly, you’ll maximize engagement, avoid unnecessary rejections, and ensure your branding looks polished across all your social channels. It’s all about respecting each platform’s rules while showcasing your best work!
Saving and Exporting Your Edited Images for Social Media Use
Now that you’ve put in the effort to edit your Shutterstock images to perfection, it’s time to make sure they look great when you share them on social media. Saving and exporting your images properly is key to maintaining quality and ensuring they’re optimized for each platform. Let’s walk through the best practices so your images stand out without any hiccups.
Choose the Right File Format
- JPEG/JPG: This is the most popular format for social media images. It offers a good balance between quality and file size, making it perfect for photos and detailed images.
- PNG: Ideal for images with transparency or graphics with text and sharp lines. Use PNG if your design includes logos or overlays.
- GIF: Best for simple animations, but not recommended for static images.
Resolution and Dimensions
Each social media platform has recommended image sizes. Uploadting images that match these dimensions ensures your images look sharp and professional. For example:
| Platform | Recommended Size | Notes |
|---|---|---|
| Instagram Post | 1080 x 1080 px | Square images work well, but also consider portrait (4:5) or landscape (1.91:1) |
| Facebook Cover | 820 x 312 px | Use high-resolution images for better quality |
| Twitter Header | 1500 x 500 px | Keep important content within the safe zone |
| LinkedIn Post | 1200 x 627 px | Optimized for sharing articles and updates |
Export Settings
When exporting your image, pay attention to these settings:
- Quality: Set to 80-100% for high quality without huge file sizes.
- Color Profile: Use sRGB for web and social media to ensure colors display correctly across devices.
- Sharpening: Apply gentle sharpening if needed, especially after resizing.
Save Multiple Versions
If you plan to share your images across different platforms, consider saving multiple versions optimized for each. This way, you can upload the best-looking image without sacrificing quality or loading times.
Finally, double-check your images on your device before posting. Sometimes, what looks good on your editing screen might appear slightly different elsewhere. Preview your images in the actual platform if possible to catch any last-minute tweaks needed.
Conclusion and Final Tips for Effective Image Editing on Social Media
Congratulations! You’re now well-equipped with the knowledge to edit Shutterstock images confidently for social media. Remember, the goal is to create images that are eye-catching, on-brand, and optimized for each platform. Here are some final tips to keep in mind:
- Stay Consistent: Use a consistent style, color palette, and filters that match your brand identity. This helps build recognition and trust among your audience.
- Keep It Simple: Don’t overload your images with too much text or clutter. Clean, focused visuals tend to perform better.
- Use High-Quality Images: Always start with high-resolution Shutterstock images. No amount of editing can fix a blurry or pixelated source.
- Optimize for Speed: Save images at the right size and quality to ensure quick loading times, especially on mobile devices.
- Test and Analyze: Experiment with different edits and monitor how your audience responds. Use platform analytics to see what works best.
Remember, editing is an art as much as it is a science. Don’t be afraid to experiment with different styles, filters, and compositions until you find what resonates with your audience. With practice, your social media images will become more engaging, professional, and effective at communicating your message.
Happy editing and posting! Your visually appealing content is just a few clicks away from captivating your followers and elevating your social media game.