If you’re diving into website design, you’ve likely heard of Elementor, a powerful page builder for WordPress. One of the most essential parts of any website is its header—it’s the first thing visitors see and plays a crucial role in user navigation. Editing the header in Elementor allows you to create a unique and engaging top section that sets the tone for your entire site. In this guide, we’ll walk you through the process of customizing your header with
Accessing the Header Section in Elementor

Before you can start editing the header, you need to know how to access it. Don’t worry; it’s a straightforward process! Here’s how you can get to the header section in Elementor:
- Log in to Your WordPress Dashboard: Start by logging into your WordPress website. This is where the magic begins.
- Navigate to Appearance: On the left sidebar, find the ‘Appearance’ tab and click on it. This will open a submenu.
- Select Elementor Header: If you’re using a theme that supports Elementor, you might see an option labeled ‘Elementor Header’ or similar. Click on it!
- Edit with Elementor: Once you’re on the header editing page, simply click on the ‘Edit with Elementor’ button. This will open the Elementor interface where you can start customizing.
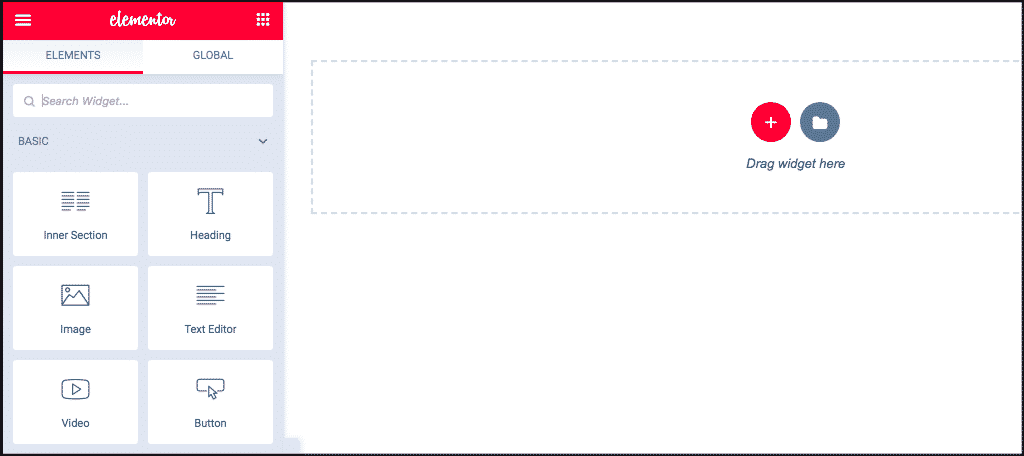
Once you’re in the Elementor editing environment, you’ll be able to see the header section on the left side. From here, you can add new elements, adjust existing ones, and make your header truly reflective of your brand. Ready to dive deeper? Let’s explore what you can customize!
Understanding Header Elements and Widgets
When you’re diving into the world of Elementor, one of the first things you’ll notice is its flexibility in design, particularly when it comes to headers. So, let’s break down what header elements and widgets are all about.
A header typically consists of a few essential elements that help define the website’s identity. Here’s a quick rundown of the most common header elements you might interact with:
- Logo: This is usually the first thing visitors see. It often acts as a link back to the homepage.
- Navigation Menu: This allows users to easily access different sections of your site. It’s vital for user experience!
- Search Bar: A handy feature that lets users quickly find specific content on your site.
- Call-to-Action Buttons: Such as “Get Started” or “Contact Us,” these encourage user interaction.
- Social Icons: Links to your social media profiles are often included in headers to promote social engagement.
Now, these elements are brought to life by Elementor‘s widgets. Widgets are the building blocks of your design. In Elementor, you can freely combine and customize various widgets to create a unique header. Some popular widgets for headers include:
- Site Logo: For displaying your brand’s logo.
- Nav Menu: A widget that automatically shows your site’s navigation.
- Icon List: Great for displaying navigational or social links.
- Button: Perfect for clear calls to action.
Understanding these elements and widgets will empower you to craft a header that not only looks good but enhances user experience as well. So, are you ready to dive into the next section? Let’s explore how to edit your header step by step!
Step-by-Step Guide to Edit Header
Editing your header in Elementor might seem intimidating at first, but fear not! With a little guidance, you’ll be customizing headers like a pro in no time. Here’s a straightforward step-by-step guide to help you through the process.
- Access Your WordPress Dashboard: Start by logging in to your WordPress admin panel.
- Open the Elementor Editor: Navigate to the page where your header is located and click “Edit with Elementor.”
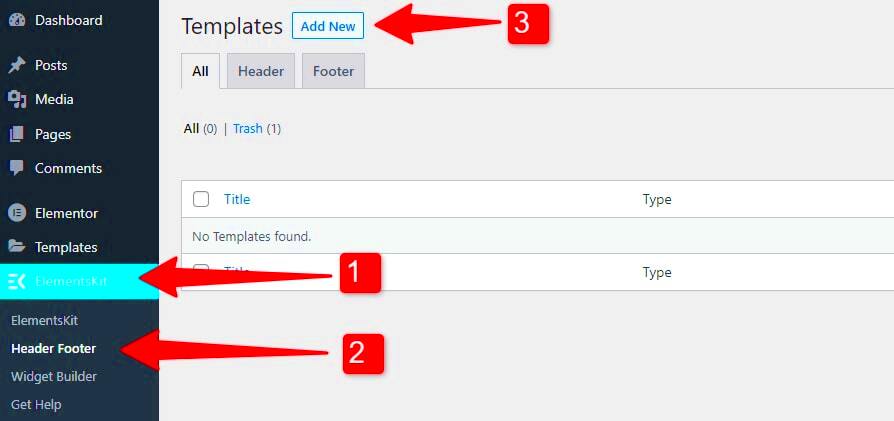
- Locate the Header Section: Scroll to the top of the page to find your existing header section. If it’s a part of your theme, you may need to go to Templates > Theme Builder to find it.
- Select the Header to Edit: Click on the header widget or section you want to edit. This will activate the settings panel on the left side of your screen.
- Modify Elements: Now, you can start customizing. Want to change the logo? Click on the site logo widget to upload a new image. Adjust the size or alignment using the panel controls.
- Edit Navigation Menus: For your nav menu, click the nav menu widget and select the menu you’d like to display. You can also customize typography and spacing here.
- Add or Change Widgets: If you want to add social icons or a search bar, drag the respective widgets from the Elementor’s sidebar into your header section. Set them up per your preference!
- Preview Your Changes: Don’t forget to hit the eye icon to preview how everything looks. Adjust as necessary.
- Save Your Work: Once you’re happy with your edits, click the green “Update” button at the bottom to save your changes.
And that’s it! By following these simple steps, you’ve just altered your header in Elementor. Remember, headers are often the first impression users get of your site, so don’t be afraid to experiment with different designs until it feels right. Happy editing!
Customizing Header Styles and Layouts
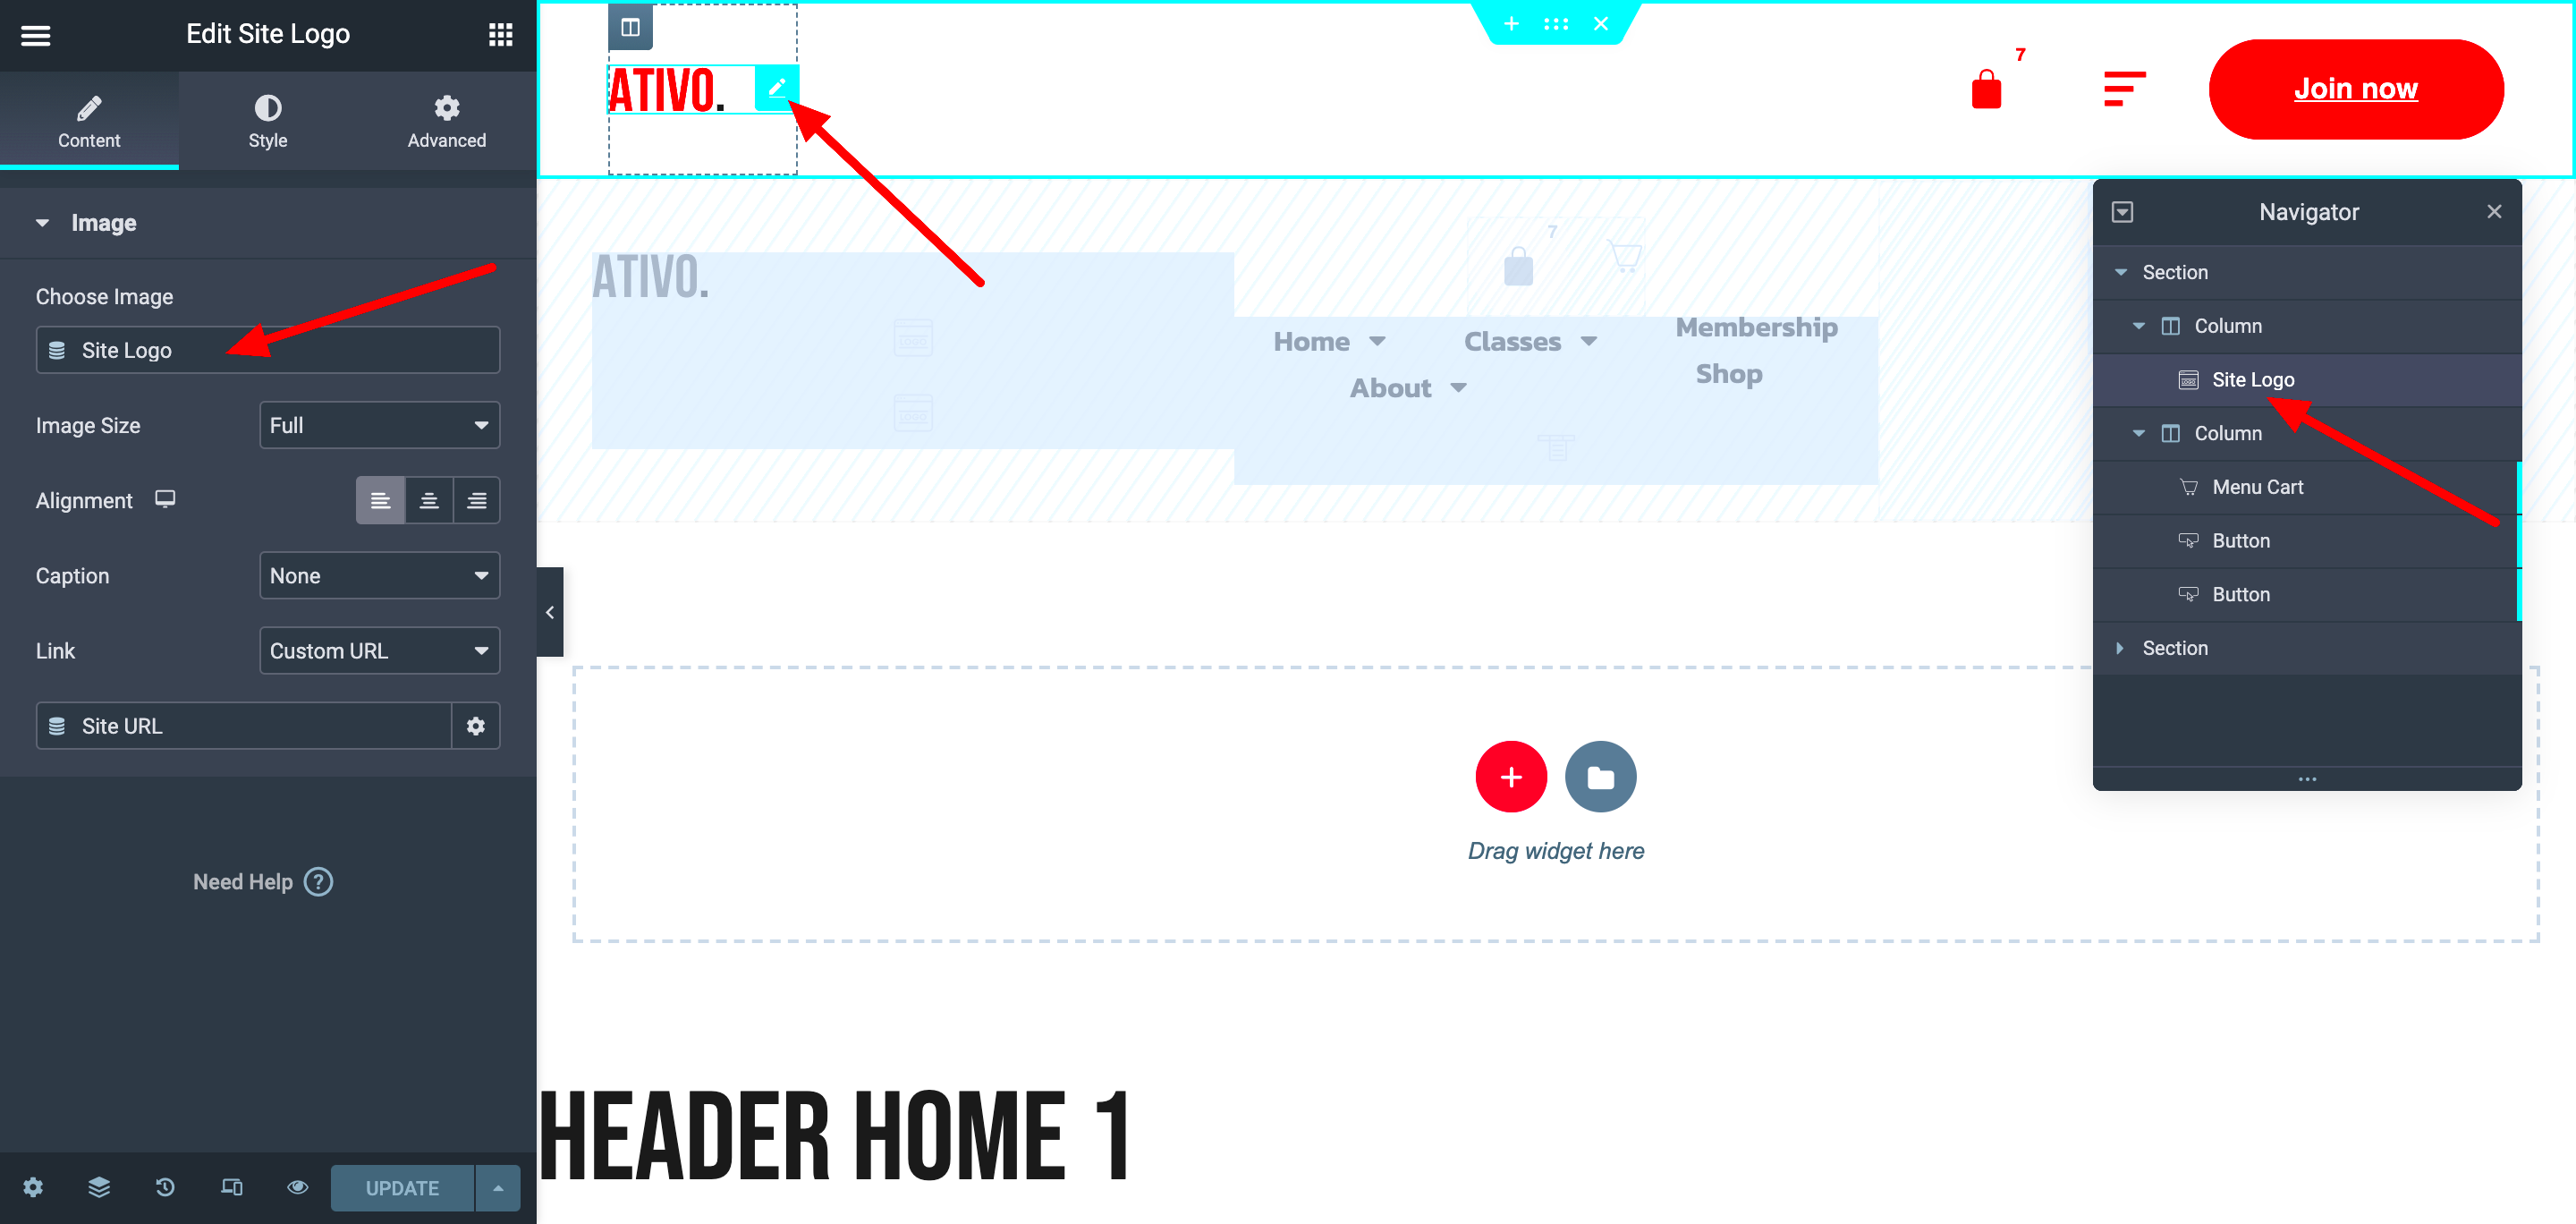
When it comes to crafting a unique online presence, your website header plays a crucial role. It’s the first thing visitors see, setting the tone for their entire experience. Elementor gives you a fantastic array of options for customizing header styles and layouts, allowing you to create something that resonates with your brand identity.
To begin customizing your header in Elementor, here are some steps you can take:
- Choose a Layout: Inside the Elementor editor, you can select from several pre-designed layouts. Whether you prefer a classic full-width layout or a boxed design, you can find something that fits.
- Edit Background: You can add background colors, images, or gradient effects to your header. Consider your brand’s color scheme to keep things cohesive.
- Typography Settings: Font choices set the mood. Elementor allows you to customize font styles, sizes, and weights. Make sure to choose fonts that reflect your brand’s character.
- Menu Customization: The header usually includes a navigation menu. Personalize this by adjusting padding, margins, and hover effects to make it more user-friendly.
- Incorporate Widgets: Don’t hesitate to add Elementor widgets like social icons, search bars, or call-to-action buttons directly into your header to enhance functionality.
Remember, your header isn’t just about aesthetics; it also needs to provide a seamless user experience. Test different styles and layouts until you find the one that best represents your brand and engages your audience.
Responsive Design Considerations for Headers
With an increasing number of users accessing websites via mobile devices, responsive design is no longer optional—it’s essential! When editing your website’s header in Elementor, it’s vital to ensure it looks great and functions well on all screen sizes.
Here’s how you can effectively address responsive design considerations for headers:
- Previewing Responsively: Elementor allows you to toggle between desktop, tablet, and mobile views easily. Utilize this feature to see how your header adjusts across different devices.
- Hide or Show Elements: Customize which elements appear on which devices. For example, you may want to hide certain graphics on mobile or switch to a simpler menu format.
- Adjust Font Sizes: Make sure text is readable on all devices. Use Elementor’s responsive settings to adjust font sizes specifically for tablets and mobile screens.
- Modify Layouts: Sometimes you might want a two-column layout on desktop but a single-column on mobile. Make these adjustments in the Elementor settings for a better user experience.
- Touch-Friendly Navigation: Ensure buttons and menu items are large enough for easy tapping on mobile devices. This minimizes user frustration and enhances overall usability.
By considering these responsive design elements, you’ll create a header that not only looks good but also performs well, ensuring your visitors have a consistent and enjoyable experience, no matter what device they’re using!
7. Saving and Publishing Your Header Changes
Once you’ve put in the time and effort to craft the perfect header for your website in Elementor, it’s essential to save and publish your changes effectively. This straightforward process ensures that everything looks just as you intended when visitors come online.
First, let’s discuss how to save your header. After making your desired adjustments in the Elementor editor, such as changing text, adding new elements, or adjusting spacing, you’ll want to hit the green “Update” button located at the bottom of the panel on the left. This step is crucial because it saves your edits without making them live immediately.
Next, to publish your header and make it visible to the public, follow these simple steps:
- Click on the “Publish” button if it’s your first time creating a header.
- If you’re updating an existing header, simply hit “Update” to reflect the latest changes.
- Once published, always preview your changes to ensure everything looks good and functions correctly.
Don’t forget to clear your cache if you’re using a caching plugin, as this will allow your visitors to see the most recent changes without any old versions lingering. Happy editing!
8. Troubleshooting Common Header Editing Issues
Editing your header in Elementor can be a breeze, but occasionally, you may run into some hiccups. No worries! Here are some common issues along with handy tips to help you troubleshoot them.
1. Changes Not Showing Up: One of the most frustrating problems can be when all your hard work doesn’t appear on the live site. Here’s what to do:
- Clear your browser cache and refresh the page.
- If using a caching plugin, clear the site’s cache.
- Double-check that you’ve published your changes.
2. Header Alignment Issues: If your header looks great in the editor but not on the live site, it could be due to theme settings or CSS conflicts:
- Inspect your header using your browser’s developer tools to see if there are any styles overriding your Elementor settings.
- Consider adjusting your theme’s settings or adding custom CSS in Elementor to rectify alignment problems.
3. Elementor Not Responding: Should Elementor freeze or not respond while editing:
- Check your internet connection.
- Try disabling any conflicting plugins.
- Update Elementor and the theme you’re using for optimal compatibility.
By addressing these common issues, you can ensure a smooth editing experience and create a header you can be proud of!
How to Edit Header in Elementor
Editing the header in Elementor is a straightforward process that can significantly enhance the user experience and aesthetic appeal of your website. The header is often the first thing visitors see, making it crucial to customize it effectively. Here are the steps and options to consider:
- Access Elementor Editor: Go to your WordPress dashboard, navigate to the page where you want to edit the header, and click on “Edit with Elementor.”
- Select the Header Section: If it’s already designed, click on the header section to access its settings. If you haven’t created one, you can add a new section and insert your header elements.
- Customize the Header: You can modify various aspects such as:
- Text Font and Size
- Background Color and Image
- Spacing and Alignment
- Logo and Menu Options
- Using Templates: Elementor offers pre-designed header templates that you can customize. Simply go to the template library, select a header design, and edit it as needed.
- Responsive Design: Ensure your header looks good on all devices. Use the responsive settings in Elementor to adjust the header for mobile, tablet, and desktop views.
- Preview and Publish: Always preview changes before publishing. Once satisfied, click on the ‘Publish’ button to make your header live.
| Feature | Description |
|---|---|
| Logo | Add your brand logo for instant recognition. |
| Navigation Menu | Create a user-friendly menu for easy navigation. |
| Contact Information | Integrate call-to-action elements like phone numbers or email. |
In conclusion, enhancing your website with a custom header using Elementor not only improves aesthetics but also boosts functionality and user engagement. Customizing your header ensures that it aligns with your brand identity and provides a seamless experience for visitors.

