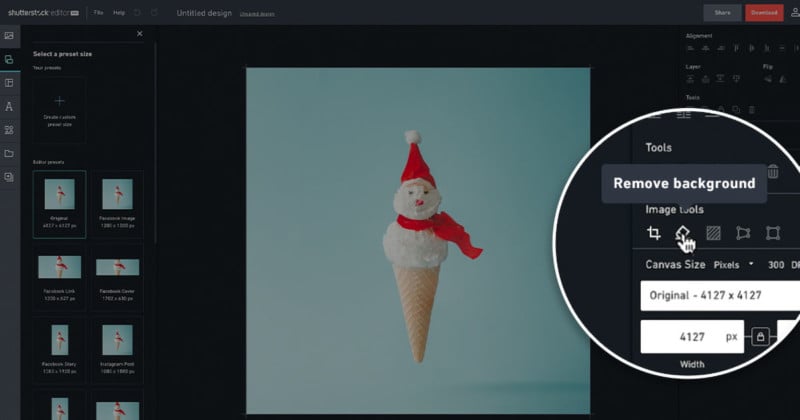
If you’ve ever jumped into Shutterstock Editor to create or tweak a design, you know how handy it is for quick edits and customizing images. One common task users want to do is removing or changing text that’s already on a design. Maybe you uploaded an image with some text you no longer need, or you want to replace existing text with your own message. Luckily, Shutterstock Editor makes it pretty straightforward to delete or edit text. In this post, we’ll walk through how you can easily remove text from your projects, so your design looks exactly how you want it without any hassle.
Steps to Remove Text in Shutterstock Editor

Removing text in Shutterstock Editor is a simple process, but it helps to follow each step carefully. Here’s a quick guide to help you do it smoothly:
- Open Your Project: First, log in to your Shutterstock account and open the project containing the text you want to delete. You can do this by clicking on My Projects and selecting the specific design.
- Select the Text Layer: Once your project loads, click on the text you wish to remove. When selected, you’ll see bounding boxes or handles around the text box, indicating it’s active.
- Delete the Text: With the text selected, look for the delete option. You can usually press the Delete key on your keyboard, or click on a trash bin icon that appears near the text box or in the toolbar. Alternatively, right-click on the text box and choose Delete or Remove.
- Confirm Removal (if needed): Some versions might prompt you to confirm the deletion. Just click Yes or OK to proceed.
- Adjust Your Design: After deleting the text, you might want to add new text or adjust other elements. Use the toolbar options to add fresh text, move objects around, or customize your design further.
And that’s it! Removing text from your Shutterstock project is as easy as selecting it and hitting delete. Remember, if you accidentally delete something, you can always undo the action by clicking the Undo button or pressing Ctrl+Z (Windows) or Cmd+Z (Mac). Keep experimenting, and you’ll master editing your designs in no time!
Tips for Efficient Text Management and Editing
Managing text in Shutterstock Editor might seem straightforward at first, but as your projects become more complex, having some handy tips can make your workflow much smoother. Here are some practical strategies to help you efficiently manage and edit your text elements.
Organize Your Layers
Think of your project as a layered cake — each element, including text, sits on its own layer. Keep your layers organized by naming them descriptively. This way, when you need to delete or modify a specific piece of text, you won’t have to hunt around. To rename a layer, simply select the text layer and click on its name in the layers panel.
Use the Text Tool Smartly
- Double-click on the text box to quickly enter editing mode.
- Use the drag handles to resize or reposition your text box without affecting the font size or style.
- Take advantage of the keyboard shortcuts like Ctrl+Z (Undo) or Ctrl+Y (Redo) to quickly fix mistakes or revert changes.
Preview Before Finalizing
Always preview your text after making edits. Use the preview mode to see how your text looks in the overall design. This helps catch any issues early and ensures your text aligns perfectly with your visual elements.
Utilize Text Templates and Styles
If you’re working with similar text styles across multiple projects, save your favorite styles as templates. This saves time and ensures consistency. When editing, you can quickly apply these styles to your text, making management faster and more uniform.
Shortcut for Quick Deletion
If you decide to remove a text element, selecting it and pressing the Delete key is the fastest way. To select multiple text layers, hold down Shift and click on each one, then delete in one go.
Tip Summary
| Tip | Benefit |
|---|---|
| Name layers clearly | Easy identification and deletion |
| Use keyboard shortcuts | Faster editing process |
| Preview your design | Catch issues early |
| Apply styles/templates | Consistency across projects |
By incorporating these tips into your workflow, you’ll find managing and editing text in Shutterstock Editor becomes quicker, less frustrating, and more enjoyable. Whether you’re tweaking a single word or adjusting multiple text layers, these strategies help keep your projects organized and polished.
Common Issues When Deleting Text and How to Troubleshoot
Sometimes, deleting text in Shutterstock Editor isn’t as straightforward as hitting the Delete key. You might run into a few common issues that can halt your workflow. Don’t worry — most of these problems are easy to troubleshoot once you know what to look for.
Issue 1: Text Won’t Delete or Is Grayed Out
Cause: The text layer might be locked or selected as a background element.
Solution: Check if the layer is locked by looking for a lock icon in the layers panel. If it is, click to unlock it. Also, ensure you’re not selecting a background or non-editable layer. Once unlocked, select the text layer and press Delete again.
Issue 2: Deletion Affects Other Elements
Cause: Multiple elements are grouped or linked together, causing unintended deletions.
Solution: Ungroup layers or unlink elements before deleting. To do this, select the grouped elements, right-click, and choose ‘Ungroup’ or similar options. Then, select only the text you want gone and delete.
Issue 3: Text Reappears After Deletion
Cause: You might have duplicated the text element or placed a copy on top of it, making it seem like the deletion didn’t happen.
Solution: Use the layers panel to verify if multiple copies exist. Delete all instances of the text layer, then add new text if needed.
Issue 4: Cannot Delete Text Using Keyboard Shortcut
Cause: The text box might be in a non-editable state or the focus isn’t on the text layer.
Solution: Click directly on the text box to activate it, then press Delete. Alternatively, select the layer from the layers panel and hit the Delete key.
Issue 5: Text Is Selected but Can’t Be Deleted
Cause: The text might be a static element or embedded in a complex background.
Solution: Ensure the text is an editable layer. If it’s a static image or embedded element, you may need to remove it by selecting and deleting the entire layer or replacing it with a new text box.
Additional Troubleshooting Tips
- Save your project before making big changes, so you can revert if something goes wrong.
- Clear cache or refresh the browser if the editor behaves unexpectedly.
- Update your browser or Shutterstock Editor app to the latest version for optimal performance.
By understanding these common issues and their solutions, you’ll be able to troubleshoot effectively and keep your workflow smooth. Remember, if something doesn’t work as expected, double-check layer locks, groupings, and selections — most problems are easily fixed once you identify the root cause.
Additional Tips for Customizing Your Design
So, you’ve learned how to delete text in Shutterstock Editor — great! But sometimes, customizing your design even further can make your project stand out. Here are some handy tips to help you make the most of your editing experience:
- Use the Alignment Tools: Whether you want your text perfectly centered or aligned to the left, right, or middle, Shutterstock Editor offers alignment options. Simply select your text box and click on the alignment buttons to position your text just right.
- Adjust Font Styles and Sizes: Play around with different fonts, sizes, and styles to match your project’s vibe. Remember, bold or italic fonts can add emphasis, while smaller or larger sizes can help prioritize information.
- Change Text Colors: Bright, contrasting colors can make your text pop, or you can choose subtle tones for a more elegant look. Use the color picker to find the perfect hue.
- Add Effects and Shadows: To give your text more depth, consider adding shadows or effects. This can improve readability and add a professional touch to your design.
- Layer Your Elements: If you’re combining text with images or other design elements, use the layer order feature. Sending text forward or backward can help you achieve a balanced composition.
- Use Guides and Grids: For precise placement, enable guides and grids. They act like visual rulers, helping you align elements accurately.
- Save Custom Styles: Once you’ve found a style you like, save it as a preset. This way, you can easily apply consistent styles across multiple projects.
Remember, the key to a polished design is experimentation. Don’t be afraid to try different combinations until you find what works best for your project. With these tips, you can take your Shutterstock Editor creations to the next level!
Conclusion and Final Thoughts on Text Deletion in Shutterstock Editor
Deleting text in Shutterstock Editor might seem straightforward at first glance, but mastering the process actually opens up a lot of creative possibilities. Whether you’re removing outdated info, simplifying your design, or just experimenting with different looks, knowing how to efficiently delete and replace text is essential.
Throughout this guide, we’ve covered the basic steps: selecting your text box, clicking the delete or backspace key, and adjusting your layout afterwards. But remember, the real magic happens when you combine text deletion with customization techniques—changing fonts, colors, effects, and positioning—to craft a design that truly represents your vision.
One thing to keep in mind is that Shutterstock Editor is designed to be user-friendly, so don’t be shy about exploring its features. The more you play around with deleting, adding, and customizing text, the more intuitive it will become.
Finally, always preview your design before finalizing. Sometimes, removing or changing text can impact the overall balance of your layout. Take a step back, look at your project with fresh eyes, and make any necessary tweaks.
In a nutshell, mastering text deletion and customization in Shutterstock Editor is a powerful way to create professional and eye-catching visuals. Keep practicing, and you’ll find that editing becomes quicker and more enjoyable over time. Happy designing!


