If you’re a Shutterstock contributor, you know how exciting it is to share your creative work with a global audience. But sometimes, things don’t go as planned—your submission gets denied, and you might wonder what to do next. Managing your portfolio isn’t just about uploading new images; it also means keeping track of your submissions, understanding why they were rejected, and knowing how to handle those situations gracefully. In this guide, we’ll walk through the steps to delete a denied submission and share tips on maintaining a strong, successful portfolio. After all, every setback is just a setup for a comeback!
Understanding Why Your Submission Was Denied

Before you jump into deleting a denied submission, it’s helpful to understand why it was rejected in the first place. Shutterstock has specific guidelines to ensure that all images meet their quality and content standards. Common reasons for denial include issues like poor image quality, inappropriate content, lack of model or property releases, or even technical problems like incorrect file formats.
Here are some of the most frequent reasons your submission might be denied:
- Technical issues: Blurry images, poor lighting, or pixelation.
- Content violations: Content that includes copyrighted material, trademarks, or sensitive subjects without proper releases.
- Model/property releases missing: Shutterstock requires releases for recognizable people or private property.
- Duplicate submissions: Similar images already available in their database.
- Incorrect file format or size: Files that don’t meet Shutterstock’s specifications.
Understanding these reasons helps you learn from the rejection and improve your future submissions. It also clarifies whether you should try to edit and resubmit or simply remove the denied work from your portfolio. Remember, a denied submission isn’t the end of the world—it’s an opportunity to refine your craft and get closer to the quality Shutterstock expects. So, take a deep breath, review the rejection notice carefully, and decide your next steps accordingly.
Steps to Delete a Denied Submission from Your Shutterstock Account

So, you’ve submitted a piece of work to Shutterstock, but it didn’t quite make the cut—it’s been denied. No worries! Sometimes, you just need to clear out those rejected files to keep your portfolio looking sharp and organized. Here’s a straightforward, step-by-step guide to help you delete a denied submission from your Shutterstock contributor account.
Step 1: Log into Your Contributor Account
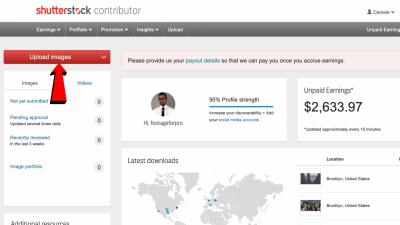
Head over to the Shutterstock Contributor site and sign in with your credentials. Once you’re in, navigate to your dashboard where all your submissions are listed.
Step 2: Access Your Portfolio or Submissions List
Find the section labeled “Your Portfolio” or “Submissions.” Depending on the interface updates, it might be under different tabs, but generally, you’ll see a list of all your uploaded files.
Step 3: Locate the Denied Submission
Use the filtering options or scroll through your list to find the specific file marked as “Denied” or “Rejected.” You can often sort by status or date to make this easier.
Step 4: Select the File for Deletion
Click on the thumbnail or title of the denied submission to open its details page. Here, you’ll see all the information about that particular file.
Step 5: Delete the Submission
Look for the delete option—usually represented by a trash can icon or a button labeled “Delete” or “Remove.” Click on it. A confirmation pop-up will likely appear, asking if you’re sure you want to delete this file.
Step 6: Confirm the Deletion
Confirm your choice. Once confirmed, the file will be permanently removed from your portfolio. Keep in mind, this action is usually irreversible, so make sure you’ve selected the correct file!
Step 7: Verify the Removal
Refresh your submissions list to ensure the denied file no longer appears. That’s it! Your portfolio is now cleaner, and you’re ready to upload new or revised content.
Tip: If you don’t see the delete option immediately, it might be due to interface updates or specific account permissions. If so, consult Shutterstock’s help resources or contact support for guidance.
Tips for Preventing Future Submission Rejections
Getting your submissions rejected can be a bit disheartening, but it’s also a learning opportunity. The good news is that with a few smart strategies, you can minimize rejections and increase your chances of approval. Here are some tips to help you stay on the right track:
- Follow Shutterstock’s Content Guidelines
- Pay Attention to Technical Quality
- Check for Model and Property Releases
- Review Your Metadata
- Stay Updated on Trends and Requirements
- Pre-Upload Checklists
Every platform has its rules. Make sure you thoroughly read Shutterstock’s contributor guidelines, especially regarding technical specs, model releases, property releases, and content restrictions. This helps ensure your submissions meet their standards.
High-quality images are key. Use good lighting, proper focus, and avoid noise or pixelation. Edit your photos to enhance colors, contrast, and clarity. For vectors and illustrations, ensure clean lines and proper resolution.
If your images include recognizable people or private property, make sure you have the proper releases. Missing releases are a common reason for rejection.
Accurate titles, descriptions, and keywords improve your content’s discoverability and relevance. Avoid keyword stuffing; instead, use descriptive and relevant terms.
Follow Shutterstock’s contributor blog and updates. Trends can influence what’s accepted, so aligning your content with current demands can boost acceptance rates.
Create a checklist to verify technical specs, releases, and metadata before uploading. This habit minimizes common mistakes that lead to rejection.
Remember, rejection isn’t the end of the road—it’s a stepping stone to better content. By learning from each rejection and continuously refining your submissions, you’ll improve your acceptance rate over time. Keep experimenting, stay consistent, and don’t get discouraged!
Additional Resources and Support from Shutterstock
If you’re navigating the process of managing your Shutterstock contributor account, having access to reliable resources and support can make a significant difference. Shutterstock offers a variety of tools and channels to assist you in resolving issues like deleting a denied submission or understanding their guidelines more thoroughly.
Help Center: The Shutterstock Help Center is a comprehensive resource filled with articles, FAQs, and step-by-step guides. You can search for topics such as “deleting a submission” or “account management” to find detailed instructions and troubleshooting tips.
Contributor Dashboard: Your account dashboard provides direct access to your submissions, earnings, and support tickets. If you encounter issues, submitting a support request through the dashboard ensures your query reaches the appropriate team quickly.
| Resource | Description |
|---|---|
| Help Center | Extensive articles and FAQs on account management, submissions, and common issues. |
| Support Ticket | Submit a request directly through your Contributor Dashboard for personalized assistance. |
| Community Forums | Connect with other contributors to share experiences and tips. |
Additionally, Shutterstock’s social media channels and email support can provide quick assistance for urgent matters. Remember, clear communication and providing detailed information when reaching out will help expedite the resolution process.
In summary, leveraging these resources ensures you stay informed and supported as you manage your contributor account effectively, making it easier to handle issues like deleting denied submissions or understanding platform policies.


