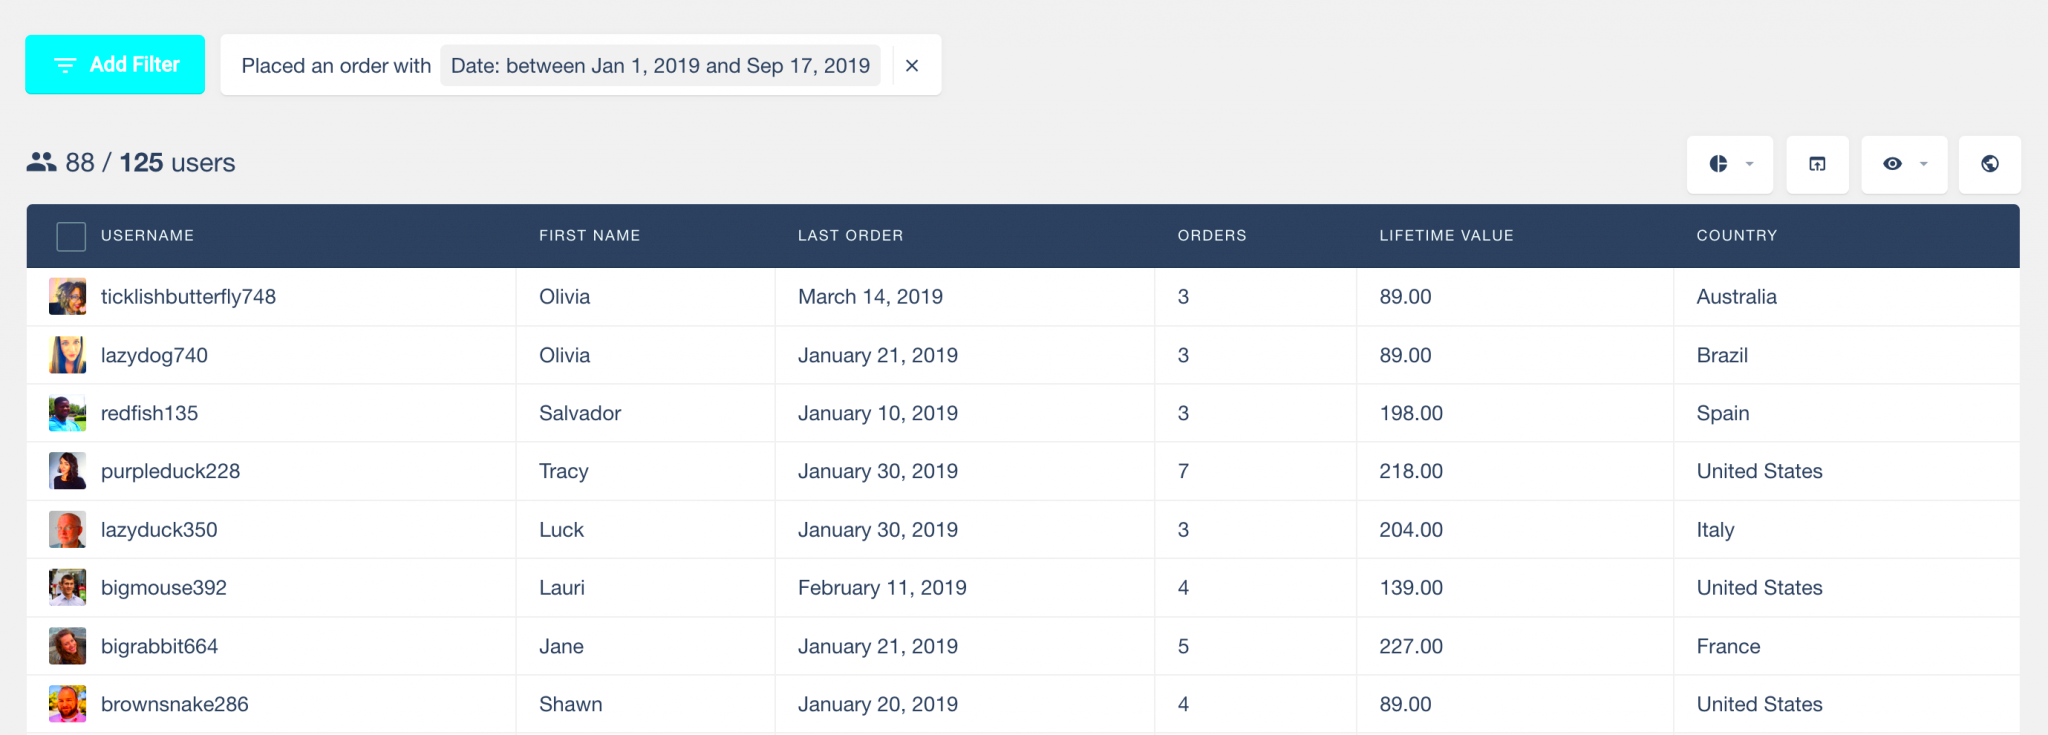
Are you looking to give your WordPress users table a fresh, personalized look? Well, you’ve come to the right place! Customizing the users table not only enhances the aesthetics but can also improve functionality and make it easier to manage your site’s users effectively. Whether you’re running a membership site, a blog, or an e-commerce platform, having your users table set up just the way you want can bring a lot of benefits. In the following sections, we’ll delve into the basics of the default users table and why customizing it is a great idea for site owners.
Understanding the Default Users Table in WordPress
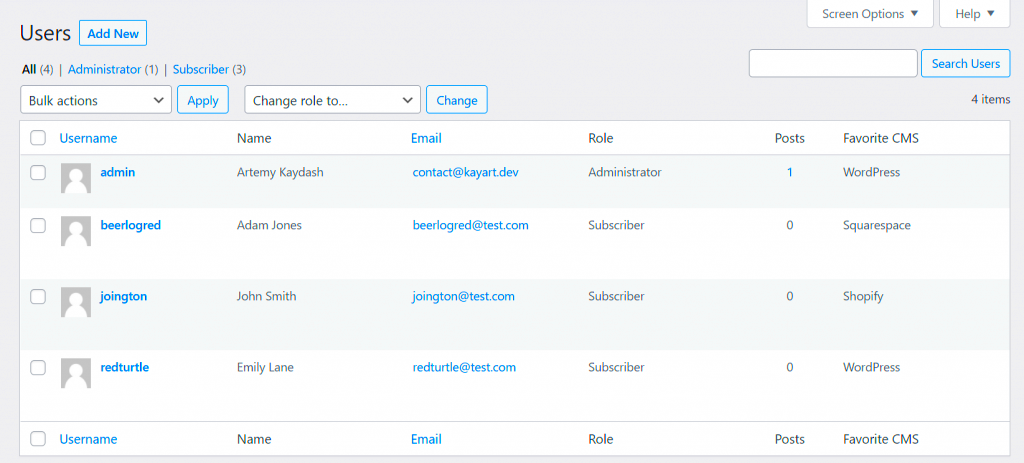
The default users table in WordPress is a fundamental feature that stores valuable information about all the users registered on your site. By understanding its structure, you can make informed decisions when it comes to customization. Here’s a breakdown of what the default users table includes:
| Column | Description |
|---|---|
| Username | The unique identifier for each user on your site. |
| The email address associated with each user account. | |
| First Name | Often included if provided by the user during registration. |
| Last Name | Similar to first name, useful when you want to personalize interactions. |
| Website | The user’s personal website, if they opted to provide one. |
| Status | Indicates whether the user is active, pending, or banned. |
| Role | Defines the user’s capabilities and permissions on your WordPress site. |
By grasping how the default users table is organized, you can pinpoint precisely where you might want to make changes. This understanding lays the groundwork for a more tailored and functional users table that meets your specific needs.
Reasons to Customize the Users Table
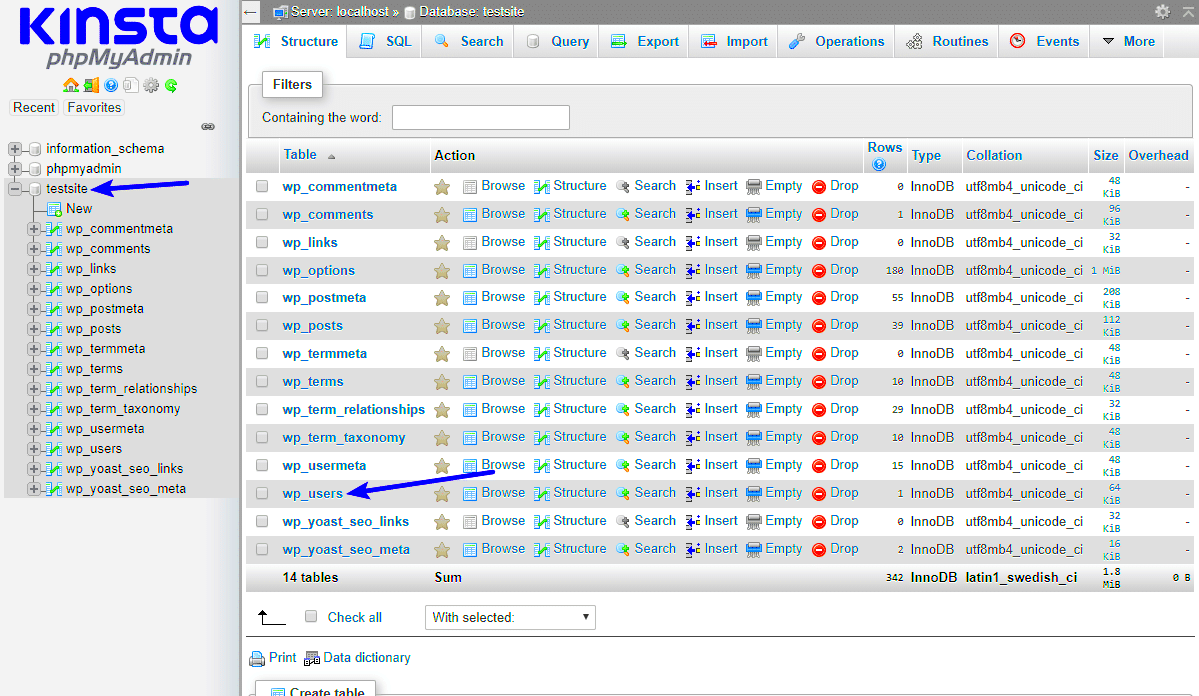
Customizing the Users Table in WordPress isn’t just a nice-to-have feature; it’s a game changer for enhancing user management efficiency, improving the workflow of your site, and ultimately providing a better experience for both administrators and users alike. Here are some compelling reasons why you might want to dive into this customization:
- Enhanced Usability: A well-organized Users Table can significantly reduce the time it takes to find and manage users. By displaying only the relevant information, administrators can locate users quickly without unnecessary clutter.
- Streamlined User Management: Customization allows you to add, remove, or rearrange columns according to your specific needs. This helps in prioritizing the data that matters most, such as user roles, registration dates, or activity levels.
- Improved User Insights: By customizing the table to include additional fields, you can gain better insights into user behavior and performance. This can aid in making informed decisions regarding marketing strategies or community engagement.
- Better Role Management: If your WordPress site has multiple user roles, customization can help you easily distinguish these roles, making it easier to manage permissions and responsibilities.
- Scalability: As your site grows and you accumulate more users, an optimized table ensures that your workflow remains efficient and organized. You won’t get bogged down with irrelevant information!
In summary, customizing your Users Table not only improves your administrative experience but enhances the overall functionality of your WordPress site. So why not give it a shot?
Methods to Customize the Users Table
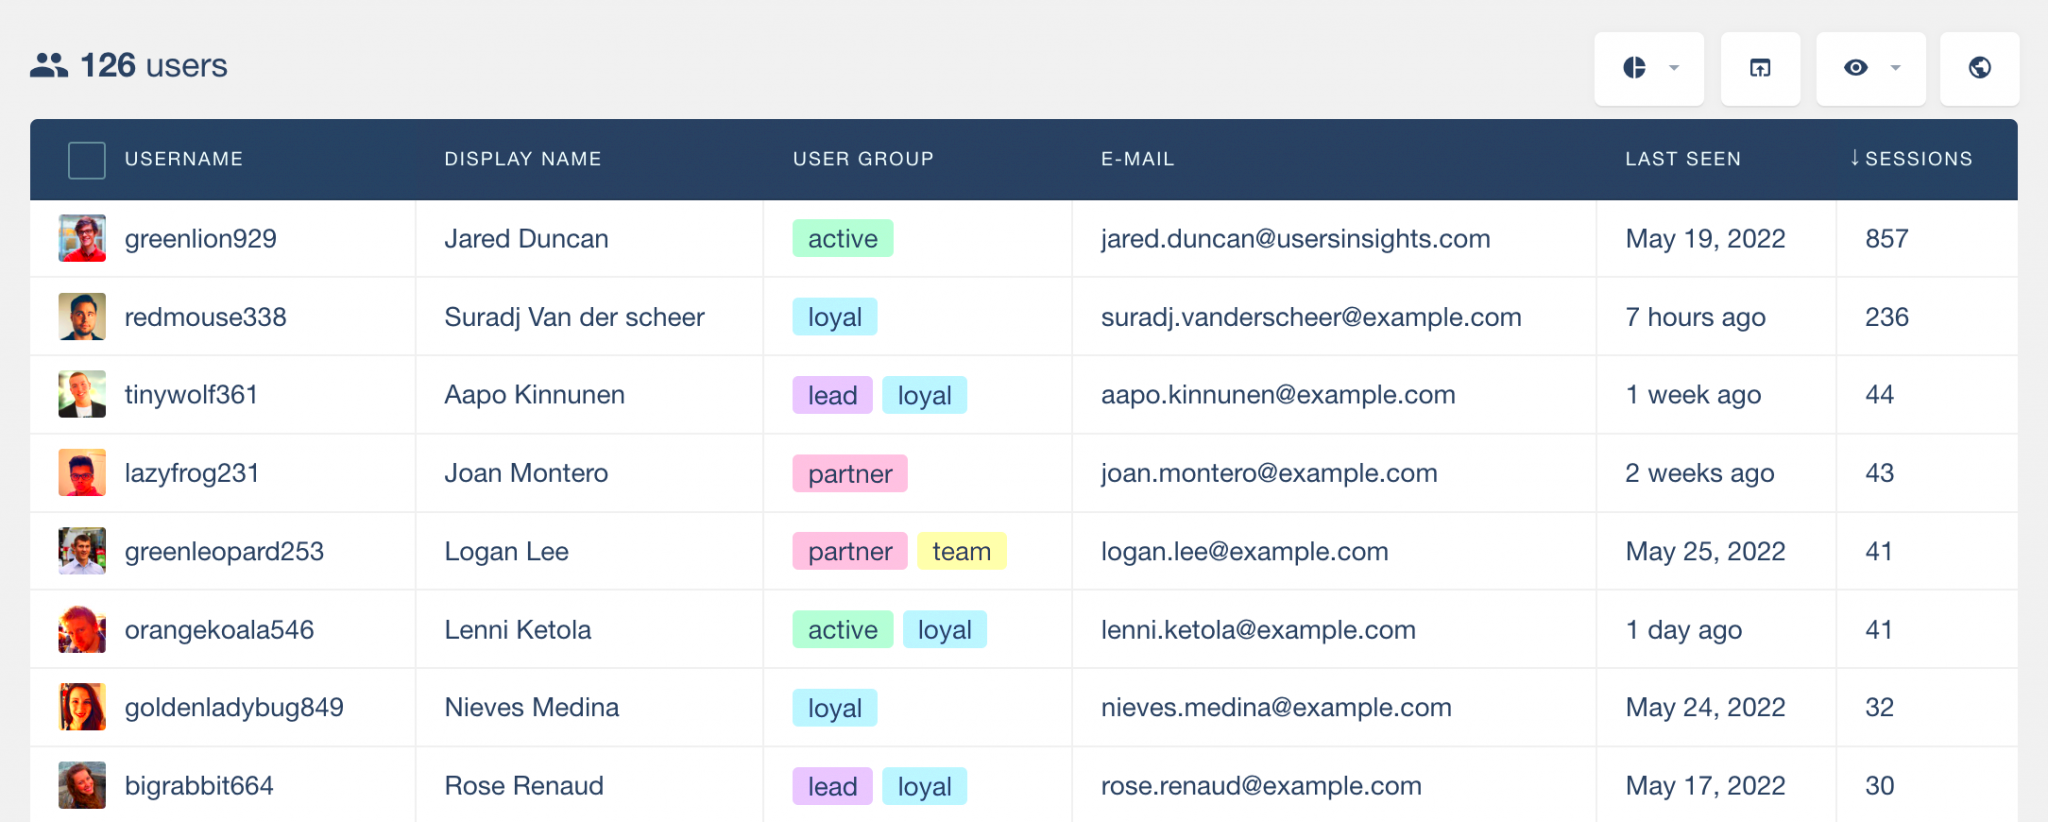
Customizing the Users Table in WordPress can be as simple or as complex as you desire. Fortunately, there are several effective methods to tailor the table to fit your unique needs. Let’s explore some popular techniques:
- Using Plugins: The easiest way to customize the Users Table is to leverage plugins designed specifically for this purpose. Some popular options include:
- User Role Editor: This plugin lets you manage user roles, capabilities, and provides options to customize the display of users.
- Admin Columns: This highly flexible plugin enables you to add or remove columns, as well as reorganize them. You can even integrate custom fields!
add_filter('manage_users_columns', 'custom_user_columns');function custom_user_columns($columns) { // Remove a column unset($columns['posts']); // Add a new column $columns['custom_field'] = 'Custom Field Title'; return $columns;}
Whichever method you choose, remember that customization can greatly enhance your user experience and streamline site management. Don’t hesitate to dive into the world of WordPress customization!
5. Using Plugins for User Table Customization
When it comes to customizing the users table in WordPress, plugins are undoubtedly one of the easiest and most efficient ways to get the job done. They save you the hassle of writing code and allow you to modify the appearance and functionality of your user list directly through the WordPress dashboard. Let’s dive into some popular plugins you can use for this purpose:
- User Table: This intuitive plugin enables you to create custom user tables with various display settings. You can sort, search, and even customize which user roles to display. Plus, it’s quite user-friendly!
- WP User Manager: Excellent for both front-end and back-end user management, this plugin lets you modify user roles, and profiles, and even create a fully customized user listing on your website.
- Ultimate Member: This is a powerful membership plugin that includes user profile features and allows admin customization of user tables. Ideal for creating a robust community and membership site!
- Custom User Table: A specialized plugin that allows you to create personalized user tables based on the criteria you define. It also supports filtering and sorting features that enhance the user’s experience.
- Members: With complete control over user roles and capabilities, this plugin allows admins to customize how user information is displayed in the users table.
By using any of these plugins, you can effortlessly tailor your users table’s look and functionality to match your site’s unique needs. Just remember to check the reviews and compatibility of each plugin with your WordPress version to ensure smooth sailing!
6. Customizing the Users Table through Code
If you’re comfortable delving into the world of coding, customizing the users table through code can be a rewarding approach that offers endless possibilities. Not only does it give you complete control, but it also allows for deeper integration with your existing site structure. Here’s a brief overview of how to get started:
To begin, you might want to create a child theme or a site-specific plugin. This helps prevent your changes from being lost during updates. Here are some key functions that you can utilize:
| Function | Description |
|---|---|
| manage_users_columns | Customize the columns of the users table by adding, removing, or modifying the data displayed in the table. |
| manage_users_custom_column | Fill in the custom columns with the relevant user data. This is where you can manipulate what’s displayed. |
| add_action(‘admin_head’, ‘function_name’) | Hook into WordPress’s admin header to enqueue styles or scripts that can style your users table. |
Here’s a quick snippet to get you started:
function custom_user_columns($columns) { $columns['custom_column'] = 'Custom Data'; return $columns;}add_filter('manage_users_columns', 'custom_user_columns');function custom_user_data($value, $column_name, $user_id) { if ($column_name == 'custom_column') { return get_user_meta($user_id, 'custom_data', true); } return $value;}add_filter('manage_users_custom_column', 'custom_user_data', 10, 3);With just a bit of coding, you can transform the users table into a dynamic and informative section of your WordPress admin panel. Dive into the code, make it your own, and watch how it elevates your site!
7. Modifying User Roles and Capabilities for Better Management
When it comes to managing your WordPress site, understanding user roles and capabilities is crucial. By customizing these roles, you can ensure that everyone from administrators to contributors has appropriate access and permissions, thus enhancing site security and usability. So, how do you go about modifying user roles?
In WordPress, user roles define what a user can or cannot do. By default, WordPress comes with several roles such as Administrator, Editor, Author, Contributor, and Subscriber. However, you might find that these roles don’t quite fit your needs. And that’s perfectly normal! You can easily modify existing roles or create new ones using plugins or by writing custom code.
Here are some steps to help you get started:
- Install a User Role Management Plugin: Plugins like User Role Editor or Members allow you to tweak roles effortlessly.
- Access the User Roles Section: Go to the plugin settings and view the list of roles.
- Edit Permissions: You can check or uncheck capabilities for each role. For instance, if you want a Contributor to edit posts, simply enable that capability.
- Add New Roles: Need a role that isn’t present? Many plugins allow you to create new roles with customized capabilities.
Remember, managing user roles effectively can help you better delegate responsibilities, reduce administrative burdens, and keep your site secure from unauthorized access. So take some time to tailor these roles to fit your specific needs.
8. Implementing Custom Columns in the Users Table
Does your user management workflow feel cluttered or cumbersome? A great way to streamline it is by implementing custom columns in the WordPress Users Table. This allows you to display additional information at a glance, making it easier for you to manage users efficiently.
Understanding which details are most relevant to your site can guide you in determining which custom columns to add. For example, you might want to view user roles, last login times, or even a profile completion status directly in the Users Table. Here’s how you can implement custom columns:
First, you’ll want to tap into the power of a plugin like Admin Columns or you can manually code it. Here’s a simplified way to go about it:
- Install Your Preferred Plugin: Search for a plugin that allows custom columns.
- Go to Settings: Once the plugin is activated, navigate to the settings page.
- Select User Columns: Choose the columns that you want to show in your Users Table. For example, add “Last Active” or “Post Count.”
- Drag to Reorder: You can easily drag and drop to arrange these columns in a way that makes sense for you.
- Save Changes: Don’t forget to save your settings!
By implementing custom columns, not only do you enhance your site’s functionality but also save valuable time managing your users. So go ahead, get creative with your columns, and make your Users Table work for you!
Styling the Users Table with CSS
Styling the Users Table in WordPress can dramatically enhance the user experience and make your admin dashboard look more cohesive with your site’s branding. Using CSS to customize its appearance might seem daunting, but it’s quite manageable once you know where to start. Let’s break it down!
First, you’ll want to target the specific elements of the users table you want to change. Here are some common CSS properties that you can adjust:
- Background Color: Change the background color of the table or specific rows to make it visually appealing.
- Text Color: Adjust the text color for better readability. Make sure there’s a good contrast between the background and text.
- Font Size & Family: Tailor the font size and family to match your theme’s overall typography.
- Padding & Margins: Add some padding and margins to create breathing room within your table cells.
- Border Styles: Customize the borders of the table or rows to create a distinct look.
Here’s a simple example of CSS you can use to start styling your users table:
css.table-users { background-color: #f9f9f9; /* Light gray background */ color: #333; /* Dark text color */ font-family: Arial, sans-serif; /* Font family */ border-collapse: collapse; /* Collapse borders */}.table-users th, .table-users td { padding: 10px; /* Add padding */ border: 1px solid #ddd; /* Light border */}.table-users th { background-color: #0073aa; /* WordPress blue */ color: white; /* White text for header */}
After applying your CSS styles, make sure to check how they render in different browsers and devices, as you want your users table to look great everywhere!
Testing Your Customizations
Now that you’ve styled your Users Table, it’s time for the crucial step: testing your customizations! This is where you get to see everything you’ve worked on in action, and it’s a great opportunity to catch any potential issues.
Here’s a streamlined process to thoroughly test your customizations:
- Refresh the Page: Simply refresh the admin page to see your CSS changes take effect. Sometimes clearing your browser’s cache is necessary for changes to show up.
- Check in Different Browsers: Open your WordPress admin in different browsers like Chrome, Firefox, and Safari to confirm your styles remain consistent across platforms.
- Responsive Testing: Adjust your browser size or use developer tools to see how the table looks on smaller screens. A responsive design is crucial today.
- User Feedback: If you have other users, ask for feedback on the new table styles. Fresh eyes may catch things you missed!
- Performance Testing: Ensure that your custom styles do not slow down your admin dashboard. Use tools like Google PageSpeed Insights to keep an eye on performance.
By following these steps, you’ll ensure that your customized Users Table looks fantastic and functions smoothly, creating a better experience for everyone who interacts with your WordPress admin. Remember, the goal is usability and aesthetics combined!
Common Issues and Troubleshooting Tips
When customizing the users table in WordPress, you may encounter a few bumps along the way. Don’t sweat it! Here are some common issues and troubleshooting tips to keep in your back pocket.
- Custom Code Not Appearing: If you’ve added custom code but don’t see any changes, double-check that you’re working on the right template file or using the right hook. Sometimes, a simple refresh or clearing your browser cache can also do wonders.
- Plugin Conflicts: Certain plugins may conflict with your customizations. If you notice unexpected behavior, try disabling plugins one by one to pinpoint the culprit. Once you identify the conflicting plugin, check if there is an update available or contact the plugin developer for help.
- CSS Not Loading: If your styles aren’t applying, ensure that you’ve enqueued your custom styles correctly. Sometimes, they may be overridden by other styles or by the theme’s CSS. Use your browser’s inspector tool to troubleshoot this.
- User Permissions Issues: If some modifications aren’t visible to certain user roles, revisit your user permissions. Ensure that roles have the necessary capabilities to view or edit the users table as intended.
- Loss of Customizations After Updates: WordPress updates can sometimes overwrite custom changes, especially if modifications are made directly to theme files. To avoid this, consider using a child theme or custom plugin for your changes.
By keeping these troubleshooting tips in mind, you can navigate common roadblocks and enjoy a smoother experience when customizing your WordPress users table.
Conclusion and Next Steps
Congratulations! You’ve taken a step forward in customizing the users table in WordPress. Customization not only enhances the appearance but also improves the overall functionality tailored to your site’s needs.
Here are some next steps you might consider:
- Back Up Your Changes: Always maintain a backup of your original settings or code before making significant changes. This way, you’ll have a safe restoration point if something goes wrong.
- Documentation and Support: If you’re using custom code or a plugin, keep an eye on their documentation for updates and support forums. Engaging with the community can also provide valuable insights.
- Test Thoroughly: After applying changes, test across different user roles and devices. This ensures that all users have a seamless experience and that your customizations don’t inadvertently affect functionality.
- Explore More Customization Options: Once you’re comfortable with user table customizations, consider diving deeper into other areas. Customizing user profiles or extending capabilities are great places to continue your learning journey.
By taking these steps, you’ll pave the way for a more organized and efficient user management system on your WordPress site. Happy customizing!

