When it comes to crafting an exceptional online shopping experience, your shopping cart is your front-line soldier. WooCommerce, a popular WordPress plugin, gives you the ability to customize your shopping cart. Whether you’re looking to enhance user experience, improve functionality, or gather more data for your marketing efforts, tweaking the shopping cart can make a world of difference. In this guide, we’ll walk you through the ins and outs of customizing your WooCommerce shopping cart by product, ensuring that it’s not just functional, but also a true reflection of your brand.
Understanding the Default WooCommerce Cart Functionality
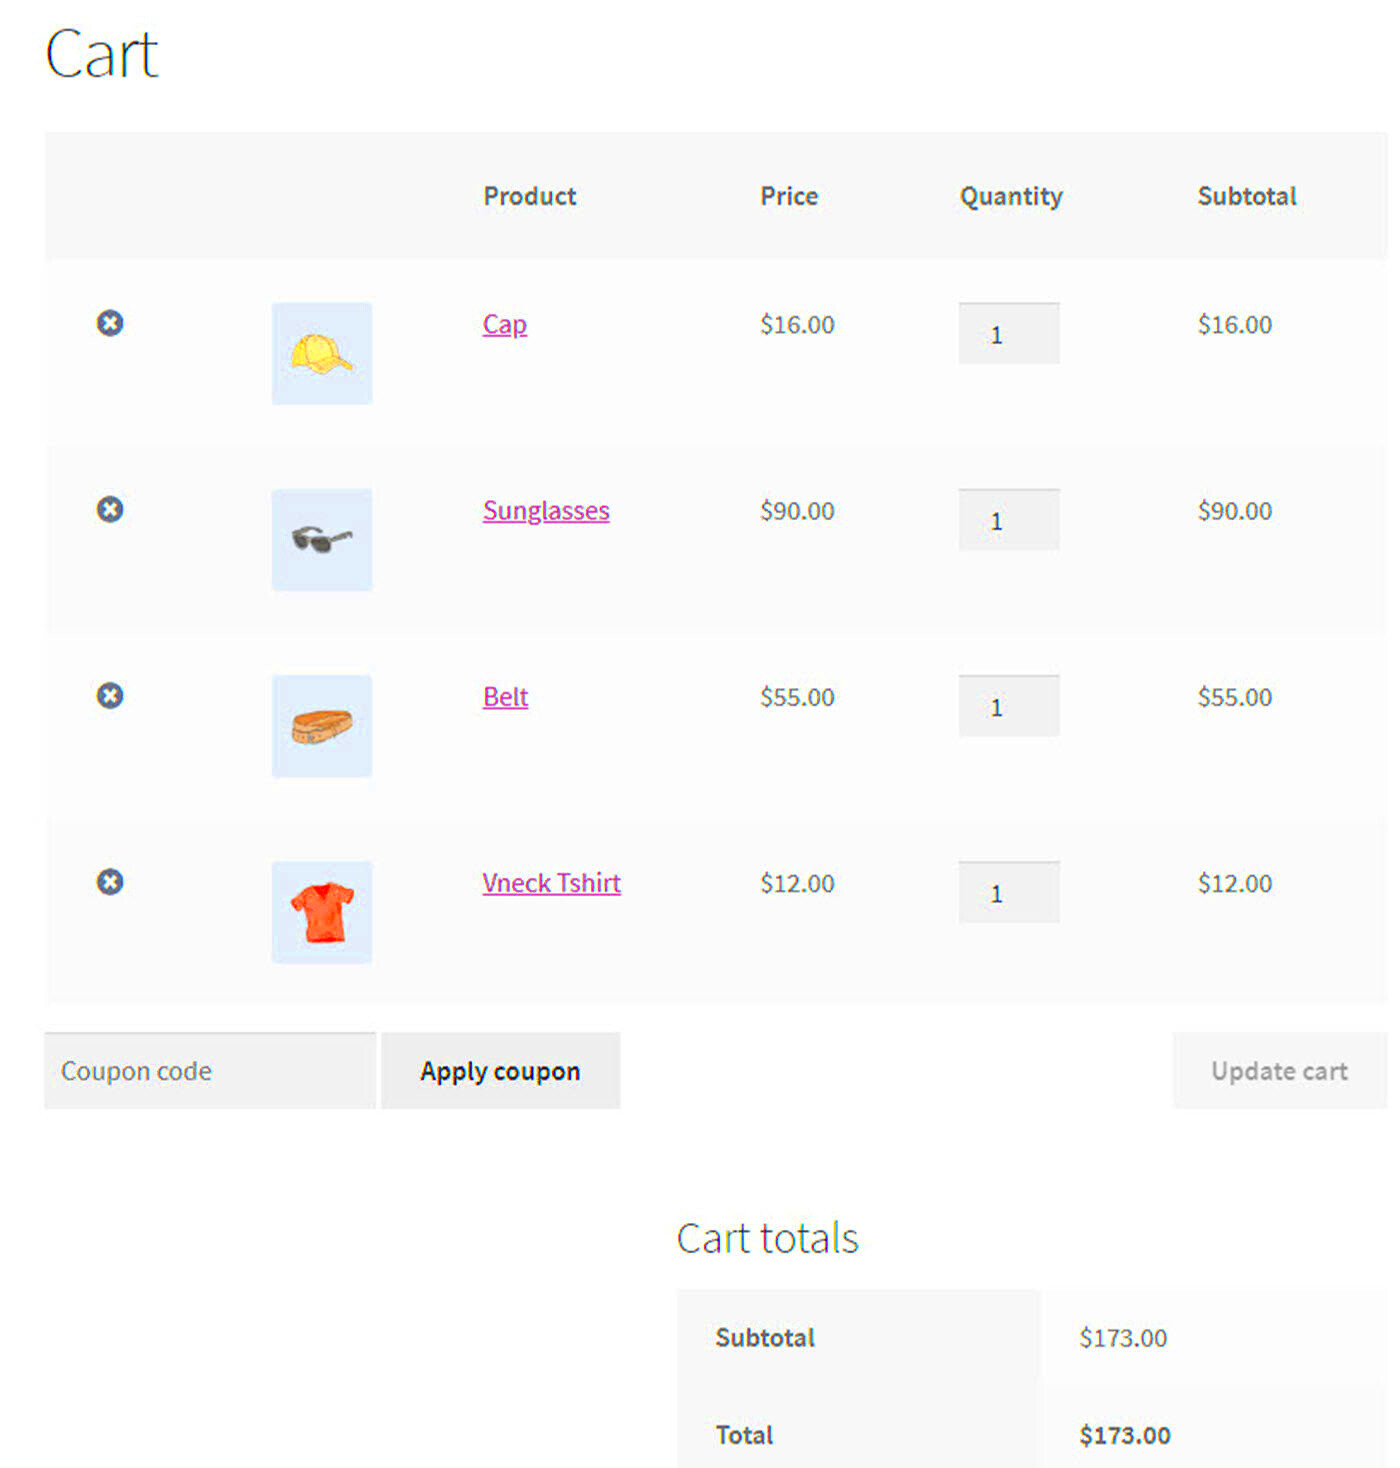
Before diving into customization, it’s essential to grasp what the default WooCommerce cart offers. Let’s break it down!
- Add to Cart: The primary function – users can quickly add products to their cart with a single click.
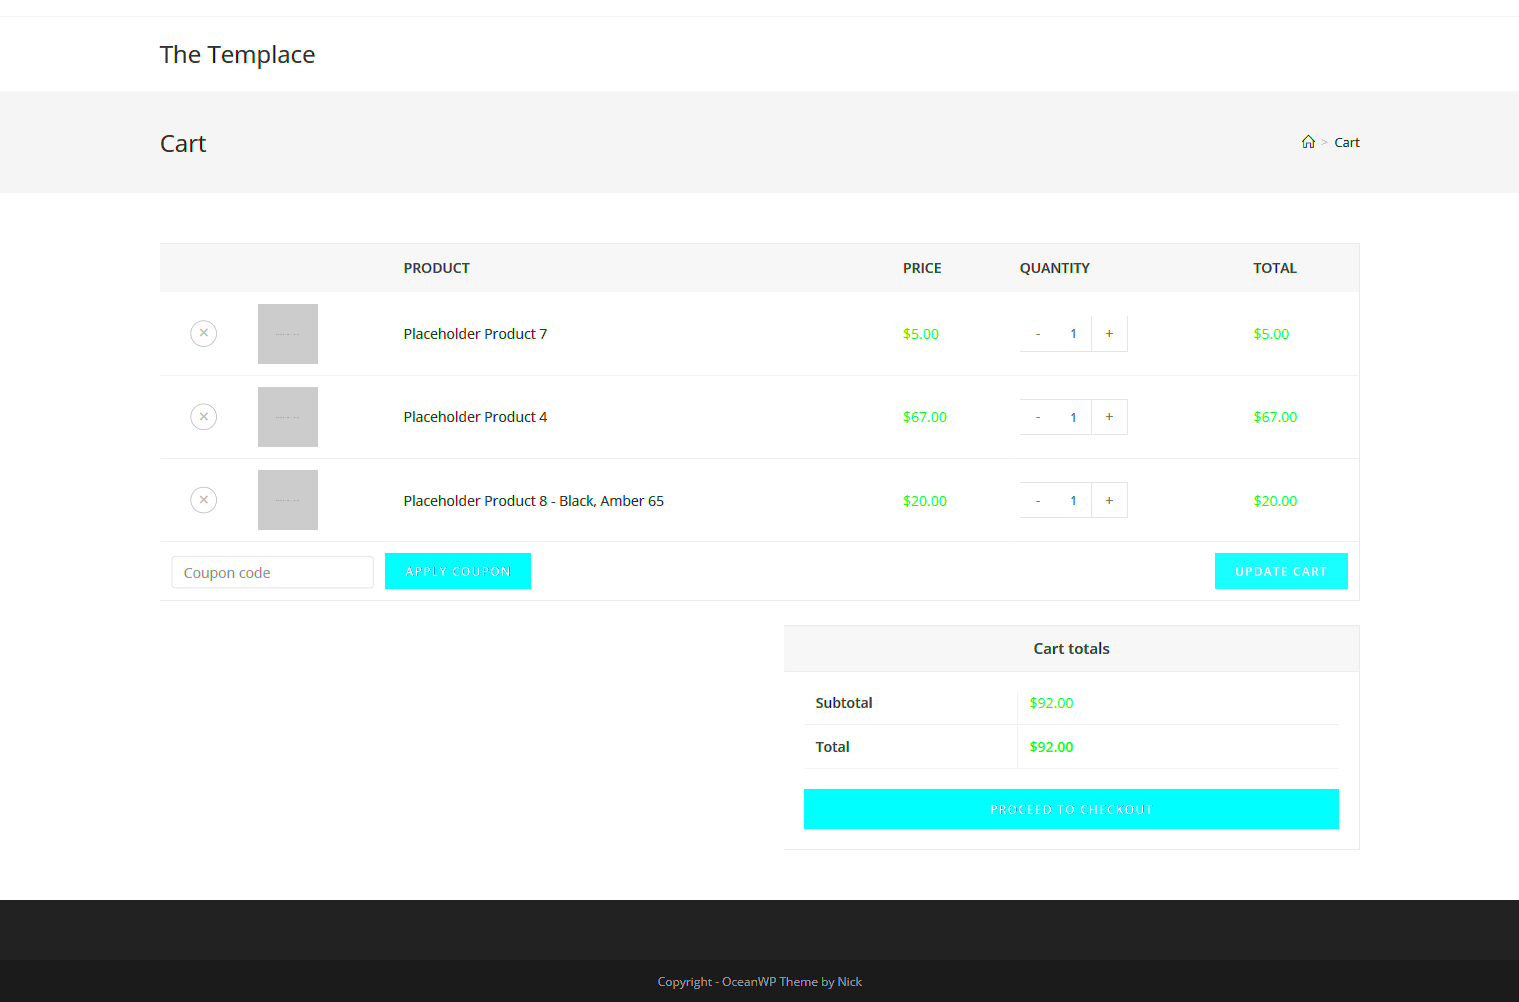
- Cart Overview: Users can easily see a list of selected products, quantities, and the total price.
- Update Cart: Shoppers can adjust product quantities or remove items as needed.
- Checkout Process: Once they are ready, users can proceed to checkout directly from the cart.
This basic setup simplifies the shopping experience, but let’s take a closer look at its components that are ripe for customization:
| Component | Description |
|---|---|
| Add to Cart Button | Usually a standard button; can be customized for color, size, and position. |
| Cart Summary | Displays products, allowing for easy review before checkout. |
| Promotion Codes | Incorporate a field for users to enter discount or promotional codes. |
| Shipping Calculator | Add a function that allows users to estimate shipping costs directly from the cart. |
By understanding the default functionality, you can pinpoint what to customize to enhance your store’s overall appeal and efficiency. Ready to dive deeper into customization? Let’s get started!
Setting Up Your WooCommerce Environment for Customization
Before diving into customization, it’s crucial to have a well-set-up WooCommerce environment. This ensures that you can efficiently implement and test changes without running into unexpected issues. Here’s how to create that perfect groundwork:
- Choose the Right Hosting Provider: A reliable hosting service can significantly affect the performance of your WooCommerce store. Look for providers that specialize in WordPress and WooCommerce.
- Install WooCommerce: If you haven’t already, install the WooCommerce plugin via your WordPress dashboard. Simply go to Plugins > Add New, search for WooCommerce, and hit Install Now.
- Pick a Compatible Theme: Selecting a theme that is compatible with WooCommerce is essential. It ensures that any customizations you make will display correctly. Check for themes in the WordPress repository or consider premium options.
- Set Up Necessary Plugins: Besides WooCommerce, consider adding plugins for additional functionality. Popular choices include custom cart options and analytics tools. Make sure they are regularly updated and compatible with your theme.
- Backup Your Site: Always have a reliable backup system in place before making any changes. This way, if something doesn’t go as planned, you can easily revert back.
With these steps outlined, your WooCommerce environment will be ready for seamless customization. Always ensure to test changes on a staging site first, if possible, to avoid disrupting the live shopping experience.
Key Customization Options for WooCommerce Shopping Cart
Once your WooCommerce environment is ready, it’s time to explore the key customization options available for your shopping cart. By tailoring these features, you can create a user-friendly experience that encourages conversions. Here’s what you can customize:
| Customization Option | Description |
|---|---|
| Cart Page Layout | Modify the arrangement of elements on your cart page. Consider using grid systems to enhance organization, making it easier for users to view items. |
| Checkout Process | Simplify the checkout process by reducing the number of steps. Implement options like guest checkout to cater to users who prefer not to create an account. |
| Custom Messages | Add personalized messages or prompts to guide users through the checkout process or to inform them of special promotions. |
| Shipping Options | Customize shipping methods displayed during checkout. Offer options based on product weight, location, and delivery speed to enhance flexibility. |
| Payment Gateways | Provide multiple payment options, such as credit cards, PayPal, or cryptocurrencies, to cater to diverse customer preferences. |
These customization options will empower you to enhance the overall shopping experience on your WooCommerce store. Remember, the key is to keep it user-friendly while still showcasing your brand’s unique personality. Happy customizing!
5. Step-by-Step Guide to Customizing the Shopping Cart by Product
Customizing the shopping cart in WooCommerce isn’t as daunting as it might seem! With a few simple steps, you can tailor the cart functionality to enhance user experience based on the specific products added. Here’s how to do it:
- Access your WordPress Dashboard: Start by logging into your WordPress admin area. Once you’re in, navigate to the WooCommerce settings where you can manage various aspects of your online store.
- Go to WooCommerce Settings: Click on the ‘WooCommerce’ tab on the sidebar, then select ‘Settings.’ Look for the ‘Products’ tab where you can manage product-related settings.
- Enable Cart Customization: Depending on the plugins you might have, ensure that the cart customization options are enabled. You may find options like ‘Cart Page’ settings where you can add custom messages or options.
- Utilize Custom Fields: If you want to add specific fields to the cart items, consider custom fields. You can set these fields for different products through the product edit page. This could include additional notes or size options, enhancing the customer’s view of their cart.
- Adjust Cart Display: Depending on your theme, you may find it beneficial to adjust how the cart displays product information. Look for options in the theme’s customizer under ‘WooCommerce’ settings to change layouts, colors, and visibility.
- Test Your Customizations: Finally, after making these changes, always test your cart. Go through the customer journey yourself to see how the customizations appear and function. It’s essential to ensure everything works seamlessly.
By following these steps, you’ll not only create a shopping cart that’s aesthetically pleasing but also user-friendly, leading to a better customer experience!
6. Using Hooks and Filters for Advanced Customization
If you’re looking to dive deeper into customizing your WooCommerce shopping cart, hooks and filters are your best friends. These powerful tools offer a way to modify or add to the default functionality of WooCommerce without altering core files. Let’s break it down a bit:
WooCommerce provides a variety of hooks and filters that allow developers and shop owners to customize their online shop more effortlessly.
- What are Hooks? Hooks are specific points in the WooCommerce code where you can “hook” your own custom functions. They come in two flavors:
- Action Hooks: These allow you to add code at a specific point in the WooCommerce workflow. For example, you could use an action hook to display additional information on the cart page.
- Filter Hooks: These let you modify data before it’s passed to the browser. It’s great for altering the text or content that appears in the cart.
- Creating Custom Functions: You can create custom functions in your theme’s functions.php file or within a custom plugin. For example, you might want to add a discount message using an action hook, like so:
add_action('woocommerce_cart_totals_after_order_total', 'add_discount_message'); function add_discount_message() { echo ''; } - Finding the Right Hooks: If you’re unsure where to start, the WooCommerce documentation is a rich resource for learning about available hooks and filters. Sites like Hookr.io can also help you find specific hooks in the WooCommerce codebase.
Utilizing hooks and filters enables you to make adjustments that align perfectly with your business needs and gives you an edge in providing a tailored shopping experience. Happy coding!
Implementing Conditional Logic for Specific Products
When it comes to customizing your shopping cart in WooCommerce, one powerful tool at your disposal is conditional logic. This feature allows you to show or hide specific fields, options, or even entire sections of your cart based on the product(s) a customer has added. By tailoring the customer experience, you can significantly enhance user engagement and potentially increase sales.
So, how do you set this up? It’s relatively straightforward, especially with the help of plugins like WooCommerce Conditional Products or WooCommerce Checkout Manager. Let’s break it down:
- Choose a Plugin: Begin by selecting a plugin that supports conditional logic. These plugins can be found in the plugin repository or on reputable sites. Install and activate your chosen plugin.
- Create Rules: Access the plugin settings and navigate to the conditional logic section. Here, you can establish rules based on specific products. For instance, you might want to offer free shipping if a customer adds a particular item to their cart.
- Test Your Conditions: After setting up your rules, it’s crucial to test them. Add products to your cart and ensure that the conditions you established are functioning as intended.
This method can be utilized for various scenarios, such as hiding fields for digital products or showing options for bundled items. Ultimately, implementing conditional logic can simplify the shopping process and improve customer satisfaction.
Testing Your Customizations for Functionality and User Experience
After you’ve gone through the trouble of customizing your WooCommerce shopping cart, it’s time to ensure everything works seamlessly. Testing your customizations is critical to maintaining a smooth shopping experience and preventing any disruptions that might lead to cart abandonment.
Here are some steps to effectively test your customizations:
- Check for Compatibility: Before you dive deep into the testing, ensure that your customizations are compatible with the theme and plugins you’re using. Check for any conflicts that might arise.
- Functionality Testing: Thoroughly test the functionalities you’ve implemented. This includes:
- Adding/removing products from the cart
- Applying discount codes or conditional logic
- Calculating taxes and shipping
- Completing a checkout
- User Experience (UX) Testing: Consider how easy and intuitive the shopping cart is to use. You can gather feedback from real users, focusing on:
- Navigation ease
- Visual appeal
- Clarity of information (like prices and shipping costs)
- Responsive Testing: With many users shopping via mobile devices, make sure your cart is functional and visually appealing on various screen sizes.
Once you’ve gone through these testing steps, make any necessary adjustments. A well-tested shopping cart can lead to improved conversions and a better overall experience for your customers!
Common Issues and Troubleshooting Tips
When customizing your shopping cart by product in WooCommerce, you may encounter some common issues. Don’t worry, though—most of these challenges can be resolved with a little troubleshooting. Let’s dive into some of the frequent issues and how to tackle them.
- Cart Not Updating: Sometimes, changes made to the cart don’t reflect immediately. Ensure you’ve cleared your browser cache and WooCommerce cache. You can also refresh your theme settings.
- Inconsistent Product Variations: If specific variations of a product aren’t appearing correctly in the cart, double-check your variation settings. Make sure each variation is enabled and correctly configured in WooCommerce.
- Conflicts with Other Plugins: Plugins can often conflict with each other. If your customization isn’t working, try deactivating other plugins one by one to see if that resolves the issue. If so, consider reaching out to the plugin developer for support.
- Checkout Errors: Sometimes customization can interfere with the checkout process. Test the checkout after making any changes to ensure that the payment gateways and other functionalities work seamlessly.
- CSS Styling Issues: If the cart’s appearance is off, there may be issues with CSS styles. Use Developer Tools in your browser (F12) to inspect elements and find out which styles are causing the issues.
Remember, it’s essential to always back up your site before making changes. This way, if something doesn’t work, you can revert to the previous version without any hassle.
Conclusion: Enhancing User Experience through Customization
Customizing the shopping cart by product in WooCommerce is more than just a trendy option—it’s a necessity for modern e-commerce businesses that want to enhance the user experience. By tailoring your shopping cart functionality to your unique products and customer needs, you not only streamline the checkout process but also create a more engaging retail environment.
Here are a few key takeaways on how customization benefits both you and your customers:
- Increased Sales: A personalized cart encourages more purchases, especially if customers see related products or get bulk discounts.
- Improved Customer Satisfaction: When customers have a smoother shopping experience, they are more likely to return to your store. A customized cart helps minimize abandonment rates.
- Better Data Tracking: Customization allows you to track user interactions more effectively, giving you insights into customer preferences and behaviors.
In conclusion, investing time in customizing your WooCommerce shopping cart enhances the overall shopping experience. It’s not just about cosmetics; it’s about functionality and meeting your customers’ expectations. So, roll up your sleeves and start making those customizations; your customers will thank you!

