Have you ever wondered how you can make your WooCommerce shopping cart more intuitive for your customers? Personalizing it by category can hugely impact user experience and conversion rates. Today, we’re diving into the nitty-gritty of customizing your shopping cart to enhance user journeys. We’ll explore everything from the basics of WooCommerce shopping carts to actionable strategies that will leave your customers smiling. Let’s unpack this exciting topic!
Understanding WooCommerce Shopping Cart Basics

Before we start customizing, let’s cover the essentials of the WooCommerce shopping cart. Understanding how the cart functions is crucial for making effective changes.
At its core, the WooCommerce shopping cart is a vital part of any online store. It allows customers to:
- Add products to their cart
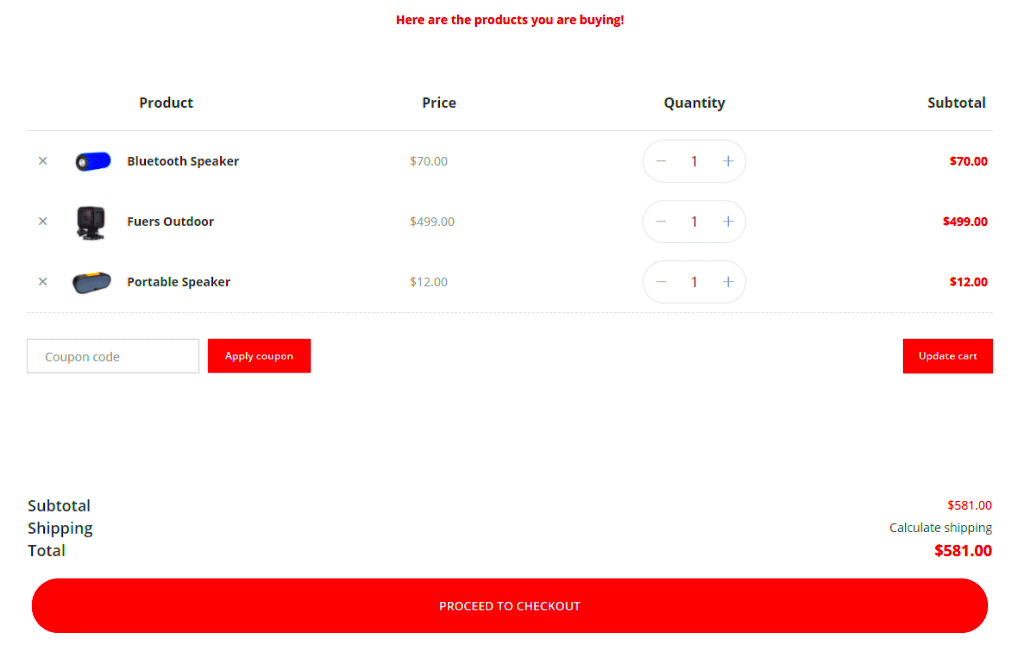
- View a summary of selected items, including quantities and totals
- Remove items they no longer wish to purchase
- Proceed to the checkout process for finalizing their orders
However, out-of-the-box, the shopping cart may not be the most user-friendly, particularly when dealing with various product categories. Here are some basic concepts to understand:
| Concept | Description |
|---|---|
| Product Categories | These are classifications that allow you to organize similar products, making it easy for customers to find what they need. |
| Cart Logic | This includes how products are displayed, the information shown, and the way users navigate through their selections. |
| Session Management | WooCommerce tracks what’s in the cart using session data, allowing users to return and find their previous selections intact. |
Grasping these foundational aspects will empower you to make meaningful customizations. Next, we’ll explore specific customization techniques to enhance category visibility in the shopping cart!
Why Customize Your Shopping Cart by Category?
When you’re running an online store with WooCommerce, you may wonder why you should bother customizing your shopping cart. Well, let me tell you—there are some pretty compelling reasons!
- Enhanced User Experience: A customized shopping cart that categorizes products can make it easier for customers to find what they need. Imagine shopping in a well-organized store, where items are displayed in logical sections. That’s how your online store can feel.
- Increased Sales: When customers can easily navigate through categories, they’re more likely to discover additional products. This is known as upselling and cross-selling, and it can significantly impact your bottom line.
- Better Analytics: By segregating products by category in the cart, you can gather more detailed insights into customer behavior. This helps you understand which categories are performing strong and where there might be opportunities for improvement.
- Branding Opportunities: Customizing the cart according to your brand’s aesthetic and category arrangement makes your store unique. Customers enjoy shopping in an environment that reflects your brand identity.
- Reduced Cart Abandonment: A confusing shopping cart can lead to frustration and ultimately, abandoned carts. By improving organization and clarity, you’re more likely to keep your customers engaged and help them check out smoothly.
Inspiring trust and providing an intuitive experience are key to making online sales. So, taking the time to customize your shopping cart by category can be a game changer!
Step-by-Step Guide to Customizing the Shopping Cart
Ready to dive into customizing your WooCommerce shopping cart by category? Let’s break down the steps, so you can make your cart as user-friendly and attractive as possible.
- Access WooCommerce Settings:
Start by logging into your WordPress dashboard. Navigate to WooCommerce > Settings.
- Install a Suitable Plugin:
To customize the shopping cart efficiently, you might need a specialized plugin. Some popular options include:
- CartFlows
- WooCommerce Cart Abandonment Recovery
- YITH WooCommerce Product Bundles
Install and activate one that suits your needs!
- Configure Plugin Settings:
Go into the settings of the installed plugin. Look for the option that allows you to categorize products in the cart. This might be labeled differently depending on which plugin you choose.
- Add CSS for Custom Styling:
Want to add some flair? You can inject custom CSS styles to enhance how your categories appear in the cart. Go to Appearance > Customize > Additional CSS and add your styles there.
- Test Your Setup:
After you’ve made your changes, always test your shopping cart. Add items from different categories and ensure they are prominently displayed and well-organized in the cart.
- Collect Customer Feedback:
Once you go live with your changes, solicit feedback from your customers. This will help you refine the setup based on real user experiences.
Customizing your shopping cart by category may seem daunting, but with this guide, you can make it a breeze. Happy customizing!
Setting Up Product Categories in WooCommerce
When it comes to customizing your WooCommerce store, setting up product categories is one of the most crucial steps. It not only helps organize your products but also enhances the overall shopping experience for your customers. Let’s dive into how you can establish product categories effectively.
To start with, follow these straightforward steps:
- Access Your Dashboard: Log in to your WordPress admin panel. On the left sidebar, hover over the “Products” menu option.
- Select Categories: Click on “Categories” to enter the category management page. Here, you’ll see an option to add new categories.
- Create a New Category: Fill in the fields:
- Name: Give your category a unique name (e.g., “Electronics”).
- Slug: Create a URL-friendly version of the name (e.g., “electronics”).
- Parent Category: If this category falls under another, select the parent category to form a hierarchy.
- Description: Add a brief description to help customers understand what this category includes.
- Save Changes: Click on the “Add New Category” button to save your new category. Repeat the process for additional categories.
Once set up, these categories will not only help organize your products but can also be used to customize your shopping cart experience. By assigning products to categories, you can offer a tailored cart experience, showing relevant products and suggestions based on their selections. This can lead to better customer engagement and potentially more sales!
Modifying the Shopping Cart Template
Now that you have your product categories set up, the next step is to modify the shopping cart template. This allows you to tailor the way the cart functions and looks, making the shopping experience perfect for your customers.
To modify the cart template in WooCommerce, you’ll want to create a child theme if you haven’t done so already. This ensures your changes won’t be overridden when you update your theme. Here’s how to get started:
- Locate the Right Template: The shopping cart template can be found in the WooCommerce plugin under
woocommerce/templates/cart/cart.php. You’ll want to copy this file to your child theme. - Create a New Directory: In your child theme, create a new folder called
woocommerce. Inside this, create another folder namedcart, and place the copied cart.php file there. - Edit the Template: Open the
cart.phpfile and start making your adjustments. This can include:- Changing the layout of product categories displayed in the cart.
- Adding or removing certain fields here, like product images or categories.
- Incorporating custom styles or scripts to enhance the visual appeal and functionality.
- Use Hooks and Filters: WooCommerce allows you to hook into various actions and filters. This means you can add additional functionality without modifying core template files directly. Explore the official WooCommerce hooks documentation for more information.
- Test Your Changes: Always preview your cart changes on different devices to ensure functionality and aesthetics remain intact.
Through effective modifications to your shopping cart template, you can create a seamless and tailored experience for your customers, enhancing their engagement and likely boosting sales. Remember, the key is testing your changes and ensuring that the shopping experience remains smooth and intuitive!
7. Using Hooks and Filters to Customize Cart Behavior
When it comes to customizing your WooCommerce shopping cart, one of the most powerful tools at your disposal is the use of hooks and filters. These allow you to extend or modify the default functionality without altering the core files, making your site more secure and easier to maintain. Essentially, hooks let you add your own functionalities, while filters allow you to modify the existing data that WooCommerce uses.
To get started, you’ll want to familiarize yourself with two types of hooks: actions and filters. Actions let you execute your own code at specific points, while filters let you change content before it is displayed. Here’s a quick overview:
- Actions: These execute functions at certain points in the WooCommerce workflow. For example, you can add custom data when products are added to the cart.
- Filters: These modify existing data, like modifying the text that appears in the cart or the prices displayed.
For instance, if you want to display a custom message when a specific category of products is added to the cart, you might use the following snippet:
add_action('woocommerce_add_to_cart', 'custom_cart_message');function custom_cart_message($product_id) { if (has_term('your-category', 'product_cat', $product_id)) { wc_add_notice(__('You have added a product from the special category!', 'your-text-domain'), 'success'); }}By understanding and implementing hooks and filters, you can create a truly customized shopping experience that suits your specific business needs. Just remember to test your modifications thoroughly to ensure everything works seamlessly!
8. Styling Your Customized Shopping Cart
Once you’ve tailored the functionality of your WooCommerce shopping cart through hooks and filters, the next step is to make it visually appealing. Just like a well-dressed store attracts customers, a stylish and user-friendly shopping cart can significantly enhance the shopping experience on your site.
Styling your shopping cart doesn’t have to be complicated. Here are some steps to get you started:
- Use Custom CSS: WooCommerce allows you to add custom CSS either through the Customizer or a child theme. This lets you change colors, fonts, and layout styles. For example:
.woocommerce-cart .cart_item { border: 1px solid #eaeaea; padding: 15px; margin: 10px 0; }- Responsive Design: Make sure your cart is mobile-friendly. Use media queries to adjust styles for different screen sizes. A responsive cart enhances usability, especially as more customers shop from their smartphones.
@media (max-width: 600px) { .woocommerce-cart { font-size: 14px; }}- Utilize Icons and Graphics: Incorporating icons can improve navigation. For instance, using a shopping cart icon or arrows can make your cart more intuitive. Just choose images that complement your store’s theme.
- Test for Accessibility: Ensure that your cart is accessible to all users. Use color contrasts that are friendly to those with visual impairments and focus on keyboard navigability.
In conclusion, styling your customized shopping cart is not only about aesthetics but also about ensuring a seamless shopping experience. By paying attention to design details, you can create a cart that not only looks good but also functionally enhances the shopping journey for your customers.
9. Testing Your Customization
Once you’ve made all those exciting customizations to your WooCommerce shopping cart by category, it’s time for the most crucial step: testing your changes! This is where you see everything in action and ensure everything works as it should. Here’s a breakdown of how you can effectively test your customizations:
- Check Functionality: Start by going through the complete purchasing process, from selecting a product to completing the checkout. Make sure that the cart reflects the correct category-based changes. For example, if you added discounts or specific features for a category, verify they’re being applied.
- Review Category-Specific Settings: If you enabled different behaviors for different product categories, check each one. Does a certain category show the correct shipping options? What about tax calculations? It’s crucial to see these dynamically change based on the category that’s in the cart.
- Cross-Device Testing: Make sure your shopping cart customization looks great and functions seamlessly across various devices—desktops, tablets, and smartphones. Sometimes, what looks good on a computer might not translate well to mobile.
- User Experience Test: If you can, ask a few friends or colleagues to test the cart. Give them specific tasks (like purchasing from different categories) and gather feedback. Sometimes, having fresh eyes on the process can reveal areas for improvement.
- Check for Errors: Use tools like browser developer tools to inspect the console for any JavaScript errors or broken links that might have cropped up due to your customizations.
After testing, document any issues you encounter and keep track of what worked and what didn’t. This careful approach ensures your changes enhance user experience and lead to happier customers!
10. Common Challenges and Troubleshooting
Even with the best intentions, customizing the WooCommerce shopping cart by category can come with its share of challenges. But don’t worry! Many issues are common, and with some troubleshooting tips, you can tackle them like a pro. Here’s what to keep an eye out for:
| Challenge | Possible Solutions |
|---|---|
| Customizations Not Visible |
|
| Errors in Checkout Process |
|
| Category-Specific Features Not Working |
|
| Design Issues on Different Devices |
|
By staying vigilant and ready to address these common challenges, you can ensure a smooth and successful shopping experience for your customers, ultimately leading to increased satisfaction and sales.
Conclusion
Customizing your shopping cart by category in WooCommerce not only enhances user experience but also can significantly improve sales by guiding customers through their shopping journey.
As an online merchant, it’s crucial to understand that different categories may require unique strategies to lead customers to checkout. Here’s a quick recap of effective methods for achieving this:
- Utilize Category-Specific Coupons: Create discount codes tailored to specific categories to encourage purchases.
- Dynamic Cart Display: Show relevant products in the shopping cart based on the category being viewed to promote cross-selling.
- Customize Cart Items: Add category-based labels or icons to differentiate products easily.
- Consider Category-Based Upsells: Suggest related products from the same category in the cart for additional sales opportunities.
Integration with Plugins: Make use of WooCommerce plugins that allow for advanced customization options such as:
| Plugin Name | Functionality |
|---|---|
| WooCommerce Customizer | Allows simple, code-free customization options for the cart page. |
| YITH WooCommerce Product Add-Ons | Add extra options or products specific to the category in the cart. |
| WooCommerce Dynamic Pricing & Discounts | Create pricing rules based on categories, enhancing promotional efforts. |
By implementing these strategies, you can create a tailored shopping cart experience that resonates with your customers and boosts your WooCommerce store’s performance.


