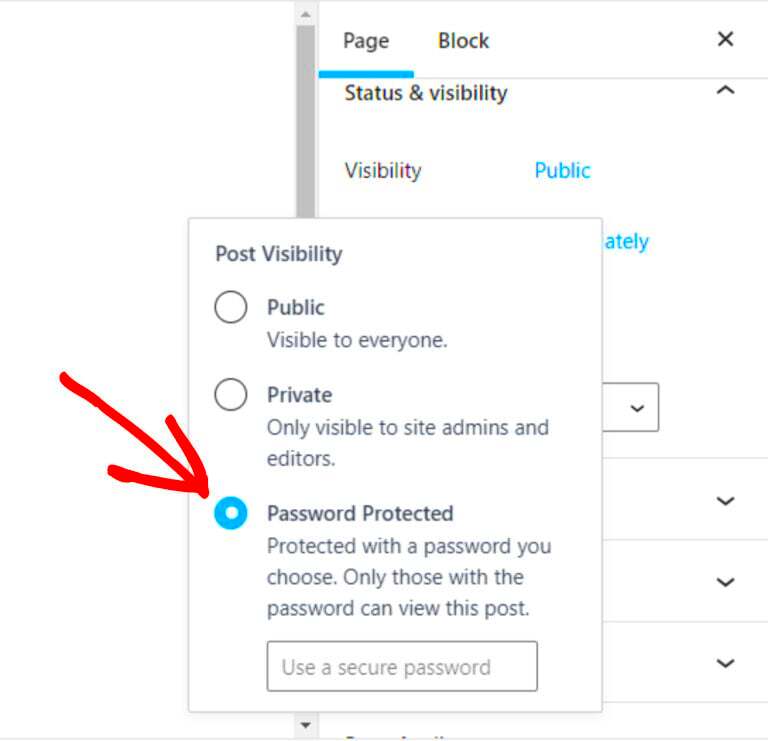
Welcome to the digital age, where security is paramount! In today’s blog, we’re diving into the world of password-protected forms on WordPress. These forms are an excellent way to collect sensitive information while ensuring that only authorized users can access them. Think of it like a gated community for your data—only the folks with the right key can get through. We’ll explore how to set them up and the benefits they offer for your website.
Why Use Password Protection for Your Forms?
So, why should you consider a password protection feature for your forms? Let’s break it down:
- Data Security: Password protection is your first line of defense against unauthorized access. By restricting access to your forms, you’re safeguarding sensitive information like personal details, payment info, and feedback.
- Privacy: If you’re collecting information that users may not want to share broadly, password-protected forms create a safe space. This builds trust with your users and encourages them to be more open in sharing their thoughts.
- Controlled Access: Use password protection to limit who can fill out a form. For instance, if you’re running a survey for a specific group, you can give the password only to those members, ensuring you get the data you need from the right audience.
- Brand Reputation: A commitment to security can enhance your brand’s reputation. Clients and users appreciate transparency and safety, making them more likely to develop a positive association with your brand.
- Customization Options: Customizing your password workflows adds flexibility. You can create different passwords for different audiences or purposes, increasing engagement and responses.
Password protection isn’t just an added layer of security; it’s a proactive measure that can enhance user experience and maintain the integrity of your data collection.
Getting Started: Prerequisites for Customizing Password-Protected Forms
Before diving into the exciting world of password-protected forms in WordPress, it’s essential to ensure you have all the necessary pieces in place. Here’s a handy checklist of prerequisites to help you kick-start the customization process:
- WordPress Installed: First and foremost, make sure you have a WordPress site set up. If you’re just starting out, you can choose from a self-hosted option or a WordPress.com plan based on your needs.
- Theme Selection: Choose a responsive and customizable WordPress theme. A good theme will allow you to make changes easily and ensure that your password-protected form looks great on any device.
- Basic Understanding of WordPress: Familiarity with WordPress is crucial. You don’t need to be an expert, but knowing how to navigate the dashboard, create pages/posts, and use plugins will make the process much smoother.
- Access to Administrator Account: To install plugins and tweak settings, you must have administrator access to your WordPress site.
- Backup Systems: Consider backing up your website before making any changes. Good backup plugins like UpdraftPlus or BackupBuddy can save you from potential headaches.
- Plugin Ready: Be ready to install plugins for custom functionality. These tools will help streamline the form-making and protection process.
With these essentials checked off your list, you’re ready to delve into the fun part—customizing your password-protected forms!
Choosing the Right Plugins for Password-Protected Forms
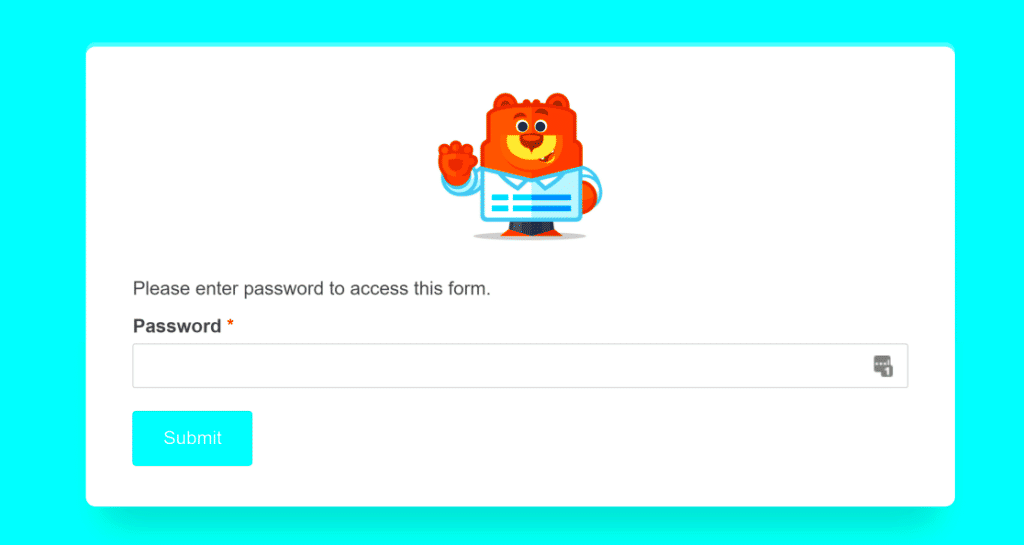
Now that you’ve prepared yourself with the fundamentals, it’s time to explore the variety of plugins available for creating password-protected forms in WordPress. The right plugin can significantly enhance functionality and user experience. Here’s how to choose wisely:
- User-Friendly Interface: Look for plugins that offer an intuitive interface. This makes the process of creating and customizing forms straightforward, even for beginners.
- Compatibility: Ensure that the plugins you choose are compatible with your WordPress theme and other installed plugins. This helps avoid conflicts and ensures seamless operation.
- Review and Ratings: Always check user reviews and ratings. This is a great way to gauge how well a plugin works in real-world scenarios.
- Functionality Required: Some plugins come with advanced features like conditional logic, email notifications, and integration with payment gateways. Think about what you specifically need and pick accordingly.
- Security Features: Since you’re dealing with password protection, it’s essential to choose plugins that adhere to strong security protocols to keep your data safe.
Here are a couple of popular plugins to consider:
| Plugin Name | Key Features |
|---|---|
| WPForms | Drag-and-drop builder, custom notifications, integrations with email marketing services. |
| Ninja Forms | Customizable templates, conditional logic, excellent support for developers. |
By focusing on these factors, you’ll be well-equipped to select the perfect plugins for your password-protected forms, making the customization process a breeze!
5. Step-by-Step Guide to Creating a Password-Protected Form
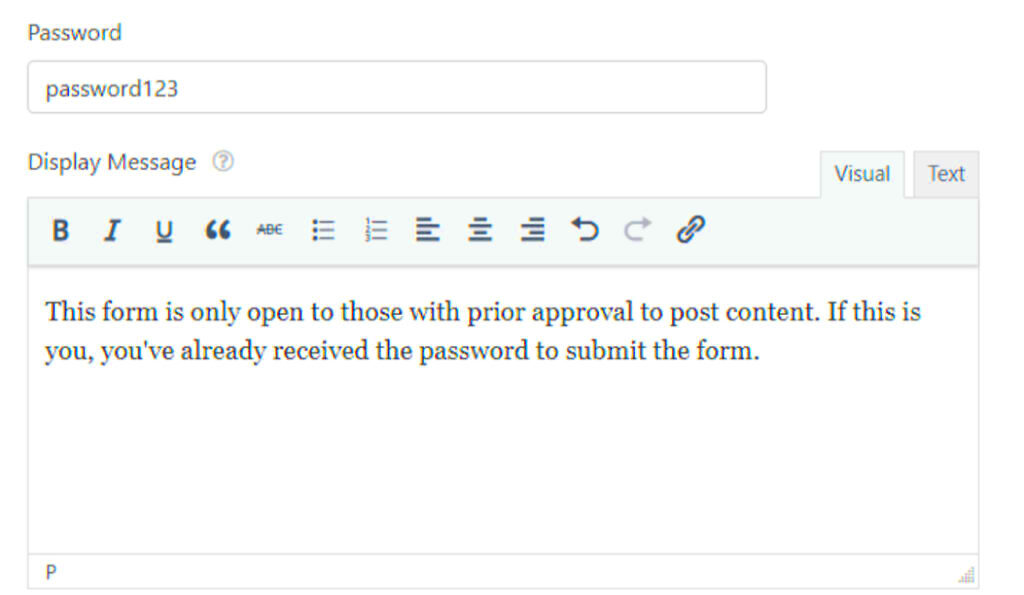
Creating a password-protected form in WordPress is a straightforward process. It adds an additional layer of security, ensuring that only authorized users can access the information you’re collecting. Follow these steps to set up your password-protected form:
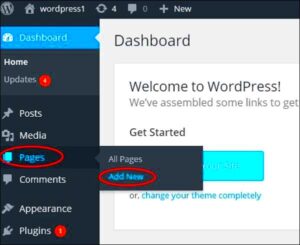
- Install a Form Plugin: First, you’ll need a form plugin that supports password protection. Some popular options include WPForms, Contact Form 7, and Ninja Forms. Navigate to Plugins > Add New in your WordPress dashboard, search for your preferred plugin, then click Install Now and Activate.
- Create a New Form: After activation, look for the plugin’s menu in your dashboard. Click on Add New to start creating your form. You’ll be presented with different fields like text boxes, dropdowns, and checkboxes. Customize the fields according to your needs.
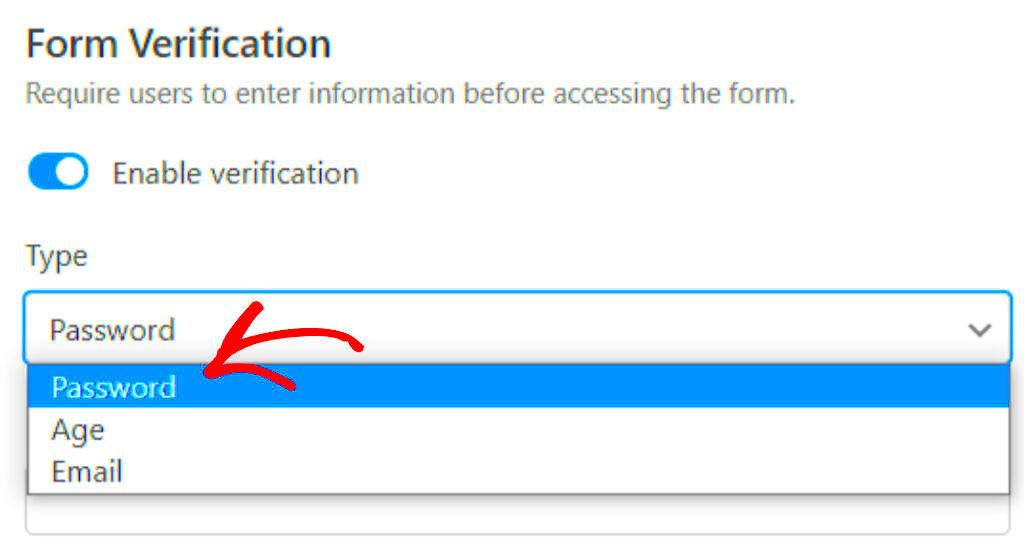
- Enable Password Protection: Most form plugins have options for password protection. Look for a setting like Form Settings or Advanced Options. Here, you can set a password that users must enter to access your form.
- Configure Email Notifications: Set up email notifications to receive form submissions. This ensures you don’t miss any responses from users who have the password.
- Publish Your Form: Once you’re satisfied with your form, copy the shortcode provided by the plugin. Then, paste it onto the desired page or post where you want the password-protected form to appear.
And that’s it! You now have a password-protected form on your WordPress site. Don’t forget to test it by using the password you set, ensuring everything works smoothly.
6. Customizing the Design of Your Password-Protected Form
Once you’ve created your password-protected form, you might find that customizing its design is crucial for matching your website’s branding and improving user experience. Here’s how you can creatively customize your form:
- Change the Layout: Use your form plugin’s layout settings to create either a multi-column design or a single-column layout. This affects how the fields are presented, making it more visually appealing.
- Add Custom CSS: If you’re comfortable with coding, you can add custom CSS to style your form. You could change the font size, colors, or add borders to make your form stand out.
Example CSS Customizations:
| Element | CSS Property | Value |
|---|---|---|
| Form Background | background-color | #f9f9f9 |
| Input Fields | border | 2px solid #0073aa |
| Submit Button | background-color | #0073aa |
- Use Images or Logos: Incorporate your logo as a header in the form to boost brand recognition. Most plugins allow you to add images easily.
- Enhance with Conditional Logic: Some plugins enable conditional logic, allowing you to show or hide fields based on user input. This can help streamline the form and make it more user-friendly.
By personalizing your password-protected form, you ensure that it fits seamlessly into your site’s overall aesthetic while delivering a smooth user experience. Happy customizing!
7. Adding Functionality: Conditional Logic and Other Features
When it comes to creating a password-protected form in WordPress, merely locking it with a password is just the start. To enhance user experience and make your form more interactive, consider adding functionality like conditional logic and other features.
Conditional Logic is a fantastic tool that allows you to show or hide fields based on user responses. This means that users will only see the questions that are relevant to them, making the form less cluttered and more user-friendly. For example, if someone selects “Yes” for a question asking whether they own a pet, you can use conditional logic to display additional questions related to their pet ownership.
Here’s how to implement conditional logic:
- Choose a form plugin that supports conditional logic (like Gravity Forms or WP Forms).
- Click on the field you want to apply logic to and look for the “Conditional Logic” section.
- Set your rules by defining which field responses will trigger the display of other fields.
In addition to conditional logic, consider adding features like:
- File Uploads: Allow users to submit documents or images.
- Multiple Form Pages: Break long forms into segments to keep users engaged.
- Custom Emails: Send personalized confirmation emails once the form is submitted.
By incorporating these features, you’ll create a more dynamic and engaging password-protected form, ultimately leading to higher completion rates and a more satisfying experience for your users.
8. Testing Your Password-Protected Form
Now that you’ve built your password-protected form, it’s time to put it through its paces! Testing is crucial to ensure that everything works as intended before you unveil it to your audience. Think of this as a dry run that helps identify any potential hiccups.
Here’s a simple checklist you can follow to test your form effectively:
- Password Protection: Try accessing the form without the password to ensure it’s truly secure.
- Form Functionality: Fill out the form as a user would. Check for any fields that may not work properly.
- Conditional Logic: Test various paths through your form to confirm that fields show and hide as expected.
- Email Notifications: Ensure that any custom emails you set up are sent correctly upon form submission.
- Data Storage: After submission, verify that the data is being captured and stored correctly in your WordPress database.
Once you have gone through this checklist, it’s a good idea to have a friend or colleague test it as well. Fresh eyes can spot issues you might overlook. Make any necessary adjustments based on feedback, then you’re all set to launch! Not only is testing crucial for functionality, but it also assures your users that they’re interacting with a reliable and secure form.
9. Common Issues and Troubleshooting Tips
When it comes to using password-protected forms in WordPress, users may occasionally run into some bumps along the way. However, don’t let these issues deter you! Here are some common problems and practical troubleshooting tips to resolve them:
- Forgotten Passwords: It’s all too easy to forget a password. If you can’t access your form, check if there’s a password recovery feature or reset it from the admin dashboard.
- Form Not Displaying: Sometimes, the password-protected form may not show up on your page. This could be due to incorrect shortcode placement or a conflict with a plugin. Always ensure you’re using the right shortcode and consider temporarily deactivating plugins to troubleshoot.
- Security Plugin Conflicts: Security plugins can sometimes block access to your password-protected forms. If you’re having trouble, check your security settings and whitelist your form if necessary.
- Not Receiving Notifications: Are you missing email notifications when someone submits a form? Verify that your WordPress site is properly configured to send emails and check your spam folder!
- Password Not Working: If your users are complaining that their passwords aren’t working, ensure that they’re typing them out correctly, paying attention to any case sensitivity.
If you find yourself facing issues, don’t lose hope! A little troubleshooting often goes a long way to get your password-protected forms running smoothly again.
10. Best Practices for Managing Passwords and Security
When managing password-protected forms, it’s essential to use best practices that enhance security and ensure a smooth user experience. Here are some key points to consider:
- Strong Passwords: Encourage users to create strong, complex passwords. A good password should consist of a mix of uppercase letters, lowercase letters, numbers, and special characters.
- Regular Updates: Keep your WordPress site, themes, and plugins updated. Regular updates patch vulnerabilities that hackers can exploit.
- Two-Factor Authentication (2FA): Consider implementing 2FA for added security on sensitive forms. This extra step can significantly reduce the risk of unauthorized access.
- Timeout Settings: Implement timeout settings on forms. After a certain period of inactivity, users should be logged out to prevent unauthorized access.
- Secure Hosting: Opt for a reputable hosting provider that offers robust security measures, including SSL certificates for encrypted data transmission.
By following these best practices, you can protect your password-protected forms while ensuring a trustful and efficient interaction with your users. Remember, security is a continuous process that evolves, so stay vigilant!
Conclusion and Next Steps
Customizing a password-protected form in WordPress not only enhances security but also gives you the flexibility to control user access to sensitive information. By following the detailed steps outlined in this post, you can create forms that meet your specific needs while maintaining the integrity of your data. Whether you are using plugins or native WordPress functionalities, implementing a password protection can significantly improve your website’s user experience and safety. Here are the key points to summarize:
- Understand Your Requirements: Start by defining the purpose of your password-protected form, detailing what information you require and who should access it.
- Choose the Right Tool: Depending on your comfort level and needs, select the appropriate plugin or WordPress feature that allows for customizable password protection.
- Customization Options: Utilize available settings to tailor the form’s appearance and behavior, including layout changes, field types, and notification settings.
- Testing: Always conduct thorough testing after customization to ensure the form works as intended and that access restrictions are effective.
- Maintenance: Regularly update your plugins and WordPress to address security vulnerabilities and keep your forms running smoothly.
As you finalize your password-protected form, consider the next steps in enhancing your site’s functionality. Explore additional plugins that can help with form management, integrate payment gateways if needed, or consider regular audits for user access to optimize security over time. For further learning, stay updated with WordPress trends and best practices to keep your site ahead in security and performance.

