Looking to make your images stand out? Shutterstock Editor is a fantastic tool that makes editing your images easy and accessible, even if you’re a beginner. One of its popular features is the ability to create transparent backgrounds, which can really elevate your designs, presentations, or social media posts. Whether you want to remove a busy background or prepare images for logos, product photos, or creative projects, understanding how to use Shutterstock Editor for transparent backgrounds is a game-changer. In this guide, we’ll walk you through the process step-by-step, so you can confidently create clean, professional-looking images with transparent backgrounds.
Why Create Transparent Backgrounds for Your Images

So, you might be wondering, why go through the effort of creating transparent backgrounds? Well, there are plenty of reasons that can make a big difference in how your images are perceived and used:
- Versatility: Transparent backgrounds allow your images to be seamlessly placed over any background—be it website pages, presentations, or social media graphics—without awkward white or colored boxes.
- Professional Look: Removing distracting or cluttered backgrounds helps your main subject stand out, giving your visuals a clean, polished appearance.
- Branding and Logo Design: Logos with transparent backgrounds are essential because they can be overlaid on various surfaces and textures without losing clarity or professionalism.
- Creative Freedom: Transparent images are perfect for collages, composite images, or layered designs where you want to combine multiple elements seamlessly.
- Time and Cost Efficiency: Editing images to remove backgrounds directly in Shutterstock Editor saves you time and money compared to outsourcing or using complex software.
Overall, creating transparent backgrounds opens up endless possibilities for customizing your visuals and making your content look cleaner, more professional, and more eye-catching. Whether you’re preparing images for marketing, personal projects, or digital art, mastering this skill is definitely worth your effort.
Preparing Your Image for Background Removal
Before diving into the background removal process, it’s a good idea to get your image ready. Proper preparation can make the whole process smoother and produce cleaner results. Think of it as tidying up your workspace before starting a big project!
First, consider the quality of your image. High-resolution images with good lighting are much easier to work with. If your photo is blurry or dark, try to find a clearer version or adjust the brightness and contrast beforehand using basic photo editing tools. This step helps ensure that the Shutterstock Editor can accurately detect the edges of your subject.
Next, think about the background. If it’s complicated or busy, removing it might be a bit more challenging. Sometimes, simplifying the background or cropping the image to focus on the main subject can make a huge difference. Use cropping tools to center your subject or eliminate unnecessary parts that could interfere with the background removal process.
Additionally, if your image has shadows or reflections that you don’t want to keep, consider editing them out first. You can do this with simple tools like the clone stamp or eraser in basic photo editors. Removing distracting elements ensures your final image looks clean and professional.
Finally, save your image in a widely supported format like PNG or JPEG. PNGs are especially good if you plan to keep transparency or need high quality. Remember to keep a copy of your original image safe just in case you need to start over.
In summary, take a moment to check your image’s resolution, lighting, background simplicity, and overall clarity. Preparing your image might take a few extra minutes, but it’ll pay off when you start removing backgrounds in Shutterstock Editor!
Using Shutterstock Editor to Remove Backgrounds
Now that your image is prepped and ready, it’s time to jump into Shutterstock Editor and start removing that background. Don’t worry — it’s pretty straightforward, and I’ll walk you through each step.
First, log into your Shutterstock account and open the Shutterstock Editor. You can do this directly from your dashboard or by uploading your image if you haven’t already. Once your image is uploaded, select it to open up the editing options.
Look for the “Background Remover” tool in the toolbar. It’s usually clearly labeled and easy to find. Click on it, and Shutterstock Editor will automatically analyze your image to detect the background. In most cases, the tool does a pretty good job of identifying the edges of your main subject.
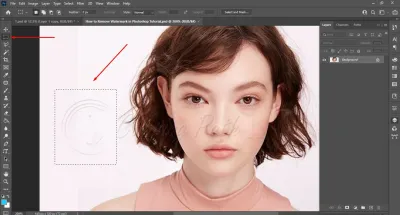
After the initial automatic removal, you might notice some areas that need touch-ups. This is totally normal! Use the brush tools to manually add or erase parts of the background. For instance:
- Erase Brush: Perfect for removing leftover bits or stray pixels.
- Restore Brush: Use this if the tool accidentally removes parts of your subject that you want to keep.
Take your time with this step. Zoom in for detailed areas like hair or intricate edges — this helps you get a clean cutout. Many editors also offer zoom and undo options, making it easier to perfect your work.
If your image includes complex details, like wispy hair or fine jewelry, consider using the “Refine Edges” feature, if available. This tool helps smooth out jagged lines and enhances the natural look of your cutout.
Once you’re satisfied with the background removal, preview your image. Check how it looks against transparent or new backgrounds. If everything looks good, go ahead and save your image as a PNG file to keep the transparency intact.
And that’s it! Removing backgrounds in Shutterstock Editor is designed to be user-friendly, even if you’re new to image editing. With a little patience and some practice, you’ll be creating stunning images with transparent backgrounds in no time.
Refining and Saving Your Transparent Image
Once you’ve removed the background and are happy with how your image looks, the next step is to refine and save it properly. This part is all about making sure your transparent image is polished and ready to use wherever you need it.
First, take a close look at your image. Sometimes, even after using the background removal tool, there might be tiny bits of background or rough edges that need some touch-up. Shutterstock Editor offers simple tools like the brush tool or eraser to fine-tune these areas. Just zoom in on your image for better control, and carefully clean up any leftover spots or jagged edges.
Next, consider the overall quality of your image. If you notice any pixelation or blurriness, try adjusting the resolution or using the sharpening tools available in the editor. Remember, a crisp, clear image looks more professional and is more versatile for various uses.
When you’re satisfied with your edits, it’s time to save your image. To keep that transparent background intact, select the PNG format. PNG supports transparency, unlike JPEG, which always has a background color. Before saving, double-check that the transparency option is enabled—most editors will automatically do this when you choose PNG.
| Step | Action |
|---|---|
| Refine edges | Use the brush or eraser tools to clean up any rough spots or leftover background. |
| Adjust quality | Apply sharpening if needed to ensure clarity. |
| Save your image | Select PNG format, ensure transparency is enabled, and download your transparent image. |
Once downloaded, your transparent background image is ready to be inserted into other projects, added to designs, or used for presentations. Saving in PNG format with transparency ensures your image looks professional and seamless wherever you place it.
Tips for Achieving Professional Results with Shutterstock Editor
If you want your transparent images to look as polished as possible, a few insider tips can make a big difference. Whether you’re a beginner or have some experience, these pointers will help you elevate your creations and get professional results with Shutterstock Editor.
Tip 1: Use High-Quality Source Images
It all starts with a good foundation. Choose high-resolution images with clear subjects and good contrast. Blurry or low-quality photos are harder to edit smoothly and might not yield clean transparent backgrounds. The better your original image, the more effortlessly you can create a professional-looking transparent graphic.
Tip 2: Zoom In for Precision
When refining edges, zoom in as much as possible. This gives you better control over the brush or eraser tools, helping you remove unwanted background bits and smooth out edges. Patience and attention to detail are key—small adjustments make a big difference.
Tip 3: Keep Edges Smooth and Natural
Harsh or jagged edges can make your image look less professional. Use tools like feathering or soft brushes to create smoother transitions around your subject. If your editor offers it, apply subtle anti-aliasing to improve edge quality.
Tip 4: Use Layering and Masking
If you’re combining multiple images, take advantage of layering and masking features. This allows you to create composite images with transparent backgrounds that look seamless. Play around with opacity and blending modes for more natural results.
Tip 5: Preview Before Saving
Always preview your image against different backgrounds—white, black, or colored—to see how it looks in various settings. This step helps you catch any issues before finalizing and ensures your transparency works across different use cases.
Tip 6: Practice and Experiment
The more you experiment with Shutterstock Editor’s tools, the better you’ll get at creating clean, professional transparent images. Don’t be afraid to try different techniques or undo changes if things don’t look right. Practice makes perfect!
By following these tips, you’ll be well on your way to creating stunning transparent images that look professional and polished. Whether for branding, presentations, or social media, mastering these skills with Shutterstock Editor will boost your creative projects significantly.
Conclusion and Additional Resources
Creating transparent backgrounds using Shutterstock Editor can significantly enhance your visual content, making it more versatile and professional. By mastering the step-by-step process outlined in this guide, you’ll be able to seamlessly remove backgrounds and customize images to fit your project’s needs. Remember, practice makes perfect—don’t hesitate to experiment with different images and editing tools to improve your skills.
For further learning, here are some valuable resources:
- Shutterstock Editor Help Center: Comprehensive tutorials and FAQs to troubleshoot common issues.
- Online Design Communities: Platforms like Canva, Adobe Creative Cloud, and Reddit’s design forums offer tips and inspiration.
- Video Tutorials: YouTube channels dedicated to graphic design and editing techniques provide visual step-by-step guidance.
Additionally, consider exploring advanced features within Shutterstock Editor, such as layering, adding effects, or integrating with other editing software. Keeping updated with new tools and functionalities will help you stay ahead in creating stunning visuals. With consistent practice and utilization of these resources, you’ll enhance your editing skills and produce high-quality images with transparent backgrounds that elevate your projects.