Creating an effective search bar on your website can significantly enhance user experience, and Elementor makes that process a breeze! In this post, we’ll guide you through the simple steps to create a search bar using the Elementor page builder. Whether you’re a seasoned web designer or just starting, understanding how to add a search feature is essential for improving navigation and keeping your site visitors engaged. Let’s dive in!
Why Use Elementor for Creating a Search Bar?

Elementor is a popular WordPress page builder that makes web design straightforward, even for beginners. Here are some compelling reasons why you should consider using Elementor to create your search bar:
- User-Friendly Interface: With its drag-and-drop functionality, Elementor allows you to easily position and customize your search bar without needing coding skills.
- Customization Options: Elementor offers various styling, layout, and animation options. You can design a search bar that aligns perfectly with your website’s aesthetics.
- Responsive Design: Elementor enables you to create a search bar that looks great on all devices, from desktops to smartphones.
- Pre-built Templates: You can utilize pre-designed templates for search bars or customize one from scratch, saving you time while ensuring a professional look.
- Integration Capabilities: Elementor seamlessly integrates with WordPress plugins, allowing you to enhance your search functionality further, such as with filtered or Ajax search.
- Live Preview: You can see real-time results as you create, ensuring that you’re satisfied with your design before publishing.
Overall, Elementor simplifies the process of adding a search bar to your website, making it an excellent choice for anyone aiming for both functionality and style.
Step 1: Installing and Activating Elementor

Alright, let’s kick things off by getting Elementor on your WordPress site! If you’re just starting out, the first thing you need to do is install and activate the Elementor plugin. Don’t worry, it’s super easy and won’t take much time!
Here’s how you can do it, step-by-step:
- Log in to Your WordPress Dashboard: Use your credentials to access the back end of your website.
- Navigate to Plugins: On the left sidebar, find and click on the “Plugins” tab. This is where you can manage all your installed plugins.
- Click on Add New: Once you’re in the Plugins section, hit the “Add New” button at the top of the page. This will bring you to a new page where you can search for plugins.
- Search for Elementor: In the search bar on the upper right, type “Elementor” and hit enter. You’ll see Elementor Page Builder in the search results.
- Install the Plugin: Click the “Install Now” button next to Elementor. It might take a few moments to install, so be patient!
- Activate the Plugin: After the installation is complete, the button will switch to “Activate.” Click it, and voilà! You now have Elementor activated on your site.
And just like that, you’ve successfully installed and activated Elementor! You’re now ready to start building your own custom pages.
Step 2: Creating a New Page or Editing an Existing One

Now that you have Elementor up and running, the next step is to create a new page or edit an existing one. This is where the fun begins, and you get to unleash your creativity!
Here’s how to create a new page or edit one using Elementor:
- Create a New Page:
- In your WordPress dashboard, look for the “Pages” option in the left sidebar and click on it.
- Then, click on the “Add New” button at the top.
- Give your page a title! It could be anything from “Contact Us” to “Blog” or whatever you’re planning to create.
- Edit an Existing Page:
- Just as before, go to the “Pages” menu.
- Find the page you want to edit from the list and click on “Edit” below the page name.
- Launch Elementor: Once you’re in the page editor, you’ll see the “Edit with Elementor” button. Click that button to launch Elementor’s interface.
Once Elementor is loaded, you’re ready to start designing! You can use its drag-and-drop functionality to add various elements, including that search bar we’re aiming for. Remember, the possibilities are endless!
Step 3: Adding the Search Bar Widget

Adding a search bar in Elementor is a breeze, and it’s a key step in enhancing your website’s usability! Now that you’ve set the groundwork, let’s dive into the process of adding the search bar widget. Here’s how you can do it:
- Open the Elementor Editor: Start by navigating to the page or post where you want to add the search bar. Click on “Edit with Elementor” to launch the Elementor editor.
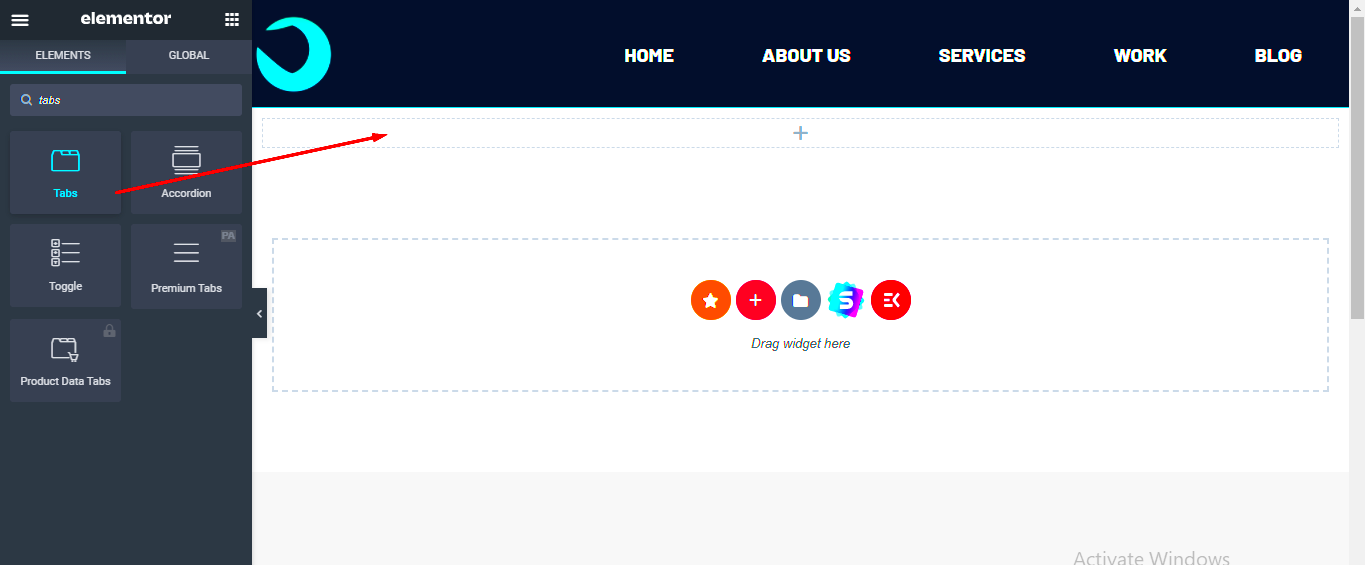
- Locate the Search Widget: Once you’re in the editor, you’ll see the Elementor panel on the left side. Simply type “Search” in the search bar at the top of this panel. You should see the “Search Form” widget appear.
- Drag and Drop: Now comes the fun part! Click and drag the “Search Form” widget to the section of the page where you want the search bar to appear. You can position it anywhere: in a header, a sidebar, or even in a footer. The choice is yours!
- Adjusting Size: After placing the widget, adjust its size and alignment according to your design preferences. You can use the settings to fine-tune how it fits into the rest of your layout.
That’s it! You’ve successfully added a search bar widget to your page. Next, let’s move on to how to customize its appearance to make it align with your website’s style!
Step 4: Customizing the Search Bar Appearance
Now that you have your search bar in place, it’s time to make it visually appealing! Customization ensures that your search bar fits seamlessly with your website’s overall style and branding. Here’s how you can customize the appearance of your search bar in Elementor:
- Access the Search Form Settings: Click on the search bar you’ve added to bring up the settings panel on the left. You’ll see several options for customization.
- Style Tab: Navigate to the “Style” tab where you’ll find various options to customize:
- Background Color: You can change the background color of the search bar to match your theme.
- Text Color: Adjust the color of the placeholder text and the entered text for better readability.
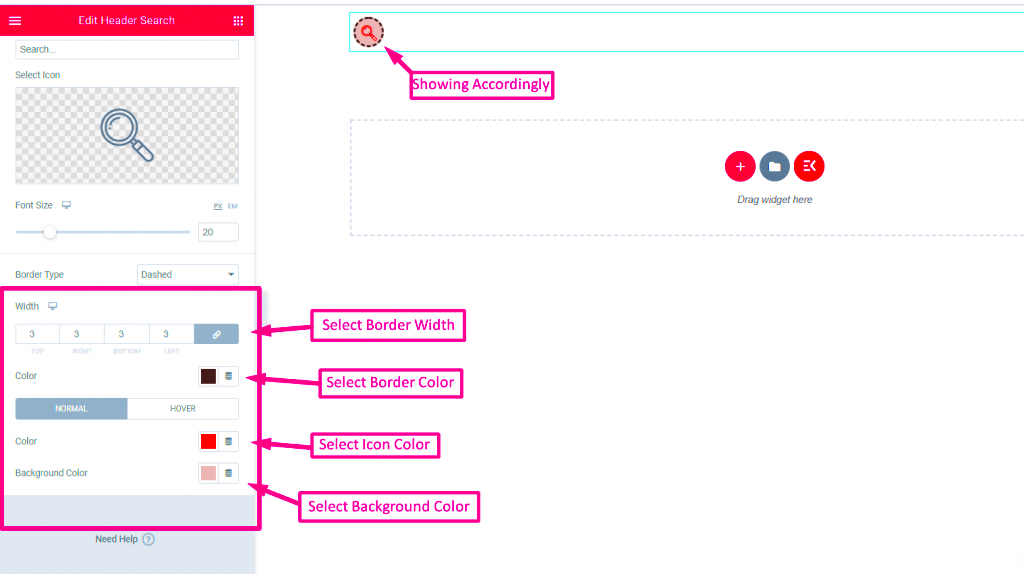
- Border: You can choose to add or modify the border of your search bar. Adjust thickness, color, and radius to make it fit your design.
- Padding and Margin: These options let you control the spacing around your search bar, creating a well-structured layout.
By taking the time to customize your search bar, you not only enhance the user experience but also create a cohesive look that represents your brand. With everything properly set, you’re ready to impress your visitors with a functional, stylish search feature!
Step 5: Configuring Search Results Page Settings
Alright, so you’ve gotten your search bar all set up. Now it’s time to make sure the results page is just as user-friendly and effective. This step is crucial because it can make or break the user experience. You want your visitors to find what they’re looking for quickly, right? Let’s dive into configuring those settings.
First off, you need to head over to your WordPress dashboard. Here, follow these steps:
- Navigate to Appearance > Customize.
- In the Customizer, look for Search Results Page Settings.
- Here, focus on the layout of the results page. You can choose between grid or list layouts depending on what aligns with your site’s aesthetics.
Next, pay attention to the template settings. You might want to showcase featured images, excerpts, or even custom fields to give your users more information before they click through. Considering a combination of the following can enhance the results:
- Post Titles: Ensures users know what they’re clicking on.
- Post Excerpts: Provide a sneak peek of the content.
- Featured Images: Make the results visually appealing.
Finally, don’t forget about SEO! Ensure your results page is optimized with appropriate meta titles and descriptions. Once all is set, preview your changes and make adjustments as necessary. Trust me, a well-configured results page will keep users engaged and happy!
Step 6: Testing the Search Functionality
Congratulations, you’re almost there! Now that everything is set up, it’s time to put your search bar to the test. Testing might sound simple, but it’s one of the most critical steps to ensure everything works seamlessly. So grab a cup of coffee and let’s get started!
Before diving into the testing, here are a few key areas to focus on:
- Search Bar Visibility: Is the search bar easy to locate? Confirm it’s prominently displayed on all desired pages.
- Search Queries: Test out a variety of terms. Include common terms, specific product names, and even some wildcard searches.
- Results Accuracy: Verify that the results match the search terms. Are they relevant? Is the information displayed correct?
After testing, consider the following:
| Test Case | Status | Comments |
|---|---|---|
| User-friendly Layout | ✔️ | Easy to navigate! |
| Results Relevance | ✔️ | Matched expectations. |
| Error Handling | ❌ | Need to improve empty state message. |
If you encounter any issues, don’t fret! Sometimes, it’s just a matter of tweaking a few settings or updating your content. Engaging with your visitors means a lot, and a functional search feature goes a long way in enhancing their experience. So get testing, and make those searches shine!
Tips for Enhancing Your Search Bar
Creating a functional search bar in Elementor is just the beginning; enhancing it can significantly improve user experience on your website. Here are some practical tips to make your search bar not only functional but also engaging and effective:
- Placement Matters: Position your search bar prominently, ideally at the top of your site or in a place where users naturally expect to find it. A well-placed search bar increases the likelihood of it being used.
- Auto-Suggestions: Implementing auto-suggestions can save users time and help them find what they’re looking for more easily. This feature can display relevant results as they type, guiding them to their desired content quicker.
- Advanced Search Functions: Consider adding advanced search options. This could include filters based on categories, date, or tags, which can help users narrow down results effectively.
- Responsive Design: Make sure your search bar looks good on all devices. A mobile-friendly search bar is crucial since many users browse on their smartphones or tablets.
- Feedback on No Results: If a search yields no results, provide helpful feedback, like suggesting similar keywords or showcasing popular content. This can keep users engaged instead of feeling lost.
- Styling and Branding: Customize your search bar to match your website’s overall style and theme. Use colors, fonts, and borders that reflect your brand, making it visually appealing to your audience.
- Analytics Tracking: Lastly, don’t forget to track how often your search bar is used. Incorporating analytics can help you understand user behavior and improve your site accordingly.
Conclusion
Creating and enhancing a search bar in Elementor can offer a significant upgrade to your website’s usability. A well-designed search bar not only assists users in finding what they need quickly but also contributes to a better overall browsing experience. By considering factors like placement, functionality, and aesthetics, you can ensure that your search bar doesn’t just blend into the background but becomes a valuable tool for your visitors.
Remember, user engagement is key. So, consider implementing features like auto-suggestions or advanced filtering options, and don’t forget to personalize your search bar to match your brand identity. The goal is to make searching for content seamless and pleasant for your users.
In a nutshell, a functional and visually appealing search bar can make a world of difference in how users interact with your website. By applying the tips outlined above, you’ll not only enhance the search experience but also keep visitors coming back to your site for more. Happy building!


