If you’ve ever downloaded an image from Shutterstock, you might have noticed the small logo or watermark placed somewhere on the picture. This logo helps protect the creator’s work and ensures proper attribution. But what if you want to change the logo’s position to better suit your project or branding needs? While Shutterstock has specific guidelines, understanding how and where the logo appears can give you more control over your images. In this post, we’ll explore how to manage logo placement effectively and what options are available to you as a user.
Understanding Shutterstock’s Logo Placement Options
Shutterstock typically places their logo as a watermark to prevent unauthorized use of images. The default placement is usually in the lower right corner, but this can sometimes interfere with your intended design or message. Fortunately, Shutterstock provides some flexibility in how the logo appears, especially if you have a subscription or special licensing agreement.
Here’s what you need to know about the logo placement options:
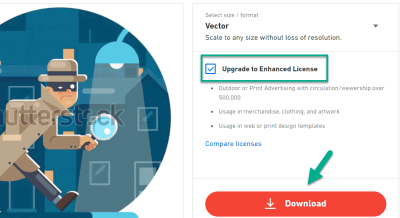
- Default Position: Usually in the bottom right corner. This is the standard for most stock images and helps keep the watermark unobtrusive.
- Custom Placement (with Licensing): Depending on your license type, you might have options to reposition or remove the logo altogether. This is common with extended licenses or special permissions.
- Editing the Logo Position: While Shutterstock doesn’t offer a direct tool to move the logo after download, you can use image editing software to reposition or remove it if you have the rights to do so.
It’s important to note that watermark placement is designed to prevent misuse, so any modifications should be done within the bounds of Shutterstock’s licensing agreements. Always check your license terms before attempting to change or remove the logo.
In the next sections, we’ll dive into practical ways you can manage the logo’s position, including how to handle it during download, and what tools you can use if you want to customize its placement on your images.
Step-by-Step Guide to Customizing Logo Position on Images
So, you want to give your images that perfect, professional touch by customizing where the Shutterstock logo appears? No worries—it’s easier than you might think! Here’s a simple step-by-step guide to help you position the logo exactly where you want it on your images.
Step 1: Access Your Shutterstock Editor
First things first, log into your Shutterstock account and navigate to the image you wish to edit. Click on the Edit Image button to open the Shutterstock Editor tool. This is where all the magic happens.
Step 2: Locate the Logo Tool
Once inside the editor, look for the Logo Settings or Watermark Tool. Usually, this can be found in the toolbar on the right or at the top menu. Click on it to open the logo options.
Step 3: Upload or Select Your Logo
If you haven’t uploaded your custom logo yet, this is the time to do so. Click Upload Logo and select your logo file from your device. If you already uploaded it previously, simply select it from your saved logos.
Step 4: Position the Logo
After selecting your logo, you’ll see it appear over the image. Now, you can drag and drop the logo to your preferred location. Want it in the top-left corner? Drag it there. Prefer it centered? Move it accordingly. Most editors also offer alignment options like top, bottom, left, right, or center.
Step 5: Adjust Size and Opacity
To make your logo fit perfectly, adjust its size by dragging the corners. You can also tweak the opacity to make it less intrusive or more prominent, depending on your style. Play around until it looks just right.
Step 6: Preview and Save
Before finalizing, preview how the image looks with the logo in its new position. Make any final tweaks needed. Once satisfied, click Save or Apply. Your customized image is now ready to download or share!
And there you go—customizing the logo position on your Shutterstock images is straightforward when you follow these steps. With a little experimentation, you’ll find the perfect placement that makes your images stand out while maintaining a professional look.
Tools and Features for Logo Placement Adjustment
When it comes to adjusting your Shutterstock logo, the platform offers a variety of tools and features designed to give you full control over the placement, size, and appearance. Let’s explore some of the key options that can help you create a polished, personalized look.
1. Drag-and-Drop Positioning
The most intuitive feature is the drag-and-drop function. Simply click on your logo in the editor window and move it around to find that perfect spot. This gives you real-time feedback and makes precise placement easy—even for beginners.
2. Alignment and Snapping Guides
Many editors include alignment tools and snapping guides. These features help you align your logo perfectly to the edges or center of the image. For example, you can snap the logo to the top-left corner or center it horizontally and vertically. This ensures symmetry and professional-looking results.
3. Size Adjustment Tools
Resize your logo effortlessly using sliders or by dragging the corners. Maintaining aspect ratio is usually automatic, but some platforms allow you to lock proportions to keep your logo looking crisp and proportional.
4. Opacity and Transparency Controls
Sometimes, a subtle logo works best. Use the opacity slider to make your logo more transparent, allowing the underlying image to show through. This is especially helpful if you want your watermark to be noticeable but not overpowering.
5. Rotation and Flip Options
Need to rotate your logo slightly for a creative effect? Many editors let you rotate or flip the logo horizontally or vertically. This adds flexibility to your design, enabling you to match the style or mood you’re aiming for.
6. Layer Management
If you’re working with multiple overlays or elements, layer management tools help you bring your logo forward or send it backward. This is useful when you want your logo to sit on top of certain parts of the image or blend into the background.
7. Preset Positioning Templates
Some platforms offer predefined templates or position presets—like bottom-right corner, center, or watermark overlays—that can be applied with a single click. These are great for quick edits or when you want consistency across multiple images.
8. Preview and Zoom Features
Finally, preview options let you see how your logo looks on different backgrounds or at various zoom levels. This helps ensure your logo placement looks good in all contexts, whether on a small thumbnail or a large print.
In summary, these tools and features make customizing your logo placement a breeze. Whether you prefer precise manual positioning or quick preset options, Shutterstock provides the flexibility to help your images look professional and personalized. Experiment with these features to find what works best for your style and workflow!
Best Practices for Logo Placement in Your Visual Content
When it comes to placing the Shutterstock logo on your images, the goal is to ensure it’s both visible and unobtrusive. You want your branding to be noticeable but not so dominant that it distracts from the main content. Here are some best practices to keep in mind:
- Consider the Composition: Think about the overall layout of your image. Place the logo where it complements the main subject rather than covering important details. Typically, the corners or edges are good spots.
- Size Matters: Keep the logo size proportionate. It should be large enough to be recognizable but not so big that it overpowers the image. Usually, 10-15% of the image width works well.
- Maintain Consistency: If you’re branding multiple images, try to keep the logo placement consistent across all visuals. This helps in building brand recognition and creates a professional look.
- Be Mindful of Background Colors: Place the logo where it contrasts well with the background to ensure clarity. If the background is busy, consider adding a semi-transparent overlay behind the logo or placing it on a plain area.
- Use Transparent Logos: Opt for PNG files with transparent backgrounds to seamlessly blend with your images, regardless of where you place them.
Remember, the main idea is to strike a balance—your logo should serve as an identifier without stealing the spotlight from your content. Experiment with different placements and sizes to see what works best for each image.
Additional Tips for Managing Shutterstock Logos on Your Images
Managing Shutterstock logos effectively can save you time and keep your images looking professional. Here are some additional tips to help you out:
- Use Templates for Quick Editing: Create templates with pre-positioned logos so you can easily add them to new images without starting from scratch each time. This approach ensures consistency and speeds up your workflow.
- Leverage Batch Processing: If you have multiple images to watermark, consider using batch processing tools or scripts that can automatically apply your preferred logo placement and size across all files.
- Keep Your Logos Up-to-Date: Make sure your logo files are current and high-quality. Using outdated or low-resolution logos can make your branding look unprofessional.
- Be Aware of Licensing Terms: Remember that Shutterstock logos are subject to licensing agreements. If you’re using their logo on images you plan to distribute commercially, double-check the licensing terms to ensure compliance.
- Adjust Transparency and Color: Sometimes, making the logo semi-transparent or matching its color to the background can help it blend better while still being visible. Use image editing tools to fine-tune these aspects.
- Test on Different Devices: View your images on various screens—computers, tablets, smartphones—to ensure the logo placement looks good everywhere. Small screens may require different positioning or size adjustments.
By following these tips, you’ll keep your images looking polished and professional, with your branding effectively integrated without overwhelming the visual content. Remember, the key is to be consistent, strategic, and thoughtful about how your logo interacts with each image.
Conclusion and Final Tips for Customizing Logo Positioning
Customizing the placement of your Shutterstock logo on your images is an essential step to ensure your branding is both effective and unobtrusive. By understanding the available tools and options, you can achieve a professional look that enhances your visual content. Remember, the goal is to strike a balance between visibility and aesthetics, making sure your logo complements rather than distracts from your main image.
Here are some final tips to keep in mind:
- Choose the right position: Common spots include the top-left, top-right, bottom-left, and bottom-right corners. Experiment with different locations to see what best suits your image.
- Adjust transparency: Slightly reducing the logo’s opacity can make it less intrusive while maintaining brand recognition.
- Maintain consistent branding: Use the same logo size, position, and style across your images to build a cohesive brand presence.
- Use guides or grids: Many editing tools offer guides to help align your logo precisely.
By applying these tips and leveraging available customization options, you can personalize your images effectively. Take the time to experiment with different placements and settings to find what works best for your brand and content style. Ultimately, well-placed logos not only protect your work but also enhance your brand identity in a subtle, professional manner.