Changing your domain name in WordPress might sound daunting, but it doesn’t have to be! Whether you’re rebranding your site, improving your SEO, or simply seeking a catchier domain, updating the name involves a few clear steps. In this guide, we’ll walk you through everything you need to know about changing your domain name while minimizing potential issues. By the end, you’ll feel confident in making this important adjustment!
Why Change Your Domain Name?

There are several reasons someone might consider changing their domain name. Here are some compelling motivations to think about:
- Rebranding: If your business has evolved, a new domain can reflect your updated identity more accurately.
- SEO Improvements: A domain that incorporates relevant keywords can improve your search engine rankings and attract more visitors.
- Shorter or Catchier Domain: A shorter, memorable domain can be easier for users to remember and type, improving user engagement.
- Changing Business Focus: If your offerings or target audience have shifted, a new domain can better represent your current focus.
- Legal Issues: Sometimes, you may need to change your domain due to trademark disputes or other legal concerns.
It’s essential to weigh the pros and cons of changing your domain name and how it may impact your existing audience. While the change can offer significant benefits, it also requires some careful planning to ensure that you maintain consistency and keep your traffic steady. More on that later!
Preparing for the Domain Change

Changing your domain name can feel like a daunting task, but with the right preparation, it becomes much smoother. First things first, you want to ensure that you don’t lose any valuable data during the process. Here are some crucial steps to prepare:
- Choose Your New Domain Wisely: Before anything else, make sure that the new domain you choose aligns with your brand and is easy to remember. Take your time here; a good domain is an essential part of your online identity.
- Check Domain Availability: Use domain registration sites to verify that your new domain is available. A quick search can save you a lot of future headaches.
- Update Your DNS Settings: Before making the switch, prepare your DNS settings. This involves pointing your new domain to your hosting provider. You might need to contact your registrar for assistance with this part.
- Redirect Old Domain to New Domain: Plan to set up 301 redirects from your old domain to your new one. This helps retain any existing traffic and SEO value your previous domain has built up.
- Inform Your Audience: It’s good practice to let your existing audience know about the change. Share the news via email or social media to keep them informed.
Taking these initial steps can significantly ease the domain change process and retain your site’s integrity. Ready to move on? Let’s talk about the crucial aspect of backing up your website!
Backing Up Your Website
Backing up your website before making any significant changes, like altering your domain name, is absolutely essential. Think of it as your safety net. Should anything go wrong during the process, having a backup means you can restore your site quickly. Here are some tips on how to back up your WordPress website effectively:
- Use a Reliable Backup Plugin: Invest in a reputable backup plugin like UpdraftPlus, BackupBuddy, or VaultPress. These plugins simplify the backup process with just a few clicks.
- Complete Backup Types: Ensure you back up both the database and files. The database contains all your posts, comments, and user information, while the files include themes, plugins, and media uploads.
| Backup Method | Description |
|---|---|
| Plugin-Based | Utilizes WordPress plugins to automate backups at set intervals. |
| Manual Backup | Involves downloading your files and database via FTP and phpMyAdmin. |
| Hosting Provider Backup | Some hosts offer built-in backup solutions for your convenience. |
Before you dive into the domain change, ensure you have solid backups in place. It’s better to be safe than sorry! Once you’re backed up, you’ll feel much more confident moving forward with your new domain name.
Changing Your Domain Name in WordPress
Changing your domain name in WordPress may seem daunting at first, but it’s a straightforward process if you follow the right steps. Whether you’re rebranding, expanding your online presence, or simply want a fresh start, updating your domain can give your website a whole new identity.
First, make sure to back up your website! This means downloading your files and creating a full database backup. You can use plugins like UpdraftPlus or manually export your database from phpMyAdmin.
After you have your backup ready, follow these steps:
- Purchase Your New Domain: Start by registering your new domain name with a registrar like Namecheap or GoDaddy.
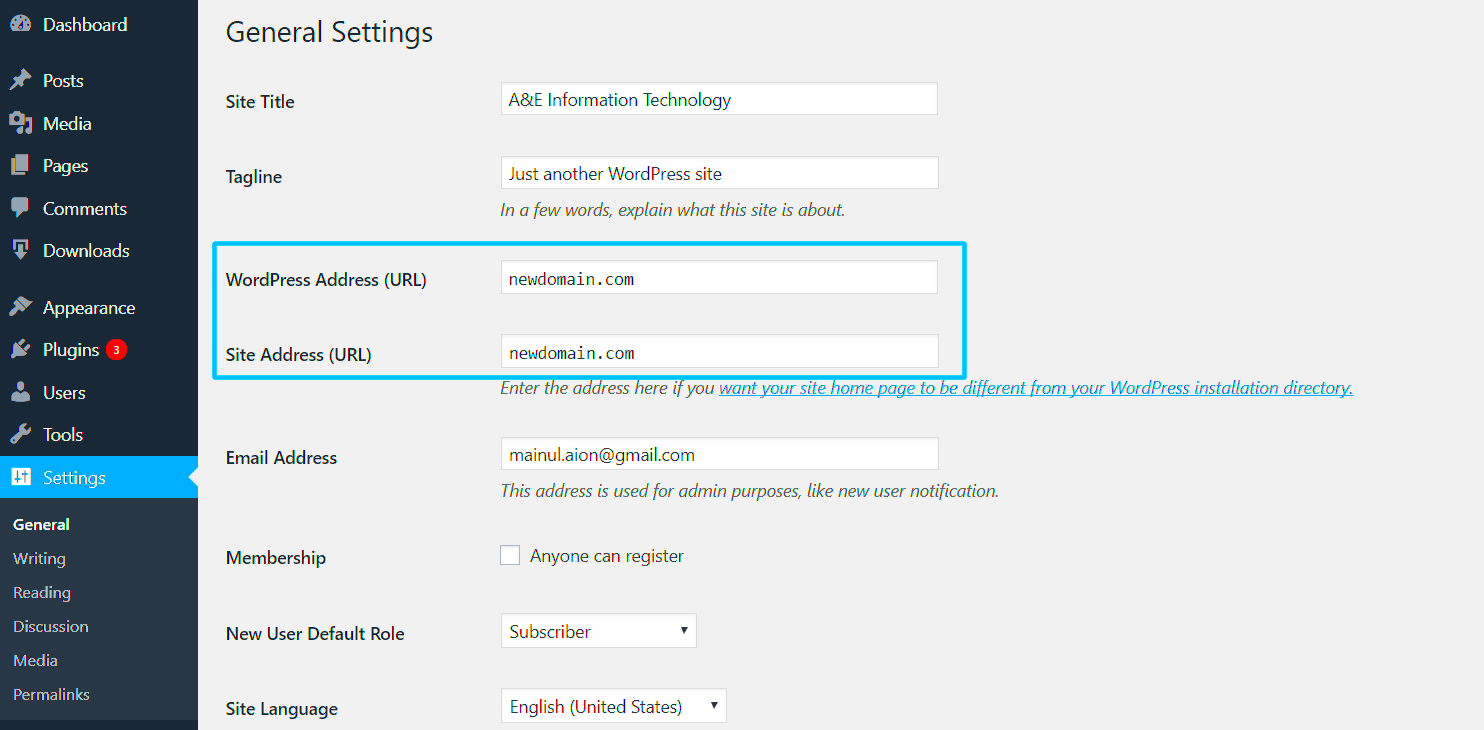
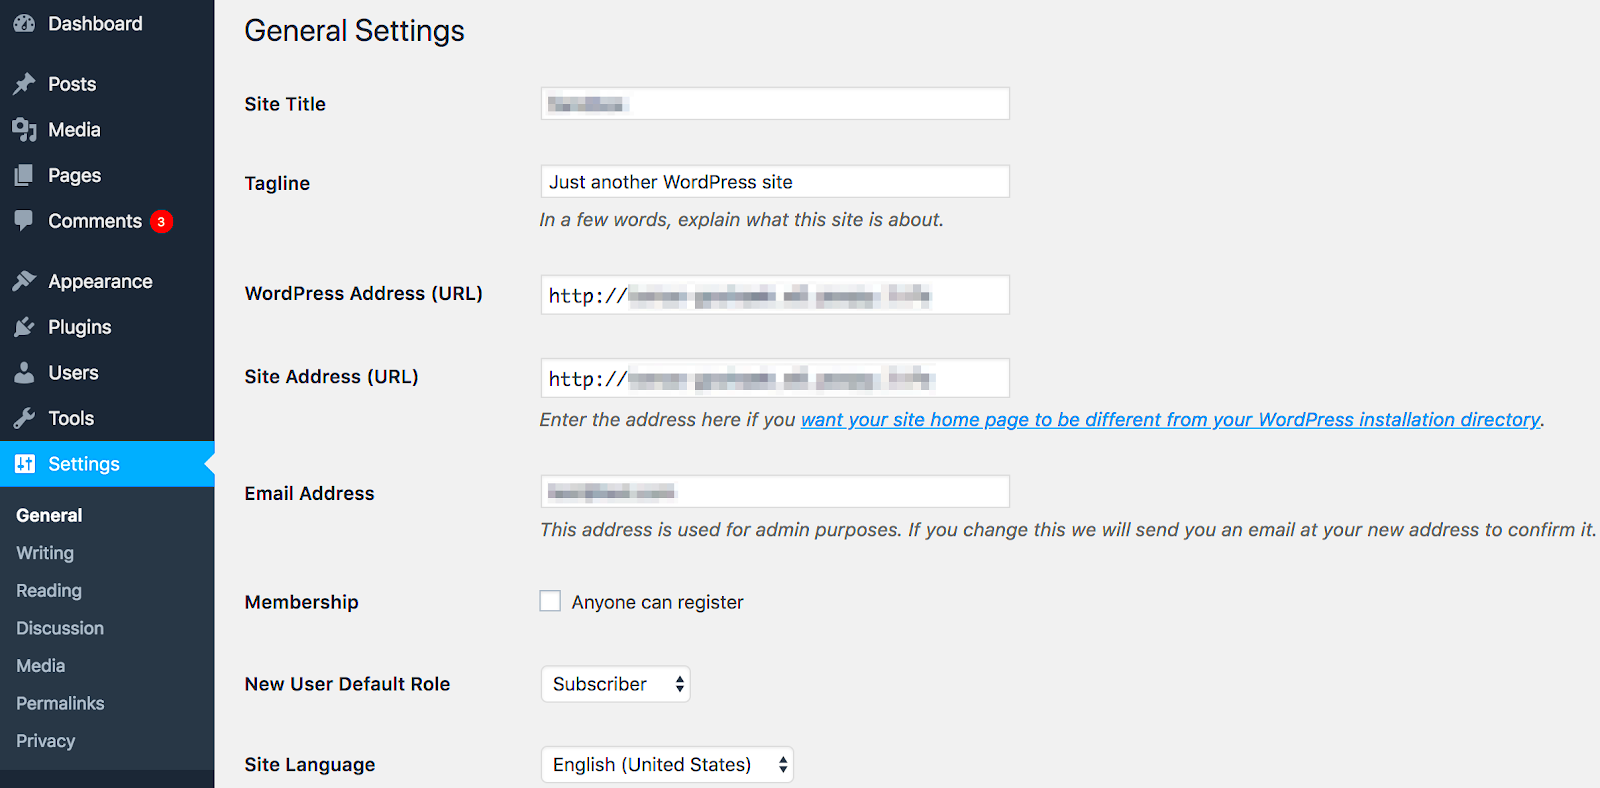
- Update Your Domain Name in WordPress: Log into your WordPress admin area and go to Settings > General. Here, you’ll see fields for “WordPress Address (URL)” and “Site Address (URL).” Change both to your new domain name.
- Modify the wp-config.php File: For added security, you can also change your domain in the wp-config.php file. Look for these lines and update them:
define('WP_HOME', 'http://yournewdomain.com');define('WP_SITEURL', 'http://yournewdomain.com');
Once you’ve made these changes, it’s time to address any potential issues like broken links or missing images. Use plugins like Velvet Blues or Better Search Replace to assist in finding all instances of your old domain throughout your content.
Lastly, don’t forget to set up redirects from your old domain to your new one using 301 redirects. This helps retain your SEO rankings and ensures users are seamlessly directed to your new site.
Updating Your Domain in the Database
After changing your domain name in WordPress, the next crucial step is to update your domain in the database. This step ensures there are no lingering references to your old domain within the database, which can cause broken links and other problems.
To make these updates, you’ll want to access your database through phpMyAdmin. Here’s how:
- Log into phpMyAdmin: Most hosting providers offer access to phpMyAdmin through their control panel. Click on the database associated with your WordPress installation.
- Find the Relevant Tables: Look for the wp_options table. The prefix may vary if you have selected a different one during installation.
- Update the Site URL: In the wp_options table, locate the siteurl and home fields. Update these to your new domain name:
| Field | Old Value | New Value |
|---|---|---|
| siteurl | http://yourolddomain.com | http://yournewdomain.com |
| home | http://yourolddomain.com | http://yournewdomain.com |
Additionally, you’ll want to search through other tables, like wp_posts, to replace any occurrences of the old domain with the new. You can run an SQL query like this:
UPDATE wp_posts SET guid = REPLACE(guid, 'http://yourolddomain.com', 'http://yournewdomain.com');UPDATE wp_posts SET post_content = REPLACE(post_content, 'http://yourolddomain.com', 'http://yournewdomain.com');
Implementing these changes ensures your new domain functions smoothly and all links are intact. Once you finish updating, clear your browser cache and test your site to confirm everything is as it should be. With a few simple updates, your website will be fully transitioned to its new domain!
7. Updating DNS Settings
Once you’ve successfully bought your new domain name, the next big step is to update your DNS settings. This is a crucial action that lets the world know where to find your website. If you’re feeling a little overwhelmed, don’t worry; updating DNS settings isn’t as complicated as it might seem!
Here’s a simple breakdown of the steps you should follow:
- Access Your Domain Registrar Account: This is where you purchased your domain. Log in to your account to get started.
- Locate DNS Management: Once in your account, look for the section labeled “DNS Management,” “DNS Settings,” or something similar. It’s usually located in the dashboard of your account.
- Edit A Records: Find the A records listed for your domain. You’ll want to point these records to the IP address of your hosting server. Your hosting provider should provide this IP address in their documentation or support pages.
- Save Changes: After making the necessary edits, be sure to save your changes. Sometimes, there’s a confirmation step, so keep an eye out for that!
- Propagation Time: DNS changes can take anywhere from a few minutes to 48 hours to fully propagate. During this time, your website might not be accessible from the new domain right away.
And just like that, you’ve updated your DNS settings! Remember, this is a pivotal moment in your website’s transformation, so take your time and double-check everything to ensure a seamless transition.
8. Testing Your New Domain
Congratulations! You’ve updated your DNS settings, and now it’s time to test your new domain. This step is vital to ensure everything is functioning properly and that visitors can reach your site without any hiccups.
Here’s how you can go about testing your new domain:
- Open a Web Browser: Start with a simple web browser of your choice. Chrome, Firefox, Safari – whatever you prefer!
- Enter Your New Domain Name: Type your new domain name into the address bar and hit enter. Watch intently to see what happens next!
- Check for Proper Loading: If your website loads correctly, fantastic! This means the DNS changes have propagated successfully. But what if it doesn’t?
- Clear Your Cache: Sometimes, your browser might still be showing an old cached version of your site. Clearing your browser’s cache can help resolve this issue. Each browser has a different method for doing this, so a quick Google search will guide you through the process.
- Explore Your Website: Click around your site to ensure everything is working as it should. Check for broken links, images, or anything that might look out of place. Pay special attention to your custom settings or plugins.
- Use Online Tools: There are plenty of online tools available that can help you verify your domain’s DNS settings and confirm it’s up and running smoothly. Tools like Whatsmydns.net can be quite handy!
If everything checks out, you can give yourself a well-deserved pat on the back! Your new domain is live, and it’s ready to attract visitors. If, however, you experience issues, don’t hesitate to reach out to your hosting or domain provider’s support team. They’re there to help you navigate any bumps along the way!
9. Redirecting the Old Domain to the New Domain
So you’ve made the leap and changed your domain name—congratulations! But hold on, before you start celebrating, there’s one crucial step you need to take: redirecting your old domain to your new one. Think of redirection as giving your users a friendly nudge in the right direction, ensuring that anyone who tries to access your old domain will be seamlessly guided to your new site.
Setting up a redirection isn’t just about ensuring your visitors end up in the right spot; it also plays a big role in maintaining your SEO rankings. If search engines still recognize your old domain, redirection allows you to transfer that existing traffic to the new address. Here’s how you can easily accomplish this:
- Access Your Domain Settings: Log in to your domain registrar’s control panel. This is where you manage all your domain settings.
- Find Redirect Options: Look for options related to forwarding or redirecting domain names. This might be labeled differently depending on the registrar.
- Set Up the 301 Redirect: Opt for a 301 redirect, which is a permanent move. Enter your new domain name in the provided field.
- Test the Redirect: Once you’ve saved your changes, make sure to test the redirect by entering your old domain into a browser and confirming it points to the new domain.
And just like that, you’ve ensured your old domain acts as a gateway to your new destination. Happy redirecting!
10. Updating Links and References
Once you’ve successfully changed your domain name and set up the necessary redirections, the next step is to update all internal links and references throughout your website. This process is crucial—while your old domain may now direct users to the new one, having outdated links can confuse users and harm your SEO.
Your task is to ensure all links point to your new domain. Here are some effective ways to do this:
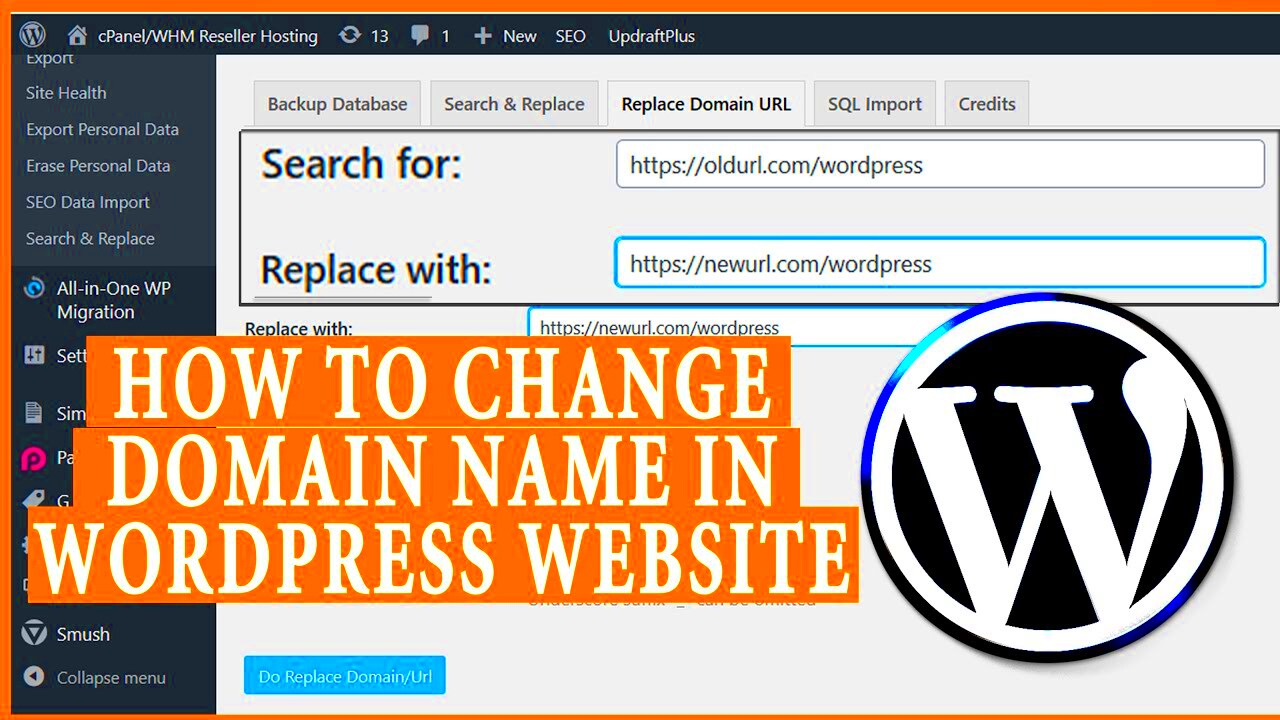
- Use a Database Search and Replace Tool: Tools like Search Replace DB can help you find every instance of your old domain in your database and replace it with your new domain quickly.
- Inspect Widgets and Menus: Don’t forget about your widgets and navigation menus. Go through these sections to ensure all links are updated.
- Update Media Links: If you have images or files linked using the old domain, these need to be updated too.
- Review Posts and Pages: Manually checking your content for old links (especially in blog posts) is also essential.
- Check Theme Settings: Sometimes, themes will have specific settings where your old link might have been included, so be sure to check there!
By updating all links and references, you ensure a smooth experience for your visitors and uphold the integrity of your website’s SEO. Plus, it prevents any potential 404 errors, which can be frustrating for users. You’ve got this!
11. Informing Search Engines About the Change
Once you’ve successfully changed your domain name in WordPress, it’s essential to notify search engines about this transformation. This step ensures that your website retains its visibility and search rankings. Here’s how to effectively inform search engines:
- Update Your Sitemap: Start by updating your XML sitemap. Most SEO plugins, like Yoast or All in One SEO, allow you to generate a new sitemap automatically. Once updated, submit the new sitemap to search engines.
- Use Google Search Console: If you haven’t already, set up Google Search Console for your new domain. You can verify ownership of the new domain and submit your updated sitemap directly there.
- Change the Site Address: Ensure you’ve changed both the ‘WordPress Address’ and ‘Site Address’ under Settings > General in your WordPress dashboard. This will help Google crawl your site under the new domain.
- Set Up 301 Redirects: Implement 301 redirects from your old domain to the new one. This method tells search engines that your content has permanently moved, transferring any SEO value you had on the old site to the new one.
- Update Backlinks: Reach out to other websites that link to your old domain and kindly ask them to update their links to reflect your new domain. This can help improve your new site’s authority.
- Monitor Performance: After you’ve made these changes, keep an eye on your website’s performance using Google Analytics and Search Console. Watch for any drops in traffic or errors that may indicate problems with the transition.
By taking these steps, you can help ensure that search engines are aware of your domain change, minimizing any potential disruptions to your site’s visibility in search results.
12. Conclusion
Changing your domain name in WordPress may seem daunting, but it can be a smooth process if you follow the right steps. It’s important to remember that your domain is more than just a URL; it’s an integral part of your brand identity. Taking the time to plan for and execute the transition properly can save you from headaches down the road.
Here’s a quick recap of what to keep in mind:
- Back Up Your Site: Always start with a backup to secure your data.
- Update WordPress Settings: Don’t forget to change your WordPress and Site Address.
- Set Up 301 Redirects: This is crucial for SEO and keeping your visitors on the right track.
- Inform Search Engines: Update your sitemap and notify search engines to ensure they’re in the loop about your changes.
- Monitor the Transition: Use analytics tools to keep an eye on your site performance post-migration.
By following these guidelines, you can confidently navigate the process of changing your domain name. Remember, patience is key—results may take time, but with persistence and proper attention to detail, you can successfully build your brand’s online presence in its new home. Cheers to your new domain adventure!


