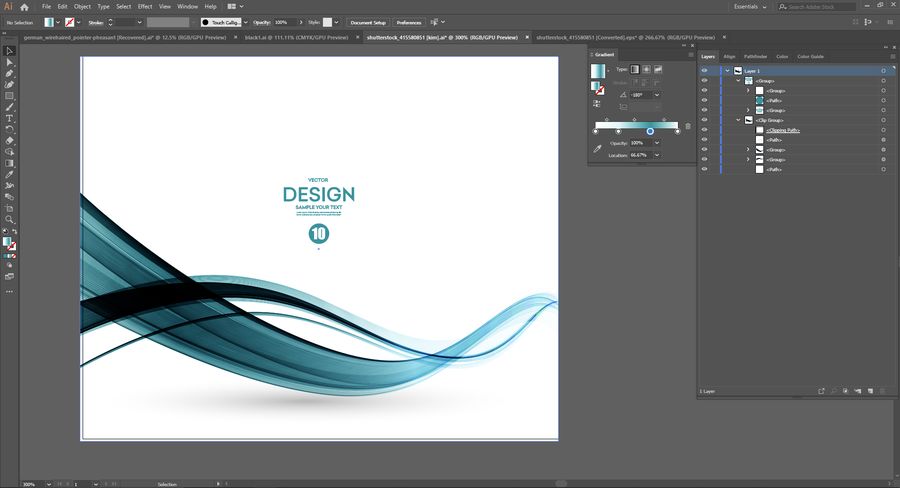
If you’ve ever downloaded a vector image from Shutterstock and wished you could customize its colors to better fit your project, you’re not alone. Vectors are incredibly versatile because they can be easily edited without losing quality, making them perfect for branding, presentations, or personal creative projects. Changing the color of a Shutterstock vector image might seem intimidating at first, but with the right approach and tools, it’s straightforward and fun. Whether you’re a designer or just exploring your creative side, this guide will walk you through the essentials of customizing vector colors so your images perfectly match your vision.
Tools Needed for Changing Vector Colors

Before diving into editing, it’s important to have the right tools at hand. Here’s what you’ll need:
- Vector Editing Software: Programs like Adobe Illustrator, CorelDRAW, or free options like Inkscape are perfect for working with vector images. These tools allow you to select, modify, and change colors effortlessly.
- Download the Vector File: Make sure you have the original, editable vector file from Shutterstock, typically in formats like AI, EPS, or SVG. These formats preserve the vector properties and make editing much easier.
- Optional – Color Palette: Having a color palette or color picker tool can help you choose the perfect shades. Many editing programs come with built-in color pickers, or you can use online tools like Coolors or Adobe Color.
- Basic Knowledge of Your Editing Software: Familiarity with tools like the selection tool, color fill, and layers will speed up your workflow. If you’re new, spend some time exploring tutorials specific to your chosen software.
Once you have these tools ready, you’re all set to start customizing your Shutterstock vector images and making them uniquely yours!
Step-by-Step Instructions for Recoloring Shutterstock Vectors

Recoloring a Shutterstock vector might sound intimidating at first, but with the right tools and simple steps, you’ll be able to customize your images effortlessly. Let’s walk through the process together so you know exactly what to do.
Step 1: Download Your Vector File
First things first, find the vector image you want to change the color of and download it from Shutterstock. Make sure you choose a vector format like AI, EPS, or SVG—these are editable and perfect for recoloring.
Step 2: Open Your Vector in an Editing Program
Next, open your vector file in a vector editing software. Popular options include Adobe Illustrator (paid), Inkscape (free), or CorelDRAW. Each of these programs allows you to select and modify individual elements easily.
Step 3: Select the Part You Want to Recolor
Use the selection tool to click on the specific part of the image you want to change. If the vector is grouped, you might need to ungroup it first (usually via a right-click or menu option).
Step 4: Change the Color
Once selected, look for the fill color option—typically a color box in the toolbar. Click on it, and choose a new color from the palette, or input a specific hex or RGB code if you have a particular shade in mind.
Step 5: Repeat for Other Elements
If your image has multiple parts you want to recolor, repeat the selection and color change process for each one. Some programs allow you to select multiple elements at once for easier editing.
Step 6: Save Your Recolored Image
After you’re satisfied with your color changes, save the file in your preferred format. For web use, SVG or PNG works well. If you plan to do more edits later, keep a copy of the original vector file too.
And there you go! With these straightforward steps, you can give your Shutterstock vector a fresh new look tailored to your project.
Tips for Achieving the Best Color Results
Recoloring vectors isn’t just about changing colors—it’s about doing it in a way that looks professional and appealing. Here are some handy tips to help you get the best possible results:
- Start with a color palette: Before editing, decide on a color palette that matches your brand or project theme. This helps maintain consistency and ensures your colors look harmonious together.
- Use hex or RGB codes: Instead of guessing, use specific color codes to achieve precise shades. This is especially useful when matching colors to other design elements.
- Adjust opacity and blending modes: Sometimes, a softer or layered look works better. Play around with opacity levels or blending modes in your software to add depth and interest.
- Maintain color contrast: Make sure your text or important elements stand out against the background. High contrast improves readability and visual impact.
- Preview your colors on different backgrounds: Check how your recolored vector looks against various backgrounds to ensure it remains clear and attractive everywhere.
- Use gradients and shades: Instead of flat colors, consider adding gradients or subtle shades to give your vector more dimension and a polished appearance.
- Test on various devices: Colors can appear differently on screens, so view your design on multiple devices to confirm your colors look great everywhere.
- Keep backups of your original: Always save a copy of the original vector before making major changes, so you can revert if needed.
Remember, patience and experimentation are key. Don’t be afraid to try different color combinations and see what works best. With a little practice, your vectors will look vibrant, professional, and perfectly tailored to your needs!
Common Issues and Troubleshooting Tips
Sometimes, when you’re working with Shutterstock vector images, you might run into a few hiccups. Don’t worry—these are pretty common and usually easy to fix. Here are some of the most frequently encountered issues and how to troubleshoot them:
Issue 1: Colors Not Changing as Expected
One of the biggest frustrations is when you try to change the color, but it doesn’t seem to take effect. This often happens if the vector image is grouped or locked. To fix this:
- Make sure to ungroup the elements before applying new colors.
- Check if the layer or object is locked—unlock it first.
- Ensure you’re working on the correct layer or object.
Issue 2: Colors Reverting After Saving
If your colors revert back after saving or reopening the file, it could be due to the file format or how the color styles are saved. Here’s what to do:
- Save your file in a format that preserves editing capabilities, like AI or EPS.
- Use “Save As” instead of just saving to ensure your changes are preserved.
- Double-check that you don’t overwrite the original Shutterstock file. Work on a duplicate.
Issue 3: Colors Look Different When Exported
This is a common issue related to color profiles and monitor calibration. To ensure your colors look consistent:
- Embed the color profile when exporting (e.g., sRGB for web, CMYK for print).
- Preview your image in different programs to see how it renders.
- Use a calibrated monitor to get accurate color representation.
General Troubleshooting Tips:
Here are some quick tips that can save you time:
- Always save a backup copy before making major changes.
- Use layers to organize different elements, making it easier to select and edit specific parts.
- If a particular tool isn’t working, try resetting your workspace or restarting the application.
By keeping these tips in mind, you’ll find that resolving common issues becomes much more manageable. Remember, patience is key—sometimes a small tweak makes all the difference!
Additional Resources for Vector Editing
If you’re eager to dive deeper into vector editing beyond the basics, there’s a wealth of resources out there to help you master your craft. Here are some of the best tools and tutorials to expand your skills:
Online Tutorials and Courses
- Adobe Illustrator Tutorials: Adobe offers comprehensive tutorials on their website, covering everything from beginner basics to advanced techniques.
- Udemy & Skillshare: These platforms host numerous courses specifically focused on vector editing, often taught by industry professionals.
- YouTube Channels: Channels like “Envato Tuts+” or “Vectornator” provide free, step-by-step tutorials that are great for visual learners.
Recommended Software for Vector Editing
| Software | Best For | Cost |
|---|---|---|
| Adobe Illustrator | Professional vector design | Subscription-based (Creative Cloud) |
| Inkscape | Free, open-source vector editing | Free |
| CorelDRAW | Vector graphics and layout design | One-time purchase or subscription |
| Vectornator | Mac and iPad users, intuitive interface | Free |
Community Forums and Support
Engaging with communities can be incredibly helpful. Here are some popular forums:
- Adobe Community: Ask questions and share tips with other Illustrator users.
- Inkscape Forum: Discuss issues and learn from other Inkscape fans.
- Reddit’s [r/graphic_design](https://www.reddit.com/r/graphic_design/): A vibrant community sharing projects, advice, and resources.
Blogs and Articles
Stay updated and inspired with design blogs:
Whether you’re just starting out or looking to refine your skills, these resources can guide you along the way. Remember, practice makes perfect—so keep experimenting, exploring new tools, and most importantly, having fun with your vector projects!


