If you’ve ever downloaded a Shutterstock vector image and wished you could tweak its colors to better fit your project, you’re not alone. Vector images are incredibly versatile because they can be easily edited without losing quality. Changing the colors of a vector image allows you to customize designs, match branding, or simply get the look just right. Whether you’re a graphic designer or a hobbyist, knowing how to change vector colors can open up a world of creative possibilities. Don’t worry if you’re new to this—it’s easier than you might think, and I’m here to guide you through the process step by step.
Tools Required for Changing Vector Colors
To change the colors of a Shutterstock vector image, you’ll need a few essential tools. Here’s what you should have on hand:
- Vector Editing Software: This is the core tool you’ll use. Popular options include:
- Adobe Illustrator – Industry-standard, feature-rich, ideal for professional editing.
- Inkscape – Free and open-source, a great alternative for those on a budget.
- CorelDRAW – Another powerful vector editor with robust features.
- Download the Vector File: Make sure you have the vector image in a compatible format like AI, SVG, or EPS. Shutterstock usually provides files in these formats.
- Basic Knowledge of the Software: Familiarity with your chosen editing tool will make the process smoother. If you’re new, consider exploring some beginner tutorials to get comfortable with the interface.
Optional but helpful tools include color palettes, eyedropper tools for picking colors from other images, and layer management features to organize your edits. Once you’ve got your software and files ready, you’re all set to start customizing your vector images and giving them the perfect color scheme for your project!
Steps to Download and Open Your Shutterstock Vector File
Alright, so you’ve found the perfect vector image on Shutterstock and you’re ready to customize its colors. First things first—let’s walk through the straightforward steps to get that vector file onto your computer and open it up for editing.
Step 1: Purchase and Download
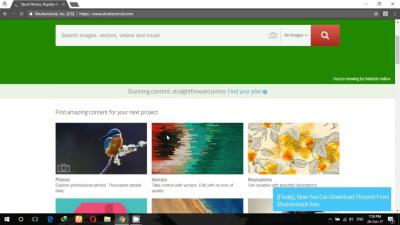
- Navigate to the Shutterstock website and locate your chosen vector image.
- Click on the “Download” button. You might need to sign in or create an account if you haven’t already.
- Choose the appropriate license type (standard or enhanced) depending on your project needs.
- Download the file. Usually, Shutterstock provides vectors in formats like AI, EPS, or SVG.
Step 2: Save and Locate Your File
- Once downloaded, save the file to a dedicated folder on your computer so you can easily find it later.
- Make a note of the file format—this is important because some editing programs handle different formats better.
Step 3: Open the Vector File
- If you have Adobe Illustrator installed, right-click the file and choose “Open with” > “Adobe Illustrator”.
- If not, open Adobe Illustrator first, then go to File > Open, and select your downloaded vector file.
- Alternatively, if you’re using a different vector editing program like CorelDRAW or Inkscape, open the file in those apps accordingly.
And voila! Once the file is open, you’re all set to start customizing the colors. Keep in mind, some files might have multiple layers or grouped objects, so take your time to familiarize yourself with the structure before making big color changes.
Using Adobe Illustrator to Change Vector Colors
Now that your vector file is open in Adobe Illustrator, let’s dive into changing its colors. Illustrator is a powerful tool, and with a few simple steps, you can modify colors to match your project’s vibe.
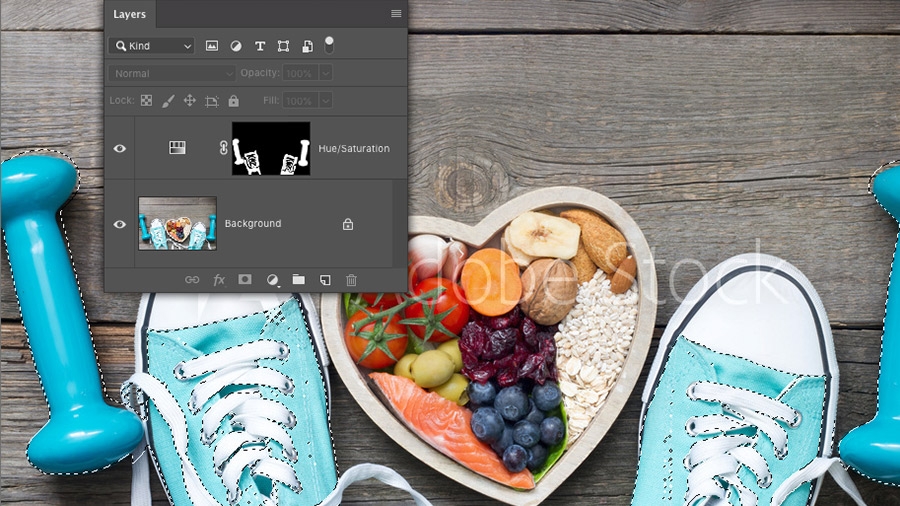
Step 1: Select the Object or Group
- Use the Selection Tool (V) from the toolbar to click on the object or group of objects you want to recolor.
- If you want to change the color of multiple objects at once, hold down Shift and click each one, or drag a selection box around them.
Step 2: Access the Color Picker
- Look at the toolbar on the left; you’ll see the Fill and Stroke color boxes.
- Double-click on the Fill box to open the Color Picker.
Step 3: Choose Your New Color
- In the Color Picker, you can select a color by clicking within the spectrum or entering specific RGB/HEX values if you have a particular hue in mind.
- Click OK once you’ve picked your color.
Step 4: Apply the Color
- With your object still selected, the new fill color will automatically apply.
- If you want to change the stroke (outline) color, repeat the process with the Stroke box.
Tip: To quickly change all objects of a certain color, use the Recolor Artwork tool (found under the Edit menu or the icon that looks like a color wheel). This lets you swap colors globally, saving time and effort.
Remember, if your vector image has multiple layers or groups, you might need to double-click to enter isolation mode or ungroup elements (Object > Ungroup) to access individual parts.
Changing colors in Illustrator is pretty intuitive once you get the hang of selecting objects and using the color tools. Experiment with different shades until your vector looks perfect for your project. Happy editing!
Alternative Methods for Editing Vector Colors
Sometimes, opening your Shutterstock vector image in a traditional editing program isn’t the only way to give it a fresh splash of color. There are some nifty alternative methods that can help you achieve the look you want, especially if you’re looking for quick fixes or don’t have access to advanced design software.
One popular approach is to use online vector editors. Websites like Vectr or Boxy SVG provide user-friendly platforms where you can upload your SVG file and tweak the colors directly in your browser. They often come with intuitive tools for selecting specific parts of the vector and applying new colors without the need to install anything.
Another method involves converting your vector image into a different format that might be easier to manipulate. For example, you can save your SVG as a PNG or JPEG and then use photo editing tools like Canva or even basic programs like Paint.NET. Just keep in mind, this approach turns your vector into a raster image, which means you lose the scalability and editing flexibility of the original vector format. So, it’s best used for quick visual adjustments rather than detailed editing.
If you’re comfortable with command-line tools, you might explore using scripts with programs like Inkscape. Inkscape has a command-line interface that allows batch processing of color changes, which can be handy if you have multiple images or need to automate the process.
Lastly, some graphic design apps, such as Adobe Illustrator or Affinity Designer, support importing SVG files and offer advanced color editing options. If you’re doing a lot of vector work, investing a little time in learning these tools can pay off in the long run, giving you the flexibility to change colors precisely and efficiently.
Tips for Achieving the Desired Color Effect
Changing the color of a Shutterstock vector image isn’t just about picking any color and hoping for the best. To really make your design pop and match your vision, here are some practical tips to guide you:
- Understand Color Theory: Knowing basic color principles—like complementary, analogous, or monochromatic schemes—can help you choose colors that work well together and create harmony in your design.
- Use Hex Codes or RGB Values: When selecting colors, using specific hex codes or RGB values ensures consistency. Many design tools allow you to input these codes directly for precise control.
- Start with a Palette: Pick a color palette that aligns with your project’s mood or branding. Tools like Adobe Color or Coolors can generate palettes that are visually appealing and cohesive.
- Adjust Opacity and Blending Modes: Sometimes, changing the opacity or blending mode of your color overlay can create more nuanced effects, like transparency or subtle color shifts.
- Test Different Shades: Don’t settle for the first color you try. Experiment with lighter, darker, or more saturated versions of your chosen hue to see which best fits your design.
- Preview in Context: Always view your colored vector in the context where it will be used—whether on a website, printed material, or social media—to ensure it looks good in real-world settings.
And remember, patience is key! Sometimes, small adjustments make a big difference. Take your time experimenting with different colors and settings until you find that perfect look that makes your vector image stand out.
Saving and Exporting Your Edited Vector Image
Once you’ve made all the adjustments and are happy with how your Shutterstock vector image looks, it’s time to save and export your work. This step is crucial because it ensures your edits are preserved and ready for your intended use, whether that’s for print, web, or other projects.
Here’s a simple guide to save and export your vector image:
- Choose the right file format: If you’re planning to do further edits later, save your file in the program’s native format, like AI for Adobe Illustrator or SVG for scalable vector graphics. These formats preserve all your layers and editing capabilities.
- Export for specific uses: For sharing online or embedding in web pages, SVG, PNG, or JPEG are common choices. SVG maintains the vector quality, while PNG and JPEG are raster formats suited for quick viewing but lose some resolution when scaled.
- Adjust export settings: When exporting, look for options like resolution (DPI), color profiles, and transparency settings. For example, if you want a transparent background, make sure to select the transparent background option, especially when exporting as PNG.
- Save a master copy: Always keep a master copy of your original vector file before exporting. This makes it easier to revisit and make further edits later without losing quality.
Tip: Many programs allow you to export multiple formats at once. For example, you might export an SVG for web use and a high-resolution PNG for printing, all from the same project.
Remember, the key to a successful save and export process is understanding your final purpose—whether it’s digital display, print, or both—and choosing the right settings accordingly. Taking a few extra moments now ensures your image looks perfect wherever you use it!
Conclusion and Additional Resources for Vector Editing
Changing the color of a Shutterstock vector image might seem tricky at first, but with the right tools and a bit of practice, it becomes a straightforward process. Whether you’re customizing a logo, creating marketing materials, or just experimenting with design, mastering color adjustments empowers you to bring your creative vision to life.
Throughout this guide, we’ve covered essential steps—from opening your vector image, selecting the appropriate tools, understanding color modes, to saving your finished work. Remember, the key is patience and experimentation. Don’t hesitate to try different color combinations or export settings to see what works best for your project.
If you’re eager to expand your vector editing skills, here are some additional resources to help you along the way:
- Official Tutorials: Check out Adobe’s or your preferred vector editing software’s official tutorials for in-depth guides and tips.
- Online Courses: Platforms like Udemy, Skillshare, and LinkedIn Learning offer comprehensive courses on vector graphics and design fundamentals.
- Design Communities: Join forums and communities such as Reddit’s r/Design, Graphic Design Stack Exchange, or Adobe Community to ask questions, share your work, and learn from others.
- Books and Blogs: There are many excellent books on vector design and color theory, as well as blogs dedicated to graphic design trends and techniques.
By continuously practicing and exploring new techniques, you’ll become more confident in your ability to edit and customize vector images effectively. Remember, every project is a learning opportunity—so keep experimenting, and have fun with your designs!