Are you tired of using the same stock images and templates without adding your personal touch? Customizing Shutterstock templates is a fantastic way to create unique, eye-catching designs tailored to your needs. Whether you’re designing social media graphics, presentations, or marketing materials, Shutterstock offers a wide variety of templates to get you started. The best part? You don’t need to be a graphic design pro! With a few simple steps, you can change the text, colors, and elements to make the design truly yours. Ready to learn how to do it? Let’s dive in!
Accessing and Opening Your Shutterstock Design

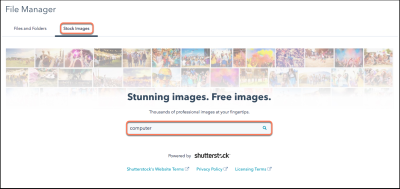
First things first, you need to access your Shutterstock account and locate the design you want to customize. Head over to the Shutterstock website and log in with your credentials. Once logged in, navigate to the ‘Downloads’ or ‘My Designs’ section, depending on how you organize your files.
Next, find the specific template you want to edit. If you haven’t downloaded it yet, search for the template using the search bar or browse through your purchased files. Once located, click on the file to open it. Your design will typically open in your default image editing software, such as Adobe Photoshop or Illustrator, if it’s a layered file. If it’s a simple image or PDF, you might need to import or open it through your editing program.
If you’re using an online editor that Shutterstock offers, like Shutterstock Editor, simply click on the ‘Edit’ button next to your downloaded file. This will launch the online editor, allowing you to make quick adjustments directly in your browser. From there, you’ll see your design loaded, ready for you to change the text, colors, or other elements. Now that your design is open, you’re all set to start customizing your template to fit your unique style and message!
Selecting the Text Element You Want to Edit
Alright, now that you’re in your Shutterstock template and ready to customize it, the first step is to identify and select the specific text element you’d like to change. Think of it as picking out the right piece of text from a puzzle — it’s all about finding the right spot to make your personal touch.
Once your template is open, hover your mouse over different parts of the design. Usually, Shutterstock templates are built with editable text boxes, and when you hover over them, they’ll often highlight or show a cursor. If clicking on a part of the design doesn’t select the text box, don’t worry — it might be grouped or layered with other elements.
Here’s a quick tip: click directly on the text you want to change, and if it’s selectable, it’ll become highlighted or show a bounding box around it. Sometimes, clicking on the text will bring up a small menu or a text editing toolbar, indicating you’ve successfully selected it.
If you’re having trouble selecting the right element, try these steps:
- Zoom in on your design for precision—sometimes, smaller text can be tricky to pick out.
- Use the layers panel (if available). This panel shows all elements in your design, and you can find your text layer listed there. Clicking on it will select the text element directly.
- Right-click on the text element for options like “Select Text” or “Edit,” depending on your editing platform.
Remember, patience is key! Sometimes, it takes a couple of clicks to get the right element, especially if your template has lots of layers or overlapping components. Once you’ve selected the text element, you’re ready to dive into editing — but we’ll cover that next.
Editing Text in Shutterstock Templates
Now that you’ve selected your desired text element, it’s time to make it uniquely yours. Editing text in Shutterstock templates is pretty straightforward, and most platforms provide an intuitive editing interface that feels familiar if you’ve used word processors before.
Here’s what you typically do:
- Click inside the selected text box to activate the cursor, just like typing in a document.
- Delete existing placeholder text by pressing the backspace or delete key.
- Type your custom message — whether it’s a name, a date, a slogan, or anything else you want to showcase.
Most templates come with default fonts and styles, but you can customize the appearance to match your branding or personal preference. Look for options like:
- Font style — choose from a list of available fonts.
- Font size — increase or decrease the size for emphasis.
- Color — pick a color that aligns with your theme or brand palette.
- Alignment — left, center, right, or justified for the perfect look.
- Effects — add shadows, outlines, or other stylistic effects if available.
Many editing tools also let you preview changes in real time, so don’t be afraid to experiment a little. Want your text to stand out? Try bold or italics. Need a specific color? Use the color picker to get it just right.
Once you’re happy with your edits, don’t forget to review the entire design to ensure everything looks cohesive. When you’re ready, save your changes or export your design — it’s that simple!
Customizing Font Style, Size, and Color
Once you’ve added your text to your Shutterstock design, it’s time to make it truly yours by customizing the font style, size, and color. This step is all about ensuring your message stands out and matches your overall aesthetic. Don’t worry — it’s easier than it sounds!
First, select the text box or the specific text you want to edit. When you click on it, a toolbar will typically appear at the top or side of your editing interface. Here, you’ll find options to change the font style, size, and color.
Choosing the Right Font Style
Shutterstock offers a variety of fonts, from elegant scripts to bold sans-serifs. It’s important to pick a font that aligns with your message and the tone of your project. For example:
- Serif fonts add a classic or professional vibe.
- Sans-serif fonts look modern and clean.
- Script fonts bring a creative or personal touch.
To change the font, simply click on the dropdown menu and scroll through the options. If you’re unsure, try a few different styles and see which one feels right. Remember, readability is key — don’t choose overly decorative fonts for large blocks of text.
Adjusting Font Size
Next, tweak the font size to make your text prominent or subtle, depending on your design. Most editors have a size input box or slider. Increase the size for headings or important points, and reduce it for supplementary info. A good rule of thumb is to keep your main message clear and easily readable from a distance.
Changing Font Color
Color is a powerful tool in design. To change the font color, click on the color palette icon. You can select from preset colors or enter a specific HEX or RGB value if you want a precise shade. For example, if your background is dark, opt for light-colored text to create contrast. Conversely, if your background is light, dark text will stand out better.
Pro tip: Use color sparingly to highlight key points or to create visual hierarchy. Too many colors can make your design look cluttered!
Additional Tips for Customization
- Line spacing and letter spacing: Adjust these to improve readability and style.
- Bold or italics: Use these to emphasize important words or phrases.
- Text alignment: Choose left, center, or right alignment based on your layout.
Take your time experimenting with these options until your text feels just right. Remember, a well-customized font can make your design more engaging and professional-looking!
Saving and Exporting Your Customized Design
After you’ve fine-tuned your text and overall design, it’s time to save your work and export it so you can use it wherever you need. Let’s walk through the simple steps to ensure your masterpiece is safely stored and ready for use.
Saving Your Work
Many design platforms, including Shutterstock’s editor, automatically save your progress as you work. However, it’s always a good idea to double-check or manually save your project, especially before closing your session. Look for a save button or option in the menu — it might be labeled as “Save,” “Save Draft,” or something similar.
If you’re working on a platform that supports multiple versions, consider naming your file descriptively, like “Spring Sale Banner v2”. This makes it easier to locate later if you want to revisit or make further edits.
Exporting Your Design
Once you’re happy with your design, exporting it is the final step. Typically, you’ll find an “Export,” “Download,” or “Share” button. Clicking this will open export options, where you can select:
- File format: Common options include PNG, JPEG, PDF, or SVG. Choose PNG or JPEG for most web and print uses. Use PDF if you need a high-quality print-ready file.
- Resolution: Higher resolutions (like 300 DPI) are ideal for printing, while 72 DPI works well for web use.
- Size: Adjust the dimensions if needed. Some tools allow you to resize during export.
Final Tips for Exporting
- Check the quality: Preview your export to ensure everything looks sharp and correct.
- Keep a backup: Save a copy of your original project file if available, so you can make future edits without starting from scratch.
- Optimize for use: For web use, compress your images to reduce load times, but keep quality high.
And that’s it! With your design exported, you’re ready to share it online, print it out, or include it in your marketing materials. Taking a few extra moments to save and export properly ensures your hard work looks great in the final product. Happy designing!
Tips for Creating Effective and Appealing Custom Texts
Designing custom text that captures attention and complements your overall design can sometimes feel tricky. But don’t worry—here are some handy tips to help you craft effective and visually appealing text for your Shutterstock projects:
- Keep it simple and clear: Your message should be easy to read at a glance. Avoid overly complicated fonts or lengthy sentences. Clear, concise text makes a stronger impact.
- Select the right font: The font style should match the mood of your design. For example, a playful font works well for a fun event, while a sleek, modern font suits professional branding.
- Pay attention to size and hierarchy: Use different font sizes or weights to emphasize key parts of your message. Headings should stand out, while supporting text stays readable but less prominent.
- Choose complementary colors: The color of your text should contrast well with the background for readability. Use color theory principles—like complementary or analogous colors—to create harmony.
- Maintain consistency: Stick to a limited palette of fonts and colors throughout your design. Consistency helps create a cohesive and professional look.
- Use spacing wisely: Proper line spacing and letter spacing improve readability. Avoid crowding your text or leaving too much empty space.
- Test your design: Before finalizing, view your design at different sizes and on various screens. This ensures your text remains effective and appealing across contexts.
Remember, the goal is to communicate your message clearly while making it visually enticing. Play around with different styles, but always keep your audience and purpose in mind. With a little practice, you’ll be creating stunning custom texts that elevate your Shutterstock projects in no time!
Conclusion and Additional Resources for Design Customization
Congratulations! You’ve now learned the step-by-step process of changing and customizing text in Shutterstock to suit your unique projects. Remember, the key is to experiment with different fonts, colors, and styles until you find what works best for your message and aesthetic.
Designing with purpose and clarity can really make your visuals stand out. Whether you’re creating social media graphics, marketing materials, or personal projects, mastering text customization is a valuable skill that enhances your overall design quality.
If you’re eager to dive deeper into design tips and tools, here are some additional resources to help you continue improving:
- Canva Design School: Offers tutorials and courses on graphic design fundamentals.
- Adobe Creative Cloud Tutorials: A great resource for learning more advanced design techniques.
- Color Theory Guides: Websites like Coolors or Adobe Color can help you choose harmonious color schemes.
- Typography Resources: Explore sites like Google Fonts or Typewolf for font inspiration and pairing tips.
- Design Communities: Join platforms like Dribbble or Behance to see what other designers are creating and get inspired.
Keep practicing, stay curious, and don’t be afraid to experiment. The more you explore different styles and techniques, the more confident you’ll become in creating eye-catching, personalized designs. Happy designing!