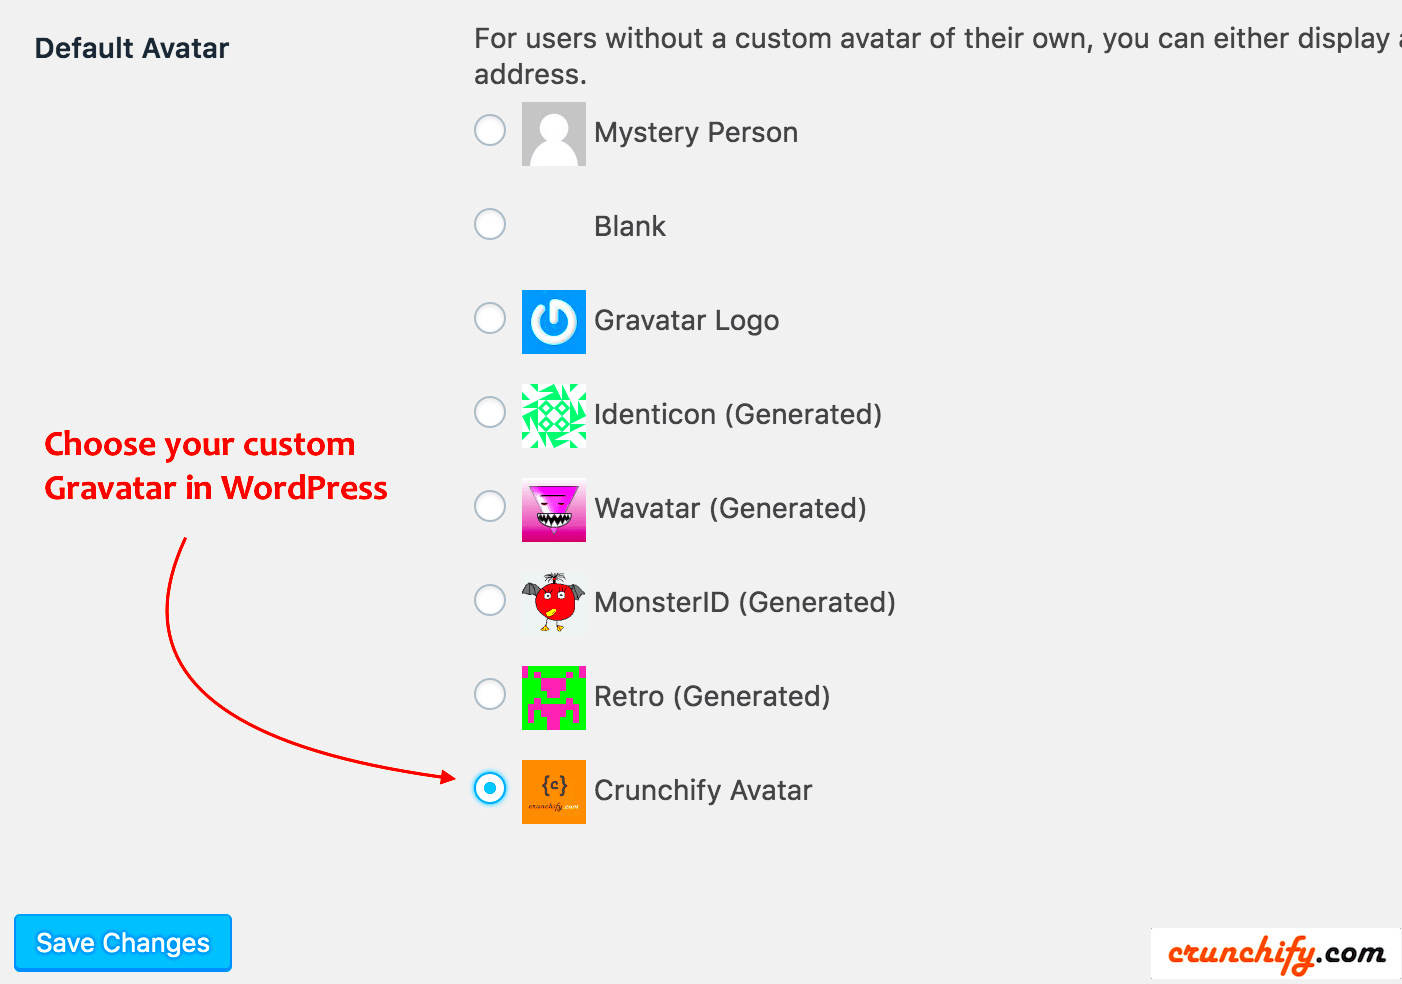
Have you ever updated your Gravatar on WordPress, only to find it’s still displaying that old, outdated picture? You’re not alone! Many WordPress users run into this common hiccup. In this guide, we’ll break down the steps to change your Gravatar and troubleshoot the issues that may arise. So, whether you’re looking to refresh your online identity or streamline your website’s appearance, let’s dive in and get that Gravatar looking just the way you want it!
Understanding Gravatar in WordPress

First things first, let’s cover what Gravatar is. Gravatar, short for “Globally Recognized Avatar,” is a service that allows you to upload a profile image that can appear alongside your comments and posts across various websites, including WordPress. Here’s a simple breakdown of its significance:
- Branding: Your Gravatar image represents you, so you want it to reflect your personal brand or personality.
- Consistency: Using the same Gravatar across different platforms helps build a consistent online presence.
- Engagement: An appealing Gravatar can encourage more interactions and engagement on your posts.
Now, you might be thinking, “That sounds great, but why isn’t my Gravatar updating?” Well, there are a few reasons storage might seem stagnant, which can usually be remedied. Below, I’ll outline some common troubles and quick fixes to ensure your Gravatar matches your fresh new look!
Here’s a quick table summarizing some key aspects of Gravatar:
| Aspect | Description |
|---|---|
| What is it? | A globally recognized avatar that appears on multiple sites. |
| Purpose | Enhance personal branding and consistency across platforms. |
| Functionality | Linked to your email address for seamless updates. |
Getting to know Gravatar and how it works in WordPress is vital before troubleshooting any issues. Remember, a picture often speaks a thousand words—especially in the digital realm!
Common Reasons Why Gravatar Isn’t Updating
If you’ve ever found yourself pulling your hair out because your Gravatar just refuses to update, you’re definitely not alone! There can be a variety of reasons why Gravatar isn’t displaying the image you expect. Let’s dive into some of the most common culprits behind this pesky issue:
- Cache Issues:
Perhaps one of the leading reasons for outdated Gravatar images is caching. Websites often store cached versions of the pages to speed up loading times. If your Gravatar image has been updated, but the cache still holds the old version, you’ll end up seeing the previous image.
- WordPress Caching Plugins:
Similar to browser cache, if you’re using caching plugins on your WordPress site, they might be serving up an older version of your Gravatar. In essence, the plugin is keeping a snapshot of your site, potentially preventing the new Gravatar from appearing.
- Gravatar Account Linkage:
Make sure your email address on WordPress matches the one associated with your Gravatar account. Any disconnection here will likely prevent your updated image from showing up.
- DNS Propagation:
If you’ve recently changed your domain or email settings, DNS changes can take time to propagate. This might lead to delays in displaying the new Gravatar image.
- Gravatar Service Outages:
Sometimes, the problem is simply on Gravatar’s end. Sometimes, their service may be down, or maintenance could be underway. It’s always worth checking their status page to see if they are experiencing issues.
Steps to Change Your Gravatar
Changing your Gravatar is a breeze once you know what to do! Follow these simple steps, and you’ll have your new image uploaded in no time.
- Log Into Your Gravatar Account:
Head over to the Gravatar website and log in using the email address associated with your Gravatar account. If you don’t have an account yet, you can create one easily!
- Add a New Image:
Once you’re logged in, look for the option to upload a new image. Click on ‘Add a new image’ and choose a file from your computer, or you can even upload an image from a URL.
- Crop Your Image:
After uploading, you’ll get a chance to crop your image. Make sure it’s a good fit to represent you! Once you’re satisfied, hit that ‘Crop’ button to proceed.
- Select Your Rating:
Gravatar allows you to choose a rating for your image (G, PG, R, or X). Choose the rating that best reflects the content of your image and move on to the next step.
- Refresh Your Website:
Head back to your WordPress site and do a hard refresh (Ctrl + F5 or Command + Shift + R) to ensure you’re loading the most recent version of your page. If everything goes well, your new Gravatar should now be visible!
If you still can’t see it, remember to clear any caching plugins or your browser cache. Patience is key, and soon, you’ll be showing off that fresh Gravatar with style!
5. Clearing Cache: A Crucial Step
If you’re having trouble changing your Gravatar in WordPress, one of the first steps you should consider is clearing your cache. Now, you might be wondering, “What does caching have to do with my Gravatar?” Well, caching is a mechanism that stores a copy of your website’s data to help it load faster. But sometimes, this can lead to outdated information being displayed—like a previously set Gravatar that you thought you had changed.
So, let’s break this down. Here’s why clearing the cache is essential:
- Update Visibility: Cached versions of your website can prevent the new Gravatar from being displayed. Clearing it ensures visitors see the latest updates.
- Fix Display Issues: Sometimes, the old Gravatar might still show up due to caching issues, leading to confusion.
- Improved Performance: Regularly clearing your cache not only helps with updates but can also boost your site’s overall performance.
So, how do you clear your cache? It depends on what you’re using:
| Tool/Method | Steps to Clear Cache |
|---|---|
| Browser Cache | Go to settings > Privacy > Clear browsing data. |
| WordPress Cache Plugin | Navigate to the plugin settings > Find the ‘Clear Cache’ button > Click it! |
| Hosting Provider Cache | Log in to your hosting account > Look for cache management options > Clear the cache. |
Remember to refresh your site after clearing the cache to see if the new Gravatar appears. You’ll be amazed at what a little cache-clearing can do!
6. Using an Alternative Method for Gravatar
If you’ve tried the usual methods and still can’t get your Gravatar to display properly in WordPress, it’s time to explore alternative options. Often, users overlook a few different ways to manage their avatars, which can circumvent the usual Gravatar process. Here are a couple of methods you can employ:
- Using a Custom Avatar Plugin: There are several plugins available that allow you to upload custom avatars directly. Some popular ones include:
- WP User Avatar
- Simple Local Avatars
- Manually Uploading an Avatar: Some themes and plugins enable you to directly upload an avatar through your user profile. Simply follow these steps:
- Go to your WordPress Dashboard.
- Click on “Users” and then “Profile.”
- Look for the avatar section and upload your desired image directly.
- Save changes.
Additionally, if you’re wanting to get creative or have other custom avatar needs, consider using a third-party avatar service that can integrate with your WordPress site.
In conclusion, while Gravatars are a great way to personalize your online identity, sometimes the systems might be glitchy. Don’t lose hope! Using cache-clearing methods or alternative approaches can usually solve your Gravatar dilemma. So, go ahead and give these options a try!
Troubleshooting Gravatar Issues
Sometimes, changing your Gravatar on WordPress doesn’t go as smoothly as you’d expect. If you’re facing issues where your new Gravatar isn’t showing up or not updating, don’t worry! You’re not alone, and there are several steps you can take to troubleshoot the problem.
Here’s a quick checklist to help you debug the situation:
- Clear Your Browser Cache: Often, the problem lies in cached images. Clear your browser’s cache or try viewing your site in an incognito window to see if the new Gravatar appears.
- Check Your Gravatar Account: Log into your Gravatar account and ensure the new image has been correctly uploaded and is associated with the email address linked to your WordPress profile.
- Refresh Your WordPress Profile: Sometimes, simply refreshing your user profile can resolve the issue. Go to your WordPress dashboard, navigate to Users, click on ‘Your Profile,’ and save changes without making any adjustments to see if this helps.
- Update Your Email: Verify that the email you’re using on WordPress matches the one associated with your Gravatar account. A mismatch can lead to display issues.
- Disable Caching Plugins: If you’re using caching plugins like WP Super Cache or W3 Total Cache, try clearing the cache or temporarily disabling these plugins to see if your Gravatar updates.
- Check for Theme or Plugin Conflicts: Sometimes, themes or plugins can interfere with Gravatar display. Test switching to a default theme (like Twenty Twenty-One) to see if your Gravatar shows up.
By following these steps, you should be able to identify and resolve any issues you’re facing with Gravatar on your WordPress site.
Final Thoughts
Changing your Gravatar on WordPress should be a straightforward process, but like many things in the digital world, it can sometimes go awry. While it can be frustrating when your new Gravatar isn’t displaying, remember that troubleshooting is a part of the experience. Don’t let the hiccups bring you down!
In summary, if your Gravatar isn’t updating, give the troubleshooting steps mentioned above a try. With a little patience and experimentation, you’ll likely find a solution that works for you. It’s always a good practice to keep your Gravatar fresh and aligned with your brand or website persona, so don’t give up.
Whether you’re using Gravatar for professional networking, personal branding, or just for fun, having a visible avatar can make a difference. Also, remember that the online community can be quite responsive. If you can’t figure it out, consider reaching out for help in forums or WordPress support. Happy blogging!


