Elementor has revolutionized the way we build websites, making it accessible for everyone, irrespective of their technical expertise. It’s a powerful page builder for WordPress that allows you to create stunning layouts through its intuitive drag-and-drop interface. One essential aspect of designing your website with Elementor is managing the cell size in your layouts, especially when working with various widgets and sections.
Cell sizing plays a pivotal role in how your content is presented, affecting both aesthetics and usability. Whether you’re aiming for a clean grid layout or a more dynamic, free-flowing design, understanding how to adjust cell sizes in Elementor will elevate your website design to the next level. So, let’s dive into the nuts and bolts of accessing the Elementor Editor, where the magic happens!
Accessing the Elementor Editor
Before you can change cell sizes in Elementor, you need to access the Elementor Editor. Don’t worry; it’s a breeze! Just follow these simple steps:
- Login to WordPress: Begin by logging into your WordPress dashboard, where you can manage all aspects of your website.
- Select a Page: From the dashboard menu, click on Pages. Choose the page you want to edit or create a new one by clicking Add New.
- Launch Elementor: Once you’re on the desired page, look for the Edit with Elementor button. Click on it, and voilà—you are now inside the Elementor Editor!
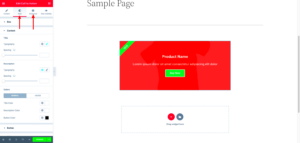
In the Elementor Editor, you’ll see a split-screen view. The main section on the right is where all the magic happens—this is where you can manipulate cell sizes and other design elements. On the left, you’ll find the Elementor panel, filled with various widgets and settings. Let’s explore how you can fine-tune those cell sizes to create the layout you envision!
Understanding Cell Types in Elementor
When diving into Elementor, it’s essential to grasp the different types of cells or columns that you can work with. Each cell serves a unique purpose and can drastically affect the layout and functionality of your pages. Let’s break down the main cell types you’ll encounter:
- Regular Columns: These are the most common type of cells. They divide your section into equal or varying widths. You can use them to arrange your content in rows or grids, making your design visually appealing.
- Inner Sections: Think of inner sections as cells within cells. They allow for more complex layouts by enabling you to stack columns inside other columns. This is particularly useful when you want to combine different content types in one area.
- Widgets: While not technically cells themselves, widgets are the content elements placed inside cells. They can include anything from images and text to buttons and videos. Understanding how to use them effectively within cells is key to mastering your layout.
Understanding these cell types helps you customize your page layout. For example, you can create anything from a straightforward blog post layout to a complex portfolio showcase. By experimenting with the different types of cells, you can see how they interact with one another and how best to implement them for your design vision.
Steps to Change Cell Size
Changing cell size in Elementor isn’t as complicated as it sounds! Here’s a simple step-by-step guide that will get you manipulating your cells like a pro in no time:
- Open Your Page: Start by opening the page you want to edit in Elementor. Click on the “Edit with Elementor” button.
- Select the Section: Hover over the section containing the cell you wish to resize. Click on the section handle to open the settings panel on the left.
- Adjust Column Width: In the settings panel, navigate to the “Layout” tab. Here, you’ll see options for column width. You can either use percentages (e.g., 50%) or pixels (e.g., 400px) to define your cell’s size.
- Manipulate Padding and Margin: Adjusting the padding and margin settings can also change how much space your cell occupies. Go to the “Advanced” tab, and play around with the margin and padding fields.
- Preview Your Changes: Once you’ve made adjustments, click the eye icon to preview how it looks on your page. This way, you can ensure everything aligns with your design vision.
- Save Your Changes: If you’re satisfied with the adjustments, don’t forget to hit the “Update” button to save your hard work!
By following these steps, you can easily adjust the size of your cells in Elementor, creating a layout that’s not just functional but also aesthetically pleasing! Remember, a little experimentation goes a long way, so feel free to play around with different sizes until you find what works best for your design.
Using Custom CSS for Advanced Sizing
If you want to take your control over cell sizes in Elementor to the next level, diving into Custom CSS is the way to go! This might sound a bit technical, but don’t worry — I’ve got your back! Custom CSS allows you to fine-tune every aspect of your design, including the size of your cells. Here’s how you can do it:
- Access the Custom CSS section: First, navigate to the cell or section where you want to apply the size changes. Locate the ‘Advanced’ tab in the Elementor panel.
- Add your CSS: Look for the ‘Custom CSS’ section. This is where you can insert your CSS code to manipulate the size of your cells. Below is a simple example to get you started:
.selector { height: 300px; /* Adjust height */ width: 80%; /* Adjust width */ max-width: 500px; /* Maximum width */}
With the above code, you’re controlling the height and width, ensuring it remains responsive without exceeding 500 pixels. Of course, you can tweak those values to suit your design needs better.
Tip: Remember that any CSS you write here will override Elementor’s default settings, giving you control over styles that the visual editor may not provide. But caution is key; a little CSS can go a long way!
Responsive Design Considerations
When it comes to web design, responsiveness is a big deal! You want your cells to adapt beautifully across all devices — that means desktops, tablets, and smartphones. Thankfully, Elementor has your back, but you still need to consider a few things.
- Using Responsive Controls: Elementor offers built-in responsive controls. When you’re in the size settings, look for the device icons that let you set different values for desktop, tablet, and mobile views.
- Media Queries: If you’re using Custom CSS, consider implementing media queries for more granular control. This way, you can specify styles for various screen sizes.
@media only screen and (max-width: 768px) { .selector { height: auto; /* Adjust height for smaller screens */ width: 100%; /* Make it full width on mobile */ }}
Here, the CSS sets specific dimensions when your screen width is 768 pixels or less, ensuring a user-friendly experience on smaller devices.
Remember: Always preview your site on multiple devices and screen sizes. You might be surprised how a seemingly small change can impact your layout. Taking the time to optimize for responsiveness will pay off in visitor satisfaction and engagement!
7. Common Issues and Troubleshooting
When it comes to changing cell sizes in Elementor, users often run into a few common issues. Don’t worry, most of these can be resolved with a little troubleshooting. Here are some of the most frequent problems you might encounter:
- Cells Not Resizing: Sometimes, the cells might not resize as you expect. This usually occurs due to conflicting styles from your theme. Make sure to check your theme settings or any custom CSS that might be overriding your adjustments.
- Alignment Problems: You might notice that after adjusting cell sizes, the content doesn’t align properly. This can often be fixed by tweaking the alignment options within the Elementor settings for your elements.
- CSS Issues: If you’re using custom CSS and your changes aren’t appearing, double-check your code for any errors. Even a tiny typo can cause your styles not to reflect.
- Responsive Design Glitches: If your cell sizes look great on desktop but are misaligned on mobile devices, ensure you’re using Elementor’s responsive settings. Adjustments need to be made specifically for mobile views.
- Slow Loading Times: Extensive custom styles and elements can slow down your page. If it seems sluggish, consider minimizing the sizes of your images or removing unnecessary widgets.
For each of these issues, take your time to experiment with the settings and see how the changes affect your design. If needed, Elementor has a community forum where you can get advice from other users who may have faced similar challenges.
8. Conclusion and Best Practices
Changing cell sizes in Elementor can significantly enhance the layout and aesthetics of your website. By understanding the tools at your disposal, you can create a visually appealing and user-friendly design that meets your specific needs. Here are some best practices to keep in mind:
- Experiment with Settings: Don’t hesitate to play around with various settings to see what works best for your layout. Elementor allows for easy adjustments, so go ahead and test different configurations.
- Use Global Settings: If you find a cell size that works, consider using the Global Settings feature to maintain consistency across your pages.
- Keep Mobile in Mind: Always preview your changes on mobile devices. This will help ensure that your design is responsive and looks good on all screen sizes.
- Optimize for Speed: Remember to keep an eye on your page loading times. Avoid over-complicating your layouts with too many elements that can cause slowness.
- Consult Documentation: Elementor has extensive documentation and tutorials. Don’t hesitate to refer to these resources when you need guidance.
At the end of the day, changing cell sizes is about blending creativity with functionality. So, have fun experimenting and enjoy the process of building your ideal website!


