So, you’ve been using Shutterstock for your creative projects, but now you’re thinking about canceling your subscription. Maybe your needs have changed, or you’re looking to cut costs. Whatever the reason, canceling your subscription doesn’t have to be a stressful process. In this guide, we’ll walk you through the simple steps to cancel your Shutterstock account without any hassle. Whether you’re a casual user or a busy professional, understanding how to end your subscription smoothly can save you time and frustration.
Reasons Why You Might Want to Cancel Your Subscription
There are plenty of valid reasons why someone might decide to cancel their Shutterstock subscription. Here are some common ones:
- Cost Savings: If you find that you’re not using the images enough to justify the expense, canceling can help you save money.
- Switching to Alternative Services: Maybe you’ve discovered other platforms that better suit your needs or offer more competitive pricing.
- Changing Project Needs: Your work might have shifted to different types of media that Shutterstock doesn’t cater to as well.
- Limited Usage: If you’ve only used Shutterstock for a short-term project or infrequently, maintaining a subscription might not be worth it.
- Quality or Content Concerns: You might prefer other sources for images or find Shutterstock’s offerings no longer aligned with your style.
- Account Management Preferences: Sometimes, users prefer to manage their assets differently or consolidate subscriptions elsewhere.
Remember, canceling isn’t always permanent—if your needs change again, you can usually resubscribe later. But it’s good to weigh your options and make sure you’re making the best choice for your current situation.
3. Step-by-Step Instructions to Cancel Your Shutterstock Subscription
Canceling your Shutterstock subscription might seem like a daunting task, but it’s actually pretty straightforward once you know the steps. Whether you’re done with your project or just need a break from the service, here’s a simple guide to help you through the process:
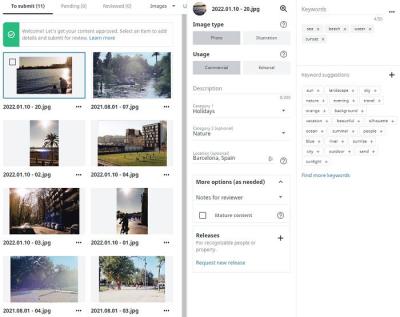
- Log into Your Shutterstock Account: Head over to shutterstock.com and sign in using your credentials. Make sure you’re using the account tied to your subscription.
- Access Your Account Settings: Once logged in, click on your profile icon located at the top right corner. From the dropdown menu, select Account Settings.
- Navigate to Subscription Management: In your account dashboard, look for the Plans & Billing tab. Click on it to view your current subscription details.
- Find the Cancel Option: Within your plan details, there should be an option that says Cancel Subscription or similar. Click on this button to initiate the cancellation process.
- Follow the Prompts: Shutterstock might ask you to confirm your decision or provide a reason for cancellation. Follow the on-screen instructions and provide any feedback if prompted.
- Confirm Cancellation: After completing the prompts, confirm your cancellation. You should receive a confirmation message or email acknowledging that your subscription has been canceled.
Important: Make sure to check if your subscription is set to auto-renew. Canceling will typically prevent future billing, but you might still have access until the current billing cycle ends.
If you encounter any issues during this process, don’t worry — customer support is there to help. You can contact Shutterstock’s support team via their help center or email for further assistance.
4. Common Issues and How to Resolve Them When Cancelling
While the process is designed to be straightforward, some users run into hiccups. Here are some common issues and easy ways to resolve them:
Issue 1: Cannot Find the Cancel Button
If you’re logged into your account but can’t see the option to cancel, it could be due to:
- Subscription type (e.g., some plans might not be cancellable online)
- Account restrictions or errors
Solution: Try clearing your browser cache and cookies, or accessing your account from a different browser or device. If the cancel button still isn’t visible, contact Shutterstock support directly for assistance.
Issue 2: Billing Still Occurs After Cancellation
This can happen if the cancellation wasn’t processed correctly or if there’s a delay in the system.
- Check your email for a cancellation confirmation.
- Verify your billing statement to see if charges still appear.
Solution: If you see charges after cancellation confirmation, reach out to customer support immediately. Keep your billing statements handy as proof.
Issue 3: Unable to Contact Customer Support
Sometimes, support channels might be busy or unclear.
- Visit the Shutterstock Help Center for FAQs and contact options.
- Use the live chat feature if available.
- Send an email explaining your issue clearly and politely.
Remember, patience is key. Customer service teams handle many requests daily, but they’re there to help you resolve any issues.
By being prepared and knowing what to expect, you can cancel your Shutterstock subscription smoothly without unnecessary stress. If you follow these tips and reach out for support when needed, you’ll be done with the process in no time!
5. What to Do After Cancelling Your Shutterstock Subscription
Once you’ve successfully canceled your Shutterstock subscription, you might wonder what the next steps are or if there’s anything you need to keep in mind. Don’t worry — it’s pretty straightforward, but a few small actions can help you stay organized and make the most of your images moving forward.
First off, review your downloaded assets. If you’ve saved any images or videos for future use, double-check that you have all the files you need stored safely on your device or cloud storage. Remember, Shutterstock’s licensing terms typically allow you to use the assets you downloaded while subscribed, but if you plan to use any previously downloaded content beyond that, it’s good to verify the licensing rights.
Next, keep an eye on your email. Shutterstock usually sends a confirmation of your cancellation, and sometimes, they might offer you a special deal or reminder of remaining credits or licenses. It’s helpful to retain this communication for your records, especially if you plan to re-subscribe later or need proof of cancellation.
If you’ve been using Shutterstock for projects, now is a good time to organize your files. Create folders on your device categorizing images by project or theme, so you’re ready to go if you decide to find similar assets outside of Shutterstock or subscribe again in the future.
Finally, consider exploring alternative sources for stock images, just in case you need to find similar content later on. Free platforms like Unsplash or Pexels are great options for high-quality images without a subscription. If you prefer paid options, look into other services that might offer different licensing models or more affordable plans to suit your needs.
6. Tips to Manage Your Subscription and Avoid Unwanted Charges in the Future
Managing your subscriptions wisely can save you money and prevent surprises on your billing statement. Here are some practical tips to help you stay on top of your digital subscriptions like Shutterstock and avoid unwanted charges:
- Set Reminders for Renewal Dates: Keep track of your subscription renewal date using a calendar or reminder app. This way, you’ll know in advance whether you want to continue, pause, or cancel before any charges occur.
- Review Your Usage Regularly: Periodically assess if you’re actually using the assets you’ve downloaded or the subscription benefits. If your usage has dropped or changed, it might be time to adjust your plan or cancel.
- Opt for Monthly Plans if Flexibility Matters: Monthly billing gives you more control. You can cancel or pause your subscription easily without committing long-term, unlike annual plans which might carry cancellation fees or require more notice.
- Use Account Management Features: Log into your Shutterstock account regularly to review your billing history, remaining credits, or licenses. Some platforms allow you to set spending limits or alerts — take advantage of these tools if available.
- Stay Alert for Promotional Emails and Offers: Companies often send special deals or renewal notices. Be cautious about re-subscribing or renewing if those offers don’t align with your current needs or budget.
Another good practice is to keep your payment information updated and remove saved credit card details if you decide not to continue the subscription. This extra step can prevent accidental re-billing or unauthorized charges.
By staying organized, setting reminders, and regularly reviewing your subscription status, you’ll maintain better control over your digital expenses. Remember, the key is being proactive rather than reactive — a little planning goes a long way in avoiding unexpected costs and making sure you only pay for what you truly need.
Conclusion and Final Thoughts on Canceling Shutterstock Subscriptions
Canceling your Shutterstock subscription doesn’t have to be a stressful or complicated process. By understanding the simple steps involved—such as navigating to your account settings, selecting the cancellation option, and confirming your decision—you can efficiently end your subscription without any hassle. Remember, it’s important to review your billing cycle to ensure that you cancel before the next payment is due, avoiding unnecessary charges.
Key Takeaways:
- Always log into your account through the official Shutterstock website to ensure security.
- Double-check your subscription plan and billing date before initiating cancellation.
- Keep a record of your cancellation confirmation for future reference.
- If you encounter issues, contact Shutterstock’s customer support for assistance.
While canceling might seem daunting at first, following the outlined steps will help you complete the process smoothly. Whether you’re switching to a different service or simply no longer need the subscription, taking control of your account settings ensures you’re making the best choice for your needs. Remember, you can always reconsider or explore new plans in the future if your circumstances change.