Shutterstock is a popular platform for high-quality stock photos, videos, and music that many creative professionals and businesses rely on. When you subscribe, you often opt into auto-renewal, which automatically extends your subscription at the end of each billing cycle. While this feature offers convenience, there are times when you might want to cancel auto-renewal—perhaps to avoid unnecessary charges, switch plans, or simply take a break from the service. Understanding how auto-renewal works and knowing how to manage it can save you from unexpected payments and give you more control over your subscription.
Step-by-Step Guide to Cancel Shutterstock Auto-Renewal
Canceling auto-renewal on Shutterstock is straightforward, but it’s important to follow the right steps to ensure your subscription doesn’t renew automatically. Here’s a simple, step-by-step guide to help you through the process:
- Log In to Your Shutterstock Account
- Navigate to Your Account Settings
- Find Subscription Details
- Locate the Auto-Renewal Option
- Disable Auto-Renewal
- Verify Cancellation
- Optional: Contact Customer Support
Start by visiting shutterstock.com and clicking on the “Log In” button at the top right corner. Enter your email and password associated with your account to access your dashboard.
Once logged in, click on your profile icon or name at the top right corner and select “Account Settings” from the dropdown menu. This will take you to your account management page.
Within your account settings, look for the section labeled “Subscriptions” or “My Plans.” Here, you’ll see details about your current subscription, including renewal dates and billing information.
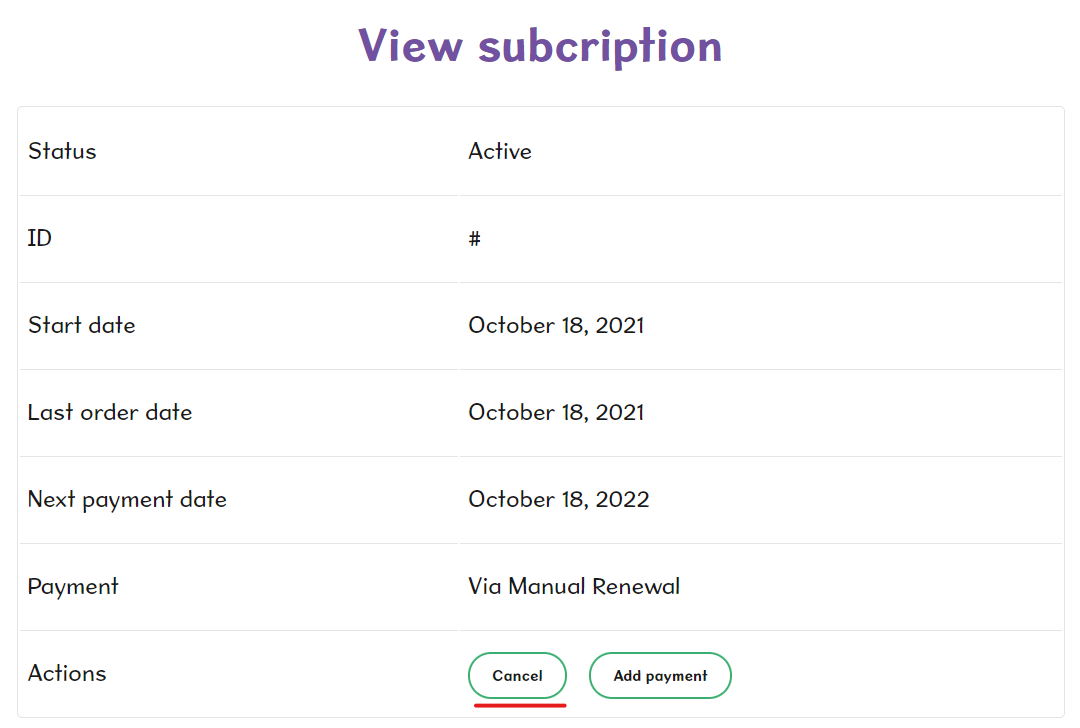
In your subscription details, find the toggle or button that indicates whether auto-renewal is active. It might be labeled as “Auto-Renew” or “Renewal Settings.”
Click on the toggle or button to turn off auto-renewal. You may be prompted with a confirmation message—confirm that you want to disable auto-renewal to proceed.
After disabling auto-renewal, double-check that the setting has been saved. Your account should now show that auto-renewal is turned off, and your subscription will expire at the end of the current billing cycle.
If you encounter any issues or cannot find the auto-renewal settings, don’t hesitate to reach out to Shutterstock’s customer support via their help center or chat support for assistance.
And that’s it! Remember, once you cancel auto-renewal, you can continue using your subscription until the current billing period ends. After that, your access will be limited unless you choose to renew again. Managing your subscription settings ensures you stay in control of your expenses and usage.
Managing Your Subscription Settings on Shutterstock
Once you’re ready to take control of your subscription, managing your settings on Shutterstock is pretty straightforward. Whether you want to pause, modify, or cancel your auto-renewal, the key is accessing your account properly. Here’s a step-by-step guide to help you navigate through the process smoothly.
Step 1: Log Into Your Account
Head over to Shutterstock’s website and log into your account using your email and password. If you’re already signed in, just proceed to the next step.
Step 2: Access Your Account Settings
Once logged in, click on your profile icon located at the top right corner of the page. From the dropdown menu, select Account Settings. This will take you to a page with all your account details and subscription info.
Step 3: Navigate to Subscription or Plan Details
Within your account settings, find the section labeled Plans & Billing or similar. Here, you’ll see information about your current subscription plan, renewal date, and payment details.
Step 4: Manage Auto-Renewal
Look for an option like Auto-Renewal or Subscription Management. Click on it to view your renewal preferences. Typically, there will be a toggle switch or a button labeled Cancel Auto-Renewal.
| Action | Description |
|---|---|
| Toggle Auto-Renewal Off | Disables automatic renewal, so your subscription will not renew after the current billing period ends. |
| Confirm Cancellation | Follow prompts to confirm your decision. You might be asked to provide feedback or reasons for cancellation, which helps Shutterstock improve their service. |
Step 5: Confirmation
Once you’ve canceled auto-renewal, Shutterstock usually sends a confirmation email. Make sure to check your inbox and spam folder to verify that the cancellation was successful.
Pro Tip: If you want to retain access until the current subscription period ends, make sure not to delete your account or cancel the entire subscription — just turn off auto-renewal!
Common Issues and Troubleshooting When Cancelling Auto-Renewal
Sometimes, the process isn’t as smooth as it should be. You might run into a few hiccups when trying to cancel auto-renewal on Shutterstock. Don’t worry — most issues are fixable with a little troubleshooting.
Issue 1: Not Seeing the Cancel Option
If you log into your account and can’t find the option to cancel auto-renewal, it could be due to:
- Using a different plan that doesn’t allow cancellation from the user portal
- Account restrictions or billing issues
- Technical glitches on the website
Solution: Try clearing your browser cache or switching to a different browser. If the problem persists, contact Shutterstock’s customer support for direct assistance.
Issue 2: Cancellation Not Taking Effect
Sometimes, even after you cancel auto-renewal, billing continues or the renewal date doesn’t change. This can happen if:
- You canceled too close to the renewal date, and the system processes the renewal before the cancellation takes effect
- There’s a delay in processing your cancellation request
Solution: Check your account to see if the renewal was processed. If it was, and you believe it shouldn’t have been, contact support immediately to request a refund or further assistance.
Issue 3: Receiving Unwanted Billing Charges
If you notice charges after canceling, double-check your billing history. Sometimes, multiple subscriptions or connected accounts can cause confusion.
- Verify the subscription linked to your account
- Ensure you canceled the correct plan
Solution: Reach out to Shutterstock’s billing support with your account details. They can clarify charges and help resolve any discrepancies.
Final Tip: Always keep records of your cancellation requests and confirmation emails. This documentation can be useful if any disputes or issues arise later on.
By staying proactive and familiar with the management process, you’ll be able to handle most issues confidently. Remember, customer support is there to help if you hit a wall. Don’t hesitate to reach out for assistance!
Additional Tips for Managing Your Shutterstock Subscription
Managing your Shutterstock subscription doesn’t have to be a chore. Here are some handy tips to keep things smooth and ensure you’re always in control:
- Regularly Review Your Subscription Settings: Log in to your Shutterstock account periodically to check your current plan, usage, and billing details. This helps you stay aware of your subscription status and avoid unexpected charges.
- Utilize the Dashboard Effectively: The dashboard provides quick access to your billing history, license details, and renewal dates. Make it a habit to glance at it before making any changes.
- Set Reminders for Renewal Dates: Mark your calendar or set digital reminders a few days before your renewal date. This way, you’ll be prepared if you decide to cancel or modify your subscription.
- Explore Alternative Plans or Packages: If you find that your current plan no longer fits your needs, Shutterstock often offers different packages. Switching to a plan that better aligns with your usage can save money and prevent unnecessary auto-renewals.
- Download Your Content Before Cancellation: If you’re planning to cancel, make sure to download all the images or videos you need beforehand. Once canceled, you might lose access to your licensed content or face restrictions.
- Stay Informed About Promotions or Changes: Shutterstock occasionally runs special offers or updates its policies. Subscribing to their newsletter or following their announcements can keep you informed about changes that might affect your subscription.
By staying proactive and organized, you can manage your Shutterstock subscription with confidence, avoiding surprises and making sure you’re only paying for what you truly need.
Contacting Shutterstock Customer Support for Assistance
If you’re having trouble canceling your auto-renewal or need help with your subscription, reaching out to Shutterstock’s customer support is a good move. They’re there to help you navigate any issues and ensure your concerns are addressed efficiently.
Here’s how you can contact Shutterstock support:
- Help Center: Visit their Help Center. It’s packed with FAQs, troubleshooting guides, and detailed articles that might answer your questions without needing to wait for a reply.
- Live Chat: For real-time assistance, Shutterstock offers a live chat feature. Look for the chat icon usually located at the bottom right corner of their support page. This is a quick way to get help from a support agent.
- Submit a Support Ticket: If your issue isn’t urgent or you prefer written communication, submit a support ticket through their contact form. Be sure to include relevant details like your account email, subscription type, and a clear description of your issue.
- Phone Support: Depending on your region, Shutterstock may offer phone support. Check their contact options on the support page to see if this is available to you.
Tips for a smooth support experience:
- Have your account details ready, such as your email address and subscription plan.
- Be clear and concise about your issue or request — mention that you want to cancel auto-renewal if that’s your goal.
- Keep records of your communication, including chat transcripts or email correspondence, in case you need to reference them later.
Remember, customer support teams are there to help, so don’t hesitate to reach out if you hit a roadblock. Whether you need help canceling your subscription or just have questions about your plan, they’re your best resource for getting things sorted out smoothly.
Conclusion and Final Tips for Subscription Management
Managing your Shutterstock subscription effectively is essential to ensure you only pay for what you need. Remember, cancelling auto-renewal before the billing date prevents unexpected charges and gives you control over your usage. To make the process smoother, keep track of your renewal dates and review your subscription options periodically.
Here are some final tips to help you stay on top of your Shutterstock subscription:
- Set reminders: Use calendar alerts a few days before renewal dates to review your subscription status.
- Review your plan: Determine if your current plan still fits your needs or if you should switch to a different tier.
- Understand cancellation policies: Be aware of any specific notice periods or fees associated with cancelling or downgrading your plan.
- Backup your assets: Download and store any images or videos you wish to keep before cancelling, as access may be revoked afterward.
By staying organized and proactive, you can manage your Shutterstock subscription effortlessly and avoid unnecessary expenses. Regularly reviewing your plan and understanding the cancellation process empowers you to use the platform efficiently and cost-effectively. Remember, managing subscriptions wisely ensures you maximize value while maintaining control over your creative resources.