Hey there! If you’re looking to add eye-catching visuals to your project without breaking the bank, Shutterstock is a fantastic resource. But what if you only need an image once and don’t want to commit to a full subscription? No worries! Purchasing a Shutterstock image for one-time use is straightforward, affordable, and perfect for occasional projects like blog posts, social media, or presentations. In this guide, I’ll walk you through the process of buying images for single use, so you can get the visuals you need quickly and confidently without any hassle.
Understanding Shutterstock Licensing Options
Before you click that “buy” button, it’s super important to understand the different licensing options Shutterstock offers. Basically, licenses determine how you can use an image and what restrictions might apply. Shutterstock provides two main types:
- Standard License: This is ideal for most common uses—like websites, blogs, social media, and print materials up to 500,000 copies. It covers digital and print use but has some restrictions, such as no use in merchandise or items for resale.
- Enhanced License: If you need to use the image in products for resale (like T-shirts or mugs), or want to print more than 500,000 copies, this license is the way to go. It also allows for unlimited digital uses and more flexible options.
Since you’re interested in a one-time purchase, the Standard License is usually enough. Just remember, once you buy an image under this license, you can use it for your project a single time—hence, “one-time use.” If you ever need to reuse or modify the image for different projects, you’ll need to purchase additional licenses. It’s pretty simple, but always good to double-check the license terms to make sure your intended use is covered.
In summary, understanding these licensing options helps you choose the right license for your needs and avoids any surprises down the line. Shutterstock’s licensing system is designed to be transparent, so you can feel confident in your purchase and focus on creating amazing content with the perfect image!
Steps to Purchase a Shutterstock Image for One-Time Use
So, you’ve found that perfect image on Shutterstock and you’re ready to make it yours for a one-time project — great choice! Purchasing an image for one-time use is pretty straightforward, but there are a few steps to get everything done smoothly. Let’s walk through the process together.
Step 1: Sign In or Create an Account
If you don’t already have a Shutterstock account, you’ll need to create one. It’s quick and easy — just enter your email, choose a password, and verify your account. If you already have an account, simply sign in to access your dashboard.
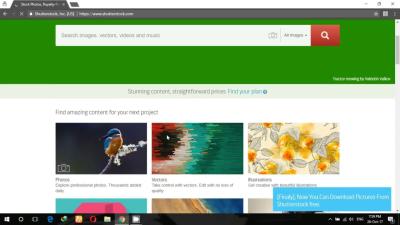
Step 2: Find Your Image
Use the search bar or browse categories to locate the image you want. When you find it, click on the thumbnail to view a larger preview and details about the image, such as its resolution, licensing options, and usage rights.
Step 3: Select the License Type
Shutterstock offers various licensing options, but for a one-time use, you’ll typically want to choose the Standard License. This license covers most common uses like websites, social media, and print materials for up to 500,000 copies. If your project requires more extensive rights, you might consider an Extended License, but for most one-time projects, the Standard License is enough.
Step 4: Choose Your Download Size
Depending on your needs, select the appropriate image size. Larger sizes give you more flexibility and higher quality, especially if you plan to print or enlarge the image. Keep in mind that larger files usually cost a bit more.
Step 5: Add to Cart and Purchase
Once you’ve selected the license and size, click the Add to Cart button. Review your selections in the cart, and when everything looks good, proceed to checkout. You can pay via credit card, PayPal, or other available methods.
Step 6: Download Your Image
After completing your payment, you’ll get instant access to download the image file. Save it to your computer or device, and you’re all set to use it for your project.
Tips for Choosing the Right Image for Your Needs
Picking the perfect image isn’t just about aesthetics—it’s about making sure it fits your project perfectly. Here are some friendly tips to help you choose the right Shutterstock image for your specific needs.
- Define Your Purpose: Before diving into the search, clarify what you need the image for—website banner, social media post, print brochure, or presentation. Knowing the purpose helps determine the style, resolution, and licensing requirements.
- Be Specific with Keywords: Use precise keywords related to your topic. Instead of just searching for “business,” try “modern business team meeting” or “creative entrepreneurs working.” This narrows results and saves you time.
- Consider the Style and Tone: Think about the vibe you want. Do you need something professional, playful, minimalist, or vibrant? Browse through several options to find one that matches your brand personality.
- Check Image Resolution and Size: Make sure the image resolution suits your project. For print, you’ll need a high-resolution image (300 dpi), whereas digital uses can often work with lower resolutions. Select a size that provides enough detail without unnecessary bulk.
- Assess the Composition and Focus: Look at the image’s composition. Is the main subject clear? Are there distracting elements? An image with a clean focus on the main subject works better in most cases.
- Match Colors to Your Palette: Choose images that complement your existing color scheme to create a cohesive look across your materials.
- Consider Cultural Sensitivity and Diversity: Opt for images that are inclusive and appropriate for your target audience, avoiding stereotypes or insensitive representations.
Remember, taking a little extra time to select the right image can make a big difference in how your project turns out. An image that aligns well with your message and audience will resonate more effectively and elevate your overall presentation.
Cost and Payment Methods for One-Time Image Licensing
When it comes to purchasing a Shutterstock image for one-time use, understanding the cost and available payment options is key to a smooth experience. Shutterstock offers various licensing options, but for a single-use image, you’ll typically be looking at their on-demand or pay-per-image plans.
The cost of a Shutterstock image for one-time use can vary depending on factors such as resolution, image size, and whether you choose a standard or enhanced license. Generally, prices can range from about $10 to $50 per image. Higher resolution files suitable for printing or large projects tend to be on the pricier side, so keep that in mind based on your needs.
Shutterstock also offers flexible payment methods to make your purchasing process hassle-free. These include:
- Credit or Debit Cards: Visa, MasterCard, American Express, Discover, and other major cards are widely accepted.
- PayPal: A popular choice for many users, providing quick and secure transactions.
- Company Accounts and Invoicing: For businesses or frequent users, Shutterstock offers options to set up accounts with invoicing, which can be helpful for expense tracking.
Before finalizing your purchase, make sure to review the licensing details and confirm that the image’s license covers your intended use. Keep an eye out for any additional fees or restrictions—sometimes, high-resolution images or special licensing options may come with extra costs.
Pro tip: If you’re planning to purchase multiple images or anticipate ongoing needs, consider exploring Shutterstock’s subscription plans or bulk image packs, which can sometimes offer better value. But for a one-time project, paying per image with a clear understanding of the licensing terms is often the simplest route.
Downloading and Using Your Shutterstock Image Legally
Once you’ve purchased your image, the next step is downloading and making sure you use it legally and ethically. Shutterstock provides a streamlined process for downloading your purchased images, but understanding the legal aspects is equally important to avoid any copyright issues.
After completing your payment, you’ll typically see a download button or link. Here’s what to do:
- Download the Image: Select the appropriate resolution based on your project needs. Higher resolutions are usually available for purchase at no extra cost, depending on your license.
- Save the File Securely: Keep your downloaded image in a safe location on your device or cloud storage. You might need it again for edits or re-use within the license limits.
- Read and Understand the License: Make sure you are familiar with the specific license you purchased. For one-time use, this typically means your rights are limited to a particular project, medium, or duration.
Using your Shutterstock image legally involves respecting the license restrictions, which usually include:
- No Redistribution: You can’t resell or redistribute the image on its own.
- Project Usage Only: Use the image solely for the project specified during purchase.
- No Unlawful or Offensive Use: Avoid using images in contexts that could be defamatory, misleading, or illegal.
- Attribution: Generally, Shutterstock images don’t require attribution, but always double-check your license details to be sure.
If you need to use the image across multiple platforms or mediums, verify whether your license covers that scope. For example, a standard license might be sufficient for digital use but not for large-scale print campaigns or merchandise. In those cases, an enhanced license might be necessary.
Remember, violating licensing terms can lead to legal complications or financial penalties. When in doubt, it’s always a good idea to consult Shutterstock’s licensing FAQs or contact their support team for clarification. Respecting copyright not only keeps you safe legally but also supports the hardworking photographers and artists behind these stunning images.
Frequently Asked Questions About Shutterstock One-Time Image Purchases
Purchasing images from Shutterstock for one-time use can raise several questions, especially for first-time buyers. Here are some of the most common queries to help you navigate the process smoothly:
- What is a Shutterstock one-time image purchase? It allows you to buy a single license for an image without subscribing to a monthly plan. You pay once, and the license grants you specific usage rights.
- How much does a one-time image purchase typically cost? Prices vary depending on the image resolution and licensing options. Generally, a standard license ranges from $10 to $50 per image.
- What does the license cover? A standard license usually permits use for digital or print projects, social media, and presentations, but excludes resale or redistribution. Always review the license details for each image.
- Can I use the image for commercial purposes? Yes, most images purchased with a standard license can be used commercially, but check specific licensing terms to ensure compliance.
- How do I purchase a one-time image? Simply search for your desired image, select the resolution, add it to your cart, and proceed to checkout. You will make a one-time payment without needing a subscription.
- What if I need a higher resolution or extended license? You can opt for a premium image or an extended license during the purchase process for additional rights and quality.
In summary, understanding the licensing options and costs involved in Shutterstock’s one-time image purchases ensures you select the right image for your project while staying compliant with licensing terms. Always review the license details before completing your purchase to avoid any usage issues.