Have you ever published a post in WordPress and felt that your featured image just wasn’t in the right spot? You’re not alone! Many WordPress users face the challenge of positioning their featured images perfectly to enhance the overall appeal of their posts. Properly positioning your featured image can significantly affect how your content is perceived and shared. In this guide, we’ll walk you through everything you need to know about adjusting the featured image position for your posts in
Understanding Featured Images in WordPress
Featured images are a crucial part of your WordPress posts. They serve as a representative image for your content, often displayed prominently on archives, sliders, or within the post itself. Let’s break down some key aspects of featured images:
- Definition: A featured image is a thumbnail image that represents a post or page. It’s usually displayed at the top of the post or in various sections of your site.
- Importance: Featured images grab attention and can significantly influence readers’ first impressions. A well-placed image can lead to more clicks, shares, and engagement.
- Types of Content: You can use featured images for blog posts, portfolio items, products, and more. They should relate closely to the content of the post for maximum impact.
- Image Size: The recommended size for featured images can vary by theme. Usually, a dimension of 1200 x 675 pixels works well for most themes but check your specific theme’s guidelines.
Now that we understand what featured images are let’s explore how to adjust their positioning effectively in your WordPress posts.
Accessing the Post Editor
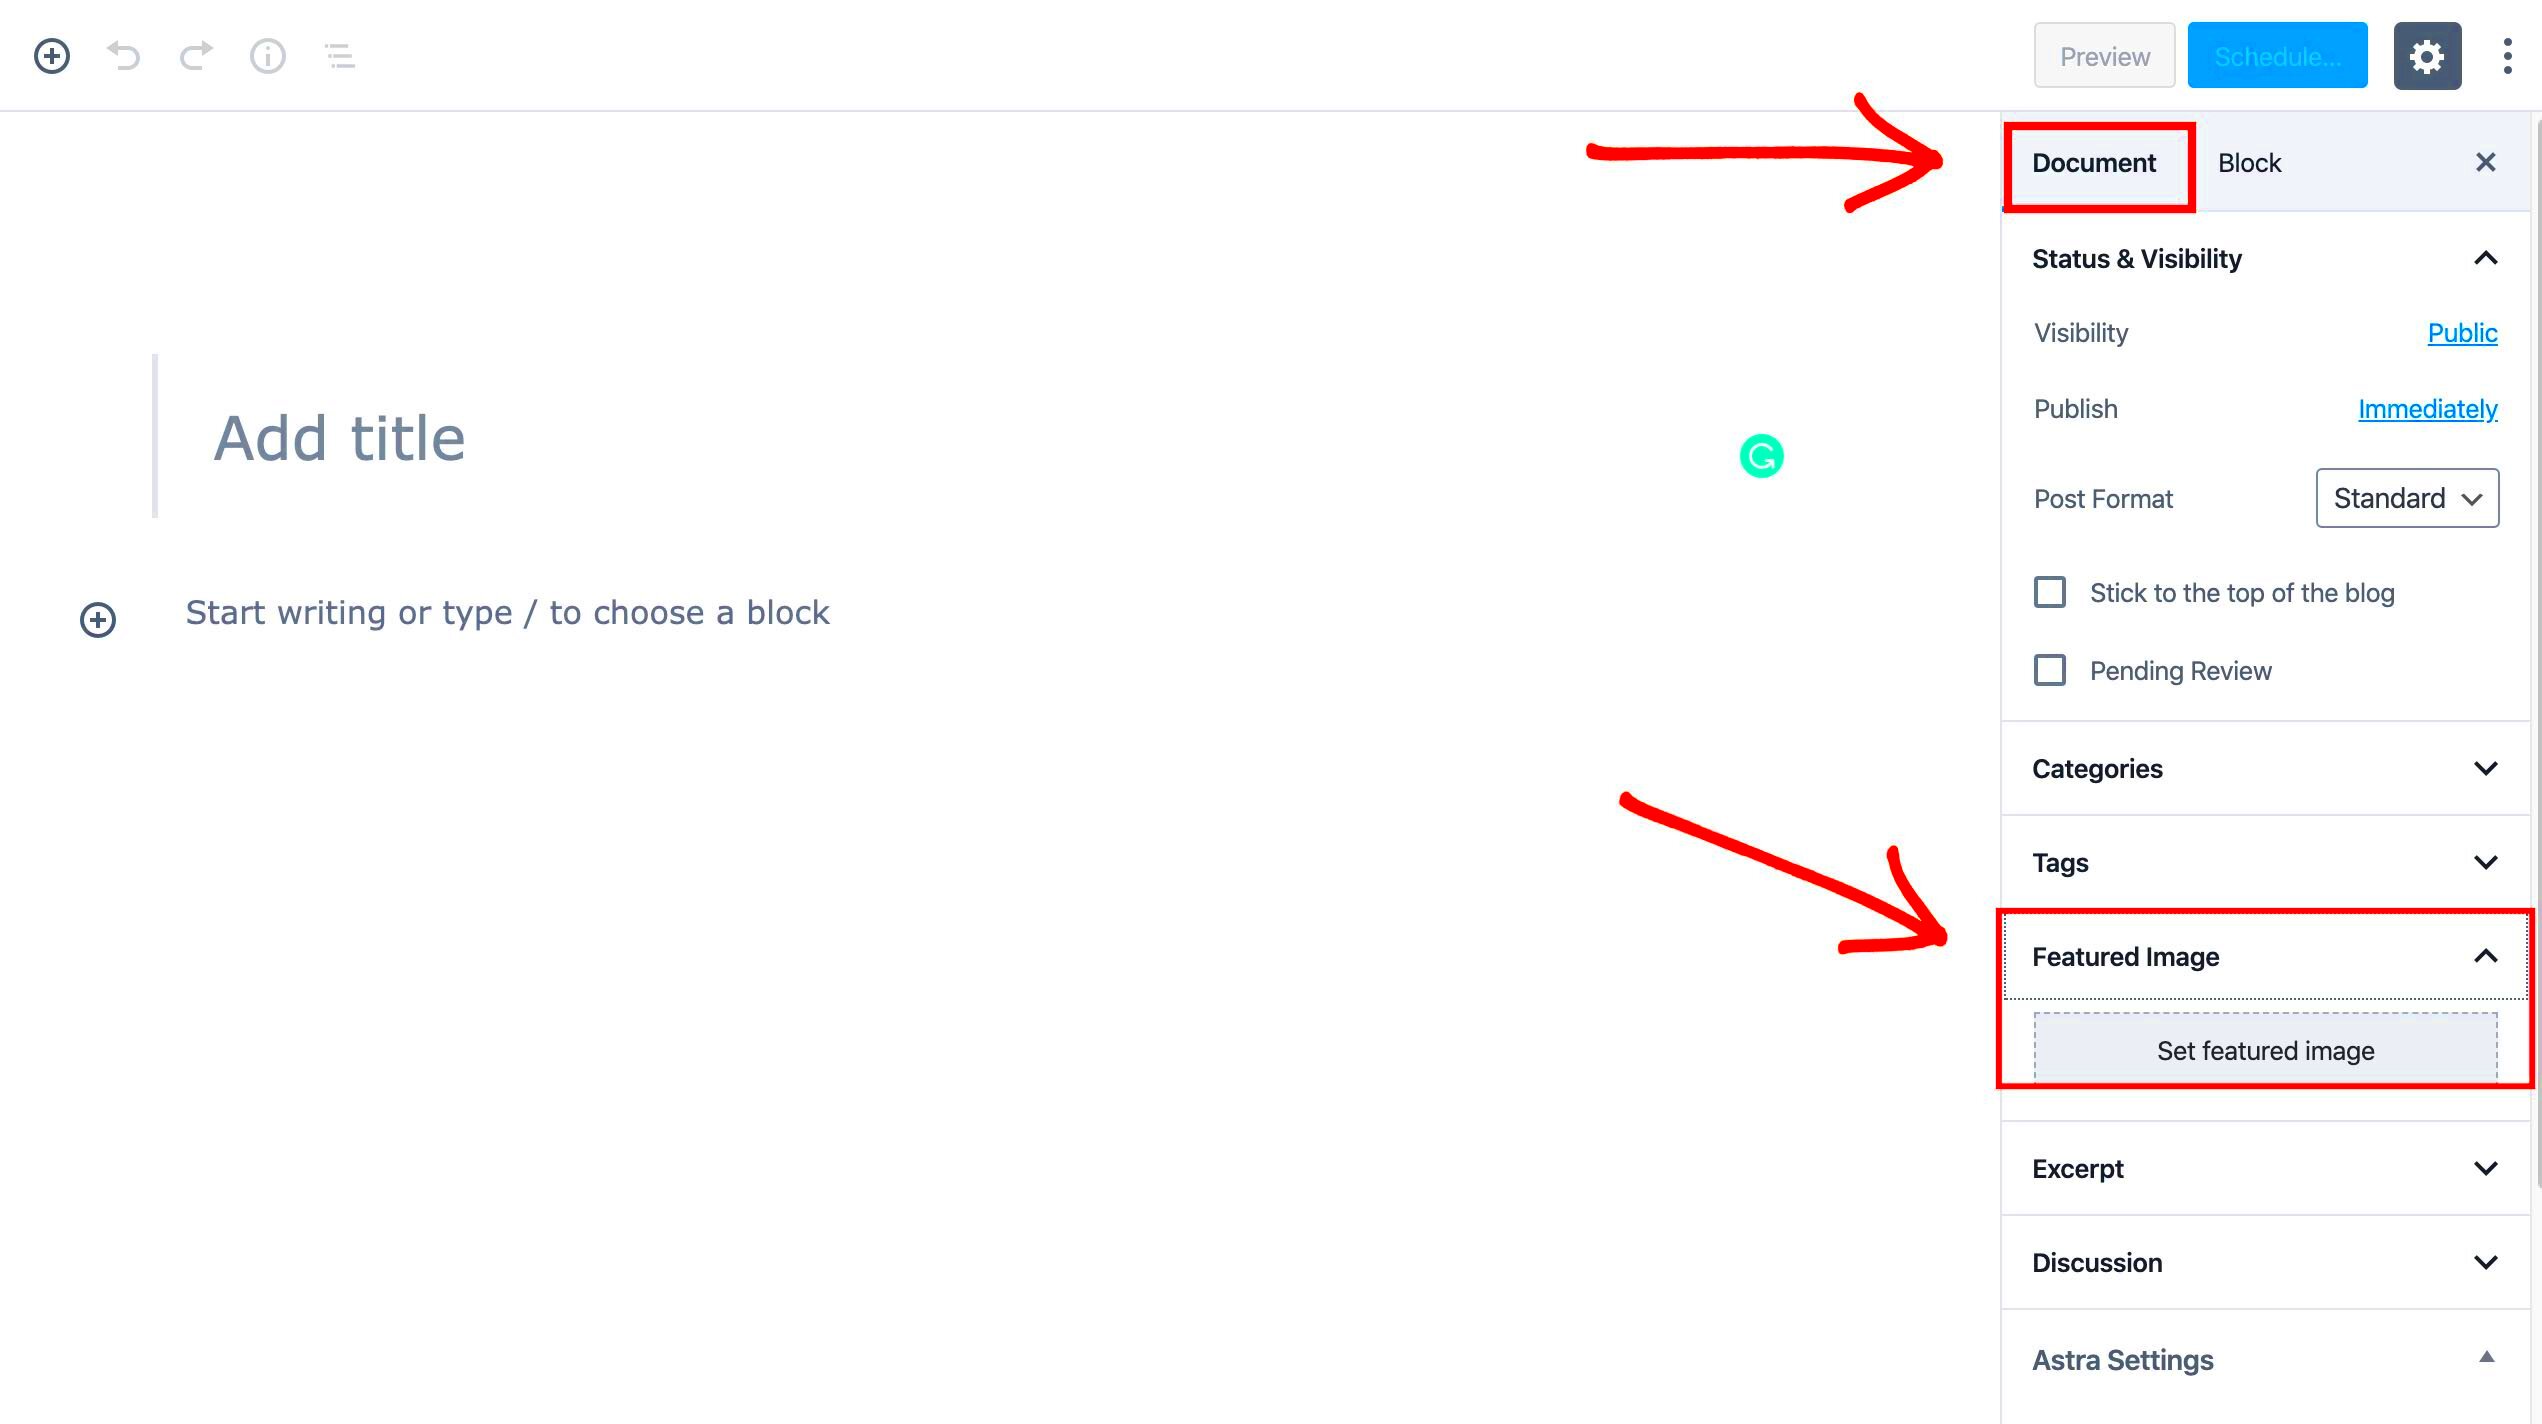
Getting started with adjusting the featured image position is easier than you might think! The first step is to access the post editor in your WordPress dashboard. Here’s how you can do it:
- Log into Your WordPress Dashboard: Open your browser and navigate to your WordPress site. Enter your credentials to log in.
- Navigate to Posts: On the left-hand side, you will see a menu. Click on “Posts” to view all your blog posts. If you’re looking to create a new post, just click “Add New.”
- Select Your Post: If you want to edit an existing post, find the post you wish to modify from the list. Hover over the post’s title, and you’ll see options like “Edit,” “Quick Edit,” and “Trash.” Click on “Edit.”
- Open the Block Editor: Once you click “Edit,” the Block Editor will open, where you can make all sorts of adjustments to your post including text, images, and layout.
And there you go! You are now in the post editor where you can manage your featured image. The layout here allows you not just to adjust the image, but also to modify your entire post—add headings, images, or even embed videos. Don’t forget to save your changes frequently!
Choosing the Right Featured Image Size
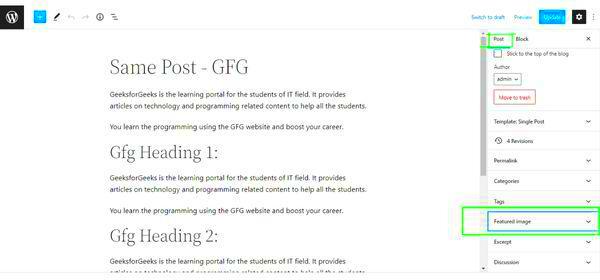
Now that you’re in the post editor, the next crucial step is selecting the right size for your featured image. This can make a significant difference in how your content appears to your readers. Here are some key points to consider:
- Know Your Theme: Each WordPress theme has specific dimensions recommended for featured images. Check your theme’s documentation to find the ideal width and height. Common sizes include:
- Thumbnail: 150×150 pixels
- Medium: 300×200 pixels
- Large: 1024×768 pixels
- Aspect Ratio Matters: Maintaining the correct aspect ratio is vital to avoid stretching or cropping. Aim for a size that aligns with your theme’s requirements while keeping the quality intact.
- Quality Over Quantity: While a bigger image might seem appealing, loading times are a consideration. Compress images to ensure faster loading without sacrificing quality. Tools like TinyPNG can help.
- Responsive Images: Make sure the image you select looks good on all devices. A responsive design automatically adjusts image size, so verify how your featured image appears on mobile and desktop versions.
By choosing the right size, you not only enhance the visual appeal of your post but also improve loading times and overall user experience. Remember, a well-placed, perfectly-sized featured image can capture attention and draw readers into your content!
5. Adjusting Featured Image Position Using the Block Editor
When it comes to positioning your featured image in WordPress, the Block Editor (also known as Gutenberg) offers a straightforward way to get things just right. Whether you want it aligned left, centered, or right, the Block Editor has options that allow for a clean and modern look while keeping the overall design of your post intact.
Here’s how you can adjust the position of your featured image:
- Start by navigating to your post or page in the WordPress dashboard.
- On the top right, make sure you’re in the “Post” view, then click on the “Featured Image” section in the right panel.
- After selecting your image, click on the “Block” tab that appears in the toolbar right above the editor.
- You will see alignment options such as “Align Left,” “Align Center,” and “Align Right.” Choose the one that fits your content best.
Pro Tip: If you want to add a bit of space around your featured image, consider using the “Image” block to ensure better control over margins. You can also adjust the size of your image using the settings available in the Block Editor.
By using this simple and intuitive approach, you can make your featured images not only eye-catching but also tailored to fit seamlessly within your content. The flexibility of the Block Editor makes it easier than ever to match your featured image to your blog’s overall design aesthetic.
6. Using Custom CSS to Fine-Tune Image Position
Advanced users will find that sometimes the default options simply don’t cut it—this is where custom CSS comes into play. Whether you want to nudge your featured image just a bit or create a unique style that sets your content apart from the rest, CSS can provide that extra flexibility needed for perfection.
Here’s how you can use custom CSS to adjust your featured image position:
- Go to your WordPress dashboard, then navigate to “Appearance” and select “Customize.”
- In the Customizer, look for the “Additional CSS” option.
- Enter your custom CSS code. For example:
.post .featured-image { margin-top: -20px; /* Moves the image 20px upwards */ position: relative; /* Allows for more precise adjustments */ }In the code snippet above, you can adjust the value of “margin-top” to achieve your desired effect. Feel free to play with margins and other CSS properties such as padding or display to perfectly position your featured image.
| CSS Property | Function |
|---|---|
| margin | Controls the space around the image. |
| position | Sets positioning scheme of the image. |
| float | Allows the image to sit beside text. |
Remember, before you apply any custom CSS, it’s a good practice to save backups of your original settings. This way, you can revert if anything doesn’t work out as planned. With custom CSS, you have the power to make adjustments that truly reflect your individual style—so don’t be afraid to experiment!
7. Testing Different Themes for Featured Image Settings
When it comes to crafting the perfect blog post, the look and placement of your featured image can make a world of difference. If you find that your image isn’t displaying as you’d like, it might be time to consider experimenting with different WordPress themes. Each theme comes with its unique settings and styles for featured images, and they can significantly affect how your content is perceived.
Here are some steps you can take to test different themes:
- Backup Your Site: Before making any changes, always back up your site. This way, you can return to your original settings if things don’t go as planned.
- Select a Theme: Go to your WordPress dashboard and navigate to Appearance > Themes, then browse through available themes. Don’t hesitate to check the details or previews.
- Preview the Theme: You can preview how your existing posts will look with a new theme. This allows you to assess if the featured image aligns well with your content.
- Test on Multiple Devices: Always check how the featured image displays on various devices—desktops, tablets, and smartphones. A mobile-friendly image is crucial!
- Check Compatibility: Ensure that the theme you’re considering is compatible with your plugins and other functionalities. Compatibility issues can lead to unexpected display problems.
By taking the time to test different themes, you can find the perfect fit for your blog’s overall design and ensure that your featured images shine just as brightly as your content!
8. Utilizing Page Builders for Enhanced Control
If you’re looking to take your featured image game to the next level, consider utilizing page builders. Tools like Elementor, Beaver Builder, or WPBakery Page Builder allow for a more hands-on approach to how your images are displayed. This can give you a ton of flexibility and a more tailored look for your posts.
Here are some compelling reasons to try out page builders for your featured images:
- Drag and Drop Functionality: Page builders typically let you easily reposition your images on the page with a simple drag-and-drop interface.
- Custom Image Sizes: You can set custom width and height dimensions, ensuring that your images fit your design perfectly, regardless of the screen size.
- Advanced Styling Options: Take advantage of additional styling options, such as overlays, shadows, or borders, that can make your featured image pop.
- Responsive Design Controls: Most page builders offer options for adjusting your featured image settings based on the device being used, ensuring a seamless user experience.
When using a page builder, starting with a template can be a great idea. Many page builders come packed with pre-designed layouts that already have featured images well-positioned, giving you a head start on customization. Don’t shy away from experimenting—play around with different settings until you find the one that captures the essence of your content while engaging your audience effectively!
Previewing Your Changes
Once you’ve made adjustments to your featured image position in WordPress, it’s crucial to see how those changes will look on your live site. This is where the preview feature comes into play, offering you a sneak peek of your post before publishing it for the world to see. A well-placed featured image can significantly enhance the aesthetic appeal of your post and possibly even increase reader engagement.
To preview your changes, follow these simple steps:
- After adjusting the featured image position via the Block Editor, look for the “Preview” button located in the upper right corner of the editor.
- Click on it, and select whether you’d like to view the preview in a new tab or window. This allows you to maintain your editing session while checking the changes.
- Once the preview loads, take a good look at how your featured image interacts with the text, other media, and overall layout of your post.
While viewing your post, consider the following:
- Does the featured image draw attention? It should complement the content, not overshadow it.
- Is the alignment consistent? Make sure it aligns well with the other elements on the page.
- How does it look on different devices? Remember to check how the post appears on mobile devices, tablets, and desktop computers.
Finally, once you are satisfied with the positioning and overall look of the featured image, navigate back to the editor to make any final tweaks before hitting the publish button. Remember, a little adjustment can go a long way in making your posts visually appealing!
Conclusion
Adjusting the featured image position for a post in WordPress is not just a technical task; it’s an art that contributes to the overall user experience of your blog. A well-placed featured image can be the difference between a reader scrolling past your post or becoming engrossed in your content. By following the steps outlined in this guide, you can enhance your posts’ aesthetics and make a lasting impression on your audience.
Here are some key takeaways:
- Think about the message: Your featured image should resonate with the content of your post.
- Experiment with different placements: Don’t hesitate to try various alignments and styles to find what best suits your needs.
- Use the preview feature liberally: Always preview your changes to see how the image plays with the rest of your post.
Remember, the way you present content can vastly influence how it’s perceived. Don’t shy away from playing around with spacing, sizes, and alignment. In the world of blogging, aesthetics play a significant role in capturing and maintaining your readers’ attention. By mastering the positioning of your featured images, you’re setting the stage for a visually compelling and engaging blog experience. Happy blogging!

