If you’re a photographer or visual creator looking to boost your income, Shutterstock is a fantastic platform to showcase your work and reach a global audience. Uploading your photos might seem straightforward, but doing it effectively can really make a difference in sales. In this post, we’ll walk through the essentials of uploading your photos on Shutterstock and share some tips to help you stand out. Whether you’re new to the platform or just want to refine your process, this guide will give you the confidence to upload like a pro and increase your chances of making sales.
Step-by-Step Guide to Upload Your Photos

Ready to get your images online and start earning? Let’s go through the process step-by-step so you can upload your photos smoothly and efficiently.
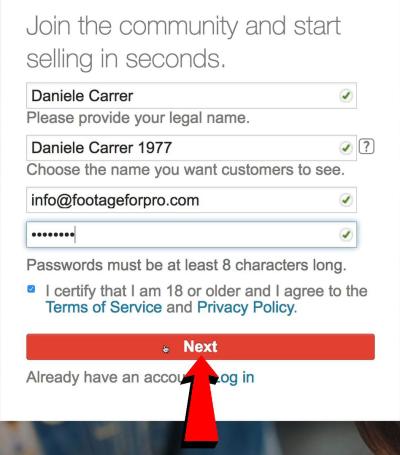
1. Create a Contributor Account
First things first, head over to the Shutterstock Contributor website and sign up. You’ll need to provide basic information such as your name, email address, and payment details. Make sure to read and agree to the contributor terms. Once registered, you’ll get access to your dashboard where all the magic happens.
2. Prepare Your Photos
Before uploading, double-check that your photos meet Shutterstock‘s quality standards:
- Resolution: Minimum of 4 megapixels (e.g., 2000 pixels on the shortest side).
- File Type: JPEG or TIFF (JPEG is most common).
- Compression: Save your JPEGs at high quality to avoid compression artifacts.
- Colors: Use sRGB color space for consistency across devices.
- Originality: Ensure your images are unique, sharp, and well-composed.
Organize your files beforehand to make the upload process smooth. Rename your images with descriptive, keyword-rich filenames—this helps with searchability later!
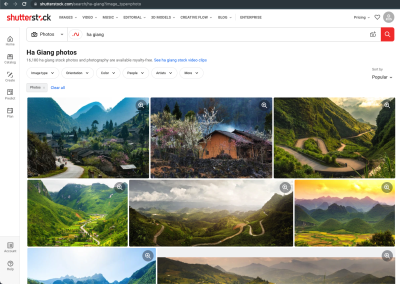
3. Upload Your Photos
Once your images are ready, log in to your contributor dashboard and click the “Upload” button. You can upload multiple files at once:
- Select your images from your computer.
- Ensure all files are correctly uploaded before proceeding.
- Fill in the required metadata—titles, descriptions, and keywords. Be descriptive and include relevant keywords to improve discoverability.
Shutterstock offers a preview feature—use it to review your images before submitting. Make sure everything looks good and that your keywords accurately describe the image to attract the right buyers.
4. Set the Image Details
For each image, you’ll need to add:
- Title: Clear and concise, summarizing the image.
- Description: Detailed info about the image’s content and context.
- Keywords: Up to 50 relevant keywords. Think about what buyers might search for.
Use a mix of broad and specific keywords to maximize visibility. Avoid keyword stuffing, and focus on the most relevant tags.
5. Submit for Review
After filling in all the details, click the “Submit” button. Your images will enter Shutterstock’s review queue, which typically takes a few days. The review team checks for quality, content appropriateness, and compliance with guidelines. If your images are approved, they’ll go live and available for sale. If not, you’ll receive feedback on what to improve or change for next time.
6. Monitor and Optimize
Once your photos are live, keep an eye on their performance through your dashboard. Pay attention to which images sell best and consider uploading more content in similar styles or themes. Regularly updating your portfolio and refining your keywords can help improve your sales over time.
Uploading photos to Shutterstock isn’t just about getting your images online—it’s about doing it smartly to attract buyers and increase your sales. Follow these steps, stay consistent, and you’ll be well on your way to a thriving contributor journey!
Preparing Your Photos for Submission

Before you even think about uploading your photos to Shutterstock, it’s crucial to make sure they’re polished and ready to impress. Think of this step as the foundation of a sturdy building — get it right here, and your chances of making sales skyrocket.
First off, quality is king. Ensure your photos are high resolution, sharp, and free from noise or pixelation. Shutterstock recommends a minimum of 4 megapixels, but the higher, the better. This helps your images look professional and appealing to buyers who want crisp visuals for their projects.
Next, pay attention to composition. Well-composed photos with clear focal points tend to perform better. Use the rule of thirds, leading lines, or symmetry to make your images more engaging. Remove any distracting elements that don’t add value — clutter can take away from the main subject.
Lighting is another critical factor. Natural light often works best, but if you’re shooting indoors, make sure your lighting is even and bright. Avoid harsh shadows or overexposed spots. Consider editing your photos to correct brightness and contrast, ensuring they look vibrant but natural.
Speaking of editing, a light touch often works best. Crop your images to the optimal size and aspect ratio for Shutterstock — typically, a landscape format (like 4:3 or 16:9) tends to be versatile, but check the specific requirements for each submission. Remove any blemishes or imperfections using photo editing software, but avoid over-editing — authenticity matters.
Lastly, double-check your file formats and metadata. Shutterstock prefers JPEG files with a resolution of at least 300 dpi. Name your files clearly and consistently, using descriptive filenames that match the content. This makes it easier to organize and helps with the next step: optimizing your metadata.
Optimizing Photo Titles, Descriptions, and Tags for Better Visibility
Now that your photos are ready to go, it’s time to make sure they’re discoverable. Think of your titles, descriptions, and tags as your photo’s GPS coordinates — they guide buyers right to your images. The better you optimize these elements, the more likely your photos are to be seen and purchased.
Start with a compelling title. Your title should be descriptive, straightforward, and include relevant keywords. Instead of “Beautiful Sunset,” try “Vivid Sunset Over Mountain Range at Dusk.” This not only helps with searchability but also accurately conveys what the image is about.
Next, craft a detailed and engaging description. Use natural language and include context or potential use cases — this helps buyers envision your photo in their projects. For example, “This high-resolution image captures a stunning sunset over rugged mountains, perfect for travel, outdoor, or nature-themed projects.”
Tags are your secret weapon for visibility. Use a mix of specific and broad keywords. Think about what buyers might search for — landscape, sunset, mountain, evening light, nature, adventure, etc. Don’t forget to include synonyms or related terms to broaden your reach.
| Example of Effective Tags |
|---|
| Sunset, Mountain Range, Dusk, Nature, Landscape, Outdoors, Adventure, Scenic, Evening Light, Clouds |
Here are some tips for choosing the best tags:
- Be specific: Instead of just “nature,” add “mountain,” “forest,” or “river” if applicable.
- Use relevant keywords: Think about who might buy your image and what they’d search for.
- Avoid overstuffing: Use a reasonable number of tags — Shutterstock recommends around 10-15 per image.
- Stay updated: Trends change, so revisit your tags periodically to keep your images relevant.
Remember, the goal is to make your photos as discoverable as possible without resorting to spammy tactics. Clear, descriptive titles, detailed descriptions, and well-chosen tags will help your images stand out in the crowded marketplace and boost your sales over time.
Understanding Shutterstock’s Content Guidelines and Quality Standards
If you want your photos to sell well on Shutterstock, it’s crucial to understand their content guidelines and quality standards. Think of these as the rules of the game—knowing them helps you avoid rejection and makes your images more appealing to buyers.
Shutterstock has clear criteria for what they accept, focusing on originality, technical quality, and relevance. Here’s a quick rundown:
- Originality: Your photos should be unique and creative. Avoid overly generic or cliché images—think outside the box!
- Technical Quality: High-resolution images (at least 4MP), sharp focus, proper exposure, and good color balance are essential. Blurry, pixelated, or poorly lit shots are a no-go.
- Model and Property Releases: If your photos include recognizable people or private property, you need the proper releases to sell them legally.
- Content Restrictions: Shutterstock prohibits images that contain illegal activities, hate speech, violence, or adult content. Keep your content family-friendly unless you’re uploading specifically for adult categories.
- Relevance and Metadata: Your photos should accurately represent what’s in the image. Use relevant keywords and descriptive titles to improve discoverability.
Understanding these guidelines isn’t just about avoiding rejection—it’s about creating images that truly meet the needs of your potential buyers. When your photos align with Shutterstock’s standards, they’re more likely to be accepted, featured, and purchased.
Also, take advantage of Shutterstock’s Content Guidelines page regularly. They update their policies, and staying informed ensures you’re always on the right track. Remember, quality and compliance go hand in hand—aim for both, and you’ll see your sales grow!
Common Mistakes to Avoid When Uploading Photos
We’ve all been there—trying to get our creative work out into the world, only to hit a few snags along the way. When uploading photos to Shutterstock, certain mistakes can trip you up and even hurt your chances of making sales. Let’s go over some common pitfalls so you can steer clear of them.
1. Ignoring Image Quality: Uploading images that are blurry, pixelated, or poorly exposed is a surefire way to get rejected. Always check your photos at full resolution before uploading. Use editing tools to enhance sharpness and correct colors if needed.
2. Forgetting to Add Relevant Metadata: Keywords, titles, and descriptions are vital for discoverability. Avoid generic tags or leaving fields blank. Instead, be specific and accurate—think about what a buyer would search for.
3. Uploading Duplicate Content: Repeating the same shots or slightly altered versions of the same image can clutter your portfolio. Focus on quality over quantity and diversify your content.
4. Ignoring Model and Property Releases: Including recognizable people or private property without proper releases can lead to rejection or legal issues. Always ensure you have the necessary permissions.
5. Not Following Content Guidelines: Uploading images that violate Shutterstock’s policies—such as offensive material, violent content, or illegal activities—will get rejected. Familiarize yourself with their rules to avoid this.
6. Over-Editing or Over-Filtering: While some editing can enhance your images, excessive filters or unnatural effects can make photos look fake or unprofessional. Keep edits subtle and authentic.
7. Poor Composition or Framing: A well-composed photo attracts more buyers. Avoid awkward cropping or distracting backgrounds. Take your time to frame your shot properly.
By being mindful of these common mistakes, you improve your chances of acceptance and increase the appeal of your photos. Remember, patience and attention to detail are key—each upload is a step toward building a successful Shutterstock portfolio that sells!
Strategies to Boost Your Photos’ Sales and Visibility
So, you’ve uploaded some fantastic photos to Shutterstock, but now what? The key to turning your uploads into steady income is not just about adding images but actively promoting and optimizing them. Let’s explore some effective strategies to boost your photos’ sales and ensure they get the visibility they deserve.
Optimize Your Keywords and Titles
Think of keywords as the bridge that connects your photos with potential buyers. Use descriptive, relevant, and popular keywords that accurately reflect your image. Avoid generic terms—be specific! For example, instead of just “flower,” try “red tulip in spring garden.” Also, craft clear, engaging titles that capture the essence of your photo. This makes it easier for buyers to find your images during searches.
Choose the Right Categories
Proper categorization helps your images appear in the right collections. Spend a little time selecting the most fitting categories and subcategories. This not only improves discoverability but also ensures your photos are shown to the right audience.
Focus on Trending and Evergreen Topics
Stay aware of current trends—whether it’s remote work, eco-friendly lifestyles, or health & wellness. Uploading images that align with trending topics can give your portfolio a visibility boost. But don’t forget evergreen themes like family, nature, or business; these consistently attract buyers over time.
Engage in Consistent Uploading
Regularly adding fresh content keeps your portfolio active and increases the chances of your images appearing in search results. Think of it as building your presence—more photos mean more opportunities for sales.
Share Your Portfolio
Leverage your social media platforms, personal website, or blog to showcase your Shutterstock portfolio. Sharing your work can attract more traffic and potential buyers. Consider creating themed collections or compiling your best shots into galleries that highlight your style and specialty.
Participate in Shutterstock Community and Promotions
Engage with other contributors, join forums, and participate in Shutterstock’s challenges or promotions. Sometimes, Shutterstock runs special campaigns that prioritize featured images, giving your photos additional exposure. Being active in the community can also give you insights into what buyers are currently looking for.
Remember, boosting sales and visibility is a combination of smart optimization, consistent effort, and active promotion. Keep refining your approach based on what works best for your niche, and over time, you’ll see your photos start to sell more frequently and reach a broader audience.
Monitoring Your Photo Performance and Making Improvements
Great, your photos are live! But the real secret to ongoing success on Shutterstock is continuously monitoring how they perform and making smart improvements. Think of it as tuning your portfolio to better meet buyer preferences and market trends.
Use Shutterstock’s Analytics Tools
Shutterstock provides contributors with analytics dashboards where you can see detailed data on each of your images. Key metrics include:
- Views: How many times your image has been seen.
- Downloads: The number of times your image has been purchased.
- Revenue: How much you’ve earned from each image.
Regularly reviewing these stats helps you identify which images are performing well and which aren’t. If certain photos get lots of views but few downloads, it might be time to tweak the keywords or update the image itself.
Identify Trends and Patterns
Are specific themes, styles, or subjects consistently performing better? Use this information to guide your future uploads. For example, if nature photos sell well during spring, plan to upload more seasonal images around that time.
Update and Improve Underperforming Images
Don’t be afraid to revisit your lower-performing images. Consider:
- Adding More Keywords: Sometimes, the right keywords can make all the difference.
- Revisiting Titles and Descriptions: Clear, compelling text can attract more buyers.
- Editing the Image: Slight cropping, color adjustments, or removing distractions can enhance appeal.
Remember, even small tweaks can lead to better visibility and sales.
A/B Testing
If Shutterstock allows, try different versions of the same image—varying keywords, titles, or even edits—to see what resonates best with buyers. This iterative approach helps you fine-tune your portfolio continuously.
Stay Informed and Adapt
Market demands evolve, so stay updated on trends, Shutterstock’s policies, and new features. Follow contributor forums, blogs, or newsletters to get insights. The more adaptive you are, the better your chances of long-term success.
In essence, monitoring your photo performance isn’t a one-time task—it’s an ongoing process. By keeping a close eye on your data and making thoughtful improvements, you can optimize your portfolio for maximum sales and grow your presence on Shutterstock as a trusted contributor.
Conclusion and Tips for Successful Uploads on Shutterstock
Uploading high-quality photos to Shutterstock can significantly boost your sales and enhance your portfolio’s visibility. To maximize your success, it’s essential to understand the platform’s standards and optimize your submissions accordingly. Remember, consistent quality and adherence to guidelines are key to gaining approval and attracting buyers.
Here are some effective tips for successful uploads:
- Use High-Resolution Images: Ensure your photos are sharp, well-lit, and at least 4 megapixels to meet Shutterstock’s minimum requirements.
- Keyword Wisely: Incorporate relevant, specific keywords to improve searchability. Use a mix of broad and niche terms.
- Follow Content Guidelines: Avoid copyrighted material, logos, or sensitive content. Familiarize yourself with Shutterstock’s content restrictions.
- Optimize Titles and Descriptions: Craft clear, descriptive titles and detailed descriptions to help buyers find your images.
- Consistent Uploads: Regularly add new content to keep your portfolio active and increase exposure.
Additionally, pay attention to technical details such as proper cropping, minimal noise, and natural colors. Consider reviewing Shutterstock’s contributor resources for the latest best practices. By maintaining high standards and staying engaged with the platform, you’ll improve your chances of making successful sales and building a reputable portfolio.
In conclusion, success on Shutterstock hinges on quality, relevance, and consistency. Implementing these tips will help you stand out and achieve your sales goals more effectively.