Have you ever wanted to add a personal touch to your WordPress site? Custom post types (CPT) are a fantastic way to make that happen! They allow you to create specialized content beyond standard posts and pages. But what if you could take it a step further? Imagine being able to notify users about updates or changes to your custom post types. In this post, we’ll dive deep into how to add notification alerts to a custom post type in WordPress, ensuring that your audience stays engaged and informed. Let’s get started!
Understanding Custom Post Types in WordPress
Custom post types are essentially content types in WordPress that allow you to organize and present your content more effectively. While WordPress comes with default post types like posts, pages, and attachments, custom post types give you the flexibility to define your content according to your specific needs.
Here’s what you need to know about custom post types:
- Creation: You can create custom post types through code or plugins. Popular plugins like “Custom Post Type UI” make the process user-friendly, enabling even beginners to create CPTs easily.
- Uses: They’re great for various applications like portfolios, testimonials, products, events, and more. If you have a specific type of content to display, chances are a custom post type is the perfect solution!
- Management: Custom post types come with their own admin menus, allowing you to manage them just like any other WordPress post type. You can add categories, tags, and custom fields to enhance functionality.
To illustrate it better, here’s a simple comparison:
| Default Post Types | Custom Post Types |
|---|---|
| Blog Posts | Event Listings |
| Pages | Product Listings |
| Attachments | Portfolio Items |
In essence, custom post types give you the tools to tailor your content management experience. And with notification alerts, you’ll keep users tuned into the latest updates—making your site not just a place for content, but a dynamic platform for interaction! So, let’s look at how we can implement those notification alerts in your custom post types.
3. Setting Up Your Custom Post Type
Setting up a custom post type in WordPress is an essential step if you want to create a distinct kind of content that goes beyond the standard posts and pages. Whether you’re building a portfolio, a product database, or a review site, having a custom post type allows you to manage your content more effectively. Let’s walk through the steps to set this up!
First, you’ll want to access your WordPress admin dashboard. From there, follow these steps:
- Use a Plugin: One of the easiest methods to create a custom post type is through plugins like “Custom Post Type UI.” Simply search for it in the plugins section, install, and activate it.
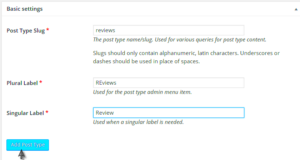
- Define Your Post Type: Navigate to the plugin settings and click “Add New.” Here, you can enter the name of your post type, such as “Portfolio” or “Products.” Customize the labels and settings to fit your needs.
- Set Additional Options: You’ll be able to specify whether your post type supports categories, tags, and custom attributes. Check the boxes that apply to your project.
- Register Your Custom Post Type: If you prefer doing this manually, you can add the code directly to your theme’s `functions.php` file. Code snippets for a custom post type typically look like this:
register_post_type('portfolio', array( 'labels' => array( 'name' => __('Portfolios'), 'singular_name' => __('Portfolio'), ), 'public' => true, 'has_archive' => true, 'supports' => array('title', 'editor', 'thumbnail'), )); - Flush Permalinks: After registering your custom post type, it’s crucial to go to Settings > Permalinks and click “Save Changes.” This ensures your new post type can be accessed correctly.
And voilà! You’ve successfully set up your custom post type in WordPress. Now you can start adding content that’s tailored specifically to your needs!
4. Exploring Notification Alerts
Notification alerts can greatly enhance user experience on your WordPress site, especially when you have a custom post type. They keep your users engaged and informed about updates, new posts, or any changes that matter. Let’s dive into how you can implement notification alerts effectively.
To get started, consider the following options for adding notification alerts to your custom post type:
- Using a Plugin: There are several plugins like “WP Notification Center” or “OneSignal” that are designed specifically to send notifications. Installing these plugins can make your life a lot easier as they usually come with customizable settings.
- Custom Code: For those with coding skills, you can create your own notification system. This could involve using AJAX to dynamically send alerts to users as soon as there’s a new post in your custom post type. The advantage? Tailoring the functionality exactly to your needs!
- Notification Triggers: Decide on what events should trigger a notification. Is it every new post? Or perhaps when a user comments? This will be vital for setting up effective notifications.
Here’s a simple example of how you could trigger a notification when a new post is published:
function my_custom_notification($post_ID) { $post = get_post($post_ID); if ($post->post_type == 'portfolio') { // Code to send notification goes here }}add_action('publish_portfolio', 'my_custom_notification');
Finally, ensure that you have a user-friendly interface where users can manage their notification preferences. Let them choose what type of alerts they want to receive, and how often. This not only enhances user satisfaction but also ensures that your notifications are welcomed rather than seen as intrusive.
In conclusion, integrating notification alerts with your custom post type can keep your users informed and engaged with your content, leading to a more dynamic and interactive website. Happy developing!
5. Implementing Notification Alerts for Custom Post Types
When you’re dealing with custom post types in WordPress, implementing notification alerts can enhance user engagement significantly. Whether you’re running a magazine site, a portfolio, or a community forum, notifying users about updates can keep them informed and coming back for more. But how do you go about setting this up? Let’s explore!
First off, we need to determine how you want to set up your notifications. The two most common scenarios are:
- Admin Alerts: These alerts inform the admins about new submissions or updates to custom post types.
- User Alerts: These alerts notify users about updates, comments, or new posts related to their interests.
Once you’ve established the type of alerts needed, the next step is to consider the method of implementation. Here’s a quick guide to get started:
- Create a Custom Function: You may write a function that triggers when a post is published or updated. Use WordPress hooks like
publish_{post_type}orsave_post_{post_type}to run your code. - Send Notifications: With your custom function in place, utilize functions like
wp_mail()to send email notifications, or consider using JavaScript for real-time notifications. - Test It Out: Before rolling it out, thoroughly test your notification system. Ensure notifications are sent accurately and aren’t overwhelming your users.
By following these straightforward steps, you can successfully implement notification alerts for your custom post types, improving user interaction on your site.
6. Using Plugins to Simplify Notification Management
If coding isn’t your strong suit or you simply want a more streamlined way to manage notifications for custom post types, using plugins can be a game-changer. Fortunately, the WordPress ecosystem is rich with plugins designed specifically for this purpose, making it easier than ever to stay connected with your audience.
Here are some popular plugins you might consider:
| Plugin Name | Key Features | Best For |
|---|---|---|
| WP Notification Center | Centralized notifications management, customizable alerts | Admin-specific notifications |
| Better Notifications for WP | Email notifications for admin and users, customizable templates | User engagement |
| Push notifications for WordPress | Real-time notifications, customizable audience segmentation | Instant updates for users |
Implementing one of these plugins can save a lot of time and effort. Simply install the plugin, configure your settings, and you’ll have a robust notification system up and running in no time!
By leveraging plugins for notification management, you can focus more on creating great content and less on the technicalities. This approach ensures your users will always be in the loop, fostering better communication and community engagement.
Customizing Notification Settings
Customizing notification settings is crucial for ensuring that your notifications serve their intended purpose without overwhelming your users. Whether you’re working on alerts for a specific custom post type or broader notification settings across your WordPress site, the customization options can significantly enhance user interaction and experience.
To start customizing your notification settings, you may want to think about:
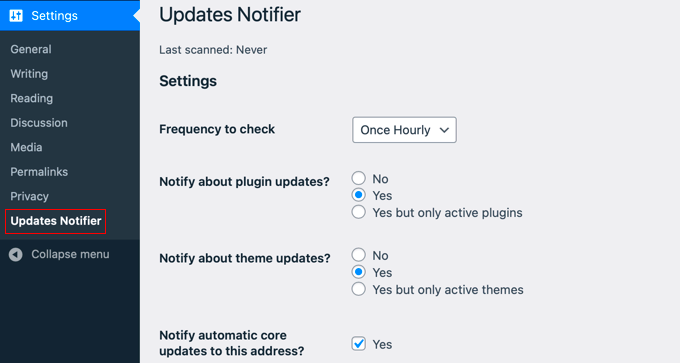
- Frequency of Notifications: Decide how often users should receive notifications. Should they get alerts in real-time, daily summaries, or weekly digests? Tailoring the frequency can help keep your audience engaged without fostering notification fatigue.
- Types of Notifications: Consider the types of notifications that are most relevant to your users. For a custom post type, are you notifying users about new posts, comments on their submissions, or insights related to their interests?
- Notification Format: The format of your notifications can play a significant role in user engagement. Think about whether you want to deliver notifications via email, on-site alerts, or mobile push notifications.
Lastly, don’t forget to integrate user preferences within your settings. Allow users to choose what they want to be notified about and how they wish to receive those alerts. This makes the notifications feel more personalized and relevant.
Overall, customizing notification settings is about finding the right balance between keeping users informed and not overwhelming them. Test different settings and gather feedback to make continuous improvements!
Testing Notifications
Testing notifications is an essential step to ensure that everything works perfectly before you roll out your custom post type alerts. After all, you don’t want to be in a situation where users miss important updates because of faulty notifications!
Here’s how to go about testing your notification system:
- Create Test Scenarios: Start by outlining different scenarios where notifications would be triggered. For example, what happens when a new post is published or when a user comments on a post? Make sure you cover various situations.
- Use Dummy Data: Set up dummy posts and fake user accounts to simulate real user actions. This allows you to identify any potential issues without affecting actual user data.
- Monitor Notification Delivery: Ensure that notifications are being sent and received as intended. Check whether emails are landing in inboxes or going to spam. For on-site notifications, ensure they appear correctly within the user interface.
- Gather Feedback: If possible, enlist a few volunteers to help you test the notifications. Ask them how they received the alerts and how they felt about the content and frequency. This feedback is invaluable!
To summarize, thorough testing of notifications is not just about checking if they work; it’s also about ensuring that users find them helpful and engaging. This way, when you finally launch your custom post type notifications, you can do so with confidence!
Troubleshooting Common Issues
When you’re diving into the world of custom post types and notification alerts in WordPress, things might not always go as planned. Don’t sweat it, though! You can tackle most issues with a little finesse and patience. Here are some common hiccups you might encounter and how to fix them:
- No Notifications Receiving: If you find that notifications are not coming through, the first thing to check is your email settings. Ensure your server can send emails. You might need to install a plugin like WP Mail SMTP to help with this.
- Incorrect Post Type: Double-check that your notifications are properly linked to your custom post type. Sometimes, a small error in coding can result in notifications only being sent for default post types.
- Plugin Conflicts: It’s not uncommon for one plugin to interfere with another. Disable other plugins one at a time to see if any of them are causing issues with your notification system.
- Theme Conflicts: If you’re using a theme that’s not well-coded, it might cause compatibility issues. Try switching to a default WordPress theme (like Twenty Twenty-One) to see if that resolves the problem.
- Debugging: If you’re still facing issues, enable WordPress debugging. You can do this by adding `define(‘WP_DEBUG’, true);` to your wp-config.php file. This will give you error messages that can guide you toward resolving the issues.
Remember, troubleshooting is part of the development process and can often lead to learning something new!
Conclusion
Adding notification alerts to a custom post type in WordPress can significantly enhance your site’s interactivity and user engagement. It allows you to keep your audience informed about new content, updates, and changes in a seamless manner. Here’s a quick recap of what we’ve discussed:
- Understanding Custom Post Types: Recognizing the power of custom post types is key for anyone looking to expand their website’s functionality.
- The Importance of Notifications: Notifications serve as a bridge between your content and your audience, ensuring that they never miss out on important updates.
- Implementation Steps: Whether you’re using plugins or custom coding solutions, the process can be straightforward, provided you follow best practices.
- Troubleshooting: Most issues are fixable with a bit of patience and systematic checking of your setup.
In the end, remember that WordPress is a powerful tool for creating a bespoke site, and integrating notification alerts into your custom post types makes it even more dynamic. Don’t hesitate to experiment, and soon you’ll have a notification system running like a well-oiled machine!

