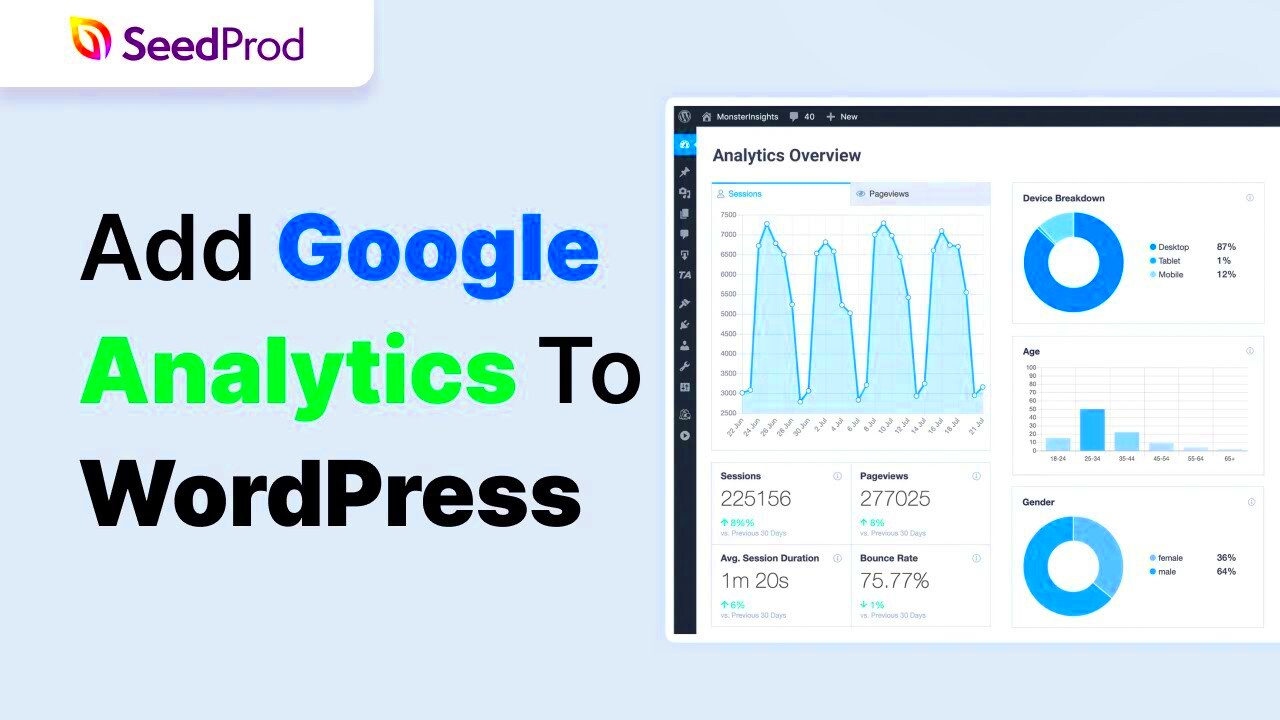
Google Analytics is a powerful tool that helps website owners track and understand their online traffic. It’s like having a personal assistant who meticulously notes how visitors interact with your site. From the number of visitors to their geographic locations, Google Analytics provides a treasure trove of insights that can drive your website strategy forward. Whether you’re running a blog, an e-commerce site, or a portfolio, understanding your audience is crucial, and this tool makes it easier than ever!
Why Use Google Analytics for Your WordPress Site?

So, why should you consider integrating Google Analytics with your WordPress site? Let’s break it down.
- Track Visitor Behavior: Knowing how users interact with your site is essential. Google Analytics allows you to see which pages are the most popular, how long visitors stay, and what they do before leaving.
- Understand Your Audience: Get detailed demographics about your visitors, such as age, gender, and geographic location. This info helps you tailor your content and marketing strategies.
- Measure Campaign Effectiveness: Whether you’re running an email campaign or social media ads, Google Analytics provides insights into what’s working and what’s not, enabling you to adjust your tactics accordingly.
- Optimize for Better Performance: Using analytics data, you can identify bottlenecks in the user experience. Knowing where visitors drop off can help you make necessary improvements to retain users.
- Free to Use: A major perk is that Google Analytics is completely free for anyone with a website, making it an accessible tool for all.
By harnessing the power of Google Analytics, you can make informed decisions that will ultimately lead to improved engagement, increased traffic, and perhaps even higher revenue for those looking to monetize their site!
Prerequisites for Adding Google Analytics to WordPress

Before diving into the nitty-gritty of integrating Google Analytics with your WordPress site, there are a few essential prerequisites to keep in mind. These will ensure that the process goes smoothly and that you get the most out of your data-tracking experience. Let’s break them down:
- A Google Account: First and foremost, you need a Google account to access Google Analytics. If you don’t have one, creating an account is seamless and free. Just head over to the Google account creation page, and you’ll be set in no time!
- WordPress Site: Clearly, this guide assumes you already have a WordPress site up and running. If you’ve built it using WordPress.com or WordPress.org (self-hosted), you’re good to go. Just ensure that it’s live so you can start tracking visitors!
- Admin Access: It’s crucial that you have administrator access to the WordPress site. Without admin rights, you won’t be able to install plugins or make necessary adjustments to your site’s code.
- Basic Understanding of WordPress: While it’s not mandatory to be a tech wizard, having a basic understanding of how WordPress works will help you navigate the interface with ease. Familiarity with plugins, themes, and user roles will definitely come in handy.
- Site Verification: Make sure your site is verified and officially live. This is important for proper data tracking and to ensure that your traffic metrics are accurate right from the get-go.
With these prerequisites in mind, you’re now ready to embark on your journey toward adding Google Analytics to WordPress. Let’s get started!
Creating a Google Analytics Account

Ready to get started with Google Analytics? Creating your account is a breeze! Just follow these straightforward steps:
- Visit Google Analytics: First, head over to the Google Analytics website. If you’re prompted, log in using your Google account credentials.
- Set Up Your Account: Click on the “Start for free” button. You’ll be directed to a setup screen. Fill out your account name, which could be your website name or any reference you find suitable.
- Property Setup: Next, you’ll create a property within your Google Analytics account. This is essentially your website. Enter details such as your website name, URL, and select the appropriate industry category and reporting time zone.
- Data Sharing Settings: You’ll see some data-sharing options. It’s usually a good idea to leave most of these checked, as they help Google improve their services and provide you with better insights over time.
- Get Tracking ID: Once your property is set up, you’ll be provided with a tracking ID. This ID is crucial as it connects your WordPress site with Google Analytics. Make a note of this code!
And voila! You now have a Google Analytics account ready to monitor your website’s performance! Keep this tracking ID handy as you’ll be using it to link Google Analytics with your WordPress installation soon.
5. Obtaining Your Tracking ID
Before diving headfirst into the exciting world of data analysis, there’s one crucial step you need to take: obtaining your Google Analytics Tracking ID. Think of this ID as your analytics passport; it allows Google to identify and collect data from your website. So let’s break it down step-by-step!
First, you’ll need to log into your Google Analytics account. If you haven’t created one yet, no worries! Just head over to the Google Analytics website, and follow the easy setup instructions. Once logged in, here’s what you need to do:
- Click on the gear icon (⚙️) located in the bottom left corner to access the Admin section.
- In the Admin panel, you’ll see three columns. In the first column, make sure you select the appropriate account.
- Now, in the second column, find the option for “Property.” Click on it, and select “Create Property.”
- Fill out the necessary details, including your website name, URL, and industry category. Choose whether you want a Universal Analytics property or a Google Analytics 4 property (GA4). If unsure, GA4 is the latest version and is recommended.
- Once your property is created, navigate to the “Tracking Information” section. Here, you will find your Tracking ID, which usually begins with “UA-” followed by a series of numbers. Make sure to copy this ID because you’ll need it soon!
That’s it! Now you have your Tracking ID ready to go. In the next section, we’ll explore some straightforward methods to add this ID to your WordPress site.
6. Methods to Add Google Analytics to WordPress
Now that you’ve got your Google Analytics Tracking ID, the next step is to integrate it into your WordPress site. There are a few easy and effective methods to accomplish this, so let’s walk through them!
Method 1: Using a Plugin
One of the simplest ways to add Google Analytics is by using a plugin. Thousands of WordPress users rely on plugins for this purpose, and there are a couple of popular choices:
- MonsterInsights – This is a widely used plugin that simplifies the integration process. It’s user-friendly and provides additional insights right within your WordPress dashboard.
- Site Kit by Google – This official Google plugin not only helps you integrate Google Analytics but also provides data from other Google services like Search Console and PageSpeed Insights.
To use a plugin:
- Go to your WordPress dashboard and select “Plugins” > “Add New.”
- Search for your chosen plugin (e.g., MonsterInsights or Site Kit).
- Click “Install Now,” then “Activate.”
- Follow the setup wizard to enter your Tracking ID.
Method 2: Manually Adding the Code
If you prefer a hands-on approach, you can manually add your Tracking ID by inserting the tracking code into your theme’s header file:
- Copy the tracking code provided by Google (found in the Admin section under “Tracking Code”).
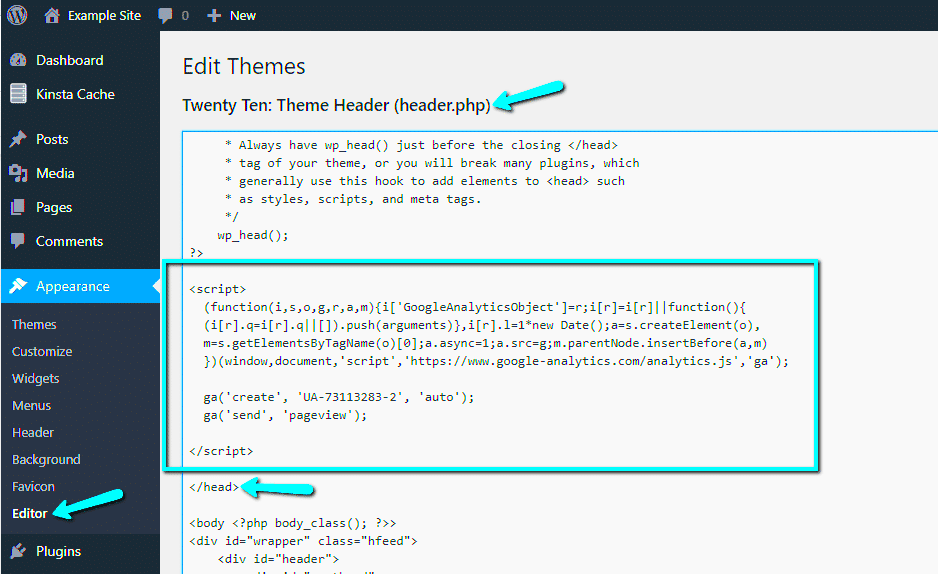
- In your WordPress dashboard, navigate to “Appearance” > “Theme Editor.”
- Find the theme header file named “header.php.”
- Paste the tracking code just before the closing </head> tag.
- Save the changes!
Note: If your theme gets updated, you may lose your changes, so consider using a child theme or a custom plugin for code additions.
Method 3: Using Google Tag Manager
Lastly, if you’re keen on versatility, consider using Google Tag Manager (GTM). This method allows you to manage multiple tracking codes without modifying the theme directly:
- Create a GTM account and get your GTM Container ID.
- Follow Google’s instructions to add the GTM code to your WordPress site’s header and footer.
- Add a new “Tag” in GTM specifically for Google Analytics using your Tracking ID.
And voila! Regardless of the method you choose, you’ll be all set up to start tracking visitor behavior on your WordPress site. Happy analyzing!
1. Using a Plugin
If you’re not very tech-savvy or you just want to keep things simple, using a plugin is one of the best ways to add Google Analytics to your WordPress site. Plugins can save you a lot of time and effort, and the right one can make the integration seamless. Here’s how to do it:
First, you’ll need to choose a Google Analytics plugin. Some popular choices include:
- MonsterInsights: This user-friendly plugin is perfect for beginners and offers advanced tracking features.
- Site Kit by Google: Developed by Google, this plugin not only integrates Google Analytics but also other Google tools.
- GA Google Analytics: A lightweight option that’s straightforward and focuses solely on connecting Google Analytics.
Once you’ve selected a plugin, follow these steps:
- In your WordPress dashboard, go to Plugins > Add New.
- Search for your chosen plugin by name, then click Install Now.
- After installation, click Activate.
- Now, go to the plugin’s settings page (usually located in the left sidebar).
- Enter your Google Analytics tracking ID, which you can find in your Google Analytics account.
- Save your settings and voila! Your site is now connected to Google Analytics.
And that’s it! By using a plugin, you’ve made the whole process a lot easier, and you can start tracking your site’s performance without diving into code.
2. Adding Code Manually to the Header
If you prefer a hands-on approach or want more control over how Google Analytics integrates with your site, adding the tracking code manually is a great option. This method requires a bit of technical know-how, but don’t worry—I’ll guide you through it!
Here’s a step-by-step breakdown:
- Get Your Tracking ID: Log into your Google Analytics account and create a new property. Once that’s done, you’ll be provided with a tracking code—usually in the format “UA-XXXXXXXXX-X”. Copy this code.
- Access Your Theme File: In your WordPress dashboard, go to Appearance > Theme Editor. Look for header.php in the list of theme files.
- Add the Tracking Code: Once you’ve opened header.php, scroll down to find the closing tag. Just before this tag, paste your Google Analytics tracking code. It should look something like this:
- Save Your Changes: After adding the tracking code, click the Update File button to save your changes. Make sure to do this carefully, as modifying theme files can affect your site.
- Verify the Setup: To check if it’s working, visit your site and return to your Google Analytics account. After about 24 hours, you should start seeing data coming in.
<script async src="https://www.googletagmanager.com/gtag/js?id=UA-XXXXXXXXX-X"></script><script> window.dataLayer = window.dataLayer || []; function gtag(){dataLayer.push(arguments);} gtag('js', new Date()); gtag('config', 'UA-XXXXXXXXX-X');</script>
And there you go! Though this method is slightly more technical, it gives you complete control over your tracking setup while allowing you to fully harness the analytics capabilities of Google Analytics. Just remember to back up your site and theme files before making any changes!
3. Using Google Tag Manager
If you’re looking for a flexible and efficient way to manage your Google Analytics setup, Google Tag Manager (GTM) is an excellent tool to consider. Not only does it streamline the process of adding tracking codes, but it also allows you to easily update them without diving into your website’s code every time. Let’s break down how to integrate Google Analytics through GTM.
First things first, you’ll need to set up a GTM account. Head over to the Google Tag Manager website and create a new account. You’ll be prompted to enter your container’s name, which should align with your website’s URL. Don’t worry; you can do this in just a few clicks!
Once you’ve got your GTM account ready, the next step is to add the GTM code to your WordPress site. You can either do this manually by copying the code directly into your theme’s header and footer sections or you can use a plugin like “Insert Headers and Footers” for ease.
After you’ve successfully added the GTM code, it’s time to set up Google Analytics within your GTM. Here’s how:
- Log in to your GTM account.
- Click on “Add a New Tag”.
- Select “Tag Configuration” and choose Google Analytics: Universal Analytics.
- Set the track type to Page View.
- In the Google Analytics Settings, you can either create a new variable with your GA tracking ID or input it directly.
- Next, under Triggering, choose All Pages to ensure all page views are tracked.
- Finally, click Save!
With that done, you’ve successfully integrated Google Analytics into your WordPress site using Google Tag Manager. What’s great about this method is how easy it is to manage and update your tags down the line!
Verifying Your Google Analytics Setup
The first step in verification is to check your Google Analytics account. Here’s how:
- Log into your Google Analytics account.
- Select the property you just set up from the account menu.
- Navigate to Real-Time > Overview.
Now, open a new tab and visit your website. You should see live activity in the Real-Time Overview section. If you see visitors counted in real-time, congratulations! Your setup is working.
However, if you don’t see any activity, don’t panic. Here’s what you can do:
- Double-check that the tracking ID in your analytics setup matches the one in your WordPress site.
- Ensure that you’ve cleared your browser cache and cookies. Sometimes, old data can interfere.
- Use Google’s Tag Assistant browser extension to troubleshoot tracking issues.
Another useful way to verify your setup is with the Google Analytics Debugger Chrome extension. This tool lets you see which tags are firing and if any errors are occurring.
Taking these steps will give you peace of mind that your Google Analytics setup is functioning as intended, allowing you to gather valuable insights into your website’s performance!
Understanding Google Analytics Dashboard
The Google Analytics dashboard can feel a bit overwhelming at first, but it’s essential for understanding your website’s performance. Once you log in, you’ll find a wealth of data laid out in various reports. Let’s break it down into digestible parts:
- Real-Time Overview: This section shows how many users are currently on your site and what pages they’re viewing. It’s like looking at a live stream of your visitors.
- Audience: Here, you can delve into who your visitors are. This section provides insights on demographics, interests, and even where they come from, whether it’s organic search, social media, or direct traffic.
- Acquisition: This tells you how users arrived at your website. Was it through search engines, referrals, or campaigns? Understanding this can help you tailor your marketing efforts.
- Behavior: Want to know what content resonates with your audience? The Behavior section uncovers which pages are the most popular and how users navigate through your site.
- Conversions: If you have set up goals, this section will reveal how well your site converts visitors into customers or leads, giving you insight into your site’s effectiveness.
To make the most out of your Google Analytics dashboard, spend some time exploring each section thoroughly. Over time, you’ll become familiar with the metrics and reports that matter most to your website’s growth.
Best Practices for Using Google Analytics
Leveraging Google Analytics effectively requires more than just setting it up. Here are some best practices to maximize your insights:
- Set Clear Goals: Determine what you want to achieve—whether it’s increasing sales, growing your email list, or boosting page views. Clear goals let you measure success more accurately.
- Regularly Review Your Data: Make it a habit to check your analytics consistently. Weekly or monthly reviews can help you catch trends early and make necessary adjustments.
- Use Segments: Segmentation allows you to analyze subsets of your data. For instance, you can compare the behavior of new vs. returning visitors, giving you a deeper understanding of your audience.
- Create Custom Dashboards: Rather than sifting through all available reports, create custom dashboards to focus on metrics that matter most to you. This way, you can monitor your performance at a glance.
- Integrate with Other Tools: Take advantage of integrations with platforms like Google Ads and Google Search Console. This will provide a more-rounded view of your marketing efforts and how they tie back to website performance.
By implementing these best practices, you’ll not only enhance your understanding of your audience and their behaviors but also make informed decisions that can significantly impact your website’s success.
Conclusion
In conclusion, integrating Google Analytics with your WordPress site is a powerful step towards understanding your audience and optimizing your website performance. By following the methods outlined above, you can start collecting valuable data that will help you make informed decisions for your site’s growth.


