Hey there! If you’re looking to spice up your WordPress site, one of the simplest yet most effective ways is by adding custom fonts in Elementor. Whether you want your website to stand out with a unique vibe or ensure better readability for your users, customizing fonts makes a significant impact. In this guide, we’ll walk you through the steps to add fonts seamlessly. Ready to get your typography game on? Let’s dive in!
Understanding the Importance of Custom Fonts
Alright, let’s talk about why custom fonts matter. You might be wondering, “Why would I need different fonts?” Well, let me break it down for you:
- Brand Identity: Fonts are a crucial part of your brand’s identity. Using a custom font can convey your brand’s personality—whether that’s modern, classic, playful, or professional.
- Improved Readability: Not all fonts are created equal. A well-chosen font can enhance readability, making your content easier to digest for your visitors.
- Visual Appeal: A unique font can draw attention and make your website visually appealing. This can keep visitors engaged longer, potentially reducing bounce rates.
- Increased Consistency: Using custom fonts across your site helps maintain visual consistency, which is key to creating a professional look.
- Enhanced User Experience: When users can easily read and enjoy your content, it improves their overall experience and encourages return visits.
In summary, custom fonts can elevate your website in many ways. They aren’t just about aesthetics; they play a critical role in how users perceive your brand and interact with your content. So, are you ready to explore the world of custom typography for your Elementor-powered site?
Preparing Your WordPress Site for Font Addition
Before diving into the thrilling world of fonts, it’s essential to lay a solid foundation for your WordPress site. Think of it as prepping the canvas before you start painting a masterpiece! Here are some steps to ensure your site is ready for new fonts:
- Backup Your Site: Always start by backing up your site. This is crucial because adding new fonts can sometimes cause conflicts. Use plugins like UpdraftPlus or BackupBuddy for easy backup solutions.
- Update Your WordPress: Ensure that your WordPress version, themes, and plugins are all updated. This reduces compatibility issues and ensures you have the latest features at your disposal.
- Check Your Theme’s Compatibility: Not all themes play well with every font. Review your current theme’s documentation to determine if it supports custom fonts. If you’re using a highly customizable theme, you’re in luck!
- Choose a Font Source: Decide whether you want to use web-safe fonts, Google Fonts, or upload custom fonts. Google Fonts is a popular choice due to its vast collection and ease of integration.
- Plan Your Font Usage: Think about where you’ll use the new fonts. Will they be in headings, body text, or specific sections? Having a plan can save you time later on.
By ticking off these steps, you create an environment that’s conducive to adding new fonts without a hitch. Now, let’s move on to the exciting part: using Elementor‘s built-in options!
Using Elementor’s Built-in Font Options
Elementor makes font integration not only easy but also incredibly intuitive. Once you’ve set up your WordPress site, you get to take advantage of its robust built-in font options. So, how exactly can you spice up your site with Elementor? Let’s break it down!
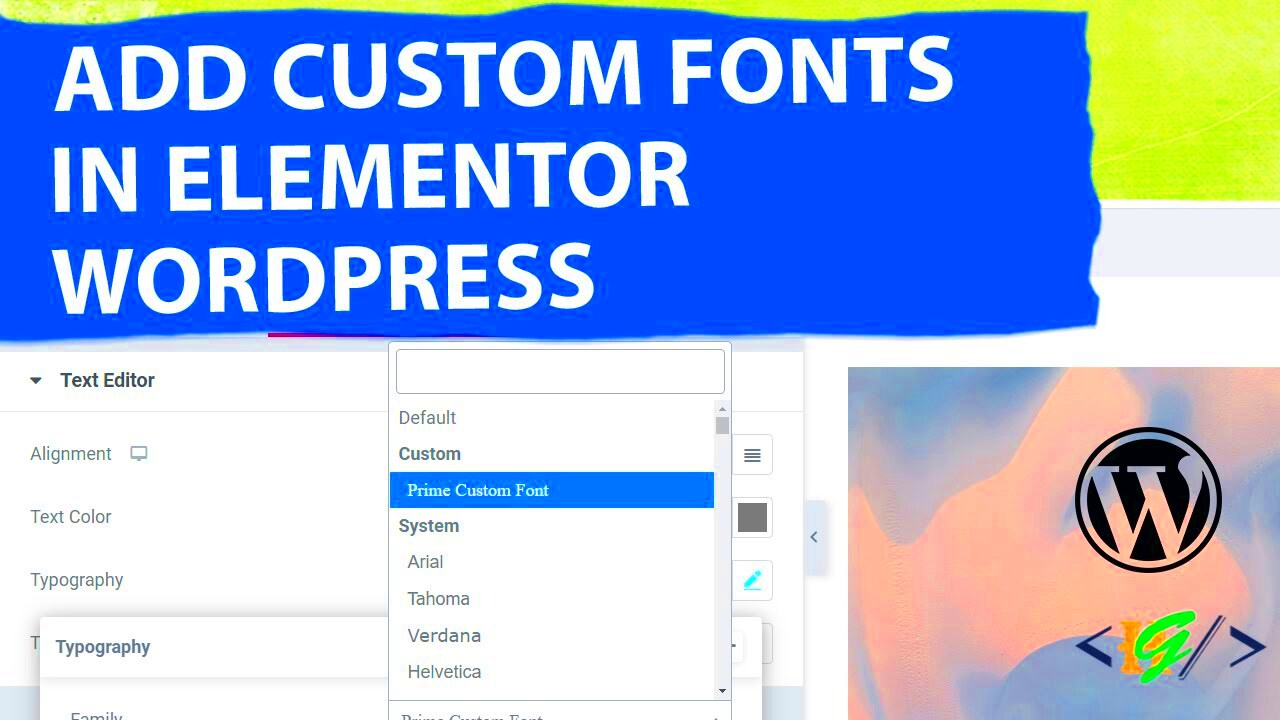
- Accessing the Font Settings: First, simply open the Elementor editor for the page or section you’d like to modify. Click on any text element, and in the left sidebar, you’ll find the ‘Style’ tab—a treasure chest full of options!
- Selecting Fonts: Under the ‘Typography’ section, you’ll see ‘Font Family.’ Here’s where the magic happens! Click on the dropdown menu to browse through a long list of Google Fonts. You can even enter the name of a specific font if you have something in mind.
- Font Customization: Beyond just picking a font, Elementor allows for extensive customization. You can alter the font size, weight, transform (like uppercase or lowercase), and even line height. Play around with these settings until it feels just right.
- Responsive Typography: Want your fonts to look great on all devices? Elementor allows you to set different font styles for desktop, tablet, and mobile. Just switch to the responsive mode and make adjustments accordingly.
- Global Fonts: If you want to maintain consistency across your website, consider setting global fonts. Navigate to the Elementor panel, click on ‘Site Settings,’ and choose ‘Typography’ to configure global font settings for headings and body text.
In just a few clicks, you can elevate your website’s design, making it both visually appealing and aligned with your brand identity. Remember, the key to beautiful typography is experimentation—so don’t hesitate to try different combinations until you find its sweet spot!
5. How to Upload Custom Fonts Manually
If you’re looking to give your WordPress site a unique flair, uploading custom fonts is a great way to go. While Elementor comes with a wide range of fonts, sometimes you might want something that aligns perfectly with your brand. Here’s a step-by-step on how to upload those fonts manually.
Before you start, make sure you have the font file on your computer. Ideally, you should have the font in the .ttf, .otf, or .woff format. Once you have the font file ready, follow these easy steps:
- Access Your WordPress Dashboard: Log into your WordPress dashboard.
- Go to Upload Section: Navigate to Media > Add New.
- Upload Font File: Click the Select Files button and choose the font file you wish to upload.
- Copy the URL: Once uploaded, click on the font file to view its details. Copy the URL of the uploaded file.
- Add Custom CSS: Go to Appearance > Customize > Additional CSS and insert the following CSS code:
@font-face { font-family: 'YourFontName'; src: url('URL-of-your-file') format('woff2'); /* Add other formats if necessary */ font-weight: normal; font-style: normal; } - Use the Font in Elementor: Now, go to your Elementor page, select the text element, and in the typography settings, choose your newly added font.
And voila! Your custom font is now live on your WordPress site, ready to make your content pop.
6. Installing a Font Plugin for Enhanced Font Management
If you prefer a hassle-free way to manage fonts on your WordPress site, then leveraging a font plugin might be the best option for you. Plugins come equipped with rich features that enable not just easy font management but also an array of customization options. Let’s dive into how to install a font plugin effectively.
There are several font plugins available, but one popular choice is Google Fonts Typography. Here’s how to get started:
- Go to Your Dashboard: Log in to your WordPress admin area.
- Access Plugin Section: Navigate to Plugins > Add New.
- Search for Plugin: In the search bar, type Google Fonts Typography.
- Install and Activate: Click Install Now and once installed, click Activate.
Once activated, you’ll find a new menu item labeled Google Fonts in your dashboard. After clicking on it, you can:
- Select Fonts: Browse through a wide array of fonts offered by Google.
- Customize Settings: Choose font variations (weight, style) and apply them to various elements of your site.
- Preview Changes: View your selections live before saving the settings.
- Apply to Elementor: After saving, head over to Elementor, and your selected fonts will be available in the typography settings.
By using a font plugin, not only do you have a more extensive font library at your disposal, but you also make managing fonts a breeze — no CSS needed!
Using Google Fonts with Elementor
When it comes to beautifying your WordPress site, fonts play a crucial role. Thankfully, Elementor makes it a breeze to integrate Google Fonts into your web design. Google Fonts not only provides a vast selection of fonts, but they also ensure that your typography is optimized for web use. Here’s how you can effortlessly add Google Fonts to your Elementor-powered site.
First things first, Elementor comes pre-packaged with a collection of Google Fonts ready for use. This means you don’t need to dive into any complex coding or plugins — it’s all built-in! Here’s how you can use Google Fonts within Elementor:
- Select Your Widget: Click on the widget you want to customize. This could be a heading, text editor, or any other text-based element.
- Go to Style Tab: Once your widget is selected, navigate to the ‘Style’ tab on the left side.
- Font Family: Look for the ‘Typography’ section and click on ‘Font Family’. Here, you’ll find a dropdown menu featuring a range of Google Fonts.
- Choose Your Font: Scroll through the available options or type the name of the font you want. Click on your desired font, and voila — it’s applied!
Additionally, if you want to tweak the appearance further, you can adjust:
- Font Size: Get just the right size for your textual elements.
- Font Weight: Play around with the thickness to get the desired look.
- Font Style: Want it italicized? You got it!
Utilizing Google Fonts in Elementor is not only simple but also adds a professional touch to your site. So go ahead, explore the plethora of fonts available, and make your website stand out!
Styling Your Fonts for Consistency
Styling your fonts consistently across your website is essential for branding and user experience. Imagine visiting a site where the font styles change every few paragraphs — it can be confusing and even off-putting! Therefore, establishing a unified font style is a step you shouldn’t overlook. Let’s dive into some practical tips on how to keep your typography consistent within Elementor.
To start, you can use the Global Settings feature in Elementor. This allows you to set default typography styles that will be applied universally across your whole site. Here’s how:
- Access Elementor Site Settings: In your Elementor dashboard, click on the ‘hamburger’ menu in the upper left corner and select “Site Settings”.
- Select Typography: Navigate to the ‘Typography’ menu, and here you can define your global font settings.
- Set Your Default Style: Choose your global font family, sizes, and weights for various text elements (like headings, body text, and button text).
Once you’ve established your global settings, remember to:
- Be Consistent: Use the same font styles for headings across all pages.
- Apply Hierarchy: Set different font sizes and weights for various heading levels (H1, H2, H3, etc.) to create a clear visual hierarchy.
- Utilize Spacing: Consistent line heights and letter spacing can greatly enhance readability and aesthetic appeal.
Lastly, don’t forget to check your site on multiple devices to ensure that your fonts look great everywhere. Creating a visually cohesive appearance through styled fonts enhances both user experience and brand identity. So, take the time to get it right!
9. Testing and Previewing Your Font Changes
Once you’ve made some exciting font changes in Elementor, the next step is to test and preview those changes to ensure they look just right on your website. It’s like admiring your new haircut before showing it off to the world! Here’s how to do it:
First, Elementor provides a built-in preview feature, which is incredibly handy. You can easily check your changes without having to navigate away from the editing page. Here’s the process:
- At the bottom of the Elementor editing panel, you’ll see an “eye” icon. Click on it to open a preview of your page in a new tab.
- This preview will show you exactly how your font choices look across different devices, such as desktop, tablet, and mobile.
- As you toggle through the devices, pay attention to aspects like readability, spacing, and overall styling.
Another handy tip is to use the Browser Inspector Tool (usually accessible with a right-click and selecting “Inspect”). This tool allows you to dig a bit deeper into your CSS styles if you’re feeling adventurous!
To wrap it up, testing and previewing your font changes is an essential part of the design process in Elementor. Don’t rush through it; take your time to ensure everything aligns with your vision. After all, the last thing you want is for your site to look off when it goes live!
10. Common Issues and Troubleshooting
Even with all the fantastic features Elementor offers, there might be a few hiccups when adding or styling fonts. Don’t worry; most issues are pretty common and can be easily fixed. Let’s take a look at some troubleshooting tips:
- Font Doesn’t Display Correctly: If your chosen font isn’t showing up, double-check that it’s properly uploaded and selected in the Elementor settings. Sometimes a simple refresh or clearing your browser cache can do the trick.
- Font Size Not Changing: If adjusting the size doesn’t seem to affect the text, make sure you haven’t defined a specific CSS rule that overrides the Elementor settings.
- Responsive Design Issues: If fonts look great on desktop but seem off on mobile, remember to set different font sizes for each device in the Elementor panel.
- Plugin Conflicts: Occasionally, third-party plugins can interfere with font settings. If you suspect this is the case, try deactivating your plugins one at a time to identify the culprit.
Lastly, stay updated with Elementor’s latest versions, as they frequently release updates that might resolve existing issues or enhance font functionalities. And remember, the Elementor community is buzzing with friendly users who can help—don’t hesitate to seek assistance!
Conclusion and Best Practices for Font Usage
Adding fonts in WordPress Elementor is a powerful way to enhance your website’s aesthetics and improve user experience. By utilizing custom fonts effectively, you can create a unique identity for your brand while maintaining readability across different devices and browsers.
To ensure optimal font usage, consider the following best practices:
- Limit Font Choices: Use a maximum of 2-3 fonts on your site to maintain visual coherence.
- Prioritize Readability: Choose legible fonts for body text. Sans-serif fonts are often preferred for digital formats.
- Responsive Design: Ensure that your fonts adapt well on various screen sizes. Test your fonts on mobile devices.
- Load Times: Optimize font loading by limiting the number of font weights and styles to reduce page load times.
- Use Consistent Sizes: Maintain uniformity in font sizes for headers and paragraphs to enhance consistency in your design.
Additionally, consider using Google Fonts and Adobe Fonts for a wide variety of options, ensuring that the fonts are well-supported and optimized for web use.
Incorporate these best practices into your design process to create a visually appealing and user-friendly website that leverages the power of typography. Fine-tuning your font choices will not only elevate your site’s design but will also enhance user engagement.
Ultimately, effective font usage contributes significantly to the overall branding of your website and can make your content stand out in a crowded digital landscape.

