Elementor has taken the web design world by storm, and for good reason! It’s a flexible and user-friendly page builder that helps you create stunning websites without needing to touch a line of code. However, there are times when you might want to go a step further by adding custom code to your pages. Whether it’s for incorporating unique features, enhancing functionality or even tweaking the design, knowing how to add custom code in Elementor can elevate your site beyond the standard templates.
Understanding Where to Add Code in Elementor

Before diving into the nitty-gritty details of adding code, it’s crucial to understand the areas within Elementor where you can seamlessly integrate your custom scripts. Here’s a quick breakdown:
- Elementor HTML Widget: This is perhaps the most straightforward option. Drag and drop the HTML widget into your layout, and then simply paste the code you want to add. This is ideal for small snippets of code.
- Custom CSS: If you’re looking to apply styles directly to specific elements, you can add custom CSS in Elementor’s settings. Just head over to the Advanced tab of any section or widget and find the Custom CSS area.
- Global Settings: For code that you want to apply site-wide, go to Elementor -> Settings -> Advanced. Here, you can add scripts or code that will affect the entire site.
- Theme Customizer: Sometimes, embedding code directly into the theme files or the Customizer can be beneficial. You can usually find this under Appearance -> Customize -> Additional CSS or Custom Scripts.
Each of these options has its advantages, so choosing the right one depends on what you’re trying to achieve with your custom code. Remember, taking the time to understand these areas will help ensure that you’re placing your code in the right location for optimal performance!
Using the HTML Widget for Custom Code
If you’re diving into the world of Elementor, one of the most straightforward ways to add custom code is by using the HTML widget. This little tool is like a treasure chest for your code snippets, allowing you to insert any HTML, CSS, or JavaScript directly into your pages. Ready to unlock its potential? Let me walk you through it!
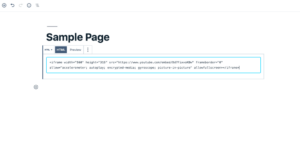
First, you’ll need to open up the page you want to edit with Elementor. Once you’re in the editor, look for the HTML widget in the left sidebar. You can easily find it by typing “HTML” in the search bar. When you spot it, just drag and drop the widget onto the section of the page where you want your code to appear.
Now that you have the HTML widget on your page, you can add your code. Click on the widget to bring up the settings panel, and you’ll see a large text area where you can paste your custom code. Here are a few tips to consider:
- Keep it Simple: Make sure your code is clean and straightforward. Complicated code might not function as intended.
- Test it Out: After adding your code, preview the changes to see if everything is working. A quick test can save you a headache later!
- Use Comments: If you’re adding multiple pieces of code, using comments can help you remember what each part does.
And voila! You’ve added custom code to your Elementor page using the HTML widget. It’s a simple yet powerful feature that can enhance the functionality and design of your site. Happy coding!
Adding Code Through the Theme or Page Settings
If you want to take your coding skills a step further, consider adding code through the theme or page settings. This method allows for greater control, especially when dealing with scripts or styles that you want to apply site-wide or across multiple pages.
To start adding code through the theme settings, go to your WordPress dashboard. Navigate to Appearance > Customize. Here you can find sections for additional CSS, and in some themes, there may also be a specific section for custom scripts. Just navigate to the right section, and you’ll have the option to input your code directly. It’s that easy!
For page-specific custom code, you can often find this option in Elementor’s settings. Right-click on the page you are editing and click on Page Settings. Within these settings, there’s usually a place for adding custom scripts if your theme supports it. It’s a fantastic way to ensure that only the page you are working on receives the custom functionality you need.
Here are some pointers to keep in mind:
- Always Backup: Before making changes in your theme settings, it’s essential to have a backup in case something goes wrong.
- Check Compatibility: Some themes may not support certain custom scripts or styles. Consult your theme documentation if you’re unsure.
- Mobile Responsiveness: Ensure that your custom code works well across devices, especially if you’re adding CSS.
Using these methods to add code can greatly enhance the versatility of your Elementor pages. Whether you’re optimizing your page load times, improving design elements, or enhancing functionality, the right code in the right place can make all the difference!
Incorporating Custom CSS and JavaScript
Adding custom CSS and JavaScript to your Elementor pages can significantly enhance their look and functionality. Let’s break down how to do this effectively.
First off, you can add custom CSS directly through Elementor, which is super convenient. Here’s how:
- Open your page in Elementor.
- Click on the gear icon (⚙️) at the bottom-left corner to access the Page Settings.
- Scroll down to the “Advanced” tab.
- Here, you’ll see a “Custom CSS” section where you can paste your styles.
Custom CSS is great for styling elements specifically on the page, giving you precise control without affecting your entire site. For those who want to apply styles site-wide, you might consider going to Appearance > Customize > Additional CSS in your WordPress dashboard.
Now, let’s shift gears to JavaScript. While Elementor doesn’t allow you to directly add JavaScript in the same way, you have a couple of options:
- Use a Plugin: There are many plugins available like “Header, Footer and Post Injections” that let you add scripts easily.
- Insert it into the HTML widget: You can add JavaScript code by using the HTML widget in Elementor, but be mindful of where you place it because it can affect your layout.
When adding custom code, always remember to test it thoroughly. Use browser developer tools (F12 on most browsers) to spot any errors or tweak your code on the fly. Enjoy bringing your creative vision to life!
Best Practices for Adding Code to Elementor Pages
When it comes to adding code to your Elementor pages, there are some best practices that can help ensure everything runs smoothly. Let’s dive into these golden rules:
| Best Practice | Description |
|---|---|
| Backup Your Site | Before making any changes, always back up your site. This prevents loss of data in case something goes wrong. |
| Use Child Themes | If you’re making significant changes to theme files, use a child theme to preserve your customizations during updates. |
| Minimize Code Usage | Only add code that is necessary. Too much custom code can slow down your site and lead to conflicts. |
| Test on Different Devices | After adding code, make sure to test your page across various devices and browsers to ensure consistency. |
| Keep It Organized | Comment your code and keep it organized to make future edits easier. This practice not only helps you but others working on the site. |
Finally, always stay updated. Code practices evolve, and keeping up with the latest trends and updates in Elementor can avoid compatibility issues. Follow the community, engage in forums, and don’t hesitate to learn from others.
By following these best practices, you’ll ensure that your coding experience with Elementor is smooth, efficient, and beneficial for your website’s overall performance!
7. Common Issues and Troubleshooting Tips
When adding code to a page using Elementor, you might encounter a few hiccups along the way. Don’t worry! It’s all part of the process. Here are some common issues and practical troubleshooting tips to help you out.
- Code Isn’t Rendering Correctly: If your code doesn’t show up as expected, double-check for typos. A small mistake can throw everything off!
- Conflicts with Other Plugins: Sometimes, other plugins may interfere with your custom code. To identify the culprit, temporarily disable other plugins one by one to see if the issue resolves itself.
- Cache Problems: If you’re not seeing your changes, try clearing your browser cache or the cache of your caching plugin. Cached files can prevent new code from displaying correctly.
- Browser Compatibility: Test your website on different browsers (like Chrome, Firefox, and Safari) to see if the issue is browser-specific. Make sure to keep your browser updated!
- Elementor and WordPress Updates: Ensure that you’re using the latest versions of both Elementor and WordPress. Outdated versions can lead to compatibility issues.
If you’ve tried these troubleshooting tips and are still facing issues, consider joining the Elementor community forums. Often, other users can provide insights and solutions based on their experiences!
8. Conclusion and Final Thoughts
Adding code to a page in Elementor can significantly enhance your website, offering increased functionality and customization. By following the steps and guidelines outlined in this post, you should be well-equipped to add your HTML, CSS, or JavaScript without a hitch.
Remember, it’s always smart to backup your site before making changes, especially when you’re dealing with code. It protects you from potential mistakes and ensures you have a restore point if things go sideways.
Also, keep in mind that there’s a learning curve to coding. Don’t get discouraged if something doesn’t work the first time! It’s all part of the journey. Here are a few final tips:
- Experiment: Try different snippets of code to see what they do. Hands-on experience is one of the best ways to learn!
- Stay Informed: Follow blogs, forums, and tutorials related to Elementor and web development. The more you know, the more confident you’ll feel.
- Don’t hesitate to ask for help: Whether it’s in forums or communities, engage with others. There’s a huge network of developers and designers out there willing to share knowledge.
In summary, with a little patience and practice, you can harness the full potential of Elementor by adding custom code to your pages. Happy coding!


