If you’re looking to enhance your Elementor page, adding a PDF can be a brilliant move. PDFs are versatile and can serve a range of purposes—from providing valuable information to offering downloadable resources. In this guide, we’ll walk you through the ins and outs of integrating a PDF into your Elementor page with ease. Whether you’re a seasoned designer or just starting, you’ll find that incorporating PDFs is straightforward and beneficial. Let’s dive in!
Why Use PDFs on Your Elementor Page?

There are several compelling reasons to include PDFs on your Elementor page. Here are a few key benefits:
- Easy Distribution: PDF files can be easily shared with users. Unlike images or text that can be messy when copied, PDFs maintain formatting and structure.
- Professional Appearance: Offering a well-crafted PDF shows professionalism. Whether it’s an e-book, a report, or a brochure, a PDF can create a lasting impression.
- Enhanced User Experience: Users can download PDFs for offline access. This is particularly beneficial for documents like guides, tutorials, or product listings.
- SEO Benefits: Search engines can index PDFs, making it easier for people to discover your content. Remember, a well-optimized PDF can contribute to better search rankings!
- Security: PDFs can be password-protected and secured, making them ideal for sensitive information that you want to share selectively.
Including PDFs in your Elementor pages can significantly improve user experience, engagement, and the overall perception of your brand. So, if you have valuable content to share, don’t hesitate to start integrating PDFs into your designs!
Step 1: Prepare Your PDF File

Before you dive into the nitty-gritty of adding a PDF to your Elementor page, it’s crucial to ensure that your PDF file is in tip-top shape. A well-prepared PDF not only enhances user experience but also showcases your professionalism. Here’s what you should consider:
- File Size: Aim for a smaller file size (ideally under 5MB) to ensure quick loading times without compromising quality. Large files can frustrate users and may take a long time to download.
- File Name: Use a clear and descriptive file name. Instead of the generic “document.pdf,” consider something like “2023-annual-report.pdf.” This makes it easier for users to understand what they’re downloading at a glance.
- Content Optimization: Check that the content is proofread, images are clear, and the layout is user-friendly. You want your readers to have a pleasant experience, so removing unnecessary jargon and ensuring visually appealing graphics is key.
- Accessibility: Ensure your PDF is accessible to everyone, including those using screen readers. Use alt text for images and maintain a proper heading structure within the document.
- File Format: Make sure the PDF is saved in the standard format. Most users will be familiar with PDFs, so keeping it as a .pdf file means it will open seamlessly across devices.
By taking the time to prepare your PDF properly, you set the stage for a smooth insertion into your Elementor page. It’s all about making life easier for your users, and that starts with a quality file!
Step 2: Upload the PDF to Your WordPress Media Library
Now that you’ve prepped your PDF, it’s time to upload it to your WordPress Media Library. This is a straightforward process, but let’s break it down to ensure you do it right:
- Log In to WordPress: Start by logging into your WordPress dashboard. If you’re using Elementor, you probably have your site set up, so this should be a breeze.
- Navigate to the Media Library: On the left sidebar of your dashboard, click on “Media.” This will take you to your Media Library where you can manage all your uploaded files.
- Upload Your PDF: Click the “Add New” button at the top of the Media Library page. This will open a drag-and-drop interface to upload files. You can either drag your PDF file into this area or click “Select Files” to browse through your computer.
- Confirm Upload: Once you’ve selected your PDF, WordPress will start uploading it. After it’s uploaded, click on the file to view its details in the attachment page. Here, you can see the URL, which is important for linking the PDF later.
- Optional – Add Descriptions: While not mandatory, adding a title, caption, or description can be beneficial for organization and SEO. Think about what keywords users might search for!
And that’s it! You’ve successfully uploaded your PDF to the WordPress Media Library, making it ready to be linked or embedded into your Elementor page. Easy, right? This step is crucial because without uploading it, you won’t be able to showcase your PDF content to your audience.
Step 3: Add a PDF Link to Your Elementor Page
Now that you have your PDF file uploaded to the media library, it’s time to add a link to it on your Elementor page. This is a straightforward process, but it’s essential to do it correctly to ensure your visitors can easily access the file. Here’s how to do it:
- Open Your Elementor Editor: Navigate to the page where you want to add the PDF link and click “Edit with Elementor.”
- Select the Text or Button Widget: Drag and drop a Text Editor or Button widget onto the canvas. The Button is great for clear calls to action, while a Text Editor can be a more subtle choice.
- Link to Your PDF: Highlight the text you want to turn into a link (if using a Text Editor) or click on your Button widget. You will see a linking option.
- Insert the Link: Click on the link icon, then paste the URL of your PDF that you’ve previously uploaded to the media library. You can also click on the “Dynamic” icon (the database symbol) and select “Media” to find your PDF file directly.
- Set the Link Options: Consider setting the link to open in a new tab. This keeps your site open in the background while the PDF opens, enhancing user experience.
- Style Your Link or Button: Use Elementor’s styling options to customize the link or button to match your website’s design.
That’s it! You now have a PDF link live on your Elementor page that visitors can click to download or view the document.
Step 4: Embedding a PDF Directly on the Page
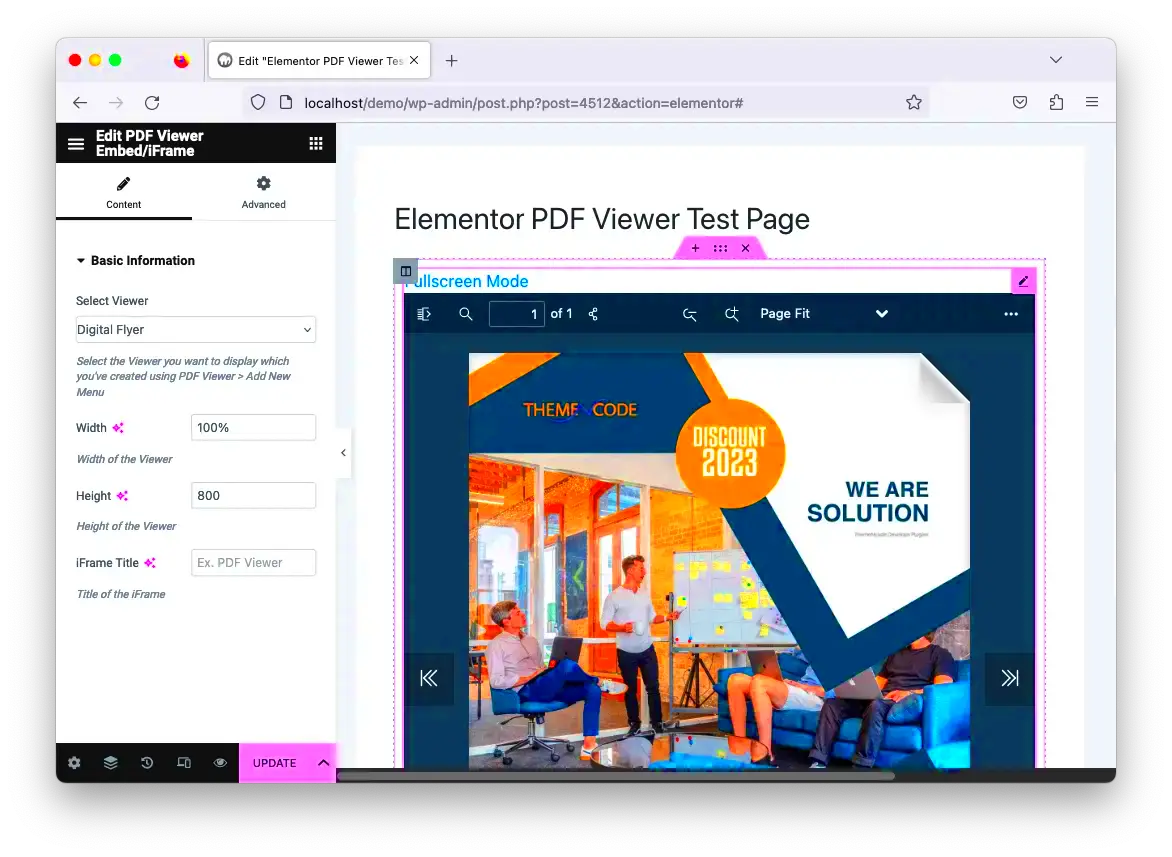
If you prefer not just to link to a PDF but want to embed it directly on your Elementor page, you can do that too! This method allows visitors to view the PDF without leaving your site, making it a convenient option. Here’s what you need to do:
- Find the Right Widget: Elementor has several widgets that can help. The most common one for embedding PDFs is the “HTML” widget.
- Prepare the Embed Code: Use a PDF viewer service (like Google Drive or PDF.js). For example, if you use Google Drive, first upload your PDF there, then get the link and format it as follows:
https://drive.google.com/file/d/YOUR_FILE_ID/preview - Paste the Embed Code: Drag the HTML widget onto your canvas. In the settings, paste the iframe code as below, replacing the link with your formatted Google Drive link:
<iframe src="YOUR_PDF_LINK" width="100%" height="600px"></iframe> - Adjust Sizing: Change the width and height values according to your preference. The above values fit most designs nicely.
- Preview and Customize: Once you’ve embedded the PDF, click on the preview button to see how it looks. Adjust the positioning and iframe sizing as necessary.
And there you have it! Your PDF is now embedded within the page, allowing your visitors to view it seamlessly. They can scroll through the document without any hassle!
Step 5: Customizing PDF Display Options
Now that you’ve added your PDF to the Elementor page, it’s time to make it visually appealing and functional! Customizing the PDF display options not only enhances the user experience but also aligns the PDF with your overall website design. Let’s dive into some of the options available for customization.
Here are the key aspects you can modify:
- Embed Size: Adjust the width and height of the PDF display to fit perfectly within your layout. This can be done in the settings under the Style tab of the PDF widget.
- Alignment: Choose how the PDF is aligned on the page—left, right, or center. A proper alignment can create a visually balanced layout.
- Scroll Behavior: Decide whether you want the PDF to scroll within a designated area or to open in a new tab. If your PDF is lengthy, scrolling might be the better option for user convenience.
- Download Option: Allow users to download the PDF directly. This is a useful feature especially if the document contains valuable resources or information that you want your visitors to keep.
- PDF Preview: Consider adding a preview thumbnail of the PDF. This invites users to engage more with the content, as visual elements often capture attention.
Once you’ve adjusted these settings to your liking, remember to click the Update button on Elementor to save your changes. Experimenting with different options can lead to more engaging content presentation on your page!
Conclusion
That’s a wrap on adding a PDF to your Elementor page! We’ve covered every step, from initial setup to customizing how your PDF looks and behaves. Here’s a quick recap:
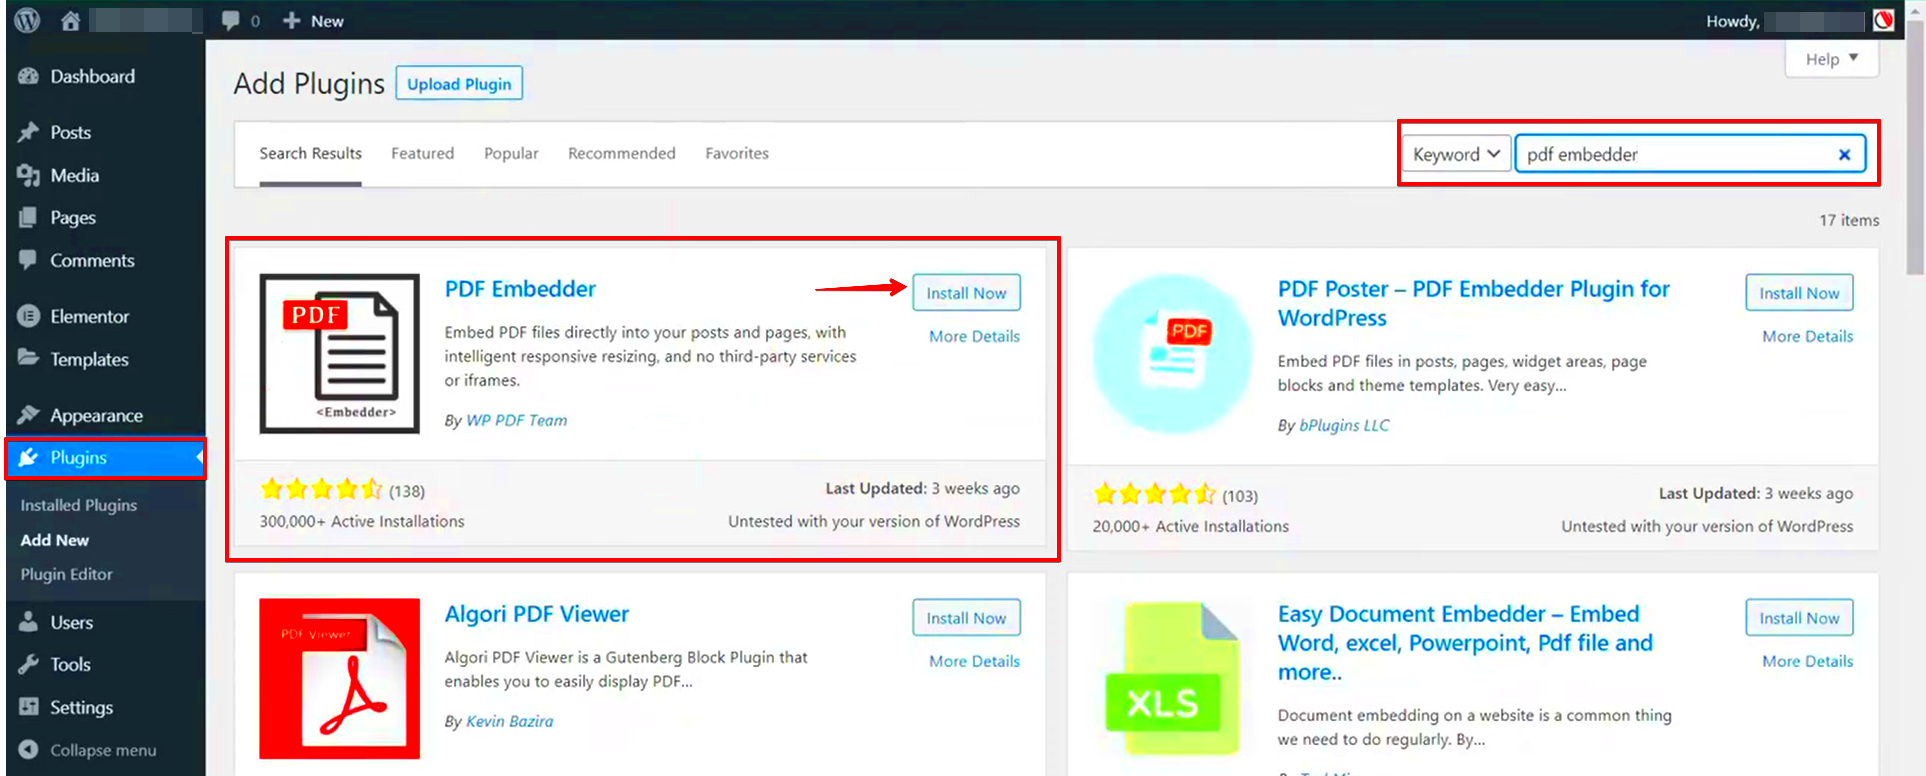
- Installing the necessary plugins to display PDFs effortlessly.
- Using Elementor to embed your PDFs using the designated widget.
- Fine-tuning your display options to suit your website’s aesthetic and improve user experience.
Adding a PDF to your site not only offers more resources for your visitors but can also enrich the overall content of your website. It’s a simple yet effective way to enhance engagement and education. Don’t forget to test everything on various devices to ensure it displays perfectly everywhere!
If you have any questions or run into challenges, feel free to drop a comment. Happy building, and may your PDFs serve as valuable tools for your audience!
Additional Resources
In the quest to enhance your Elementor experience, additional resources can be incredibly invaluable. Whether you’re looking for more detailed tutorials, tools to improve your web design skills, or communities where you can share and learn, the following resources are essential for mastering Elementor and effectively managing PDF files:
- Elementor Official Documentation: The Elementor documentation offers comprehensive guides on getting started, advanced features, and troubleshooting tips.
- Tutorials on YouTube: Channels like Elementor’s official channel provide visual demonstrations for adding PDFs and other elements to your pages.
- WordPress Forums: Engage with experts and fellow users on the WordPress support forums where you can ask questions and share insights regarding PDF integration.
- Online Courses: Websites like Udemy and Coursera offer structured courses tailored to all skill levels.
- Design Inspiration: Use platforms like Dribbble and Behance to gather design ideas and see how others effectively use PDFs in their Elementor designs.
By utilizing these resources, you can significantly enhance your understanding of Elementor, gain new skills, and create better web experiences by effectively adding PDFs to your pages.


