Have you ever wished to enhance your website’s functionality but weren’t quite sure how to do it? Well, Elementor offers a simple solution with header snippets! In this section, we’re going to dive into the world of header snippets. They’re more than just a fancy title for your website; they play a crucial role in optimizing your site. Get ready to unlock the potential of your Elementor pages!
Understanding Header Snippets: What Are They?

Header snippets, often referred to as “header codes,” are small blocks of code that you add to the head section of your HTML document. They can significantly enhance the capabilities and performance of your Elementor site. Let’s break it down a bit further:
- Functionality: Header snippets can include various elements like meta tags, scripts, and styles, which contribute to better user experience and SEO.
- SEO Boost: By adding tracking codes like Google Analytics, you can monitor your website’s performance. This insight helps in making data-driven decisions.
- Customization: Header snippets allow you to implement custom JavaScript or CSS for unique functionalities that Elementor might not offer out-of-the-box.
Here’s a simple table to illustrate some common uses of header snippets:
| Snippet Type | Purpose |
|---|---|
| Meta Tags | Improve SEO by providing search engines with information about your site. |
| Tracking Codes | Analyze website traffic and user behavior. |
| Custom CSS/JS | Add unique features or styling to your site that Elementor doesn’t support. |
In essence, header snippets empower you to take full control of your site’s performance and appearance!
Benefits of Using Header Snippets in Elementor

When it comes to building a website with Elementor, one often overlooked but incredibly powerful feature is the ability to use header snippets. So, why should you consider adding header snippets to your Elementor-built site? Let’s break down the benefits!
- Enhanced Functionality: Header snippets can drastically improve the functionality of your site. They allow you to implement custom scripts, styles, or even integrate third-party services like Google Analytics and social media tracking.
- Improved SEO: By adding meta tags or structured data, header snippets can help search engines better understand your content. This can lead to improved search rankings and better visibility for your website.
- Custom Scripts and Styles: Want to add a special CSS style or JavaScript code? Doing this directly in the header ensures that it loads before the content, which means that visitors will see your styles and scripts in action immediately.
- Better Performance Monitoring: You can easily integrate performance and analytics tools that help you track user behavior effectively. This is crucial for making informed decisions about your website’s adjustments.
- Consistency Across Pages: A centralized place for header snippets ensures that all pages load the same scripts and styles consistently, giving your site a cohesive look and feel.
In short, utilizing header snippets in Elementor is not just a technical enhancement; it’s a way to unlock the full potential of your website, aligning it with your brand’s goals and ensuring a better user experience.
Step-by-Step Guide to Adding a Header Snippet in Elementor
Ready to dive into the nitty-gritty of adding a header snippet in Elementor? Great! Follow this easy, step-by-step guide that will walk you through the process.
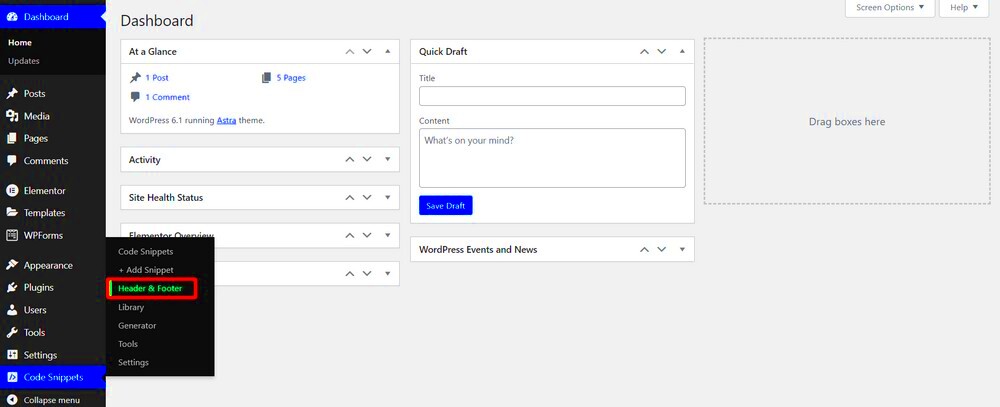
- Access Your WordPress Dashboard: Start by logging into your WordPress account, then navigate to your dashboard. This is the control center of your site.
- Select Elementor Settings: From the dashboard, go to “Elementor” and then click “Settings.” This is where you set various options related to the Elementor plugin.
- Go to the Integrations Tab: In the settings menu, switch to the “Integrations” tab. Here, you can add various integrations including the header snippets.
- Find Header & Footer Scripts: Look for a section that allows you to add scripts. This is where you can input your custom code. It usually has sections for header and footer scripts.
- Paste Your Snippet: In the header section, paste your desired snippet. This could be a line of JavaScript for tracking, for example. Make sure to double-check your code for any errors!
- Save Your Changes: Remember to hit the “Save” button after you’re done. This ensures that your snippet goes live on your site.
And voilà! You’ve successfully added a header snippet in Elementor. Always remember to test your site afterward to ensure everything is functioning as intended. Happy building!
Customizing Your Header Snippet
Once you’ve added a header snippet in Elementor, the fun really begins! Customizing your header snippet sets the stage for your site’s unique identity. This is your opportunity to ensure that your header reflects your brand’s voice and style. Here’s how to do it effectively:
- Access the Elementor Editor: Start by navigating to the page where you have your header snippet. Click on “Edit with Elementor” to open the page in the Elementor interface.
- Select the Header Snippet: Click on the header snippet you want to customize. You should see a panel on the left side of your screen with various options.
- Typography: Adjust the fonts to align with your brand. Choose from various font styles, sizes, and weights. Don’t forget to check the line height for better readability!
- Colors and Background: Customize your color scheme to match your branding. You can change the text color, background color, and even add an image or gradient as a backdrop.
- Spacing: Modify padding and margins to create space between your header elements. This helps in achieving a visually balanced layout.
- Add Elements: Feel free to incorporate additional elements like icons, social media links, or call-to-action buttons if they enhance the functionality of your header.
Remember, the header is often the first element visitors see, so make it engaging and informative. And don’t worry; you can always preview changes before publishing!
Common Issues and Troubleshooting Tips
Even the most skilled Elementor users can encounter hiccups when adding header snippets. But don’t fret! Here are some common issues and clever troubleshooting tips to get you back on track:
| Issue | Possible Solutions |
|---|---|
| Header Snippet Not Displaying |
|
| Header Snippet Overlapping with Content |
|
| Header Looks Different on Mobile |
|
Staying proactive can save you a lot of trouble! Remember to check Elementor’s documentation and support forums, as they offer a wealth of information for more complex issues. Don’t let minor roadblocks discourage you; with a bit of tweaking, you’ll have an engaging header in no time!
7. Best Practices for Header Snippets
When it comes to adding header snippets in Elementor, adhering to best practices is crucial for ensuring that your website performs optimally. Here are some top tips to consider:
- Keep It Relevant: Make sure your header snippets are relevant to the content of your website. Whether it’s meta tags, social media integration, or tracking codes, they should enhance user experience or analytics.
- Optimize for Speed: Avoid overly large snippets or multiple scripts that can slow down your site. Use asynchronous loading where possible to keep your webpage loading quickly.
- Test Your Snippets: After adding any new header snippet, it’s essential to test your site. Check for broken links, loading times, and how the snippets interact with existing plugins and elements.
- Consult SEO Guidelines: If you’re adding SEO-related snippets, make sure to comply with SEO best practices. Use schema markup guidelines from Google to help with better visibility on search engines.
- Document Changes: Keep track of what snippets you add and any changes you make. This way, you can easily debug or roll back changes if something goes awry.
- Review Mobile Responsiveness: Ensure your snippets do not interfere with the mobile version of your site. Test how everything displays on different devices.
By following these best practices, you’re not only enhancing the functionality of your website but also ensuring a smoother and more enjoyable user experience overall.
8. Conclusion: Enhancing Your Elementor Experience with Header Snippets
In conclusion, mastering header snippets in Elementor is a game-changer for web design and functionality. These snippets are essentially small snippets of code placed in the header section of your website that can greatly enhance your site’s capabilities. From improving SEO to integrating social media tools, header snippets allow designers and developers to customize their sites in unique ways.
Moreover, leveraging header snippets can significantly streamline your workflow. Here are a few key takeaways:
- Better Customization: With header snippets, you’re not just limited to Elementor’s built-in features. You can integrate external tools, scripts, and styles that cater specifically to your needs.
- Improved Performance: Snippets can enhance site performance if implemented correctly. As mentioned earlier, focusing on speed and responsiveness is vital.
- Enhanced Analytics: Adding tracking codes enables you to monitor your website’s performance. This is crucial for making informed decisions about your content and audience engagement.
Overall, understanding how to effectively implement and manage header snippets will elevate your Elementor experience. Take some time to experiment with different snippets and observe how they affect your site. Remember, your website is a reflection of you—make it shine!


