
Hey there! If you’re someone who loves making your images stand out, then you’re in the right place. Shutterstock Editor is a fantastic tool that lets you customize your images easily—no fancy design skills needed. Whether you’re creating social media posts, banners, or just jazzing up your photos, adding unique borders can really give your visuals that extra pop. Today, I’ll show you how to add a fancy border to your images using Shutterstock Editor, so your pictures look professional and eye-catching in no time. Let’s dive in and get creative!
Step-by-Step Guide to Adding a Fancy Border to Your Images
Ready to give your images a stylish edge? Follow these simple steps to add a fancy border in Shutterstock Editor:
- Open Shutterstock Editor and upload your image or select one from your library.
- Select your image on the canvas to activate the editing options.
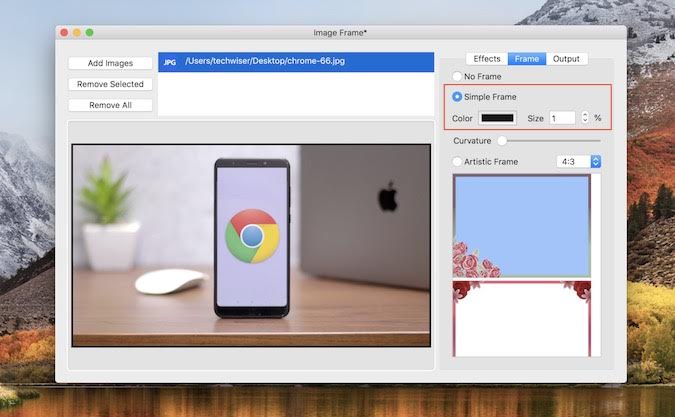
- Navigate to the ‘Borders’ tool in the side menu. It might be labeled as Border & Frame.
- Choose a border style from the available options. Shutterstock offers a variety of fancy borders like dotted, dashed, double, or decorative designs.
- Adjust the border thickness using the slider or input box to get the perfect width.
- Customize the border color by clicking on the color palette. You can pick a solid color or even add gradient effects if available.
- Add special effects like shadows, glows, or patterns to make the border more eye-catching. Many styles allow further customization in this section.
- Preview your image to see how the border looks. Make any tweaks needed to match your style.
- Save or export your finished image once you’re happy with the design. You can download it in your preferred format.
And ta-da! You’ve just added a fancy, personalized border to your image using Shutterstock Editor. Play around with different styles and effects to truly make your images one of a kind. Have fun experimenting, and don’t be afraid to get creative!
Tips for Choosing the Right Border Style and Color
Picking the perfect border style and color can really make your images pop and match your overall design vibe. It’s all about balancing flair with harmony. Here are some friendly tips to guide you along:
- Match the Mood: Think about the mood you want to convey. Bright, cheerful images might look great with vibrant colors like yellow or turquoise, while elegant, sophisticated images might need subtle shades like gold or black.
- Consider the Image Content: If your photo has a lot of busy details, go for a simple, thin border so it doesn’t overwhelm the picture. For cleaner shots, a thicker or more decorative border can add a lovely touch.
- Complement Your Design: Make sure your border color complements other elements in your design. If you’re creating a social media post, pick a border that harmonizes with your background or text colors.
- Experiment with Styles: Shutterstock Editor offers different border styles—solid, dashed, dotted, or even decorative patterns. Don’t be afraid to try out a few options to see what works best!
- Use Contrast Effectively: Contrasting borders can really make your image stand out. For example, a white border around a dark image or vice versa creates a sharp visual punch.
Pro tip: Sometimes, less is more. A subtle border in a matching or neutral color can add elegance without overwhelming your image. On the other hand, bold colors and decorative styles are perfect for making a statement. Play around with different combinations to find what feels right for your project!
Additional Customization Options for Image Borders
Once you’ve chosen your border style and color, the fun doesn’t have to stop there. Shutterstock Editor offers a variety of additional customization options that help you fine-tune your image borders to perfection:
- Border Thickness: Adjust the thickness to make your border more prominent or subtle. A thin line can give a delicate touch, while a thick border adds boldness and emphasis.
- Corner Styles: Some borders can have rounded or beveled corners, giving your images a softer or more polished look. Experiment with different corner styles to match your design aesthetic.
- Adding Shadows: Enhance your border by adding shadows. This creates a layered effect, making your image appear more three-dimensional and eye-catching.
- Patterned Borders: Beyond solid styles, explore patterned borders like stripes, zigzags, or floral designs. These can add personality and a unique flair to your images.
- Transparency and Opacity: Play with transparency settings to blend your border into the background or make it stand out more distinctly. Lower opacity can give a subtle, elegant look, while full opacity makes it bold and clear.
Another great tip is to combine multiple features—for example, a thick dashed border with a soft shadow—to create a bespoke effect that matches your creative vision. Remember, the key is to experiment and preview your edits before finalizing. This way, you can see exactly how each tweak influences the overall look, ensuring your images look just right.
Finalizing and Saving Your Edited Image
Congratulations! You’ve added that gorgeous, fancy border to your image and are now ready to wrap things up. Before you hit the save button, it’s a good idea to take a quick look at your masterpiece to ensure everything looks just right. Double-check the following:
- Border placement: Is the border evenly surrounding your image? Sometimes, borders can appear slightly skewed if the sizing isn’t perfect.
- Border style and color: Does the border match your overall design aesthetic? If not, you can easily tweak the style or color before finalizing.
- Image clarity: Make sure the image remains sharp and clear after adding the border. Zoom in to see if any pixelation or blurriness has occurred.
Once you’re satisfied, it’s time to save your creation. Shutterstock Editor offers several options to ensure you get your image in the perfect format:
Format Best For Notes JPEG Web use, social media, quick sharing Good balance of quality and file size PNG Transparency needed, high-quality printing Supports transparent backgrounds if needed TIFF High-quality print projects Larger file size, best for professional printing To save your image:
- Click on the Download button usually located at the top right corner of the editor interface.
- Select your preferred file format based on your needs.
- Choose the resolution—higher for print, standard for online use.
- Click Download again, and voila! Your image with the fancy border is ready to be shared or printed.
Tip: If you plan to make further edits later, consider saving a copy in the project format or as a layered file if available, so you can tweak the border or other elements without starting from scratch.
Conclusion and Additional Resources for Image Editing
Adding a fancy border to your images using Shutterstock Editor is a fun and straightforward way to elevate your visuals. Whether you’re customizing images for social media, presentations, or personal projects, a well-chosen border can make your images stand out and look more polished.
Remember, the key is to experiment with different border styles, colors, and thicknesses until you find what best complements your image. Don’t be afraid to try out various options—sometimes, the most unexpected combinations create the most striking results!
If you’re eager to learn more about advanced image editing techniques or explore other creative tools, here are some helpful resources:
- Shutterstock Support Center – Find tutorials, FAQs, and troubleshooting tips.
- Shutterstock Blog – Stay updated with creative inspiration and industry trends.
- Adobe Photoshop – For more complex editing and design projects.
- Canva’s Guide to Image Editing – Easy tips for enhancing your visuals.
In the end, practice makes perfect. The more you play around with borders and other effects, the more confident you’ll become in creating images that truly wow your audience. Keep experimenting, and happy editing!