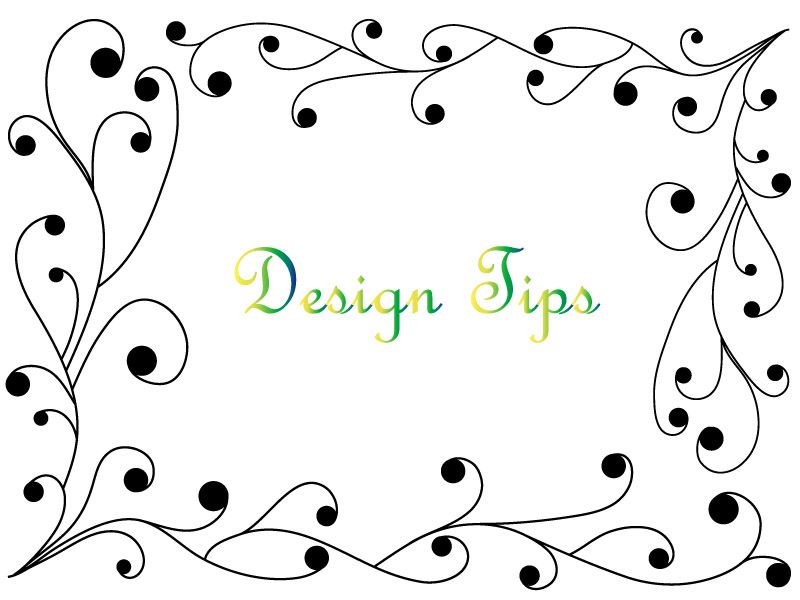
When it comes to making your design stand out, sometimes a simple touch like a fancy border can make all the difference. Shutterstock offers a wide variety of border options that can add flair, structure, or elegance to your projects. Whether you’re creating social media graphics, invitations, or marketing materials, understanding how to incorporate stylish borders can elevate your work and capture attention. In this guide, we’ll explore how to add these eye-catching borders and the different types you can choose from, so your designs look polished and professional every time.
Understanding the Types of Borders Available on Shutterstock

Shutterstock provides a diverse selection of borders to suit any style or project. Knowing the different types available can help you pick the perfect one to complement your design. Here’s a quick rundown of the most common borders you might find:
- Decorative Borders: These feature intricate patterns, floral designs, or artistic flourishes. They’re perfect for wedding invitations, greeting cards, or any project that needs a touch of elegance.
- Simple Lines and Frames: Clean, minimalistic borders like thin lines or rectangles that add structure without overwhelming the content. Great for business presentations or modern designs.
- Vintage or Retro Borders: Borders with distressed textures, ornate flourishes, or classic motifs that give a nostalgic feel. Ideal for vintage-themed projects or branding that wants to evoke tradition.
- Bold and Artistic Borders: Bright, thick, or abstract borders that make your design pop. These are excellent for posters, social media posts, or anything that needs to grab attention quickly.
Many borders are customizable, allowing you to change colors, thickness, and sometimes even the pattern itself. When browsing Shutterstock, look for borders that match your design style and consider how they’ll interact with your content. Remember, a good border should enhance your message without overpowering it, so choose wisely and experiment to find what works best for your project.
Step-by-Step Guide to Adding a Fancy Border to Your Shutterstock Images
Ready to give your Shutterstock images that extra flair? Adding a fancy border can really make your designs stand out, whether you’re creating social media graphics, presentations, or print materials. Don’t worry—it’s easier than you think! Here’s a simple, step-by-step guide to help you get started.
Step 1: Download Your Image
First things first, select and download the image you want to work with from Shutterstock. Make sure you choose the highest resolution available so your final design stays crisp and professional-looking.
Step 2: Choose Your Editing Tool
Next, pick a photo editing tool. You can use software like Adobe Photoshop, Canva, GIMP, or any online editor that supports layering and border effects. For this guide, we’ll assume you’re using Canva because it’s user-friendly and accessible.
Step 3: Upload Your Image
Log into your chosen tool and upload your Shutterstock image. Once uploaded, drag it onto the workspace or canvas to prepare for editing.
Step 4: Add a Border Effect
- In Canva, select your image, then click on the “Effects” tab.
- Look for the “Borders” option, or in some tools, you’ll find border settings directly in the image editing options.
- Choose a border style—solid, dashed, dotted, or even custom patterns if available.
Step 5: Customize Your Border
Now, it’s time to make it your own! Adjust the border’s:
- Color: Pick a color that complements or contrasts your image.
- Thickness: Set how bold or subtle you want your border to be.
- Style: Experiment with different patterns, such as double lines, shadows, or decorative corners.
Step 6: Add Decorative Elements (Optional)
If you want to get fancier, consider adding decorative corners, ribbons, or patterns around your border. Many tools have sticker packs or clipart that can spice up your design.
Step 7: Save and Export
Once you’re happy with your fancy border, save your work. Export the image in the preferred format (PNG, JPEG, etc.), and you’re all set to showcase your stylish creation!
Tips for Choosing the Right Border Style for Your Design
Picking the perfect border style isn’t just about making things look pretty—it’s about enhancing your overall message and aesthetic. Here are some friendly tips to help you choose the right border style for your design:
Understand Your Audience and Purpose
Think about who will see your design and what you want to convey. For example:
- Professional or corporate work: Opt for clean, simple borders like thin lines or subtle shadows.
- Creative or playful projects: Go for colorful, decorative, or textured borders.
- Elegant or luxurious designs: Choose ornate borders with gold, silver, or intricate patterns.
Match the Border with Your Image Content
The border should complement your image, not overpower it. For instance:
- For vibrant photos, a minimalistic border can help highlight the image without distraction.
- For vintage or nostalgic images, consider ornate or distressed borders.
- For modern designs, sleek lines and geometric patterns work well.
Consistency Is Key
If you’re creating a series of images or designs, maintain a consistent border style to create a cohesive look. This helps reinforce your brand identity or visual theme.
Experiment and Get Feedback
Don’t be afraid to try different styles! Sometimes, what looks good in your mind might need a second opinion. Show your designs to friends or colleagues and see which border style resonates most.
Use Borders to Guide the Viewer’s Attention
A well-chosen border can direct the viewer’s focus toward the main subject. For example, a subtle glow or shadow can add depth and draw attention without being too distracting.
In the end, the right border style depends on your unique project and personal taste. Play around, have fun, and let your creativity shine through!
Common Mistakes to Avoid When Adding Borders on Shutterstock
Adding borders to your Shutterstock designs can really make them pop, but it’s easy to make some common mistakes that can ruin the overall look. Let’s go over a few pitfalls to watch out for so your borders always enhance your work rather than detract from it.
1. Overusing Borders — Sometimes, less is more. Adding a thick or overly decorative border around every element can make your design look cluttered and overwhelming. Aim for subtlety and balance. Use borders to highlight key parts, not to fill every empty space.
2. Ignoring Color Harmony — Choose border colors that complement your design. Clashing colors can distract viewers and take away from your main message. A good rule of thumb is to pick a border color from your existing palette or use neutral shades like black, white, or gray for a sleek look.
3. Not Considering Border Thickness — The thickness of your border matters. A border that’s too thin might be barely noticeable, while one that’s too thick can dominate the design. Test different thicknesses to see what works best for your specific project.
4. Neglecting Consistency — If you’re adding borders to multiple elements within a design, keep the style consistent. Using different border styles or colors randomly can make your design look chaotic. Consistency helps create a cohesive and professional appearance.
5. Overlooking the Final Preview — Always step back and preview your design at actual size before finalizing. Sometimes, borders look great in editing mode but don’t translate well when viewed at full size or on different screens. Make adjustments as needed for the best visual impact.
6. Ignoring File Compatibility and Export Settings — Ensure your border design is compatible with Shutterstock’s upload requirements. Save your file in the correct format, resolution, and color mode. Forgetting this can cause your borders or entire design to look off or get rejected.
By being mindful of these common mistakes, you’ll ensure your borders add style and professionalism to your Shutterstock creations. Remember, a well-placed, thoughtfully chosen border can truly elevate your design game!
Final Touches and Saving Your Edited Design
Almost there! Once you’ve added your fancy border and are happy with how everything looks, it’s time to add those final touches and save your masterpiece in the best possible way.
1. Review Your Design — Take a step back and look at your work. Check for alignment, spacing, and whether the border complements the overall design. Make sure there are no awkward gaps or overlaps. Sometimes, zooming out or viewing at actual size helps spot issues you might miss when zoomed in.
2. Adjust Layer Order and Effects — If you’re working in a design app that supports layers, double-check that your border layer is correctly positioned (usually on top). Consider adding subtle effects like shadows or gradients to give your border more depth and dimension, but don’t overdo it.
3. Fine-Tune Colors and Thickness — Sometimes, minor tweaks make a big difference. Adjust the border color to better match your palette, or tweak the thickness for just the right emphasis. Small refinements can turn a good design into a great one.
4. Save Your Work in the Right Format — When saving, choose the appropriate file type based on your intended use. For Shutterstock, high-resolution PNG or JPEG files are usually ideal. Ensure your resolution is at least 300 DPI for clarity, especially if you plan to print.
| Format | Best Use | Notes |
|---|---|---|
| JPEG | Web, online portfolios | Good balance of quality and file size |
| PNG | Transparent backgrounds, detailed images | Supports transparency; ideal for overlays |
| TIFF | High-quality print works | Larger files; best for printing purposes |
5. Save Multiple Versions — It’s a good idea to save different versions of your design. Keep an editable file (like PSD or AI) so you can make future adjustments, and save flattened copies for upload or sharing.
6. Upload and Final Check — Before submitting your design to Shutterstock, double-check their guidelines regarding borders and overall image quality. Upload your final version, and give it one last look on the platform to ensure everything appears perfect.
And voilà! With your final touches complete, your design with a fancy border is ready to impress. Whether for online use or print, these steps ensure your work is polished, professional, and ready for the world to see.
Conclusion and Additional Resources for Creative Borders
Adding a fancy border to your Shutterstock designs can significantly enhance their visual appeal and make them stand out. Whether you’re aiming for a modern, elegant, or playful look, utilizing creative borders allows you to customize your projects to match your unique style. Remember to experiment with different styles, colors, and thicknesses to find the perfect border that complements your overall design. Using Shutterstock’s vast library of graphics and editing tools makes this process easier and more efficient.
For further inspiration and to expand your skills, consider exploring the following resources:
- Shutterstock Tutorials: Official guides on creating and customizing borders.
- Design Blogs: Websites like Behance and Dribbble showcase creative border designs.
- Graphic Design Courses: Platforms like Udemy and Skillshare offer courses on advanced design techniques.
- Design Software Help Centers: Tutorials for tools like Adobe Photoshop, Illustrator, and Canva.
Incorporating creative borders into your projects not only elevates their aesthetic but also demonstrates your attention to detail and design prowess. Keep experimenting and exploring new ideas to continually refine your skills and produce eye-catching, professional-looking designs.


