If you’re a photographer or a content creator looking to share your work on Shutterstock, understanding how their review process works is key to getting your photos approved. Shutterstock prides itself on maintaining a high standard of quality, which means every submission goes through a careful review. This process ensures that only the best, most relevant images make it to their platform, benefiting both buyers and sellers. In this post, we’ll walk you through what to expect during the review and share some tips to help your photos stand out and get approved quickly.
Understanding Shutterstock’s Submission Guidelines

Before you even upload your images, it’s essential to familiarize yourself with Shutterstock’s submission guidelines. These rules are designed to ensure that all images meet quality, legal, and content standards. Here’s what you need to keep in mind:
- Technical Quality: Your photos should be sharp, well-exposed, and free from noise or pixelation. Avoid over-compression that can degrade image quality.
- Content Relevance: Your images should be clear and focused on a specific subject. Avoid cluttered backgrounds or distracting elements.
- Model and Property Releases: If your photo features recognizable people or private property, you need the appropriate releases to sell those images legally.
- Legal Compliance: Ensure your images don’t contain copyrighted material, trademarks, or sensitive content that could lead to legal issues.
Additionally, Shutterstock discourages certain types of content, such as images that are overly edited, contain nudity (unless compliant with their guidelines), or include dangerous or illegal activities. It’s also important to avoid stock-like or overly generic photos that don’t offer unique value.
To help you navigate these guidelines, Shutterstock provides detailed resources and examples on their contributor portal. Taking the time to review these can save you time and increase your chances of approval. Remember, quality and originality are your best allies in this process. So, invest in good equipment, focus on capturing authentic moments, and always double-check that your images align with their standards before submission.
Steps Involved in the Photo Review Process
So, you’ve uploaded your photo to Shutterstock and now, the real wait begins — the review process. Don’t worry, it’s pretty straightforward, but understanding each step can help you prepare better and increase your chances of getting approved quickly.
First things first, once your photo is uploaded, it enters the initial screening phase. During this stage, Shutterstock’s review team quickly scans your image for basic requirements like technical quality, adherence to guidelines, and relevance. They’re looking to see if your photo is sharp, well-lit, and free of obvious issues like noise or pixelation.
Next, your image moves into the detailed review stage. Here, the reviewers evaluate more specific aspects such as composition, originality, and whether the content complies with Shutterstock’s content policies. For example, they check if there are any recognizable logos, trademarks, or copyrighted material that might cause issues. They also assess if the image is appropriate for commercial use, especially if it features identifiable people or private property.
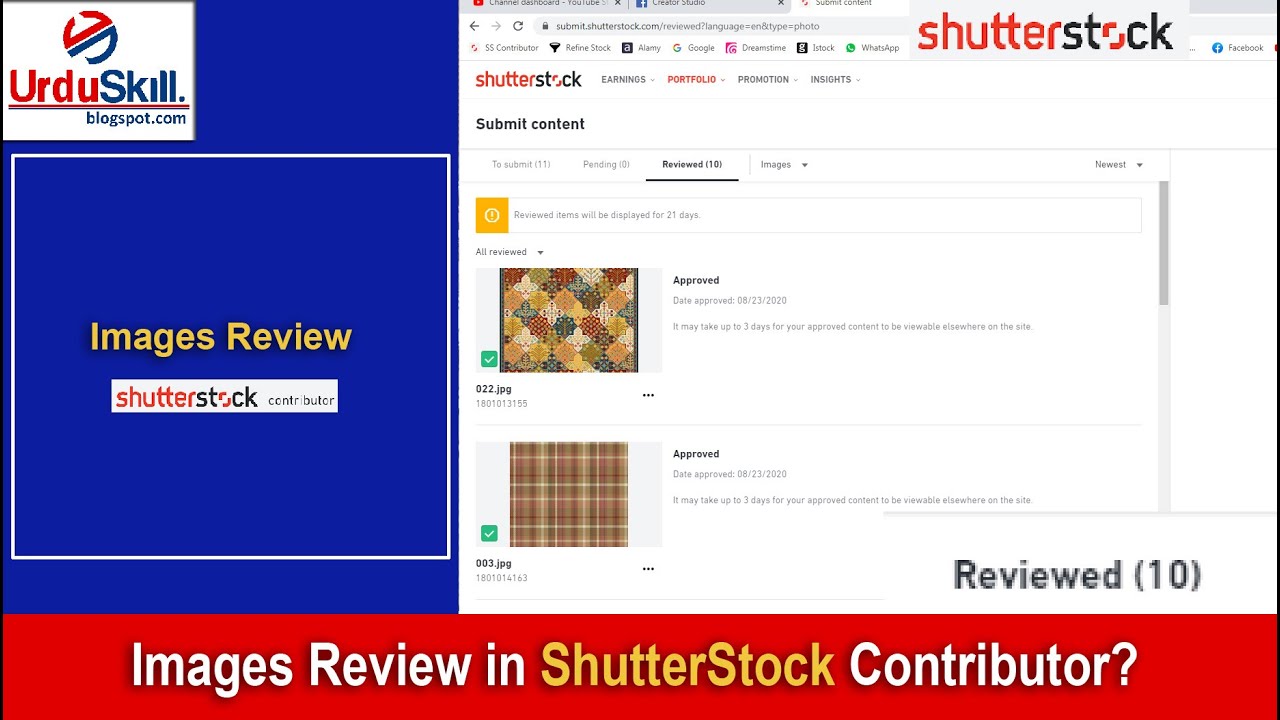
Throughout this process, reviewers might leave comments or flag images for revisions if needed. Sometimes, images are held for manual review, especially if they’re borderline or flagged by automated systems. If your photo passes all checks, it’s marked as approved, and you’ll see it live on your portfolio. If not, you’ll receive feedback on why it was rejected, which is invaluable for improving your future submissions.
A quick tip: the entire review process typically takes anywhere from a few hours to a few days, depending on the volume of submissions and the complexity of your images. To speed things up, ensure your photos meet Shutterstock’s technical specifications and guidelines before uploading. Remember, patience and attention to detail are key! As you get more familiar with what reviewers look for, the process will become smoother and more predictable.
Common Reasons Photos Are Rejected by Shutterstock
Understanding why photos get rejected is half the battle in getting your work approved. Shutterstock has clear guidelines, but some issues crop up more often than others. Being aware of these common pitfalls can save you time and frustration.
Here are some of the top reasons your images might be rejected:
- Poor Technical Quality: Blurry, noisy, or pixelated images are a no-go. Always make sure your photos are sharp, well-exposed, and in focus.
- Incorrect or Missing Metadata: Proper titles, descriptions, and keywords are essential. Without accurate metadata, your images might not be discoverable or could be rejected for lack of information.
- Content Violates Policies: This includes copyrighted logos, trademarks, or private property without permission. Also, images that depict illegal activities or inappropriate content will be rejected.
- Poor Composition or Unoriginal Content: Stock photos should be well-composed and unique. Overused or cliché images, like generic sunsets or empty desks, often get rejected.
- Model and Property Releases: If your photo features recognizable people or private property, you need the appropriate releases. Without them, Shutterstock cannot accept the image for commercial use.
- Over-processed or Filtered Images: Excessive editing can make images look unnatural and may lead to rejection. Aim for natural-looking photos that accurately represent the scene.
- Watermarks or Branding: Any watermarks, logos, or branding elements on your photos are grounds for rejection unless they are part of the content and approved.
To improve your chances, always review Shutterstock’s contributor guidelines before submitting. Check your images for these common issues and fix them if needed. Remember, rejection isn’t the end—it’s a learning opportunity. Use the feedback to refine your photography skills and submission quality, and soon enough, you’ll be seeing your photos approved and featured on the platform!
Tips for Preparing and Submitting Photos to Increase Approval Chances
Getting your photos approved on Shutterstock can sometimes feel like navigating a tricky maze, but don’t worry — with a few smart strategies, you can boost your chances significantly. Here are some practical tips to help you prepare and submit photos that stand out and meet those all-important quality standards.
First things first, always start with high-resolution images. Shutterstock prefers images that are sharp, clear, and detailed. Aim for at least 4 megapixels, but the higher, the better. This ensures your photos will look professional and versatile for various uses.
Next, pay close attention to composition and lighting. Well-composed photos with good lighting are more likely to be accepted. Use natural light whenever possible, and avoid harsh shadows or overexposed areas. Think about the foreground and background — a cluttered or distracting background can hurt your chances.
Another tip is to ensure your photos are technically perfect. This means no blurriness, noise, or artifacts. Use editing tools to correct exposure, contrast, and color balance, but avoid over-editing. The goal is to present a natural, appealing image.
When preparing your submission, consider the subject matter. Shutterstock favors images that are relevant, unique, and high-quality. Steer clear of overly generic or cliché shots unless you can bring a fresh perspective. Also, be mindful of the model releases and property releases when your photos include identifiable people or private property.
Finally, before hitting submit, review Shutterstock’s technical requirements. Check their guidelines for file formats (preferably JPEG), color spaces (sRGB), and other specifications. Small details like image size, metadata, and keywords can make a big difference in whether your photo gets approved or rejected.
Remember, patience is key. Don’t get discouraged by initial rejections. Use their feedback as a learning opportunity and keep refining your skills. The more you understand what Shutterstock looks for, the better your chances of getting your photos approved on the next try!
Best Practices for Ensuring Your Photos Meet Shutterstock Standards
Ensuring your photos meet Shutterstock’s standards isn’t just about avoiding rejection — it’s about creating images that can be sold and appreciated worldwide. Here are some best practices to help you align your work with Shutterstock’s expectations and increase your success rate.
Stay Updated with Shutterstock’s Guidelines. They occasionally update their technical and content requirements. Regularly check their contributor resources and guidelines page to stay in the loop. This proactive approach helps you adapt your submissions to current standards.
Use a consistent editing style. While you don’t need to over-edit, applying a consistent color correction and sharpening style can help your portfolio look cohesive. This not only elevates the quality but also strengthens your brand as a photographer.
Pay close attention to model releases and property releases. If your photos feature recognizable people or private property, make sure you have the proper legal releases. Shutterstock requires these for licensing your images, and missing releases can be a quick route to rejection or legal issues.
Make sure your photos are relevant and marketable. Think about what buyers are searching for — popular themes include business, lifestyle, technology, nature, and travel. Conduct some research to identify trending topics and styles that perform well on Shutterstock.
Optimize your images with accurate keywords and descriptions. Use descriptive, relevant keywords to help your images get discovered. Avoid keyword stuffing, but be thorough. Clear, precise metadata can make the difference between an image getting overlooked or selling quickly.
Lastly, review your photos for technical flaws. Check for issues like dust spots, sensor spots, or distracting elements. Use editing tools to clean up minor imperfections. Remember, the first impression counts — a polished, professional-looking image is more likely to pass review.
By following these best practices, you’re not just increasing your approval chances — you’re also building a strong, reputable portfolio that can attract more buyers over time. Patience, consistency, and attention to detail are your best allies on your Shutterstock journey!
Conclusion and Final Tips for Successful Photo Submission
Successfully getting your photos approved on Shutterstock can significantly enhance your portfolio and income potential. Remember, the platform values high-quality, original, and well-composed images that meet their standards. To maximize your chances of approval, keep in mind the following key tips:
- Prioritize technical quality: Ensure your photos are sharp, well-lit, and properly exposed. Avoid noise, blurriness, or over/underexposure.
- Follow content guidelines: Submit images that are relevant, appropriate, and free from copyright issues or model releases when necessary.
- Pay attention to composition: Use the rule of thirds, leading lines, and balanced framing to create visually appealing images.
- Be consistent: Regularly upload high-quality images to build your portfolio and increase your chances of acceptance.
- Review Shutterstock’s requirements: Familiarize yourself with their specific technical and content standards to avoid common pitfalls.
Additionally, consider creating a checklist before submitting your photos:
| Checklist Item | Importance |
|---|---|
| High resolution and sharp focus | Essential |
| Proper keywording and metadata | Helps in discoverability |
| Clear subject and strong composition | Increases approval chances |
| No watermarks or branding | Required |
| Model and property releases (if applicable) | Mandatory for recognizable individuals or private property |
In conclusion, patience and attention to detail are your best allies. Keep refining your skills, stay updated with Shutterstock’s guidelines, and persistently submit your best work. With dedication, success in getting your photos approved is well within reach.